Advertisement
Product Introduction
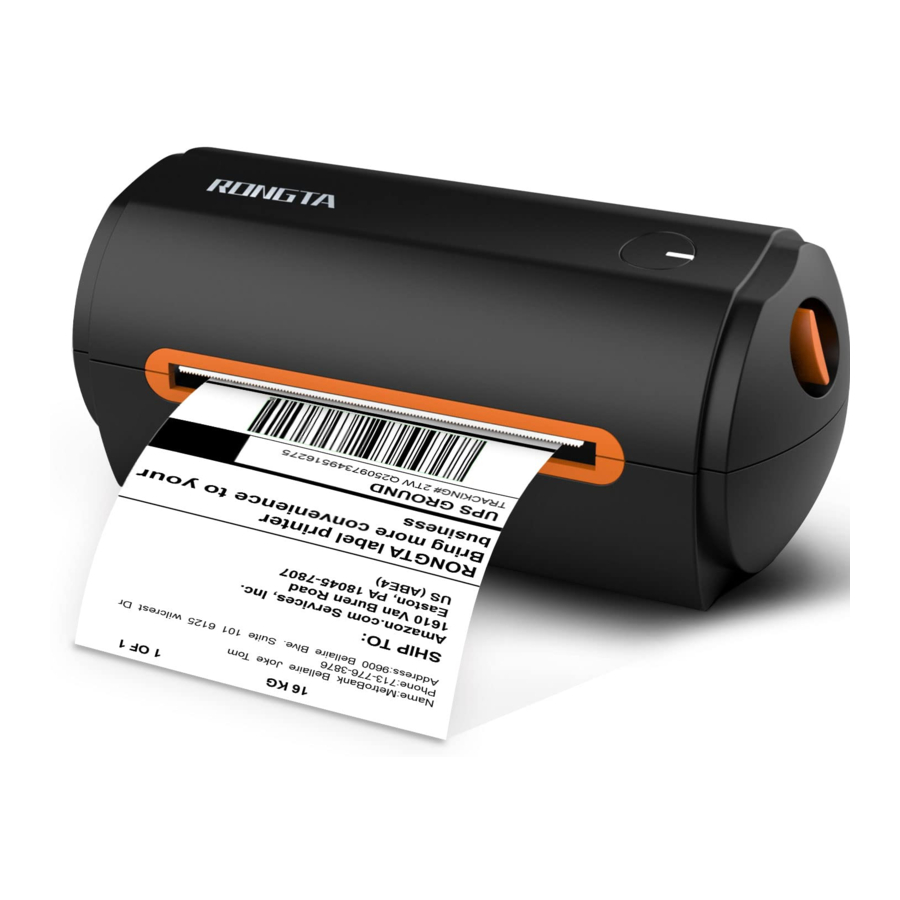
This label printer provides you with safe, reliable and efficient printing quality at a reasonable economic price, At the same time, Printer is widely used in supermarkets, Catering industry, clothing industry, warehousing industry, etc.due to its super functions and easy operation.
Main Features
- High printing quality
- Low noise
- The attractive appearance
- Reasonable structure, simple use and maintenance
- Intelligent detection and positioning
- Auto feed and retreat paper
- Simple operation
- Label off intelligent handling function
- Fast printing, saving time
- Superior heat dissipation, can handle heavy printing workload
Appearance and Components

Application Field
- Cashier system of supermarkets
- Cashier system of Catering industry,
- Cashier system of clothing industry
- Cashier system of warehousing industry
Technical Parameters
Printing Parameters


The pictures are for reference only, please subject to practicality

 Remark: The interface is optional or customized, and the specific interface is subject to the actual object.
Installation and Operation of Printer
Printer Unpacking
Check the parts:
Before use, make sure the accessories are included in the package(the following picture is an example). If any thing is missing, contact the supplier or manufacturer. The specific accessories may not be included depending on the printer model.
 Printer |  Power adapter |  Power cord |
 USB cable |  Quick Installation Guide |
The pictures are for reference only, please subject to practicality.
Connecting the Printer
Connect the power line
- Confirm that the power switch is in off (O) state.
- Connect the power adapter to the printer.
- Connect the power line to the power adapter.
- Connect the other end of the power line to a nearby socket.
Use the special power adapter for the printer. The connection diagram is as follows:

Connect the USB cable

- Connect the USB cable to the printer.
- Connect the USB cable to the PC host.
- Turn the power switch to on (l) state.
Folded Paper Loading
- Facing the back of the machine, hold the paper guide with both hands, and adjust the distance between the left and right guides according to the folded paper size.
![]()
- Insert the folded paper into the paper guide
![]()
- Confirm that the printer has detected paper feeding, automatically feeds paper and delivers paper normally


Handling of Paper Jam

- Move the top cover lever forward with both hands and lift the top cover.
- Remove the jammed paper from the feeding channel, and check whether the print head has adhesive or carbon deposition. If yes, clean it with an alcohol cloth, remove the wrinkled paper and replace it with new paper.
Bluetooth Pairing and Printing (only valid for printers with Bluetooth)
Bluetooth printer needs to be paired with the main device driving the printer before working, and the pairing process is initiated by the main device.
The general pairing method is as follows:
- Turn on the printer.
- The main device searches for external Bluetooth device.
- If there are multiple external Bluetooth device, select the printer corresponding to BDA address. (see self-test page for details.)
- Enter the initial password or "1234",
- Complete the pairing.
Please refer to the Bluetooth function description of the main device for the specific pairing method. VVhen pairing, the label printer with Bluetooth interface must be on.
 Note: During pairing, please do not turn on multiple printers at the same time, otherwise you may not be able to judge which printer was successfully paired.
After successful pairing, other host computers can still be paired with the printer, and each printer can be paired With up to 8 host computers. If more upper computers are paired with printers, the host computer paired with the printer at the earliest will be automatically removed from the pairing list by the printer. At this time, if this host computer needs to drive the printer for printing, it needs to be paired again, (For multi-connected Bluetooth only.)
Use Bluetooth Interface for Printing (only valid for the printers with Bluetooth)
For host computers with virtual Bluetooth serial ports (such as mobile phones using SMARTPHONE, POCKET PC, PALM, notebook computer, etc.), after successful pairing, printing data can be sent to the printer via the virtual Bluetooth serial port for printing. If the host computer does not have a virtual Bluetooth serial port, when you want to drive the printer for printing, please consult the supplier of the host computer.
The Switch, Key and Indicator Light of Printer
Precautions for power switch/use
- Turn the printer power switch to on (1) state, and the printer will be turned on.
- Turn the printer power switch to on (O) state, and the printer will be turned off,
- Turn off the printer with power switch. If you pull the power plug directly, it is easy to damage the internal circuit of the printer and cause print data loss.
- After power-off, wait for a while (not more than 5 seconds) before turning on the printer again otherwise it is likely to cause a failure.
- Please use the original battery of this machine, otherwise it may lead low print quality or damage to the printer.
Attention:
Make sure the power supply is connected before turning on the printer.
Keys and Indicators
Function description of buttons
| Scenarios | Button operation | Corresponding functions |
| Power Off | Press and hc*d turn on printer | print self-test page |
| Standby | Press and hold 3S | Enter label specification learning mode |
| Open the cover | Press and hold 10 S | Restore factory settings |
| Standby | Press | Automatically feed one blank label sheet |
| Continuous printing process | Press | Pause printing |
| Pause printing | Press | Continue printing |
Indicator description
| Indicator status | Status description | |
| Indicator always lights up | Normal standby | |
| Indicator flashes | Buzzer alarm | |
| Buzzer alarm (common) | 2 Sounds | Printer mechanism error |
| 3 Sounds | Paper shortage error | |
| 5 Sounds | Overheating error | |
| 6 Sounds | Cover opening error | |
| 7 Sounds | Seam label error | |
Printer Test
Print Self-Test Page
When the printer is initially installed or there are any problems with the printer, you can run self-test program to confirm the following status: firmware version, printer parameter setting status, print quality, and related setting information of external devices, etc. After confirming that there is no problem With the printer after the self-test, please check other devices or software. This function runs independently of other devices or software.
The self-test method is as follows:
- Confirm that the printer is connected to power supply and the paper roll is loaded correctly.
- Confirm that the printer is turned off and the top cover is closed in place.
- Press and hold the FEED button, then press the POWER button to turn on the printer; release the button after the printer is turned on.
Print with the Window Driver
- To install Windows driver, please refer to "Driver Installation Instruction".
- Set the "port" of the Windows driver as the appropriate interface to use. Print the test page with the "Print test page" function of Windows driver.
Label Learning
Note: In the following cases, the user can perform label positioning learning so that the printer can better position the label:
- Install and use the printer for the first time.
- First use of printer after sensor cleaning.
- Reuse the printer after it is not used for long time.
- Replace with a new type of paper roll.
- The printer cannot recognize the mark effectively during printing.
When the printer is ready, press and hold the FEED button for 3s until the standby status indicator flashes twice, release the button, and the printer will start learning and feed paper. If the printer learns under continuous paper mode, the learning is invalid.
Users can also complete the learning through the printer tool software. (refer to "Instruction for Printer Setting Tool". )
Note: After learning, you can re-open the top cover and place the blank label paper just fed during learning back for printing to avoid paper waste.
USB Interface
The printer's USB interface socket is standard USB type-B

| PIN | SIGNAL NAME |
| 1 | VBUS |
| 2 | D- |
| 3 | D+ |
| 4 | GND |
Cleaning the Printer
Cleaning the Printer Head
Clean the print head when one of the following conditions occurs to the printer:
- Printing is not clear.
- A vertical column of the printed page is not clear.
- The paper feeding noise is high.
The print head cleaning steps are as follows;

- Turn off the power supply of the printer, , open the upper cover and remove the paper if exists.
- If printing has just been completed, wait for the print head to cool completely.
- Clean the printer head with a soft cotton moistened with ethyl alcohol.
- After waiting for absolute ethyl alcohol to volatilize completely, close the upper cover and try printing again.
Cleaning the Sensor
Clean the paper shortage sensor when one of the following conditions occurs to the printer:
- In the printing process, the printer occasionally stops printing and alarms for paper shortage.
- No alarm for paper shortage.
The paper shortage sensor cleaning steps are as follows:
- Turn off the power supply of the printer, open the upper cover, and remove the paper if there is any.
- Wipe off the dust and stain on the sensor surface with soft cotton cloth (which should be dried) dipped in absolute ethyl alcohol.
- After waiting for absolute ethyl alcohol to volatilize completely, close the upper cover and try to start the machine again.
Cleaning the Printing Rubber Roller
When one of the following conditions occurs to the printer, the printing rubber roller should be cleaned:
- Printing is not clear.
- A vertical column of the printed page is not clear.
- The paper feeding noise is high.
The printing Rubber Rollers cleaning steps are as follows:

- Turn off the power of the printer and open the upper cover.
- Use a soft cotton cloth (which should be dried) dipped in a neutral detergent to wipe off dust and stains on the surface of the printing rubber roller.
- Close the upper cover after the cleaning agent is completely volatilized.
Attention:
- The power supply must be turned off during the daily maintenance of the printer.
- Do not touch the surface of the print head with hands and metal objects, and do not scratch the surface of the print head, printing rubber roller and sensor with tweezers and other tools.
- The organic solvents such as gasoline and acetone shall not be used.
- Wait until absolute ethyl alcohol is completely volatilized, then turn on the power supply to continue printing.
Troubleshooting
The table below shows common problems and solutions for operators,
If you have followed the simple troubleshooting methods but the printer is still not functioning properly, please contact the customer service department of your dealer for assistance.
| Fault Phenomenon | Cause | Solution |
POWER indicator is off |
|
|
Unable to print |
|
|
Incomplete print content |
|
|
Incorrect positioning |
|
|
Poor print result |
|
|
Safety Instructions
Before operating and using the printer, please carefully read the following items and strictly observe the use rules.
Safety warning
 The print head will become very hot during printing, please do not touch the print head and peripheral parts during printing and printing just finished.
 Please do not touch the print head and connectors, in case that static damages the printer head.
Instructions

Violating following instructions may cause serious injury or death.
- Do not plug several products in one porous power outlet.
- This may cause over-heat and a fire
- If the plug is wet or dirty, dry or wipe it before using.
- If the plug does not fit perfectly to outlet, do not plug in.
- Be sure to use only standardized porous power outlet
- You must use the supplied adapter.
- It is dangerous to use other adapters.
- Do not pull the cable by pulling.
- This may damage the cable or cause a fire.
- Do not plug in or unplug with your wet hands.
- You may be electrocuted.
- Do not bend the cable by force or leave it under any heavy object.
- A damaged cable may cause a fire.
Note: Violating following instructions may cause slight damage of the appliance.
- If you observe a strange smoke, odour or noise from the printer, unplug it before taking following measures.
- Switch off the printer and unplug the set from the mains.
- After the disappearance of the smoke, call your dealer to repair it.
- Install the printer on the stable surface.
- If the printer falls down, it may be broken and you may hurt yourself.
- Use the approved accessories only and do not try to disassemble, repair or remodel it by yourself.
- Call your dealer when you need these services.
- DO not touch the blade Of auto cutter.
- Do not let water or other foreign objects drop into the printer.
- If this happened, switch off and unplug the printer before calling your dealer.
- Do not use the printer when it is out of order. This can cause a fire or an electrocution.
- Switch off and unplug the printer before calling your dealer.
- Other considerations:
- Place the printer on a solid and even base so that it cannot fall.
- Leave enough space around printer for operation and maintenance.
- Keep all liquids away from the printer.
- Do not expose the printer to high temperatures, direct sunlight or dust.
- Ensure the printer is connected to a socket with the correct mains voltage.
- Switch off the printer POWER supply when it's not in use for a long time.
- To ensure the printing quality and reliability, suggest use the same quality or recommend paper supplier.
- PIs, switch off the POWER supply when connect/disconnect all the ports or it will cause damage to the printer control circuit.
- Never carry out maintenance or repair work yourself. Always contact a qualified service Technician,
- Keep this User Manual in a place which is easily accessible at all times.
Other Precautions
The copyright for this user manual and various other manuals is property of our company. Any copying or conversion into electronic form and saving of this material without the express written permission is strictly prohibited. Use Of the information contained in this manual is not subject to any patent liability. This manual has been prepared with utmost care and attention to detail but may contain certain errors and/or omissions. Our company is not legally liable for any damages resulting from the use Of the information in this manual. Our company and its affiliates are not legally liable (United States excluded) for any damages, loss, costs, and/or expenses that result from the breakdown, malfunction, and/or misuse of the product due to violation or neglect of the operation and maintenance information and instructions provided by our company, as well as from the unauthorized alteration, repair, and/or modification of the product by the user and/or third party. We are not legally liable for any damages and/or issues resulting from the use of options and/or parts that are not authentic or authorized products,

Rongta Technology (Xiamen) Group Co., Ltd.
ADD: No.88, Tonghui South Road, Tongan, Xiamen, China.
WEB: www.rongtatech.com
TEL: 0086-592-5666129
FAX: 0086-592-5659169

Documents / Resources
References
Download manual
Here you can download full pdf version of manual, it may contain additional safety instructions, warranty information, FCC rules, etc.
Advertisement


Need help?
Do you have a question about the RP422 and is the answer not in the manual?
Questions and answers