Advertisement
Product Introduction
Safety Warnings

Do not touch the paper cutting knife or paper-tearing knife of the printer.
The print head is a heating component. Do not touch the print head and its surrounding components when the printer is still warm in temperature.
Do not touch the surface of the thermal printhead and connectors, to avoid electrostatic damage to the printhead.
Main Features
- High printing quality
- Low noise
- The attractive appearance
- Reasonable structure, simple use and maintenance
- Intelligent detection and positioning
- Auto feed and retreat paper
- Simple operation
- Label of intelligent handling function
- Fast printing, saving time
- Superior heat dissipation, can handle heavy printing workload
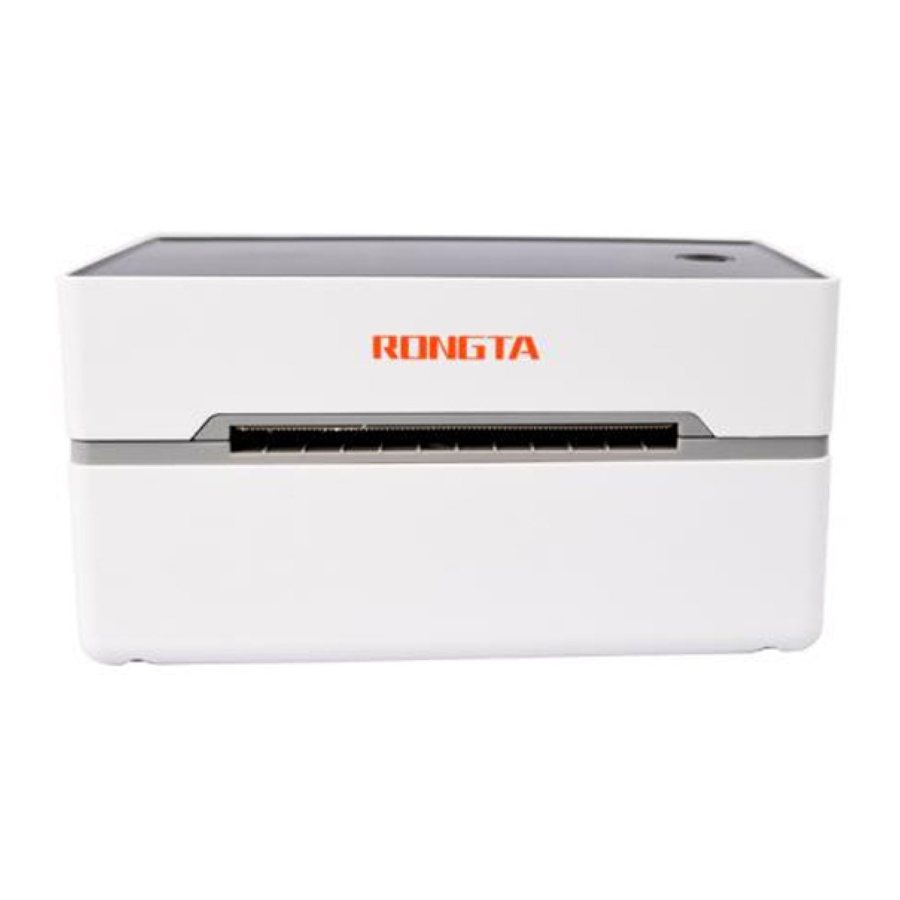
Appearance and Components
- Front View

- Rear View

- Inside View


Application Field
- Cashier system of supermarkets
- Cashier system of Catering industry
- Cashier system of clothing industry
- Cashier system of warehousing industry
Technical Parameters
Printing Parameters
| Printing method | Thermal line printer |
| Paper loading method | Easy paper loading/auto paper feeding |
| Printing speed | 180mm/s |
| Printing paper width | 40-85mm |
| Effective resolution | 203dpi |
| Thickness of printing paper | 0.05-0.18mm |
| Character size | ASCI Font A: 12424 ASCII Font B: 917 Chinese character 26x24 |
| Interface type | USB |
| Print character | |
| ASC character set | 12«24 dot, 1.25 (width)X3.00 (height)mm |
| National Standard Class I and II Chinese Character Font | 24x24 dot, 3.00 (width)X3.00 (height)mm |
| Type of bar code | One-dimensional code: Code 39, 39C. 125, Code 93, ITF25. EAN128, Code 128, Codabar, EAN-8, EAN8+2, EAN8+5. EAN-13, EAN13+2, EAN13+5, UPC-A, UPCA+2. UPCA+5. UPC-E. UPCE+2, UPCE+5 MSIC. ITF14, EAN14, CODE11, POST QR code: QRCODE, PDF417 (optional) |
| Extended character table | CP437, KATAKANA, CP850,CP852,CP858, CP860, CP863, CP863, CP866, WPC1250, WPC1252 |
| Power supply | |
| Power adapter | DC 24V ⎓ 2.5A |
| Environmental requirements | |
| Working environment | Operating temperature: 0~50°C, Operating humidity: 20~85% |
| Storage environment | Storage temperature: -20 ~ 70°C, Storage humidity: 5~95% (Except paper rols ) |
| Environmental conditions | |
| Drive | WINXP/WIN7/WIN8/WIN10 |
| Print command | TSPL/CPCL (optional)/ZPL (optional) |
| Character printing | It supports double width and double height printing of AN K characters, custom characters and Chinese characters: adjusts dot patterns of character spacing for prnting |
 Remark: The interface i s optional or customized, and the specific interface s subject to the actual object.

- The pictures are for reference only, please subject to practicality
Installation and Operation of Printer
Printer Unpacking
Check the parts:
Before use, make sure the accessories are included in the package (the following picture is an example). If anything is missing, contact the supplier or manufacturer. The specific accessories may not be included depending on the printer model.

Label printer: 1 set
Power cord: 1 pcs
Power adapter: 1 pcs
USB cable: 1 pcs
Quick installation guide: 1 pcs
- The pictures are for reference only, please subject to practicality
Connecting the Printer
- Connect the power line
- Confirm that the power switch is in off (O) state.
- Connect the power adapter to the printer.
- Connect the power line to the power adapter.
- Connect the other end of the power line to a nearby socket.
Use the special power adapter for the printer. The connection diagram is as follows:

- Connect the USB cable

- Connect the USB cable to the printer.
- Connect the USB cable to the PC host.
- Turn the power switch to on (l) state.

Folded Paper Loading
- Facing the back of the machine, hold the paper guide with both hands, and adjust the distance between the left and right guides according to the paper size.
![]()
- Insert the label paper into the paper guide and the paper will be fed automatically.


 Note: Please ensure that the label paper is fed in place, and part of label paper will be automatically fed out from the paper exit.
Handling of Paper Jam
- Facing the front of the machine, push the top cover opening button forward with both hands at the same time.
![]()
- Lift the cover up.
![]()
- Remove the jammed paper from the feed channel, and replace new paper. discard the wrinkled paper.
![]()
- After the jammed paper is pulled out, normal media installation can be performed.


Bluetooth Pairing and Printing
(only valid for printers with Bluetooth)
Bluetooth pri nter needs to be paired with the main device driving the printer before working, and the pairing process is initiated by the main device.
The general pairing method is as follows:
- Turn on the printer.
- The main device searches for external Bluetooth device.
- If there are multiple external Bluetooth device, select the printer corresponding to BDA address.
- Enter the initial password "0000" or "1234".
- Complete the pairing.
Please refer to the Bluetooth function description of the main device for the specific pairing method. VVhen pairing, the label printer with Bluetooth interface must be on.
Note: During pairing, please do not turn on multiple printers at the same time, otherwise you may not be able to judge which printer was successfully paired.
After successful pairing, other host computers can still be paired with the printer, and each printer can be paired With up to 8 host computers. If more upper computers are paired with printers, the host computer paired with the printer at the earliest will be automatically removed from the pairing list by the printer. At this time, if this host computer needs to drive the printer for printing, it needs to be paired again.
(For multi-connected Bluetooth only.)
Use Bluetooth Interface for Printing
(only valid for the printers with Bluetooth)
For host computers with virtual Bluetooth serial ports (such as mobile phones using SMARTPHONE, POCKET PC, PALM, notebook computer, etc.), after successful pairing, printing data can be sent to the printer via the virtual Bluetooth serial port for printing. If the host computer does not have a virtual Bluetooth serial port, when you want to drive the printer for printing, please consult the supplier of the host computer.
The Switch, Key and Indicator Light of Printer
Precautions for power switch/use
- Turn the printer power switch to on (1) state, and the printer will be turned on,
- Turn the printer power switch to on (O) state, and the printer will be turned off.
- Turn off the printer with power switch. If you pull the power plug directly, it is easy to damage the internal circuit of the printer and cause print data loss.
- After power-off, wait for a while (not more than 5 seconds) before turning on the printer again otherwise it is likely to cause a failure.
- Please use the original battery of this machine, otherwise it may lead low print quality or damage to the printer.
Attention:
Make sure the power supply is connected before turning on the printer.
Keys and Indicators
- Function description of buttons
Scenarios Button operation Corresponding functions Power Off Press and hold + turn on the printer Print self-test page Standby Press and hold 3S Enter label specification learning mode Open the cover Press and hold 10S Restore factory settings Standby Press Automatically feed one blank label sheet Continuous printing process Press Pause printing Pause printing Press Continue printing - Indicator description
Indicator status Status description Simple Troubleshooting The green indicator s always on Normal standby / The blue indicator flashes RAM detection error Contact the nearest service center The pink indicator is always on Print head is overheating Automatically resume work after the printer cools down. The red indicator is always on Upper cover is not closed Check whether the top cover is properly closed The red indicator flashes No paper detected Check whether paper has been loaded The Yellow indicator is always on Low input voltage Replace the power adapter The white indicator is always on Pause printing Press FEED button to print normally Th yallow indicator flashes Paper jam Open the cover to remove the jammed paper The green indicator flashes slowly Printer is working /
Printer Test
Print Self-Test Page
When the printer is initially installed or there are any problems with the printer, you can run self-test program to confirm the following status: firmware version, printer parameter setting status, print quality, and related setting information of external devices, etc. After confirming that there is no problem With the printer after the self-test, please check other devices or software. This function runs independently of other devices or software.
The self-test method is as follows:
- Confirm that the printer is connected to power supply and the paper roll is loaded correctly.
- Confirm that the printer is turned off and the top cover is closed in place.
- Press and hold the FEED button, then press the POWER button to turn on the printer; release the button after the printer is turned on.
Print with the Window Driver
- To install Windows driver, please refer to "Driver Installation Instruction".
- Set the "port" of the Windows driver as the appropriate interface to use. Print the test page with the "Print test page" function of Windows driver.
Label Learning
Note: In the following cases, the user can perform label positioning learning so that the printer can better position the label:
- Install and use the printer for the first time.
- First use of printer after sensor cleaning.
- Reuse the printer after it is not used for long time.
- Replace with a new type of paper roll.
- The printer cannot recognize the mark effectively during printing.
When the printer is ready, press and hold the FEED button for 3s until the standby status indicator flashes twice, release the button, and the printer will start learning and feed paper. If the printer learns under continuous paper mode, the learning is invalid.
Users can also complete the learning through the printer tool software. (refer to "Instruction for Printer Setting Tool". )
Note: After learning, you can re-open the top cover and place the blank label paper just fed during learning back for printing to avoid paper waste.
CIeaning the Printer
Cleaning the Printer Head
Clean the print head when one of the following conditions occurs to the printer:
- Printing is not clear.
- A vertical column of the printed page is not clear.
- The paper feeding noise is high.

The print head cleaning steps are as follows:
- Turn off the power supply of the printer, , open the upper cover and remove the paper if exists.
- If printing has just been completed, wait for the print head to cool completely.
- Clean the printer head with a soft cotton moistened with ethyl alcohol.
- After waiting for absolute ethyl alcohol to volatilize completely, close the upper cover and try printing again.
Cleaning the Sensor
Clean the paper shortage sensor when one of the following conditions occurs to the printer:
- In the printing process, the printer occasionally stops printing and alarms for paper shortage.
- No alarm for paper shortage.

The paper shortage sensor cleaning steps are as follows:
- Turn off the power supply of the printer, open the upper cover, and remove the paper if there is any.
- Wipe off the dust and stain on the sensor surface with soft cotton cloth (which should be dried) dipped in absolute ethyl alcohol.
- After waiting for absolute ethyl alcohol to volatilize completely, close the upper cover and try to start the machine again.
Cleaning the Printing Rubber Roller
When one of the following conditions occurs to the printer, the printing rubber roller should be cleaned:
- Printing is not clear.
- A vertical column of the printed page is not clear.
- The paper feeding noise is high.

The printing Rubber Rollers cleaning steps are as follows:
- Turn off the power of the printer and open the upper cover.
- Use a soft cotton cloth (which should be dried) dipped in a neutral detergent to wipe off dust and stains on the surface of the printing rubber roller.
- Close the upper cover after the cleaning agent is completely volatilized.
Attention:
- The power supply must be turned off during the daily maintenance of the printer.
- Do not touch the surface of the print head with hands and metal objects, and do not scratch the surface of the print head, printing rubber roller and sensor with tweezers and other tools.
- The organic solvents such as gasoline and acetone shall not be used.
- Wait until absolute ethyl alcohol is completely volatilized, then turn on the power supply to continue printing.
Troubleshooting
The table below shows common problems and solutions for operators.
If you have followed the simple troubleshooting methods but the printer is still not functioning properly, please contact the customer service department of your dealer for assistance.
| Fault Phenomenon | Cause | Solution |
| POWER indicator is off |
|
|
| Unable to print |
|
|
| Incomplete print content |
|
|
| Incorrect positioning |
|
|
| Poor print result |
|
|
Safety Instructions
Before operating and using the printer, please carefully read the following items and strictly observe the use rules.
- Please install the printer on a stable surface to avoid printer suffered from any vibration and shocks.
- Do not use and store the printer in places with high temperature, high humidity and high pollution.
- Connect the printer's power adapter to an appropriate grounding socket. Avoid using the same socket with large motors or other equipment that may cause voltage fluctuation of power supply.
- Keep water or conductive materials (such as metal) out of the printer. Once it occurs, Power should be turned off immediately.
- Never use the printer without paper, otherwise it will seriously damage the printing rubber roller and thermal head.
- Unplug the product from the power outlet if the printer is idle for a long time.
- Do not disassemble or modify the product personally.
- Use only the power adapter specified in this instruction.
- In order to ensure the printing quality and prolong the service life of the product, it is recommended to use the recommended or equivalent thermal printing paper.
- DO not plug/unplug the product With the product powered on.
- When plugging and unplugging the printer power cordi please hold the arrow position of the printer power connector with your hand, not the cord of the printer power cord.
- Please keep this manual for the future use and reference.
Rongta Technology (Xiamen) Group Co., Ltd.
ADD: No.88, Tonghui South Road, Tongan, Xiamen, China.
WEB: www.rongtatech.com

TEL: 0086-592-5666129
FAX: 0086-592-5659169

Documents / Resources
References
Download manual
Here you can download full pdf version of manual, it may contain additional safety instructions, warranty information, FCC rules, etc.
Advertisement


Need help?
Do you have a question about the RP311 and is the answer not in the manual?
Questions and answers