
Related Manuals for Rongta Technology RP420


Summary of Contents for Rongta Technology RP420
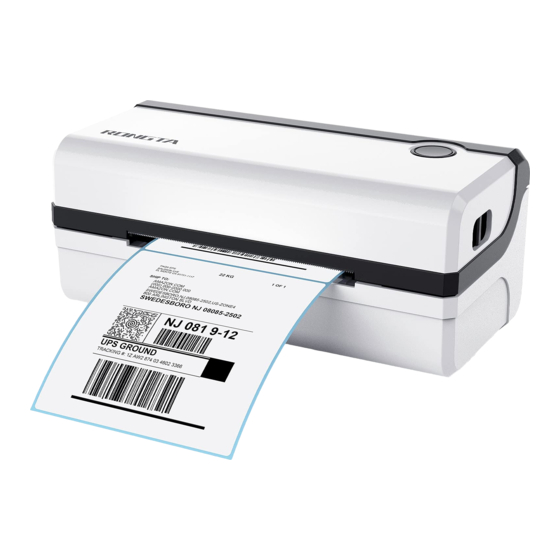
- Page 1 LABEL PRINTER User Manual Any quetion, please contact TANGMAXX After-Sales via: Email: one@tangmaxx.com Whatsapp: 1(626)501-6856 V1.1.420...
-
Page 2: Table Of Contents
Contents I. Product Introduction......................2 1.1 Main Features....................... 2 II. Safety Instructions....................... 3 2.1 Safety warning......................3 2.2 Instructions........................3 2.3 Other Precautions....................... 4 III. Appearance and Components..................5 IV. Technical Parameters......................7 4.1 Printing Parameters....................7 V. Installation and Operation of Printer................8 5.1 Printer Unpacking......................8 5.2 Connecting the Printer.................... -
Page 3: Product Introduction
I. Product Introduction Thank you for purchasing the label printer produced by our company. This label printer provides you with safe, reliable and efficient printing quality at a reasonable economic price. At the same time, Printer is widely used in supermarkets, Catering industry,clothing industry,warehousing industry,etc.due to its super functions and easy operation. -
Page 4: Safety Instructions
II. Safety Instructions Before operating and using the printer, please carefully read the following items and strictly observe the use rules. 2.1 Safety warning The print head will become very hot during printing, please do not touch the printhead and peripheral parts during printing and printing just finished. Please do not touch the printhead and connectors, in case that static damages the printer head. -
Page 5: Other Precautions
4) Do not let water or other foreign objects drop into the printer. • If this happened, switch off and unplug the printer before calling your dealer. 5) Do not use the printer when it is out of order. This can cause a fire or an electrocution. -
Page 6: Appearance And Components
III. Appearance and Components Front View Rear View Upper Cover FEED Button Paper Guide Power Interface USB Interface Paper Exit Cover Opening Key Power Switch Heat Dissipation Port Inside View Thermal Head Piece Rubber Roller Paper Guide Application Field Cashier system of supermarkets Cashier system of clothing industry Cashier system of Catering industry Cashier system of warehousing industry... - Page 7 Dimension LABEL P RINTE...
-
Page 8: Technical Parameters
IV. Technical Parameters 4.1 Printing Parameters Printing method Thermal line printer Easy paper loading/auto paper feeding Paper loading method Printing speed Actual speed detection:127.38mm/s 104mm Printing paper width 203dpi Effective resolution Continuous paper, label paper, and black label paper Paper type 0.06-0.18mm Thickness of printing paper Min 38mm Max 112mm... -
Page 9: Installation And Operation Of Printer
V. Installation and Operation of Printer 5.1 Printer Unpacking Check the parts: Before use, make sure the accessories are included in the package(the following picture is an example). If any thing is missing, contact the supplier or manufacturer. The specific accessories may not be included depending on the printer model. Standard Accessories Main machine Power adapter... -
Page 10: Connecting The Printer
5.2 Connecting the Printer Connect the power line (1) Confirm that the power switch is in off (0) state. (2) Connect the power adapter to the printer. (3) Connect the power line to the power adapter. (4) Connect the other end of the power line to a nearby socket. Use the special power adapter for the printer. -
Page 11: Paper Sensor
5.3 Paper Sensor When printing, the paper needs to be detected by a label detector. Using different kinds of paper, the detector is located in a different position. If the detector is in an incorrect position that will cause the printer to fail to detect properly, resulting in an abnormal phenomenon of jumping paper. - Page 12 Black label When using Black Label paper (figure 3), move the detector to detect the black label paper until it is positioned at the location of the Black label (figure 4). Figure 3 Figure 4 LABEL P RINTE...
-
Page 13: Folded Paper Loading
5.4 Folded Paper Loading (1) Facing the back of the machine, hold the paper guide with both hands, and adjust the distance between the left and right guides according to the folded paper size. (2) Insert the folded paper into the paper guide (3) Confirm that the printer has detected paper feeding, automatically feeds paper and delivers paper normally LABEL P RINTE... -
Page 14: Loading The External Paper Roll
5.5 Loading the external paper roll 5.6 Handling of Paper Jam (1) Move the top cover lever forward with both hands and lift the top cover. (2) Remove the jammed paper from the feeding channel, and check whether the print head has adhesive or carbon deposition. If yes, clean it with an alcohol cloth, remove the wrinkled paper and replace it with new paper. -
Page 15: The Switch, Key And Indicator Light Of Printer
VI. The Switch, Key and Indicator Light of Printer 6.1 Precautions for power switch/use (1) Turn the printer power switch to on (1) state, and the printer will be turned on. (2) Turn the printer power switch to on (O) state, and the printer will be turned off. (3) Turn off the printer with power switch. -
Page 16: Printer Test
VII. Printer Test 7.1 Print Self-Test Page When the printer is initially installed or there are any problems with the printer, you can run self-test program to confirm the following status firmware version, printer parameter setting status, print quality, and related setting information of external devices, etc. -
Page 17: Label Learning
7.3 Label Learning Note: In the following cases, the user can perform label positioning learning so that the printer can better position the label: Install and use the printer for the first time. First use of printer after sensor cleaning. Reuse the printer after it is not used for a long time. -
Page 18: Usb Interface
VIII. USB Interface SIGNAL NAME VBUS LABEL P RINTE... -
Page 19: Cleaning The Printer
IX.Cleaning the Printer 9.1 Cleaning the Printer Head Clean the print head when one of the following conditions occurs to the printer: (1) Printing is not clear. (2) A vertical column of the printed page is not clear. (3) The paper feeding noise is high. The print head cleaning steps are as follows: (1) Turn off the power supply of the printer, , open the upper cover and remove the paper if exists. -
Page 20: Cleaning The Printing Rubber Roller
9.3 Cleaning the Printing Rubber Roller When one of the following conditions occurs to the printer, the printing rubber roller should be cleaned: (1) Printing is not clear. (2) A vertical column of the printed page is not clear. (3) The paper feeding noise is high. The printing Rubber Rollers cleaning steps are as follows: (1) Turn off the power of the printer and open the upper cover. -
Page 21: Troubleshooting
X.Troubleshooting The table below shows common problems and solutions for operators. If you have followed the simple troubleshooting methods but the printer is still not functioning properly, please contact the customer service department of your dealer for assistance. Solution Cause Fault Phenomenon a. -
Page 22: Setting Integration Tool Manual
XI.Setting Integration Tool Manual 11.1 Connection Test The operation display is as follows According to the model interface, select U or other port or driver port to connect the printer, and click [Connection Test]. If the following figure is displayed successfully, it means that the printer has been connected. -
Page 23: Display Printer Information
11.2 Display Printer Information Click [Display Printer Information] to view the basic information of the current printer. 11.3 Download When the firmware version of the printer is low or not ideal, click [Download]. The dialog box shown below is displayed. Click [Select Program File] to select the program, and then click [Update]. -
Page 24: Set Printer
If you want to change the font, select [Font Library], click [Open File] to select the font, and then click [Update]; after the printer beeps once, the font is successfully updated. 11.4 Set Printer 11.4.1 Print set Click [Set Printer] to pop up the window shown in the figure below. You can change the basic parameters in the print setting interface. - Page 25 The function details are as follows Parameter description Submenu Description Defaults (parameter order is consistent with description) Print Type Thermal ribbon Automatic position Enable/disable when power on Max label height 30~400mm Label height supported (Two bytes) Continuous paper, Paper type label paper, and black-marked paper Reprint when Error...
- Page 26 11.4.2 Label Calibration: When the printer is ready, switch to the label calibration screen. (As shown in the figure below): a. Automatic label learning: Recognize the specifications of the newly loaded paper through learning. b. Paper shortage learning: If paper shortage prompt occurs when there is paper or the seam cannot be found while label learning, you can click [Paper Shortage Learning] when there is no paper and the cover is closed.
- Page 27 11.4.3 Print test Switch to print test screen.(As shown in the figure below) a. Debug mode:The mode is disabled by default. After enabling this mode, the printer prints the original data sent to facilitate finding errors; b. Print head bad point detection:When the printer is ready, click [Detect] to check whether the print head is normal.
- Page 28 d. Print test text: As shown in the figure below, you can enter the text you want to print in the text box and set the printable area in label mode. Click [Print] to perform print test. 11.4.4 PRN Print Click [Open File], select an RRN file and click [Print] to print the file.
- Page 29 11.4.5 User setting Switch to the user setting screen to set buzzer on/off or restore the default settings of the printer. The function details are as follows Parameter description (parameter order is Submenu Description Defaults consistent with description) Beep Change the sound of ON \ OFF \ 0ON Restore Reset printer back to the...
- Page 30 11.4.6 Ethernet Switch to Ethernet interface to set Ethernet parameters 1. Set the IP address of the printer, change it to "192.168.1.87", and set the communication port 2. Set the printer's subnet mask and change it to "255.255.255.0" 3. Set the printer's gateway as "192.168.1.1" 4.
- Page 31 11.4.7 WIFI Printer parameter setting instruction 1.Open the setting tool " PrinterTool ". According to the instruction manual of this setting tool, first make. sure that the printer is connected. Open the setting tool and select "WiFi". Input the SSID (WiFi name) to which the printer is connected, and the corresponding mode.
- Page 32 11.4.8 Serial Port Settings Switch to serial port setting interface to set serial port parameters. interface to set serial port parameters. LABEL P RINTE...
- Page 33 11.4.9 Bluetooth Settings If the printer has Bluetooth function, you can set the Bluetooth parameters. 1. First press and hold the FEED button of the printer, and then turn on the printer to print the self-test page.From the self-test page, find out the Bluetooth pairing name and password of the printer.
- Page 34 11.4.10 Character Set Setting Switch to the character set setting screen, click the drop-down button to select the required codepage, and click "Set". LABEL P RINTE...
-
Page 35: Windows Driver Installation
XII.Windows Driver Installation 12.1 Installation Before installing the printer driver, please connect your printer to the computer and make sure the power switch is turned on. Double click the installation Then, it will show as below picture: Select the language, then click “OK” .Then, it will show as below picture: LABEL P RINTE... - Page 36 Then click “Install”.It will show as below picture: Wait till it shows the above picture, it means, the printer driver has been installed successfully, and then click "OK". Click “Finish” to finish driver installation. LABEL P RINTE...
-
Page 37: Printer Setup And Testing
12.2 Printer Setup and Testing 12.2.1 Setup Printer Properties Click Start Menu, and then click" Devices and Printers", just as above picture Right-Click "Label Printer” and then click “Printer properties” LABEL P RINTE... - Page 38 And then, it will show as below picture: On Label Printer “General”, you could configure the printer communication port, such as Serial port, Parallel port and USB port. You also could set the paper specification, beeper etc. After all the setting, you could start to print the testing page. LABEL P RINTE...
- Page 39 12.2.2 Printing Test Page After finishing port configuration, we start to print test page. On Label Printer “General”: Click “Print Test Page”, the printer will print test page, which means the printer has been connected with computer successfully and the port configuration is correct. LABEL P RINTE...
- Page 40 12.2.3 Other Properties and Function Configuration You could set the paper specification etc., please refer to the follows: Select the printer properties, click on "Print preferred page", enter the page and print settings interface, as shown in the following figure. LABEL P RINTE...
- Page 41 Click the Paper Name drop-down box to select the paper size to use. LABEL P RINTE...
- Page 42 Click “Manage” to enter the custom paper interface. LABEL P RINTE...
- Page 43 Offset sets horizontal and vertical margins. Rotate to print in different directions. LABEL P RINTE...
- Page 44 Click Advanced Settings to enter the Set Print Density and Set Print Speed screen as shown in the following figure. LABEL P RINTE...
-
Page 45: Uninstall The Driver
12.3 Uninstall the driver (1) Open the control panel (2) Click “Uninstall a program LABEL P RINTE... - Page 46 (3) Double-click the driver to be uninstalled (4) Click "Yes” (5) Uninstallation complete LABEL P RINTE...
- Page 47 Click Advanced Settings to enter the Set Print Density and Set Print Speed screen as shown in the following figure. LABEL P RINTE...
Need help?
Do you have a question about the RP420 and is the answer not in the manual?
Questions and answers