
Related Manuals for Dymo LabelWriter 400


Summary of Contents for Dymo LabelWriter 400
- Page 1 LabelWriter 400 LabelWriter 400 Turbo Quick Start www.dymo.com LW 400 T_QSC.indd 1 27-01-2006 14:08:39...
- Page 2 Quick Start Follow these steps to install the LabelWriter printer and print your first label. 1. Unpacking your LabelWriter Printer For Windows, do not plug the printer into your computer until asked to do so NOTE during the software installation. 1 Unpack your printer and save the packing materials.
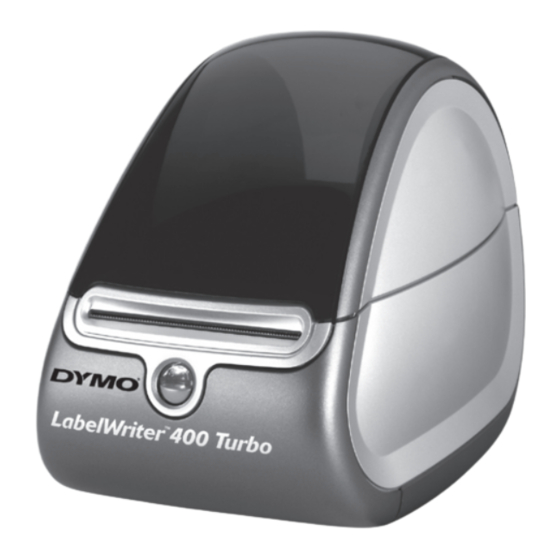
- Page 3 Become familiar with the printer’s major components. See Figure 2. cover Label roll connector DC power connector Platen release Label feed path and tear bar Cable Form-feed Label eject channel button and LED button Figure 2 LabelWriter Printer Features The form-feed button on the front of the printer is used to advance a single label. The label eject button is used to remove labels from the printer.
- Page 4 2 Select the language version you wish to install and then follow the on-screen instructions. To install the software on a Macintosh system 1 Insert the DYMO LabelWriter CD into the CD-ROM drive. After a few seconds, the DYMO Label Software Installer icon appears. See Figure 3.
- Page 5 3. Connecting your LabelWriter Printer At some point during the software installation, you will be asked to connect your LabelWriter printer to the USB port. For Windows, do not connect the printer to NOTE Power adapter your computer until instructed to do so during the software installation.
- Page 6 4. Loading Labels 1 Press the form-feed button to eject the labels that protected the printer during shipment. 2 Open the top cover and remove the label spool. 3 Hold the spool spindle in your left hand and place the label roll on the spindle so that the labels feed from underneath.
- Page 7 5. Printing your First Label 1 Start the DYMO Label software by doing one of the following: • For Windows, click Start, then Programs>DYMO Label>DYMO Label. • For Macintosh, double-click the DYMO Label icon in the folder where you installed the software.
- Page 8 DYMO Purchase Registration DYMO bvba Sanford Australia Industriepark-Noord 30 1-11 Keysborough Ave, 9100 Sint-Niklaas Keysborough, Victoria 3173 Belgium Australia...
Need help?
Do you have a question about the LabelWriter 400 and is the answer not in the manual?
Questions and answers