
Related Manuals for Nescafe Dolce Gusto DeLonghi neo


Summary of Contents for Nescafe Dolce Gusto DeLonghi neo
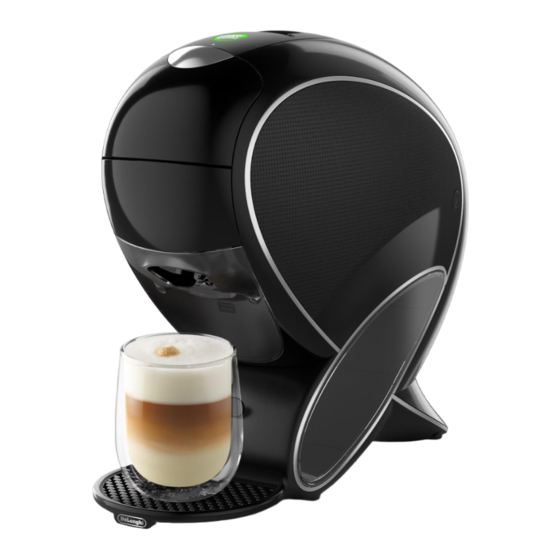
- Page 1 YOUR COFFEE SHOP AT HOME YOUR COFFEE SHOP AT HOME USER MANUAL Read the Safety Precautions before first use.
- Page 2 YOUR COFFEE SHOP AT HOME...
-
Page 3: Table Of Contents
CONTENTS MACHINE OVERVIEW CONNECT YOUR MACHINE MACHINE STATUS OVERVIEW RINSE (BEFORE FIRST USE) BEVERAGE CHOICE BEVERAGE PREPARATION BLACK COFFEE PREPARATION (POD ONLY) COFFEE SPECIALTIES PREPARATION (POD AND SACHET) OTHER DRINKS PREPARATION (SACHET ONLY) CLEAN (REGULARLY) DESCALE DESCALE THE MACHINE & THE JET NOZZLE ALERTS / TROUBLESHOOTING... -
Page 4: Machine Overview
MACHINE OVERVIEW Multi Coloured Start Button Pod Inlet / Shutter Slider Bluetooth and WiFi LED ® ON/OFF Button To save energy, the machine automatically switches off after Sachet Door / Holder 1 minute. Cleaning Door Pod Bin Drip Grid Drip Tray Water Tank (1.3 L) Frequency of BLE/WiFi module... -
Page 5: Connect Your Machine
CONNECT YOUR MACHINE We recommend you connect your machine with the NESCAFÉ® Dolce Gusto® app. Cup customisation Smart re-order Reward for every cup Help and support How to pair your machine? 1 Have your phone near your machine 2 Enable Bluetooth® and WiFi on your phone 3 Open the NESCAFÉ®... -
Page 6: Machine Status Overview
MACHINE STATUS OVERVIEW Start Button For details, Machine Status Action needed Indication see page(s) Wait a few seconds until Heating up it turns steady green Top up time for beverage For a longer cup, press preparation the start button again FLASHING GREEN Ready for beverage Insert a pod... - Page 7 Start Button For details, Machine Status Action needed Indication see page(s) The sachet needs to A sachet is left in the be removed (open and machine close the sachet door). STEADY YELLOW The pod or the sachet Reinsert the pod or the 26 / 27 cannot be detected sachet...
-
Page 8: Rinse (Before First Use)
RINSE (BEFORE FIRST USE) 1 Remove the water tank. Push it 2 Fill the water tank with ambient temperature fresh drinking water. from the left side toward the right. Always keep the machine upright. Insert the water tank back into the machine. - Page 9 RINSE (BEFORE FIRST USE) ~5 s 5 Close the slider (without a pod) and 6 Empty the container and water tank when rinsing stops (the start button press the start button for 5 seconds. Release when the button flashes goes steady green). Refill and green twice.
-
Page 10: Beverage Choice
BEVERAGE CHOICE Your Coffee Shop at home* With a pod, a sachet or a combination of the two, prepare your favorite beverage. Indicative Indicative Type Beverage Sachet preparation cup size time – 45 ml 20 s Espresso 205 ml (50 ml espresso –... - Page 11 BEVERAGE CHOICE With your NEO machine you can prepare beverages from Roast & Ground coffee, soluble coffee, milk, cacao and plant-based beverages (oat milk, coco milk, almond milk, etc.). Indicative Indicative Type Beverage Sachet preparation cup size time 270 ml 1 min 15 s Cappuccino 300 ml...
-
Page 12: Beverage Preparation
BEVERAGE PREPARATION Before all beverage preparations During / after beverage preparation ~10 s *click* Adjust the drip tray position to the Once the extraction is finished, the selected beverage. Place the cup, start button flashes green rapidly. For a shorter cup, manually stop glass or coffee pot on the drip tray. -
Page 13: Black Coffee Preparation (Pod Only)
BLACK COFFEE PREPARATION (POD ONLY) 1 Preheating: For espresso preparation, 2 Open the slider and insert the pod in you may preheat the cup. Press the the correct direction. Close the slider. start button to start the water flow and press again to stop it. Empty the cup and place it on the drip tray again. -
Page 14: Coffee Specialties Preparation (Pod And Sachet)
COFFEE SPECIALTIES PREPARATION (POD AND SACHET) 1 Open the sachet door completely 2 Open the slider and insert the pod in and insert the sachet properly until the correct direction. Close the slider. the end. Make sure it is placed in the correct direction and position. - Page 15 OTHER DRINKS PREPARATION (SACHET ONLY) 1 Open the sachet door completely 2 Press the start button. The machine and insert the sachet properly until starts brewing, automatically the end. Make sure it is placed in recognising beverage parameters the correct direction and position. (sequence, volume, temperature).
-
Page 16: Clean (Regularly)
CLEAN (REGULARLY) 1 Empty and clean the water tank using a long soft brush with a mild detergent. Rinse the water tank with WATER TANK water. 2 Fill it with fresh water and insert it The water tank is not dishwasher back into the machine. - Page 17 CLEAN (REGULARLY) 1 Open the sachet door and remove the sachet holder. 2 Clean the sachet holder with fresh water (a sponge can be used). Dry it afterwards with a soft dry cloth. SACHET HOLDER The pod bin will contain both used pods and rinsing water.
-
Page 18: Descale
DESCALE (every 6 months or at descaling alert) Descaling helps to keep your machine Do not use vinegar! working and ensures great in-cup Be careful not to spill the quality. descaling liquid on the machine! Do not unplug the machine during descaling! TIP: connect your machine and get an automatic notification when it is time to descale. - Page 19 DESCALE (every 6 months or at descaling alert) 0.5 L 1 Mix 0.5 liter of fresh water with 2 Insert the water tank into the the NESCAFÉ® Dolce Gusto® liquid machine. Remove the drip tray descaler (sold on website). Pour the if needed.
- Page 20 DESCALE ~15 s 5 While pressed, the start button In case there is no water flow, turns from steady green until it the jet nozzle might be clogged. softly dims orange. Descaling starts Follow the jet nozzle cleaning and water starts to flow. The start process (see pages 21 to 23).
- Page 21 DESCALE 8 Remove the drip tray if needed. 9 Close the slider and press the start Place an empty large container button once. It starts to dim orange underneath the coffee outlet. softly. Rinsing starts. JET NOZZLE CLEANING / DESCALING 10 Empty the container and the water The jet nozzle must be maintained and tank once rinsing is finished.
-
Page 22: Descale The Machine & The Jet Nozzle
DESCALE THE MACHINE & THE JET NOZZLE ~10 s 1 If necessary, remove the pod from 2 Press the start button for 10 seconds the pod inlet and/or the sachet from until it blinks purple. The jet nozzle the sachet holder. Close the sachet will move to removal position. - Page 23 DESCALE THE MACHINE & THE JET NOZZLE ~3 s 5 After cleaning, check that there 6 Reinsert the opened jet nozzle back are no residues. Otherwise use a into the machine and follow the same brush or sponge to remove them. steps in reverse order.
-
Page 24: Alerts / Troubleshooting
ALERTS / TROUBLESHOOTING The start button turns steady blue. 1 Refill it with fresh drinking water and The beverage preparation stops part ensure it is properly back in place. way during the extraction or does not start at all. The water tank may be empty. - Page 25 ALERTS / TROUBLESHOOTING The start button flashes white rapidly: 1 Ensure the machine is switched on. is the pod blocked or the pod bin full? Empty the pod bin to reset the beverage counter. If the button flashes white but the pod bin is not full, this is due to emptying the pod bin while the machine was switched off.
- Page 26 ALERTS / TROUBLESHOOTING The start button turns steady yellow. 1 A sachet is left in the machine and needs to be removed. After the sachet is removed, the start button turns steady green. If the button remains yellow but the sachet holder is empty, this is due to removing the sachet while the machine was switched off.
- Page 27 ALERTS / TROUBLESHOOTING The machine is unable to detect the 1 Open the sachet door. Check if sachet. Either the start button is flash- the sachet is well inserted. Flip it ing yellow or hot water is extracted and reinsert it. If the sachet is well instead of a product.
- Page 28 ALERTS / TROUBLESHOOTING TIP: connect your machine and get an automatic notification when it is time to descale. The start button is steady orange 1 See the Descale section on pages when the machine is ready or 18 to 21. If the start button turns dimming orange during an extraction.
- Page 29 ALERTS / TROUBLESHOOTING The start button turns steady red. 1 Switch off the machine. Unplug the machine, wait for at least 10 seconds and plug it in again. If the error persists, call the NESCAFÉ® Dolce Gusto® hotline. Sachet holder For additional maintenance instructions, please scan the QR code.
- Page 30 ALERTS / TROUBLESHOOTING The machine cannot be switched on. 1 Check if the power plug is correctly plugged in. If the machine still cannot be switched on, call the NESCAFÉ® Dolce Gusto® hotline. 15 s In some situations, our hotline might 1 Press the ON/OFF button and the recommend resetting the machine to start button at the same time for...
- Page 32 YOUR COFFEE SHOP AT HOME HOTLINE 0800 707 6066 www.dolce-gusto.com...
- Page 33 YOUR COFFEE SHOP AT HOME HOTLINE 0800 707 6066 www.dolce-gusto.com...
- Page 35 ALERTES / DÉPANNAGE SCANNEZ-MOI Il est impossible d’allumer la machine. 1 Vérifiez si la fiche est correctement branchée. Si le problème persiste, appelez la hotline NESCAFÉ® Dolce Gusto®. 15 s Dans certains cas, notre hotline 1 Appuyez simultanément sur le pourra recommander de rétablir les bouton marche / arrêt et sur le réglages usine de la machine.
- Page 36 ALERTES / DÉPANNAGE SCANNEZ-MOI Le bouton de démarrage émet une 1 Éteignez la machine. Débranchez- lumière rouge continue. la. Attendez au moins 10 s, puis rebranchez-la. Si le problème persiste, appelez la hotline NESCAFÉ® Dolce Gusto®. Couvercle du support du sachet Veuillez scanner le code QR pour obtenir des instructions de maintenance additionnelles.
- Page 37 ALERTES / DÉPANNAGE CONSEIL : connectez votre machine et recevez une notification automatique lorsqu’il est temps d’effectuer un détartrage. Le bouton de démarrage émet une 1 Voir la section Détartrage aux lumière orange continue lorsque pages 18 à 21. Si le bouton de la machine est prête ou une démarrage émet une lumière lumière orange atténuée pendant...
- Page 38 ALERTES / DÉPANNAGE La machine n’arrive pas à détecter le 1 Ouvrez le couvercle de la trappe du sachet. Soit le bouton de démarrage sachet. Vérifiez si celui-ci est bien émet une lumière jaune clignotante, inséré. Tournez-le et réintroduisez- soit de l’eau chaude est extraite à la le.
- Page 39 ALERTES / DÉPANNAGE Le bouton de démarrage émet une 1 Un sachet est resté dans la machine lumière jaune continue. et doit être enlevé. Après le retrait du sachet, le bouton émet une lumière verte continue. Si le bouton reste jaune mais que le support du sachet est vide, cela est dû...
- Page 40 ALERTES / DÉPANNAGE Le bouton de démarrage clignote 1 Assurez-vous que la machine est rapidement en blanc : pod bloqué ou allumée. Videz le bac à pods usagés bac à pods plein ? pour réinitialiser le compteur de boissons. Si le bouton clignote en blanc mais que le bac à...
- Page 41 ALERTES / DÉPANNAGE Le bouton de démarrage émet 1 Remplissez le réservoir d’eau une lumière bleue continue. La potable fraîche et veillez à bien le préparation de la boisson s’arrête ou remettre en place. ne démarre pas du tout. Le réservoir d’eau est peut-être vide.
- Page 42 NETTOYAGE ET DÉTARTRAGE DE LA BUSE À JET ~3 s 5 Après le nettoyage, vérifiez qu’il 6 Réinsérez la buse à jet dans la n’y ait pas de résidus. S’il y en a, machine et effectuez les mêmes utilisez une brosse ou une éponge opérations dans l’ordre inverse.
- Page 43 NETTOYAGE ET DÉTARTRAGE DE LA BUSE À JET ~10 s 1 Si nécessaire, enlevez le pod ou 2 Appuyez sur le bouton de démar- le sachet. Fermez le couvercle rage pendant 10 s, jusqu’à ce qu’il du sachet et glissez le curseur en clignote en violet.
- Page 44 DÉTARTRAGE 8 Enlevez le bac d’égouttage le cas 9 Glissez le curseur en position fermée échéant. Placez un grand récipient et appuyez sur le bouton de démarrage vide sous la sortie café. une fois. Il émet une lumière orange atténuée. Le rinçage démarre. NETTOYAGE ET DÉTARTRAGE DE LA BUSE À...
- Page 45 DÉTARTRAGE ~15 s 5 Pendant ce temps, la lumière émise S’il n’y a pas d’écoulement d’eau, par le bouton de démarrage passe la buse à jet pourrait être bouchée. du vert continu à l’orange s’atténuant Nettoyez la buse à jet (voir les doucement.
- Page 46 DÉTARTRAGE (tous les 6 mois ou si l’alarme de détartrage est active) 0.5 L 1 Mélangez 0,5 l d’eau fraîche avec le 2 Insérez le réservoir d’eau dans la liquide détartrant NESCAFÉ® Dolce machine. Enlevez le bac d’égouttage Gusto® (vendu sur le site Internet). si nécessaire.
- Page 47 DÉTARTRAGE (tous les 6 mois ou si l’alarme de détartrage est active) SCANNEZ-MOI Le détartrage aide à N’utilisez pas de vinaigre ! maintenir votre machine Veillez à ne pas verser de en bon état et vous liquide détartrant sur la garantit une très bonne machine ! Ne débranchez qualité...
- Page 48 NETTOYAGE (FRÉQUENT) 1 Ouvrez le couvercle du réceptacle du sachet et enlevez le support du sachet. 2 Nettoyez le support du sachet avec de l’eau (une éponge peut être utilisée). Essuyez-le ensuite avec un chiffon doux sec. COUVERCLE DU RECEPTACLE DU SACHET Le bac à...
- Page 49 NETTOYAGE (FRÉQUENT) 1 Videz et nettoyez le réservoir d’eau en utilisant une brosse douce longue et un détergent doux. Rincez le RÉSERVOIR D’EAU réservoir d’eau avec de l’eau. 2 Remplissez-le d’eau fraîche et Ce réservoir n’est pas conçu remettez-le dans la machine. pour passer au lave-vaisselle.
- Page 50 AUTRES PRÉPARATIONS DE BOISSONS (SACHET) 1 Ouvrez complètement le couvercle 2 Pressez le bouton de démarrage. e et du logement du sachet et insérez La machine prépare la boisson en correctement le sachet jusqu’en reconnaissant automatiquement butée. Assurez-vous qu’il est bien les paramètres de préparation de placé.
- Page 51 PRÉPARATION DE SPÉCIALITÉS DE CAFÉ (POD ET SACHET) 1 Ouvrez complètement le couvercle 2 Glissez le curseur en position ouverte et du logement du sachet et insérez insérez le pod dans la bonne direction. correctement le sachet jusqu’en Glissez le curseur en position fermée. butée.
- Page 52 PRÉPARATION DES CAFÉS (POD) 1 Préchauffage : pour préparer de 2 Glissez le curseur en position ouverte l‘espresso, vous pouvez préchauffer la et insérez le pod dans la bonne tasse. Pressez 1 fois le bouton de dé- direction. Faites glisser le curseur en marrage pour démarrer l’écoulement position fermée.
- Page 53 PRÉPARATION D’UNE BOISSON Avant toute préparation de boisson Pendant / après la préparation d’une boisson ~10 s *clic* Une fois l’extraction terminée, le bouton Adaptez la position du bac d’égouttage de démarrage clignote rapidement en à la boisson choisie. Posez la tasse, vert.
- Page 54 CHOIX DE LA BOISSON Avec notre machine NEO, vous pouvez préparer des boissons à base de café torréfié & moulu, de café soluble, de cacao, de lait d’origine animale ou végétale (lait d’avoine, lait de coco, lait d’amande etc.). Temps de Taille de tasse Type Boisson...
- Page 55 CHOIX DE LA BOISSON Votre coffee shop à la maison.* Préparez votre boisson favorite avec un pod, un sachet ou une combinaison des deux. Temps de Taille de tasse Type Boisson Sachet préparation indicative indicatif – 45 ml 20 s Espresso 205 ml (50 ml d’espresso...
- Page 56 RINÇAGE (AVANT LA PREMIÈRE UTILISATION) ~5 s 5 Faites glisser le curseur en position 6 Videz le récipient et le réservoir d’eau lorsque le rinçage s’arrête (le bouton fermée (sans pod) et appuyez sur le bouton de démarrage pendant émet une lumière verte continue). 5 s.
- Page 57 RINÇAGE (AVANT LA PREMIÈRE UTILISATION) 1 Retirez le réservoir d’eau. Poussez-le 2 Remplissez le réservoir d’eau avec de l’eau potable fraîche à du côté gauche de la machine vers la droite. Laissez toujours la machine température ambiante. Remettez le à la verticale. réservoir dans la machine.
- Page 58 Indication du Pour plus bouton de État de la machine Action nécessaire de détails, démarrage cf. page(s) Retirez-le Un sachet est resté (ouvrir et fermer le couvercle dans la machine de la trappe du sachet) JAUNE CONTINU Le pod ou le sachet Réinsérez le pod ou ne peuvent pas être 26 / 27...
- Page 59 APERÇU DES DIFFÉRENTS MODES DE LA MACHINE Indication du Pour plus État de la bouton de Action nécessaire de détails, machine démarrage cf. page(s) Attendez quelques secondes jusqu’à Mise en température ce que la lumière verte soit continue Temps de Pour plus de volume, réappuyez préparation max.
- Page 60 CONNEXION DE LA MACHINE Nous vous recommandons de connecter votre machine à l’application NESCAFÉ® Dolce Gusto®. Personnalisation de la tasse Fonction de commande intelligente Récompense pour chaque tasse Aide et assistance SCANNEZ-MOI Comment appairer votre machine ? 1 Tenez le téléphone près de la machine 2 Activez les fonctions Bluetooth®...
- Page 61 PRÉSENTATION DE LA MACHINE Bouton de démarrage multicolore Insertion pod / obturateur Curseur Voyant LED Bluetooth et WIFI ® Bouton marche / arrêt Pour économiser de l’énergie, la machine s’arrête après 1 min. Couvercle de la trappe du sachet Couvercle de la trappe de nettoyage Bac à...
- Page 62 SOMMAIRE PRÉSENTATION DE LA MACHINE CONNEXION DE LA MACHINE APERÇU DES DIFFÉRENTS MODES DE LA MACHINE RINÇAGE (AVANT LA PREMIÈRE UTILISATION) CHOIX DE LA BOISSON PRÉPARATION D’UNE BOISSON PRÉPARATION DES CAFÉS (POD) PRÉPARATION DE SPÉCIALITÉS DE CAFÉ (POD ET SACHET) AUTRES PRÉPARATIONS DE BOISSONS (SACHET) NETTOYAGE (FRÉQUENT) DÉTARTRAGE...
- Page 63 YOUR COFFEE SHOP AT HOME...
- Page 64 YOUR COFFEE SHOP AT HOME YOUR COFFEE SHOP AT HOME MODE D’EMPLOI SCANNEZ-MOI Lisez les consignes de sécurité avant la première utilisation.
Need help?
Do you have a question about the DeLonghi neo and is the answer not in the manual?
Questions and answers