
Related Manuals for Fantini Rubinetti PARTI INCASSO M685A


Summary of Contents for Fantini Rubinetti PARTI INCASSO M685A
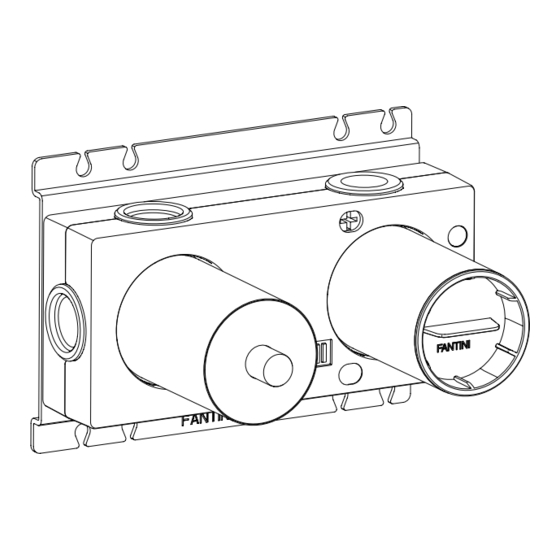
- Page 1 PARTI INCASSO Istruzioni / Instructions / Instructions De Montage / Bedienungsanleitung / Instrucciones M685A M687A ART. ART.
-
Page 2: Utensili Necessari
UTENSILI NECESSARI - NECESSARY TOOLS - OUTILS NÉCESSAIRES ERFORDERLICHE WERKZEUGE - HERRAMIENTAS NECESARIAS - FERRAMENTAS NECESSARIES DATI TECNICI - TECHINCAL DETAILS - DONNÉES TECHNIQUES TECHNISCHE DATEN - DATOS TÉCNICOS - DADOS TÉCNICOS Pressione minima Minimum pressure Pression minimum 1 BAR Pressione massima Minimum pressure Pression maximum... - Page 3 DATI TECNICI - TECHINCAL DETAILS - DONNÉES TECHNIQUES TECHNISCHE DATEN - DATOS TÉCNICOS - DADOS TÉCNICOS Se la pressione dell’acqua è superiore a 5 bar, è preferibile installare un riduttore di pressione a monte dell’alimentazione per evitare vibrazioni e rendere regolare la regolazione della temperatura. If water pressure is above 5 bar, it is advisable to install a flow restrictor upstream of the water supply to avoid vibrations and regulate temperature.
- Page 4 PREINSTALLAZIONE - PRE-INSTALLATION - PRÉ-INSTALLATION VORINSTALLATION - PREINSTALCIÓN - PRÉ-INSTALAÇÃO M685A M687A 14233,055 142,331 13047,097 130,471 456,466 4,565 306,028 3,060 48,5 48,5 verde: Assemblare con Loctite verde: 1 - 5 1 - 9 Assemblare con loctite blu: 2551,279 25,513 1 - 18 Trat Termico: Trat Superficiale: Trat Termico:...
-
Page 5: Installazione
INSTALLAZIONE - INSTALLATION - INSTALLATION INSTALLATION - INSTALACIÓN - INSTALAÇÃO profondità minima / minimum depth /profondeur minimale / profondità massima / maximum depth / profondeur maximale / minimale tiefe / profundidad mínima maximale tiefe / profundidad máxima READ THE INSTRUCTION MANUAL LEGGERE MANUALE ISTRUZIONI READ THE... - Page 6 INSTALLAZIONE - INSTALLATION - INSTALLATION INSTALLATION - INSTALACIÓN - INSTALAÇÃO 1 - M685A 1/2” 1/2” 1/2” 1/2” 1 - M687A 1/2” 1/2” 1/2” 1/2”...
- Page 7 INSTALLAZIONE - INSTALLATION - INSTALLATION INSTALLATION - INSTALACIÓN - INSTALAÇÃO...
- Page 8 INSTALLAZIONE - INSTALLATION - INSTALLATION INSTALLATION - INSTALACIÓN - INSTALAÇÃO...
- Page 9 INSTALLAZIONE - INSTALLATION - INSTALLATION INSTALLATION - INSTALACIÓN - INSTALAÇÃO ø 8mm Nota bene, vite e tassello NON sono forniti, vanno scelti in funzione del supporto. Please note, screw and dowel are NOT supplied, they must be chosen according to the support. Nota bene, les vis et les chevilles NE sont PAS fournies, elles doivent être choisies en fonction du support.
- Page 10 INSTALLAZIONE - INSTALLATION - INSTALLATION INSTALLATION - INSTALACIÓN - INSTALAÇÃO...
- Page 11 INSTALLAZIONE - INSTALLATION - INSTALLATION INSTALLATION - INSTALACIÓN - INSTALAÇÃO TEFLON TEFLON COLLAUDO INGRESSI INLET TEST ESSAI ENTRÉES PRÜFUNG DER EINLÄSSE PRUEBA DE LAS ENTRADAS ENSAIO DAS ENTRADAS MIN 5 Bar Max 10 Bar...
- Page 12 INSTALLAZIONE - INSTALLATION - INSTALLATION INSTALLATION - INSTALACIÓN - INSTALAÇÃO •Mettere in pressione l’impianto per verificarne la tenuta e la corretta installazione •Put the system under pressure in order to verify the hold and correct installation •L’installation sous pression pour en vérifier l’ è tanchéité et le bon fonctionnement •Installation unter Druck stellen um das Fassungsvermögen und den korrekten Einbau zu überprüfen •Presurizar la planta para comprobar su retenciò...
- Page 13 INSTALLAZIONE - INSTALLATION - INSTALLATION INSTALLATION - INSTALACIÓN - INSTALAÇÃO •Applicare il collante sulla parete con l’utilizzo di una spatola •Apply the adhesive to the wall with a spatula •Appliquer le produit collant sur le mur avec une spatule •Den Klebstoff mit einer Spachtel an die Wand auftragen •Aplicar el adhesivo a la pared con una espátula •Aplicar il collante sulla parete con l’utilizzo di una spatola...
- Page 14 INSTALLAZIONE - INSTALLATION - INSTALLATION INSTALLATION - INSTALACIÓN - INSTALAÇÃO •Applicare nuovamente il collante su tutta la guarnizione e nell’area adiacente •Reapply the adhesive to all of the gasket and the surrounding area •Applique de nouveau le produit collant sur tout le joint et autour •Den Klebstoff auf die ganze Scheibe und den umgebenden Bereich wieder auftragen •Volver a aplicar el adhesivo a toda la empaque y la zona circundante •Candidate-se totalmente ao colante em toda a sua guarnização e na área adicente...
- Page 15 INSTALLAZIONE - INSTALLATION - INSTALLATION INSTALLATION - INSTALACIÓN - INSTALAÇÃO as medidas para o corte dos azulejos e inter-eixo para a pré-perfuração do revestimento.
- Page 16 Fratelli Fantini Spa via Buonarroti, 4 Pella (NO) Italia T +39 0322 918411 r.a. F +39 0322 969530 fantini@fantini.it www.fantini.it...
Need help?
Do you have a question about the PARTI INCASSO M685A and is the answer not in the manual?
Questions and answers