
Subscribe to Our Youtube Channel
Related Manuals for Nordcap NC81MP


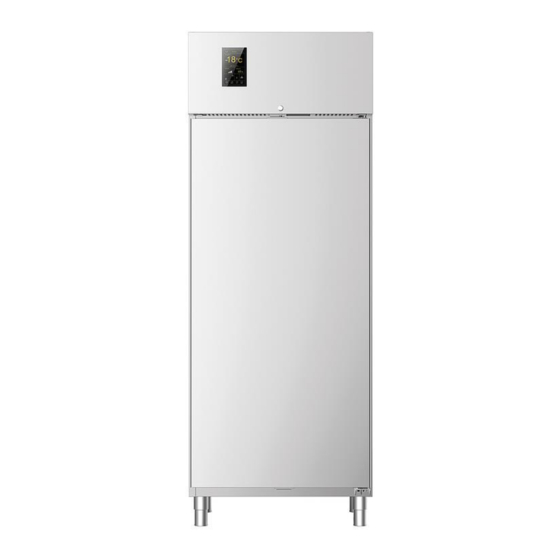
Summary of Contents for Nordcap NC81MP
- Page 1 Bedienungsanweisung Backwaren-Kühl- / -tiefkühlschrank NC81MP [Art. 474600400607] 2019-02...
- Page 2 Wir gratulieren Ihnen zum Erwerb unseres Geräts! Die Arbeit ist einfacher aufgrund der intuitiven Graphik der Benutzerschnittstelle, entwickelt zur Vereinfachung des Zugangs zu den Funktionen, die so dargestellt werden, dass sie sofort gefunden werden, um die Interaktion zwischen Benutzer und Gerät zu verbessern. In einer einzigen Maschine ein Konzentrat von Technologie, das es gestattet, für eine bessere Effi...
-
Page 3: Sicherheitshinweise Zur Benutzung
SICHERHEITSHINWEISE Sicherheitshinweise zur Benutzung • Eine Benutzung und Reinigung, die von den Angaben im vorliegenden Handbuch abweichen, sind als Zwe- ckentfremdung anzusehen und können zu Schäden, Verletzungen und tödlichen Unfällen führen; sie führen zum Verfall des Gewährleistungsanspruches und entbinden den Hersteller von jeglicher Haftung. •... - Page 4 Sicherheitshinweise Risiken im Zusammenhang mit der Benutzung des Geräts • RISIKEN DURCH DIE BEWEGUNG AUF RÄDERN: Achten Sie bei den Bewegungen darauf, das Gerät nicht zu schnell zu schieben, falls es auf Rädern montiert ist, um zu vermeiden, dass es umkippt und beschädigt wird; achten Sie auch eventuelle Unebenheiten der Gleitfl...
-
Page 5: Informationen Zum Gerät
INFORMATIONEN ZUM GERÄT Richtiges beladen des Geräts Die Speisen werden in einer einzigen Schicht in Behältern angeordnet: • off en; • lebensmittelgeeignet; • widerstandsfähig gegen niedrige Temperaturen; Die Behälter müssen gleichmäßig im Inneren der Kammer verteilt werden. Ein korrekte Positionierung der Behälter gestattet die frei Zirkulation der Luft im Inneren der Zelle: Verstopfen Sie die Lüftungsgebläse nicht und vermeiden Sie die Überladung des Geräts. - Page 6 Informationen zum Gerät Blockieren der Tür Die Öff nung der Tür kann mit dem Schloss auf dem Armaturen- brett blockiert werden. Cloud-Verbindung Wenn der Kunde ein Cloud-Abonnement beantragt hat, wird die Maschine mit einem Ethernet-Kabel mit dem Netz verbunden. Der Anschluss befi ndet sich auf der Karte im hinteren Teil des Ar- maturenbretts.
- Page 7 BENUTZUNG Seite 16 Seite 11 Bereich Hinweise Kontinuierlich kalt Liefert Angaben zum Status der Maschine Menü Benutzung Wenn aktiviert, arbeitet die Maschine Wenn an, zeigt an: Zur Benutzung der Maschine müssen kontinuierlich (Kompressor immer nur eingestellt werden: die Tür ist off en in Betrieb).
- Page 8 Benutzung Erste Einschaltung 11.45 Nome macchina c° Set -10°C Impostazioni 11.45 11.45 PASSWORD Mercoledì, 17:17 1234 Italiano Nome macchina: ““ Settings/Service Set 05 Impostazioni Parametri 11.45 11.45 Nome macchina: ““ Parametri generali Parametri Protocolli Confi gurazione Network Set 05 Set 05 11.45 Impostazioni Tipo ricetta...
- Page 9 Benutzung Menü Benutzung Die Betriebsparameter einstellen Zur Benutzung der Maschine müssen nur eingestellt werden: Temperatur im Inneren des Gerätes; Feuchtigkeit im Inneren des Gerätes; Rotationsgeschwindigkeit der Gebläse. Die Maschine durch Berühren der Taste ON-OFF einschalten. Wenn das Display für einige Minuten nicht berührt wird, wechselt die Maschine zum Standby: Zum verlassen dieses Zustands ist es ausreichend, das Display an beliebiger Stelle zu berühren.
- Page 10 Benutzung Menü Rezepte 11.45 Name Maschine Einen eingestellten Set speichern Nach der Einstellung der drei Parameter (Temperatur, Feuchtig- keit, Gebläsegeschwindigkeit) ist es möglich, sie zu speichern und dem soeben eingestellten Set einen Namen zuzuordnen c° (z. B. Eiscreme); dies gestattet es, den Sollwert erneut zu verwen- den, ohne dass die Parameter jedes Mal neu eingegeben werden müssen.
- Page 11 Benutzung Einen gespeicherten Set löschen, ändern oder 11.45 duplizieren Das Feld “Rezepte” berühren. Den Namen des betreff endes Sets berühren (z. B. “Schokola- de”): es erscheint verschiedene Symbole, die es gestatten: c° Set -10°C den Sollwert zu löschen; die drei Parameter (Temperatur, Feuchtigkeit, Gebläsege- schwindighkeit) des Sets permanent zu ändern;...
- Page 12 Benutzung Den Set duplizieren (z. B. “Schokolade”), indem eine Ko- 11.45 Preset duplizieren pie erstellt wird, der ein beliebiger Name zugeordnet wer- de kann (z. B. “dunkle Schokolade”). Dunkle Schokolade Die Kopie hat zu Beginn die gleichen Parameter wie das Original;...
- Page 13 Benutzung Einen bereits vom Benutzer oder vom Hersteller 11.45 gespeicherten Set starten Die zuvor vom Benutzer abgespeicherten Zyklen oder die vom Hersteller gespeicherten befi nden sich im Bereich “Rezepte”. Um alle anzuzeigen, den Display berühren und von unten nach oben wischen (Funktion “Scroll”). c°...
- Page 14 Benutzung 11.45 Menü Statistiken Im Menü Statistiken werden die Variationen der Feuchtigkeit und der Temperatur der letzten 12 Stunden abgespeochert. Falls er- forderlich ist es möglich, die Daten auf einem USB-Stick zu ko- pieren. c° Das Feld “Statistiken” berühren: Es erscheint eine Seite, die Set -10°C Informationen zur Variation der Temperatur und der Feuch- tigkeit während des Tags liefert.
-
Page 15: Menü Einstellungen
Benutzung Menü Einstellungen 11.45 Das Feld “Einstellungen” berühren. Es erscheint eine Seite, die es gestattet, einige Einstellungen vorzunehmen: • manuelles Abtauen (beim Berühren der Position star- c° tet das Abtauen sofort); • Einstellung Datum und Uhrzeit; Set -10°C • Auswahl der Sprache; •... -
Page 16: Wartung
WARTUNG Normale Reinigung des Gerätes PSA (persönliche Schutzausstattung), die bei der ordentlichen Wartung des Gerätes verwendet werden muss VOR DER DURCHFÜHRUNG ALLER WARTUNGSEIN GRIFFE MUSS DIE STROMVERSORGUNG DES GERÄTS UNTERBROCHEN WERDEN; BENUTZEN SIE AUSSER DEM GEEIGNETE PERSÖNLICHE SCHUTZAUSSTATTUNGEN Z. B. HANDSCHUHE USW.. DER BENUTZER DARF AUSSCHLIESSLICH ORDENTLI... - Page 17 Wartung Reinigung des Touchscreens Ein mit ein wenig spezifi schem Produkt für Bildschirme getränk- tes Tuch verwenden und die Anweisungen des des Herstellers des Reinigungsmittels beachten. Sprühen Sie nicht zu viel Produkt auf, um Infi ltrationen zu ver- meiden, die das Display beschädigen könnten. Reinigung der Schlitze und Gitter/Schwamm Halten Sie die Schlitze durch häufi...
- Page 18 Wartung Entsorgung Das Abklemmen der Stromversorgung und der Wasserzufuhr muss durch qualifi zierte Techniker erfolgen. Falls vorhanden, müssen ordnungsgemäß entsorgt werden: - Kühlgas; - in den Hydraulikkreisläufen vorhandenen Frostschutzmittel, Diese dürfen nicht in die Umwelt gelangen. Gemäß den Bestimmungen von § 13 des ital. Gesetzerlasses Nr. 49 des Jahres 2014 „Umsetzung der EU-Richtlinie RAEE 2012/19 zu elektrischen und elektronischen Altgeräten“...
- Page 19 Wartung Funktionsstörungen Falls das Gerät nicht funktioniert oder falls funktionelle oder strukturelle Veränderungen festgestellt werden: - Unterbrechen Sie die Stromversorgung und die Wasserzufuhr; - Konsultieren Sie folgende Tabelle und überprüfen Sie die vorge- schlagenen Lösungen. Wenden Sie sich an den Vertragskundendienst des Herstellers, falls in der Tabelle keine Lösung enthalten ist;...
-
Page 20: Garantie
Wartung Garantie Die Gewährleistungspfl icht des Herstellers für Geräte und Bauteile aus seiner Produktion hat eine Dauer von einem Jahr ab dem Rechnungsdatum und sie besteht in der kostenlosen Lieferung von Bauteile, die nach seinem unanfechtbaren Urteil ausgetauscht werden müssen. Der Hersteller wird die eventuellen Mängel beheben, vorausgesetzt, das Gerät wurde unter Beachtung der Anweisungen im vorlie- genden Handbuch installiert und benutzt. - Page 21 NordCap GmbH & Co. KG Thalenhorststraße 15 28307 Bremen Hauptsitz (Service, Finanzen & Personal, Lager, IT, Marketing) Telefon: +49 421 48557-0 Telefax: +49 421 488650 E-Mail: bremen@nordcap.de Die NordCap Verkaufsniederlassungen in Deutschland: Nord: Hamburg • Ost: Berlin • Süd: Ingelheim • West: Erkrath...
- Page 22 User Manual Bakery / Cream Deep Freezer NC81MP [Art. 474600400607] 2019-02...
- Page 23 Congratulations on having purchased our equipment! Work is simpler due to the intuitive user interface graphics, designed to simplify function access, that are displayed to be immediately identifi ed and promote user and device interaction. A concentration of technology in a single equipment allowing to perform diff erent and complementary activities for the best effi...
-
Page 24: Safety Instructions
SAFETY INSTRUCTIONS Safety instructions for use • Use and cleaning other than those indicated and foreseen in this booklet are considered improper and can cause damages, injuries or fatal accidents, null and void the warranty and hold the manufacturer harmless from any liability. •... - Page 25 Safety Instructions Risks associated with equipment use • RISKS DUE TO MOVING ON WHEELS: if the equipment is fi tted with wheels, be careful not to push the equipment roughly when moving to prevent it from tipping over and being damaged, also pay atten- tion to any unevenness of the sliding surface.
- Page 26 LEARNING ABOUT THE EQUIPMENT Correctly loading the equipment Food should be placed in a single layer in containers: • uncovered; • food-safe; • resistant to low temperatures; Containers should be evenly placed inside the cell. Correct container placement will permit free air circulation in the cell: avoid obstructing the air vents and overloading the equipment over the admissible limits.
- Page 27 Learning about the equipment Door lock The door opening can be locked by acting on the lock placed on the dashboard. Cloud Connection If the customer has requested a Cloud subscription, the machine must be connected to the network via an Ethernet cable. The socket is located in the board located in the back of the dashboard.
- Page 28 page 16 page 11 Warnings area Constant cold Use menu Provides information on the state of If enabled, the machine runs contin- the machine. All you need to do to start using the uously (compressor always running). If on, it indicates that: machine is setting up: This function is useful when large temperature...
-
Page 29: First Ignition
First ignition 11.45 Nome macchina c° Set -10°C Impostazioni 11.45 11.45 PASSWORD Mercoledì, 17:17 1234 Italiano Nome macchina: ““ Settings/Service Set 05 Impostazioni Parametri 11.45 11.45 Nome macchina: ““ Parametri generali Parametri Protocolli Confi gurazione Network Set 05 Set 05 11.45 Impostazioni Tipo ricetta... - Page 30 Use menu Setting the operating parameters All you need to do to start using the machine is setting up: temperature inside the equipment; humidity inside the equipment; rotation speed of the fans. Turn on the machine by touching the ON-OFF key. If you do not touch the display for a few minutes, the ma- chine goes into stand-by mode: to exit this state, simply touch the display anywhere.
- Page 31 Recipes menu 11.45 Name of the machine Saving a set After setting the three parameters (temperature, humidity, fan speed) you can save them, assigning a name to the set just se- lected (e.g. ice cream); this allows you to reuse it without having c°...
- Page 32 Delete, change or duplicate a saved set 11.45 Touch the "Recipes" fi eld. Touch the name of the set you are interested in (e.g. "Choc- olate"): several symbols appear allowing you to: c° Delete the set. Set -10°C Editdit the three parameters of the set (tempera- ture, humidity, fan speed) defi...
- Page 33 Duplicate the set (e.g. "Chocolate") making a copy to 11.45 Duplicate Preset which you can assign any name ("Dark chocolate" for ex- ample). Dark chocolate At fi rst, the copy has the same parameters as the original; these values can be changed by using the keys as usual.
- Page 34 Start a set already saved by the user or the 11.45 manufacturer Cycles previously saved by the user or those stored by the Manu- facturer can be found in the "Recipes" section. To view all of them, touch the display and move your fi nger from right to left, always keeping the fi...
-
Page 35: Statistics Menu
11.45 Statistics menu The Statistics menu stores the changes in humidity and temper- ature over the last 12 hours. If necessary, you can download the data (text only) to a USB stick. c° Touch the "Statistics" fi eld: a page appears providing infor- mation on the change in temperature and humidity during Set -10°C the day. -
Page 36: Settings Menu
Settings menu 11.45 Touch the “Settings” fi eld. A page appears allowing you to make some settings: • manual defrosting (touching the entry immediately starts defrosting); c° • date and time setting; • language selection; Set -10°C • Assign a name to the machine;... -
Page 37: Maintenance
MAINTENANCE Ordinary cleaning of the equipment Personal protective equipment to be worn during routine maintenance of the equipment BEFORE PERFORMING ANY MAINTENANCE, CUT OFF THE POWER SUPPLY TO THE MACHINE AND WEAR SUITABLE PERSONAL PROTECTION EQUIPMENT E.G. GLOVES, ETC.. USERS MUST CARRY OUT ONLY ROUTINE MAINTE NANCE OPERATIONS I.E. - Page 38 Maintenance Touch screen cleaning Use a cloth just soaked in a specifi c product for the crystals fol- lowing the instructions of the manufacturer of the detergent. Do not spray too much product to avoid infi ltrations that could damage the display. Slot and grill/sponge cleaning Keep vents free of obstructions and dust cleaning them often with a normal vacuum or brush.
- Page 39 MAINTENANCE Disposal at end working life Only qualifi ed personnel can disconnect the machine from the electrical and water mains. If applicable, recovery and correctly dispose: - coolant gas; - anti-freeze solutions in the hydraulic circuits, avoiding spills or disposal in the environment. As per Legislative Decree no.
- Page 40 MAINTENANCE Malfunctions If the equipment does not work or functional or structural alter- ations are noted: - disconnect it from the power and water mains; - consult the table below to check the proposed solutions; If the solution is not found in the table, contact a manufacturer's authorised service centre communicating: - the nature of the defect;...
-
Page 41: Warranty
MAINTENANCE Warranty The manufacturer's warranty on the equipment and its parts regarding its production is for 1 year, from invoice date, and consists in the free supply of parts to be replaced which, at is sole discretion, are defective. The manufacturer will take care to remove any faults and defects provided that the equipment has been installed and used correctly in accordance with the instructions given in the manual. - Page 42 MANUALE DI UTILIZZO E MANUTENZIONE Pasticceria Congelatore a pozzo NC81MP [Art. 474600400607] 2019-02...
- Page 43 Complimenti per aver acquistato la nostra apparecchiatura! Il lavoro è più semplice grazie alla grafi ca intuitiva dell’interfaccia utente, pensata per semplifi care l’accesso alle fun- zioni, che sono rappresentate per essere subito individuate e per favorire l’interazione tra l’utente e il dispositivo. In un’unica macchina un concentrato di tecnologia che le consentirà...
-
Page 44: Avvertenze Di Sicurezza
AVVERTENZE DI SICUREZZA Avvertenze di sicurezza per l’utilizzo • Un utilizzo ed una pulizia diversi da quelli indicati e previsti in questo libretto sono considerati impropri e possono provocare danni, lesioni o incidenti mortali, fanno decadere la garanzia e sollevano il costrut- tore da qualsiasi responsabilità. - Page 45 Avvertenze di sicurezza Rischi collegati all’utilizzo dell’apparecchiatura • RISCHI DOVUTI AGLI SPOSTAMENTI SU RUOTE: se l’apparecchiatura monta delle ruote, fare attenzione, durante gli spostamenti, a non spingere violentemente l’apparecchiatura per evitare che si ribalti e si danneggi, fare attenzione anche alle eventuali asperità della superficie di scorrimento. L’apparecchiatura dotata di ruote non può...
-
Page 46: Conoscere L'apparecchiatura
CONOSCERE L’APPARECCHIATURA Caricare correttamente l’apparecchiatura Le pietanze vanno sistemate, in unico strato, in recipienti: • scoperti; • adatti all’uso alimentare; • resistenti alle basse temperature; I recipienti dovranno essere sistemati in modo omogeneo e uniforme all’interno della cella. Un corretto posizionamento dei contenitori permetterà la libera circolazione dell’aria all’interno della cella: evitare di ostruire le ven- tole di aerazione e di sovracaricare l’apparecchiatura oltre i limiti consentiti. - Page 47 Conoscere l’apparecchiatura Blocco della porta L’apertura della porta può essere bloccata agendo sulla serratura posta sul cruscotto. Connessione Cloud Se il cliente ha richiesto un abbonamento Cloud, la macchina deve venire connessa alla rete mediante un cavetto ethernet. La presa si trova nella scheda posizionata nella parte posteriore del cruscotto.
- Page 48 UTILIZZO pag. 16 pag. 11 Area avvisi Freddo continuo Menu utilizzo Forniscono delle indicazioni sullo stato Se attivato, la macchina funziona di della macchina. Per utilizzare la macchina serve solo continuo (compressore sempre in Se acceso indica che: impostare: funzione). La funzione risulta utile temperatura all’interno la porta è...
-
Page 49: Prima Accensione
Utilizzo Prima accensione 11.45 Nome macchina c° Set -10°C Impostazioni 11.45 11.45 Password Mercoledì, 17:17 1234 Italiano Nome macchina: ““ Settings/Service Set 05 Impostazioni Parametri 11.45 11.45 Nome macchina: ““ Parametri generali Parametri Protocolli Confi gurazione Network Set 05 Set 05 11.45 Impostazioni Tipo ricetta... - Page 50 Utilizzo Menu utilizzo Impostare i parametri di funzionamento Per utilizzare la macchina serve solo impostare: temperatura all’interno dell’apparecchiatura; l’ umidità all’interno dell’apparecchiatura; velocità di rotazione delle ventole. Accendere la macchina toccando il tasto ON-OFF. Se non si tocca il display per qualche minuto la macchina va in stand-by: per uscire da questo stato è...
- Page 51 Utilizzo Menu ricette 11.45 Nome macchina Salvare un set impostato Dopo aver impostato i tre parametri (temperatura, umidità, ve- locità ventole) è possibile salvarli, assegnando un nome al set appena impostato (es. gelato); questo permette di poterlo riuti- c° lizzare senza bisogno di reimpostare ogni volta i suoi parametri. Toccare il campo “Ricette”.
- Page 52 Utilizzo Eliminare, variare o duplicare un set salvato 11.45 Toccare il campo “Ricette”. Toccare il nome del set che interessa (es. “Cioccolato”): appa- iono diversi simboli che permettono di: c° eliminare il set; Set -10°C modifi care in modo permanente i tre parametri del set (temperatura, umidità, velocità...
- Page 53 Utilizzo Duplica il set (es. “Cioccolato”) facendo una copia alla 11.45 Duplica Preset quale è possibile assegnare un nome a piacere (es. “Cioc- colato fondente”). Cioccolato fondente La copia, inizialmente, ha gli stessi parametri dell’originale; questi valori possono essere variati agendo, come di con- sueto, sui tasti Confermare toccando il tasto Esempio:...
- Page 54 Utilizzo Avviare un set già salvato dall’utilizzatore o dal 11.45 Costruttore I cicli salvati in precedenza dall’utilizzatore o quelli memorizzati dal Costruttore si trovano nella sezione “Ricette”. Per visualizzarli tutti, toccare il display e spostare il dito dal basso verso l’alto tenendolo sempre appoggiato (funzione “scroll”). c°...
- Page 55 Utilizzo 11.45 Menu statistiche Il menu statistiche tiene in memoria le variazioni di umidità e temperatura delle ultime 12 ore. Se necessario è possibile scari- care i dati (solo testo) in una chiavetta USB. c° Toccare il campo “Statistiche”: compare una pagina che for- nisce informazioni sulla variazione della temperatura e Set -10°C dell’umidità...
-
Page 56: Menu Impostazioni
Utilizzo Menu impostazioni 11.45 Toccare il campo “Impostazioni”. Compare una pagina che permette di eff ettuare alcune im- postazioni: • sbrinamento manuale (toccando la voce parte imme- c° diatamente lo sbrinamento); • impostazione data e ora; Set -10°C • selezione lingua; •... -
Page 57: Manutenzione
MANUTENZIONE Pulizia ordinaria dell’apparecchiatura DPI (dispositivi di protezione personale) da indossare durante la manutenzione ordinaria dell’apparecchiatura PRIMA DI EFFETTUARE QUALSIASI INTERVENTO DI MANUTENZIONE ORDINARIA O STRAORDINARIA, È NECESSARIO DISINSERIRE L’ A LIMENTAZIONE ELET TRICA DELL’ A PPARECCHIO ED INDOSSARE ADEGUATI STRU MENTI DI PROTEZIONE PERSONALE ES. -
Page 58: Periodi Di Inattività
Manutenzione Pulizia Touch screen Utilizzare un panno appena imbevuto di un prodotto specifi co per i cristalli seguendo le indicazioni del produttore del deter- gente. Non spruzzare troppo prodotto per evitare infi ltrazioni che po- trebbero danneggiare il display. Pulizia feritoie e griglia/spugna Tenere le feritoie libere da ostruzioni e polvere pulendole spesso con un normale aspirapolvere o un pennello. - Page 59 Manutenzione Smaltimento a fi ne vita Le operazioni di scollegamento dai circuiti elettrici ed idraulici devono essere eff ettuate esclusivamente da tecnici qualificati. Se presenti recuperare e smaltire in modo corretto: - gas refrigerante; - soluzioni incongelabili presenti nei circuiti idraulici, evitando versamenti o perdite in ambiente.
- Page 60 Manutenzione Malfunzionamenti Se l’apparecchiatura non funziona o si notano alterazioni funzio- nali o strutturali: - disconnetterla dall’alimentazione elettrica e idrica; - consultare la tabella sottostante per verifi care le soluzioni pro- poste; Se la soluzione non fosse presente in tabella, contattare un cen- tro di assistenza autorizzato dal costruttore, comunicando: - la natura del difetto;...
-
Page 61: Garanzia
Manutenzione Garanzia L’ obbligo del costruttore per la garanzia sulle apparecchiature e sulle parti relative di sua produzione ha la durata di 1 anno, dalla data della fattura e consiste nella fornitura gratuita delle parti da sostituire che, a suo insindacabile giudizio, risultassero difettose. Sarà...
Need help?
Do you have a question about the NC81MP and is the answer not in the manual?
Questions and answers