Table of Contents
Advertisement
Available languages
Available languages
Quick Links
MŌDRN
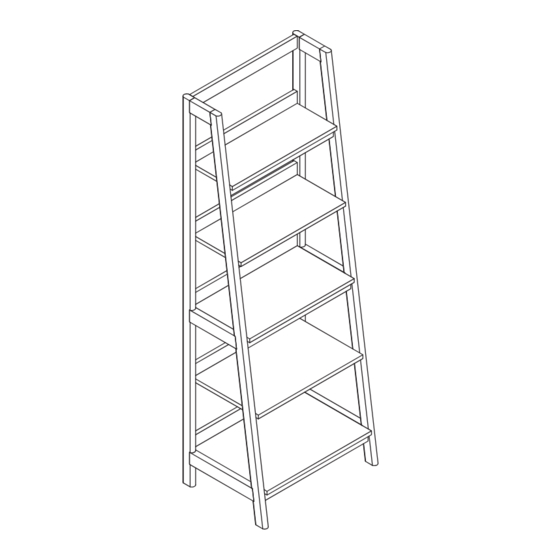
Scandi Minimal Finna Ladder Bookcase
Assembly Instructions
White/Light Oak
model# HYN-GD1SBC-WH
UPC 677446152848
THIS INSTRUCTION BOOKLET CONTAINS IMPORTANT SAFETY INFORMATION.
PLEASE READ AND KEEP FOR FUTURE REFERENCE.
Manufactured By:
BDDMI
1321 Tyler St NE, Minneapolis, MN 55413
Customer Service:
1.877.436.7290
customersupport@tenspringstreet.com
Lot# ________
Date________
1/9
Advertisement
Table of Contents

Related Manuals for M?DRN Scandi Minimal Finna HYN-GD1SBC-WH


Summary of Contents for M?DRN Scandi Minimal Finna HYN-GD1SBC-WH
- Page 1 MŌDRN Scandi Minimal Finna Ladder Bookcase Assembly Instructions White/Light Oak model# HYN-GD1SBC-WH UPC 677446152848 Customer Service: 1.877.436.7290 customersupport@tenspringstreet.com THIS INSTRUCTION BOOKLET CONTAINS IMPORTANT SAFETY INFORMATION. PLEASE READ AND KEEP FOR FUTURE REFERENCE. Manufactured By: Lot# ________ BDDMI Date________ 1321 Tyler St NE, Minneapolis, MN 55413...
-
Page 2: Parts List
PRE-ASSEMBLY PREPARATION: DO NOT LET CHILDREN PLAY IN OR AROUND THE UNIT DUE TO THE POSSIBLE RISK OF FINGER ENTAPMENT • Please read through this instruction before beginning assembly. • Two adults assembly is recommended. • Clear out the space for assembly and lay out all parts base on Parts List, extra room will allow you to easily determine if all the pieces are present. - Page 3 PARTS LIST: Fixed Shelf D (I) Fixed Shelf E (J) QTY: 1 QTY: 1...
-
Page 4: Hardware List
HARDWARE LIST: Dowel (H1) Cam Bolt (H2) QTY: 40 QTY: 38 Cam (H3) 25mm Flat Head Screw (H4) QTY: 38 QTY: 10... - Page 5 CAM LOCK INSTRUCTION This product is assembled with a cam lock set. STEP 1: Insert Cam lock into the cam lock hole of panel I. Cam lock arrow should be pointing towards the cam lock dowel insertion hole. STEP 2: Insert wooden dowel into panel II.
- Page 6 STEP-BY-STEP ASSEMBLY: STEP 1: Carefully tap small wooden dowels into place. Leave 1/2” of the dowels sticking out. Insert H2 into panel F, H, J. Refer to page 5 on how to use the cam lock system. Ensure all hardware pieces are properly tightened. Make sure the bolts go through the pre-drilled holes properly.
- Page 7 STEP-BY-STEP ASSEMBLY: STEP 3: Carefully tap small wooden dowels into place. Leave 1/2” of the dowels sticking out. Refer to page 5 on how to use the cam lock system. Ensure all hardware pieces are properly tightened. Make sure the bolts go through the pre-drilled holes properly. Do not over tighten bolts.
- Page 8 ANTI-TIP RESTRAINT 1 . W a s h e r 2 . W a l l 3 . W a l l 4 . T r u s s 5 . W a l l A n c h o r S c r e w H e a d S c r e w S t r a p...
-
Page 9: Pre-Assembly Preparation
PRE-ASSEMBLY PREPARATION: WARNING: Do not exceed the maximum load capacity. Exceeding the maximum load capacity may result in collapse and possible injury. • Your complete satisfaction is our number 1 priority. Our product is designed and manufactured to meet the highest quality of standards. In the event that you have assembly questions, or parts are missing or damaged, our customer service department would appreciate the opportunity to assist you. - Page 10 MŌDRN Biblioteca Escalonada Escandinava Minimalista Finna Instrucciones de Ensamble blanco/roble claro model# HYN-GD1SBC-WH UPC 677446152848 Servicio al Cliente: 1.877.436.7290 customersupport@tenspringstreet.com ESTE MANUAL DE INSTRUCCIONES CONTIENE INFORMACIÓN IMPORTANTE DE SEGURIDAD. POR FAVOR LEA Y GUARDE PARA REFERENCIA FUTURA. Fabricado Por :...
-
Page 11: Lista De Partes
PREPARACIÓN DE PRE-MONTAJE: NO PERMITA QUE LOS NIÑOS JUEGUEN ALREDEDOR DE LA UNIDAD POR EL POSIBLE RIESGO DE ATRAPAMIENTO DE LOS DEDOS • Por favor, lea estas instrucciones antes de comenzar el ensamblaje. • Se recomienda que el montaje se lleve a cabo por dos adultos. •... - Page 12 LISTA DE PARTES: Repisa Fija D (I) Repisa Fija E (J) QTY: 1 QTY: 1...
- Page 13 LISTA DE ARTÍCULOS DE FERRETERÍA: Clavija de Madera (H1) Tornillo de Leva (H2) QTY: 40 QTY: 38 Leva (H3) 25mm Tornillo de Cabeza Plana (H4) QTY: 38 QTY: 10...
- Page 14 INSTRUCCIONES PARA LAS Este producto se ensambla con un juego de trabas de leva. TRABAS DE LEVA PASO 1: Inserte la traba de leva en el orificio para la traba de leva del panel I. La flecha de la traba de leva debe apuntar hacia el orificio de inserción de la clavija de la traba de leva.
- Page 15 ENSAMBLAJE PASO A PASO: PASO 1: Con cuidado golpee las clavijas de madera en su lugar. Deje un saliente de 1.27 cm (½”) en las clavijas. Inserte H2 en el panel H. Consulte la página 5 sobre cómo usar el sistema de trabas de leva.
- Page 16 ENSAMBLAJE PASO A PASO: PASO 3: Con cuidado golpee las clavijas de madera en su lugar. Deje un saliente de 1.27 cm (½”) en las clavijas. Consulte la página 5 sobre cómo usar el sistema de trabas de leva. Asegúrese de que todas las piezas metálicas estén bien ajustadas. Cerciórese que los pernos pasen por los agujeros pretaladrados de manera apropiada.
- Page 17 CONTROL ANTIVUELCO 1 . A r a n d e l a 2 . Ta q u e t e 3 . To r n i l l o 4 . To r n i l l o d e C a b e z a 5 .
-
Page 18: Seguridad Y Cuidado
SEGURIDAD Y CUIDADO: ADVERTENCIA: No exceda la capacidad de carga máxima. Exceder la capacidad de carga máxima puede provocar un colapso y posibles lesiones. • Su completa satisfacción es nuestra prioridad número 1. Nuestro producto está diseñado y fabri- cado para cumplir con los más altos estándares de calidad. En caso de que tenga preguntas de ensamblaje o que haya partes faltantes o dañadas, nuestro departamento de servicio al cliente agradecerá...
Need help?
Do you have a question about the Scandi Minimal Finna HYN-GD1SBC-WH and is the answer not in the manual?
Questions and answers