Advertisement
Quick Links
Инструкция
по эксплуатации
Электрический накопительный водонагреватель Ariston
ABS PRO ECO INOX 80 V Slim
Цены на товар на сайте:
http://www.vseinstrumenti.ru/santehnika/vodonagrevateli/elektricheskie/nakopitelnye/vertikalnye/ariston/
abs_pro_eco_inox_80_v_slim/
Отзывы и обсуждения товара на сайте:
http://www.vseinstrumenti.ru/santehnika/vodonagrevateli/elektricheskie/nakopitelnye/vertikalnye/ariston/
abs_pro_eco_inox_80_v_slim/#tab-Responses
Advertisement

Related Manuals for Ariston ABS PRO ECO INOX 80 V Slim


Summary of Contents for Ariston ABS PRO ECO INOX 80 V Slim
- Page 1 Инструкция по эксплуатации Электрический накопительный водонагреватель Ariston ABS PRO ECO INOX 80 V Slim Цены на товар на сайте: http://www.vseinstrumenti.ru/santehnika/vodonagrevateli/elektricheskie/nakopitelnye/vertikalnye/ariston/ abs_pro_eco_inox_80_v_slim/ Отзывы и обсуждения товара на сайте: http://www.vseinstrumenti.ru/santehnika/vodonagrevateli/elektricheskie/nakopitelnye/vertikalnye/ariston/ abs_pro_eco_inox_80_v_slim/#tab-Responses...
-
Page 2: Electric Water Heater
ELECTRIC WATER HEATER... - Page 3 _ _ _ _ _ _ _ _ _ _ _ _ _ _ _ _ _ _ _ _ _ _ _ _ _ _ _ _ _ _ _ _ _ _ _ _ _ _ _ _ _ _ _ _ _ _ _ _ _ _ _ _ _ _ _ _ _ _ _ _ _ _ _ _ _ _ _ _ _ _ _ _ _ _ _ _ _ _ _ _ _ _ _ _ _ _ _ _ _ _ _ _ _ _ _ _ _ _ _ _ _ _ _ _ _ _ _ _ _ _ _ _ _ _ _ _ _ _ _ _ _ _ _ _ _ _ _ _ _ _ _ _ _ _ _ _ _ _ _ _ _ _ _ _ _ _...
- Page 4 ABS PLT PLUS PW, ABS PLT ECO, ABS PRO ECO INOX, ABS PRO ECO INOX PW - 7 « », , 188676, " " « », , 188676, " " « » , 127015, , 14, . +7 (495) 213 03 00, 213 03 01 +7 (495) 777 33 00 e-mail: service.ru@aristonthermo.com www.ariston.com/ru...
- Page 5 (3852) 36-20-02, (3852) 75-49-50 , . 54 (3854) 32-78-02 , . 238 (3852) 33-41-41 , . 76 (4164) 12-13-50, (4164) 14-23-88 , . 43 (41642) 2-11-63 , . 10 (4162) 49-00-51 , . 20 (4162) 53-49-45 , . 127 (4162) 52-20-00, (4162) 52-40-00 , .
- Page 6 (496) 223-65-77 . 56 (496) 614-14-86, (496) 614-63-64 , . 15 (496) 540-83-92, (916) 250-21-12 , . 40 (4967) 76-24-03 , . 36 , (8152) 25-07-51 , . 110 , (831) 414-16-10, (903) 602-16-10, (950) 353-08-99 , . 1 (831) 412-09-71, (831) 412-07-52, (831) 417-97-25, , .
- Page 7 (343) 310-00-91 , . 31 (343) 245-78-58, (323) 269-84-86 , . 17 (343) 310-18-90, (343) 278-71-29 , . 10-106 (343) 268-12-01 , . 1 (343) 335-76-71, (343) 335-48-00, (343) 306-73-46, , . 34 (343) 306-73-47, (343) 306-73-51, (343) 306-73-44 (343) 351-04-87 "...
- Page 9 ( . . .) ( . . .) ( . . .) ( . . .)
- Page 10 . .) « ». « ».
- Page 12 " ". 1.1. 1.1.1. 1.1.2. 1.1.3. 1.1.4. 1.1.5. 1.1.6. 1.2. 1.2.1. 1.2.2. 1.2.3. 1.2.4. 1.2.5. 1.2.6. 1.2.7. Ø 353 Ø 450 17,5 /89/336 2468-011-11182725-2006. 2.1. 2.1.1. 2.1.2. 2.1.3. - 10 2.1.4. 2.1.5.
- Page 13 2.2. 2.2.1. . 1) . 1), . 1) . 1). 2.2.2. 0˚ . 2.2.3. 2.2.4. 80˚ 2.2.5. . 1). 2.2.6. . 2) 2.3. – H05VV-F 3 1,5 ², 8,5 CEI-EN...
- Page 14 3.1. 3.2. • Для моделей с интерфейсом, указанным на рисунке 6 и 7: . ). «+» «-». 40° 80° . . 1-5), Во время первого включения температура нагрева по умолчанию установлена на уровне 70°С. . ), • Для моделей с интерфейсом, указанным на рисунке 8 и 9: Включите...
- Page 15 EXTRA POWER/DOUBLE POWER • Для моделей с интерфейсом, указанным на рисунке 7 и 9: По умолчанию водонагреватель работает на стандартном уровне мощности. Функция EXTRA POWER/DOUBLE POWER включает дополнительный нагревательный элемент, чтобы ускорить время нагрева горячей воды. Для активации данной функции, нажмите кнопку (поз.
- Page 16 . 5 - . 4 5 - . 3 5 — . 3, 4 5 — • Для моделей с интерфейсом, указанным на рисунке 8 и 9: , 01). Коды ошибок: 01- 02-E03 - 10- 11- 12- 13- 16 - 04 - 14- 15 - 50- 51 -...
- Page 17 • Для моделей с интерфейсом, указанным на рисунке 7 и 9: Чтобы заменить планку, на которой расположены сенсоры (поз. ), отсоедините провода (поз. F), идущие от электронной платы и осторожно вытащите планку из отверстия, не перегибая ее. Чтобы заменить плату управления (поз. W), отсоедините провода (поз. Y) и развинтите фиксирующие шурупы. Чтобы заменить...
- Page 18 4.4.8. 4.4.9. 4.4.10. • • • 4.4.11. CEI-EN, 4.4.12. 4.4.13. 2002/96/EC-EU 2002/95/EC.
- Page 19 _ _ _ _ _ _ _ _ _ _ _ _ _ _ _ _ _ _ _ _ _ _ _ _ _ _ _ _ _ _ _ _ _ _ _ _ _ _ _ _ _ _ _ _ _ _ _ _ _ _ _ _ _ _ _ _ _ _ _ _ _ _ _ _ _ _ _ _ _ _ _ _ _ _ _ _ _ _ _ _ _ _ _ _ _ _ _ _ _ _ _ _ _ _ _ _ _ _ _ _ _ _ _ _ _ _ _ _ _ _ _ _ _ _ _ _ _ _ _ _ _ _ _ _ _ _ _ _ _ _ _ _ _ _ _ _ _ _ _ _ _ _ _ _ _ _ _...
- Page 20 ABS PLT PLUS PW, ABS PLT ECO, ABS PRO ECO INOX, ABS PRO ECO INOX PW - 7 « », , 188676, « » " ", , 03680, , 86 , " " , 03680, , 86 , . +380 44 496 25 18 -mail: info.ua@aristonthermo.com www.ariston.com/ua...
- Page 22 ( .I. .) ( .I. .) ( .I. .) ( .I. .)
- Page 23 . .) « ». « ».
- Page 25 " ". 1.1. 1.1.1. 1.1.2. 1.1.3. 1.1.4. 1.1.5. 1.1.6. 1.2. 1.2.1. 1.2.2. 1.2.3. 1.2.4. 1.2.5. 1.2.6. 1.2.7. Ø 353 Ø 450 ’ , 17,5 /89/336 2468-011-11182725-2006. 2.1. 2.1.1. 2.1.2. 2.1.3. - 10 2.1.4. 2.1.5.
- Page 26 2.2. ’ 2.2.1. ’ . 1) ’ . 1), . 1) . 1). 2.2.2. 0° . 2.2.3. 2.2.4. 80° 2.2.5. . 1). 2.2.6. ’ . 2) ’ ’ 2.3. H05VV-F 3 1,5 ², 8,5 CEI-EN...
- Page 27 3.1. 3.2. • Для моделей з інтерфейсом, який вказаний на малюнку 6 та 7: . ). «+» «-». 40° 80° . . 1-5), Під час першого включення температура нагріву по умовчанню встановленна на рівні 70°С. . ), • Для моделей з інтерфейсом, вказаним на малюнку 8 та 9: Увімкніть...
- Page 28 70° . : 6-12 70° , • Для моделей з інтерфейсом, який вказаний на малюнках 6 та 7: 70° ( " " "+", • Для моделей з інтерфейсом, який вказаний на малюнках 8 та 9 : "- Ab -". "mode" (" ").
- Page 29 01- 02-E03 - 10- 11- 12- 13- 16 - 04 - 14- 15 - 50- 51 - 60- 90- 91-E92 - . ). 3.5. • Для моделей з інтерфейсом, вказаним на малюнках 8 та 9: "set" здійснюється поворотом кнопки "set". Далі необхідно підтвердити вибрану годину натисненням цієї кнопки. Повторіть 4.1.
- Page 30 4.3.2. 4.3.3. RESET TEST, RESET. RESET 4.4. 4.4.1. 4.4.2. 4.4.3. 50° 4.4.4. 4.4.5. 0° , 4.4.6. 4.4.7. 4.4.8. 4.4.9. 4.4.10. • • • 4.4.11. CEI-EN, 4.4.12. 4.4.13. 2002/96/EC-EU 2002/95/EC.
-
Page 31: General Warnings
GENERAL WARNINGS 1. This manual is an integral part of the water heater. It should be preserved alongside the appliance even if the latter is transferred to another user and/or moved to another location. 2. Carefully read this manual. It provides important information for the safe installation, use and maintenance of the appliance. -
Page 32: Key To Symbols
KEY TO SYMBOLS Symbol Meaning Failure to comply with this warning implies the risk of personal injury, in some circumstances even fatal Failure to comply with this warning implies the risk of damage to property, plants or animals General requirements and safe operating precautions GENERAL SAFETY NORMS Ref. -
Page 33: General Information
Congratulations on your purchase of an electric water heater manufactured by Ariston Thermo Group. The appliance is designed in compliance with the European standards. It is user-friendly, demonstrates great consumer properties and durability in operation. We hope that you will be satis ed with its work. - Page 34 2.2. Hydraulic connection Installation of safety valve included in the package is necessary. Do not install any cut-o valve between the safety valve and the inlet of the tank and do not block the drain hole of the safety valve. Demountable connectors should be used for the water heater connection to the water supply system.
-
Page 35: Starting And Operation
3. STARTING AND OPERATION 3.1. Commissioning Before connect the appliance to electricity source, ll the tank up with mains water. To do this, turn on the domestic mains tap and the hot water tap. Once the water heater is full, the water will ow from the domestic mains tap. Visually check for water leaks from the ange and slightly tighten it, if necessary. - Page 36 Due to a special knob on the control panel, you are able to use multiple cleaning cycles in a row, which increases the probability of complete elimination of bacteria. ECO function is activated by pressing the “ECO” knob on the control panel. To deactivate the function, press the same knob again.
- Page 37 4. MAINTENANCE AND REPAIR WORKS All maintenance and repair works should be carried out by a competent person only in conformity with the safety norms and with any provisions set forth in this manual. 4.1. Water Drain If there is a chance that the ambient temperature drops below 0°C in the room where the appliance is installed, drain water from the water heater.
- Page 38 4.3.2. Safety valve The safety valve (pressure safety device) must be inspected regularly to check that it is not clogged. Remove the limescale deposits if necessary. If the safety valve is equipped with a lever, regular valve correct operation check procedure can be performed with its help.
- Page 39 Quick manual on the storage water heater installation Supplied items Manual and safety valve are included Installation recommendations Requirements for fasteners L-screw Choose installation location as close as possible to the point of water use Supporting part of the wall Plaster coat Connection diagram "T"...
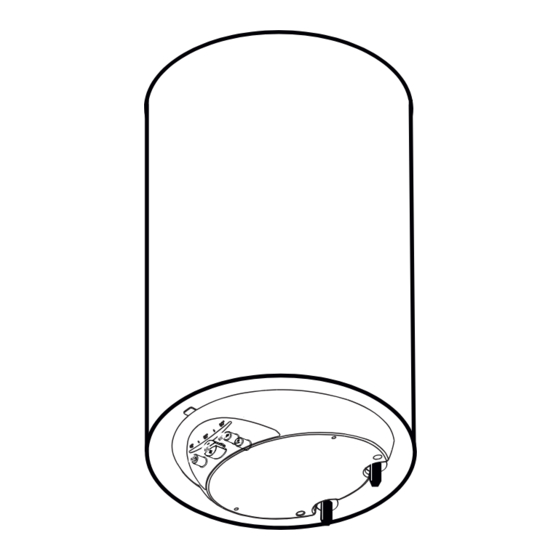
- Page 40 Water heater device 1. Outer housing 2. Bracket 3. Inner tank 4. Hot water outlet 5. Magnesium anode 6. Cold water inlet 7. Thermal insulation 8. Thermostat shell 9. Heating element 10. Flange 11. Thermostat 12. RCD 13 9 13. Power supply cable 14.
- Page 41 Data plate 1. Brand 2. Serial Number 3. Model 4. Tank material 5. Maximum pressure 6. Volume 7. Rated power 8. Voltage 9. Current frequency 10. Country of origin 11. Protection rating Serial number unique sequential number day of production year of production code of the plant product code...
- Page 42 Installation scheme ø Vertical models Horizontal models Dimensions ø MOD. В С...
- Page 45 +7 (495) 777 33 00 e-mail: service.ru@aristonthermo.com www.ariston.com/ru " " , 03680, , 86 , . +380 44 496 25 18 -mail: info.ua@aristonthermo.com www.ariston.com/ua Ariston Thermo SpA Viale A. Merloni, 45 60044 Fabriano (AN) Tel. 0732.6011 Telefax 0732.602331 Telex 560160 www.aristonthermo.it info.it@aristontermo.com...
Need help?
Do you have a question about the ABS PRO ECO INOX 80 V Slim and is the answer not in the manual?
Questions and answers