Advertisement
- 1 Foreword
- 2 Name of Body
- 3 What's in the Box
- 4 Separately Sold Accessories
- 5 Installation and Disassembly Guide
- 6 Power Supply
- 7 Display Screen
- 8 Controller Operation Instruction
- 9 Status Description
- 10 Maximum Brightness in Different States
- 11 Software Upgrade
- 12 Over-Temperature Protection
- 13 Fan Troubleshooting
- 14 Illuminance Testing Data
- 15 Technical Data
- 16 IMPORTANT SAFETY INSTRUCTIONS
- 17 Documents / Resources
Foreword
Thank you for purchasing!
Godox M600D is a LED Light product with superior performance. It has a separation design of light body and controller, high power, thousand-bit brightness adjustment and various dimming curves functions, quite suitable for large photo studios, broadcast studios, Outdoors or large-scale field scenes.
Features:
- 600W input power to create bright light output.
- Brightness adjustment is accurate to 0.1%, controlling the brightness in subtle scenes.
- 4 dimming curves: linear, S-curve, exponential, and logarithmic.
- Bowens mount is perfectly compatible with more optical accessories.
- Various professional control methods: Bluetooth control/DMX512 remote control/2.4G wireless control.
- Super high color rendering index: CRI:≥96, TLCI: ≥97
- 12 simulated scenes light effects: flash, lightning, TV, broken bulb, etc.
- Two power supply methods: AC power supply (110V~220V)and V-mount battery power supply (14.8V or 26V).
- The side with yellow battery removal button supports unilateral power supply.
- 2.4 inches TFT panel, 4 buttons, 1 knob, clear UI interface.
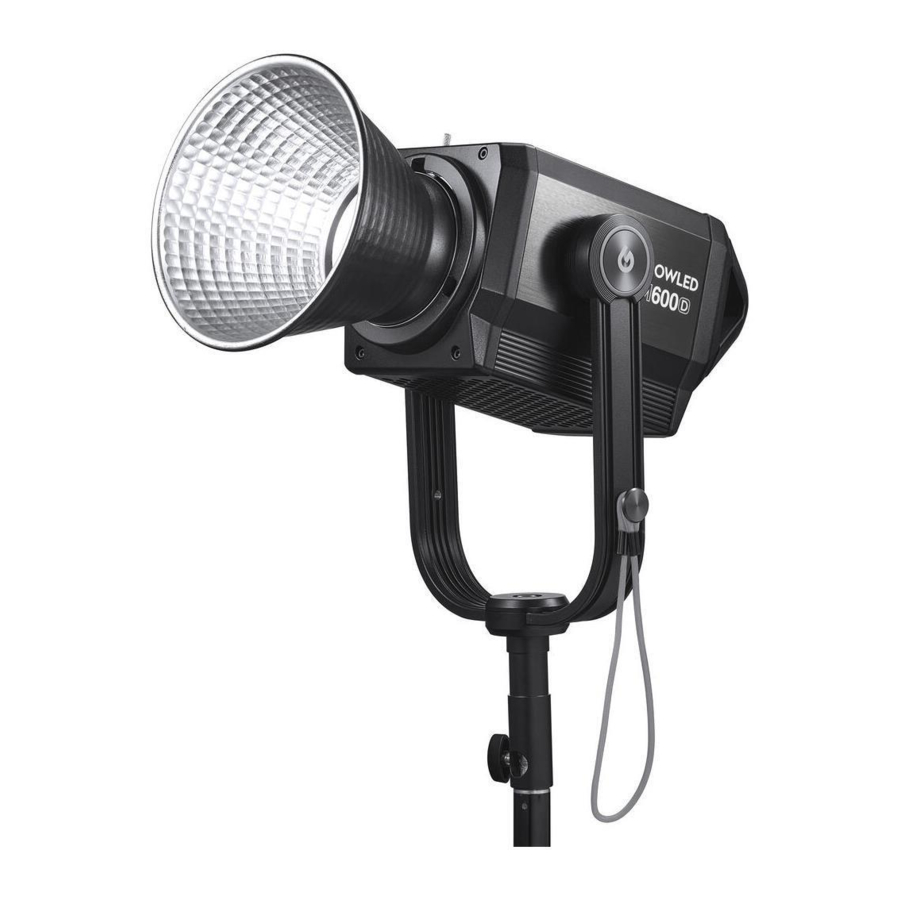
Name of Body
Light Body

Controller

Remote Control (Separately SoldAccessory)
")
What's in the Box

Separately Sold Accessories
Better shooting effects and using experience matched with following accessories: RC-A6 Remote Control and Safety Wire Rope.

Installation and Disassembly Guide
- Connect the controller and the light body
Press and hold the spring latch button of the connecting cord, insert the connecting cord into the DC INTPUT Port of the light body. Then continue press and hold the button to insert the other end of the connecting cord into the DC OUTPUT Port of the controller to complete the connection.

- Mounted on the tripod
Adjust the light body to a proper angle, rotate the screw of sleeve knob to install the light body on the tripod, then rotate the screw of sleeve knob to fix the light body on the tripod. The inclination angle of the light body could be adjusted by loosening the bracket angle adjustment handle and then screwing down the handle afterwards.

![warning]() Note: The tripod belongs to separately sold accessories.
Note: The tripod belongs to separately sold accessories.
![information]() Tips: Press the handle direction adjustment button to adjust the handle by 3600 .
Tips: Press the handle direction adjustment button to adjust the handle by 3600 . - Mounted on the light stand
Loosen the handle of the controller clamp, then insert the light stand and rotate the handle to tighten. Finally, insert the V port of the controller into the clamp slot. Tip: Press and hold the mount fixing pusher can easily remove the controller.

- Installation and disassembly the lamp cover Installation: Press the Mount Fixing pusher top-down, put the lamp cover on Bowens Mount, and rotate clockwise to tighten it. Disassembly: Press the Mount Fixing pusher top-down, then rotate counterclockwise to remove it.

![warning]() Note: Make sure to remove the lamp cover before use to avoid overheating damage. Put on the lamp cover to protect the lamp when not in use.
Note: Make sure to remove the lamp cover before use to avoid overheating damage. Put on the lamp cover to protect the lamp when not in use. - Installation and disassembly the standard reflector
Installation: Press the Mount Fixing pusher top down, put the standard reflector on Bowens Mount, and rotate clockwise to tighten it.
Disassembly: Press the Mount Fixing pusher top-down, then rotate counterclockwise to remove it.


 Tips: Press the handle direction adjustment button to adjust the handle by 3600 .


Connected to DMX Controller
The Connection operation diagram of Controller M600D-CL and DMX Controller is as follows:

Power Supply
AC Power Supply

 Note: Please press the latch button when installing or disassembling the power cord and connecting cord.
V-mount battery power supply

Note: The light can be supplied by 14.8V or 26V V-mount battery. Only the side with yellow battery removal button supports unilateral charging, one with. When it is powered by two batteries and one of which is low, the device still can't work normally even if the other one is full. The corresponding battery icon will blink in low battery mode. It is recommended to check whether both batteries have sufficient power when using two batteries.
Display Screen

Controller Operation Instruction
Turn OnlOff
Press the controller < C.) > Button for 1 second after connecting to the power supply to turn on or off.

Brightness Adjustment (thousand-bit adjustment)

Turn the SET adjustment knob on the main interface to adjust brightness from 0% to 100%, with an increment of 0.1% in each level. Rotate clockwise to increase brightness, and counterclockwise to decrease brightness. The brightness will increase or decrease by 0.1% unit in normal rotation speed; and increase or decrease by 1% unit in rapid rotation speed; and increase or decrease by 10% unit if press and rotate.
Menu Setting
Short press < MENU > Menu Button to enter the menu interface, displayed in order with Wireless Control, Bluetooth, DMX Mode, Fan Mode, Dimming Curve, Screen Brightness, Language, Restore Factory Setting, Version & Update.
Turn and short press the SET adjustment knob on the menu interface to select and enter the corresponding setting options interface.
- Wireless Control
The Wireless Control interface is displayed in order with Wireless Switch, Channel, Group and ID. Short press & turn the SET adjustment knob to complete the settings of Wireless Switch, Channel, Group and ID.

- Bluetooth
The Bluetooth Setting interface is displayed in order with Bluetooth Switch, Reset and MAC Code.
Short press & turn the SET adjustment knob to complete the settings of Bluetooth Switch and Bluetooth Reset.

For more smartphone APP operations, please open the "help" in "GodoxLight"APP to gain detailed guidance.
![]()
![warning]() Note: the APP can be used directly on the firstly installed device (smartphone or tablet). When changing to other mobile device, the light shall be reset before the normal usage of APP.
Note: the APP can be used directly on the firstly installed device (smartphone or tablet). When changing to other mobile device, the light shall be reset before the normal usage of APP.
- DMX Mode
The DMX Setting interface is displayed with Address Channel. Turn the SET adjustment knob to choose address from OFF or 1-512, the light will be in DMX OFF or ON mode respectively. Afterwards, short press the SET adjustment knob to return to the previous menu interface.


DMX Practical Form
| Address Code / Operation Mode | CCT | FX | |
| n(Mode) | 0-51 | 52-255 | |
| n+1 | DMX*(100/255) Integer 0-100% brightness adjustment | DMX*(100/255) Integer 0-100% brightness adjustment | |
| n+2 | DMX*(Total Light Effect/255) Light Effect/255) |
| |
| n+3 | 0-85: Light Effect Level I 86-171: Light Effect Level Il 172-255: Light Effect Level Ill | ||
| n+4 | |||
| n+5 |
- Fan Mode
Turn the SET adjustment knob on the Fan Setting interface to choose Cooling Mode, Off Mode, Low-Speed Cooling Mode, High-Speed Cooling Mode.
![warning]() Note: Enter mute mode when turning off the fan.
Note: Enter mute mode when turning off the fan.

- Dimming Curve
Turn the SET adjustment knob on the Dimming Curve Setting interface to choose linear/S-curve/exponential/ logarithmic dimming curve.

- Screen Brightness
Turn the SET adjustment knob on the Screen Bright Setting interface to choose 1, 2, 3 levels of screen brightness.

- Language
Turn the SET adjustment knob on the Language Setting interface to choose English or Simplified Chinese.

- Restore Factory Setting
Turn the SET adjustment knob on the Restore Factory Setting interface to choose "Yes" or "No" and short press to confirm. If you choose "Yes", the system will initiate resetting program and resetting progress bar is displayed on the screen, after which it will return to the main interface.

- Version & Update
The Version Code displayed on the Version & Update interface is the firmware version of the product.


Light Effect Setting
Short press < > button to enter FX Light Effect interface, turn the SET adjustment knob to choose flash, lightning, broken bulb or TV scenes.
Note: Short press the SET adjustment knob to change the rate and adjust brightness after choosing one of the above Light Effects.
Flash Mode

Lightning Mode

Broken Bulb Mode

TV Mode

Status Description
Long Term Use

- Do not cut off the power immediately when the product is turned off after a long period of operation. The controller will automatically enter cooling state, and "System cooling, do not power off immediately " is displayed on the panel. You can cut off the power after system cooling is done and the screen turns black.
Connecting Cord Issue

- When the connecting cord is not correctly connected to the light or controller, a separated icon of connecting cord and device is displayed on the panel. Please check the connecting ports of the controller and light.
Switch from AC Power Supply to V-Mount Battery Power Supply
- Unplug the power cord and install V-mount battery then turn on the product.


Note: If you install the V-mount battery before unplugging the power cord, and the brightness value is set higher than the maximum brightness that the battery can be turned on, then you switch to V-mount battery power supply by unplugging the power cord, the light and the controller will automatically power off. The machine can only resume mormal operation after reboot.
Maximum Brightness in Different States
CCT mode: Maximum Brightness (%) in Auto Cooling Mode or High-Speed Cooling Mode when supplied by V-mount battery
| V-mount battery | linear | S-curve | exponential | logarithmic |
| 14.8V(single) | 20% | 30% | 50% | 4% |
| 14.8V(double) | 40% | 43% | 72% | 8% |
| 26V(single) | 30% | 38% | 63% | 5% |
| 14.8V+26V | 50% | 48% | 78% | 10% |
| 26V(double) | 60% | 50% | 84% | 15% |
CCT mode: Maximum Brightness (%) in Fan Off Mode when supplied by V-mount battery
| V-mount battery | linear | S-curve | exponential | logarithmic |
| 14.8V(single) | 20% | 30% | 50% | 4% |
| 14.8V(double) | 25% | 35% | 55% | 4% |
| 26V(single) | 25% | 35% | 55% | 4% |
| 14.8V+26V | 25% | 35% | 55% | 4% |
| 26V(double) | 25% | 35% | 55% | 4% |
CCT mode: Maximum Brightness (%) in Low-Speed Cooling Mode when supplied by V-mount battery
| V-mount battery | linear | S-curve | exponential | logarithmic |
| 14.8V(single) | 20% | 30% | 50% | 4% |
| 14.8V(double) | 40% | 43% | 72% | 8% |
| 26V(single) | 30% | 38% | 63% | 5% |
| 14.8V+26V | 50% | 48% | 78% | 10% |
| 26V(double) | 50% | 48% | 78% | 10% |
CCT mode: Maximum Brightness (%) in different Fan Mode when supplied by AC power
| Fan Mode | linear | S-curve | exponential | logarith mic |
| Auto Cooling | 100% | 100% | 100% | 100% |
| Off | 25% | 35% | 55% | 4% |
| Low-Speed Cooling | 50% | 48% | 78% | 10% |
| High-Speed Cooling | 100% | 100% | 100% | 100% |
FX mode: Maximum Brightness (%) in different Fan Mode when supplied by AC power
| Auto Cooling | 100% |
| Off | 25% |
| Low-Speed Cooling | 50% |
| High-Speed Cooling | 100% |
FX mode: Maximum Brightness (%) in different Fan Mode when supplied by V-mount battery
| V-mount battery | Auto Cooling | Off | Low-Speed Coolin$igh-Speed Cooling | |
| 14.8V(single) | 20% | 20% | 20% | 20% |
| 14.8V(double) | 40% | 25% | 40% | 40% |
| 26V(single) | 30% | 25% | 30% | 30% |
| 14.8V+26V | 50% | 25% | 50% | 50% |
| 26V(double) | 60% | 25% | 50% | 60% |
Note: The dimming curve is not adjustable in FX mode, it is linear in default.
The above data is based on 26V 270Wh 10.5Ah battery and 14.8V 260Wh 17Ah battery.
Software Upgrade
- Download the new firmware to the U disk from the official website (http://www.godox.com.cn/Downloads.html).
- Turn off the M600D LED light. Insert the U disk with new firmware into the USB upgrade port.
- Turn on the M600D LED Light, and it will automatically enter the upgrading interface..
- It will return to main interface after completion.
Notes:
- New firmware must be the official website, and keep only one BIN file in the root directory of the USB disk.
- The USB port can only support firmware upgrade function.
Over-Temperature Protection

If the temperature of the light body is too high, the Over-Temperature Protection icon flashes on the main interface, the light body can be used normally.
If the temperature of the light body exceeds the limit of Over-Temperature Protection, the Over-100.0% If the temperature of the light body exceeds the
Temperature Protection icon flashes on the main interface and the screen works properly after the light goes out in 3 seconds. When the temperature decreases to 50 0 C, the OverTemperature Protection icon disappears, then the light body can resume working.
Fan Troubleshooting

If icon appeared and blinking and fan off icon is also appeared on the display, It might be the fan failure. Please contact with customer service.
Illuminance Testing Data
| Testing Condition | 1m | 3m | 5m |
| Bare Lamp | 23800(lux) 2210(fc) | 3070(lux) 285(fc) | 1440(lux) 133(fc) |
| Lamp with Cover | 164000(lux) 15200(fc) | 15700(lux) 1460(fc) | 5720(lux) 532(fc) |
Technical Data
| Mode | M600D |
| Power | 740W (Max) |
| Controller AC Power Input | AC100-240V/10A |
| Controller Power Input | DC48V/15A |
| Light Head Input | 80V/7.5A |
| V-mount battery (optional) Specifications | 14.8V, 150Wh / 26V, 260Wh |
| Channel | 32(1~32) |
| Group | 16(0~9, A~F) |
| ID | 1~99, OFF |
| Color-Temperature | 5600K |
| CRI | ≥96 |
| TLCI | ≥97 |
| Working Environment Temperature | -10~400C |
| FX Light Effect | 12 kinds within 4 types |
| Controlling Method | Support DMX512, 2.4G Wireless Control, Bluetooth APP |
| Dimming Curve | 4 types: linear/S-curve/ exponential/logarithmic |
| Mute Mode | YES |
| 2.4G Wireless Control Distance | ≈60m |
| Bluetooth Transmission Distance | ≈30m |
| Display Screen | 2.4 inches |
| Light Body Dimension | 447.3*242.8*152.9mm |
| Controller Dimension | 332.4*121.6*179.2mm |
| Light Body Weight | 4.5 kg |
| Controller Weight | 3.987 kg |
| Bluetooth Transmission Frequency | 2402.00-2480.00MHz |
| Maximum Transmit Power | 5dbm |
* Product design and specifications are subject to change without notice.
IMPORTANT SAFETY INSTRUCTIONS
When using your photographic equipment, basic safety precautions should always be followed, including the following:
- Read and understand all instructions before using.
- Close supervision is necessary when any appliance is used by or near children. Do not leave appliance unattended while in use.
- Care must be taken as burns can occur from touching hot parts.
- The appliance switch is provided with the symbols 0 indicating of and 1 indicating on. The symbols and may be used for this purpose.
- Do not operate appliance with a damaged cord or if the appliance has been dropped or damaged — until it has been examined by a qualified serviceman.
- Position the cord so that it will not be tripped over, pulled, or contact hot surfaces.
- If an extension cord is necessary, a cord with a current rating at least equal to that of the appliance should be used. Cords rated for less amperage than the appliance may overheat.
- Always unplug appliance from electrical outlet before cleaning and servicing and when not in use. Never yank cord to pull plug from outlet. Grasp plug and pull to disconnect.
- Let appliance cool completely before putting away. Loop cord loosely around appliance when storing.
- To reduce the risk of electric shock, do not immerse this appliance in water or other liquids.
- To reduce the risk of electric shock, do not disassemble this appliance, but take it to a qualified serviceman when service or repair work is required. Incorrect reassembly can cause electric shock when the appliance is used subsequently.
- The use of an accessory attachment not recommended by the manufacturer may cause a risk of fire, electric shock, or injury to persons.
- Connect this appliance to a grounded outlet.
- Disconnect this unit from its source of supply before replacing the projection lamp.
- This appliance has a polarized plug (one blade is wider than the other). To reduce the risk of electric shock, this plug is intended to fit in a polarized outlet only one way. If the plug does not fit fully in the outlet, reverse the plug. If it still does not fit, contact a qualified electrician. Do not modify the plug in any way.
SAVE THESE INSTRUCTIONS

- Always keep this product dry. Do not use in rain or in damp conditions.
- Do not disassemble. Should repairs become necessay, this product must be sent to an authorized maintenance center.
- Keep out of reach of children.
- As this product do not have waterproof function, please take measures of waterproof in rainy or damp environment.
- Do not leave or store the product if the ambient temperature reads over 40 0 C.
- Do not use the product in the presence of flammable gases, chemicals and other similar materials.
![]()
Hot parts! When the product is always on and flickering, please do not touch the high temperature part of the LED head.- When replacing product accessories, please turn off the LED light and perform a cold cut.
- The light source contained in this luminaire shall only be replaced by the manufacturer or his service agent or a similar qualified person.
- The lamp shall be changed if it has become damaged or thermally deformed.
- The luminaire is intended for professional use only.

E-mail: godox@godox.com
godox.com

Documents / Resources
References
Download manual
Here you can download full pdf version of manual, it may contain additional safety instructions, warranty information, FCC rules, etc.
Advertisement


Need help?
Do you have a question about the M600D and is the answer not in the manual?
Questions and answers