Gourmia GCR1700 - COOK-A-RIFFIC ROBOTIC COOKER with AUTO-STIR SPATULA MANUAL
- Manual (18 pages)
Advertisement
Welcome to Delicious Meals from Gourmia!
With the purchase of the Cook-a-Riffic Robotic Cooker with Auto-Stir Spatula, you are embarking on a satisfying and savory adventure. Consider all the dishes you can prepare using the features of this truly hands-free Robotic Cooker: Grill, Sauté, Roast, Bake, Stir-fry, Pan Fry, Steam, Stew, Slow Cook and Sauces. We are sure you and your family will love all the delicious entrées, snacks, vegetables, soups, desserts and more that come from inside this new, easy and innovative Robotic Cooker.
The following pages of this manual give you full and complete instructions for all the functions and features of your Cook-a-Riffic Robotic Cooker. Inside these pages, you'll find cooking guides, information on Cooking Methods and Auto Modes, and complete step-by-step instructions for operating, assembly, cleaning and maintenance of your Cook-a-Riffic Robotic Cooker. Please read all safety instructions and complete directions carefully for safe usage at all times.
SAFETY FIRST
IMPORTANT SAFEGUARDS
When operating this electric appliance, basic safety instructions should always be followed. Refer to the following for these instructions.
- READ ALL SAFETY & USAGE INSTRUCTIONS BEFORE USING ROBOTIC COOKER.
- EXERCISE EXTREME CAUTION: Do not allow liquids of any kind to touch the interior of Robotic Cooker base. Use extreme caution when moving Removable Cooking Pot onto or off of the Cooking Base to ensure that liquids DO NOT spill into the base. Spills may cause electrical shock, severe injury or death.
- AVOID ELECTRICAL SHOCK. DO NOT immerse cord, plugs or the Robotic Cooker base in water or other liquid.
- DO NOT touch the hot surface of the Robotic Cooker Base or Removable Cooking Pot. Use pot holders or mitts when handling the Cooking Pot, Base, Auto-stir Spatulas or Lid.
- Do not exceed MAX fill line in the Removable Cooking Pot when adding liquids. Damage to Robotic Cooker may occur.
- UNPLUG Robotic Cooker from outlet when not in use or before cleaning. DO NOT add or remove parts or accessories while HOT. Do not let cord hang over edge of table or counter or touch hot surfaces, including the Robotic Cooker.
- Children should never use Robotic Cooker; close supervision is required when appliance is used near children.
- Never touch, cover or obstruct the EasyVue Lid during or after operation.
Serious burns or scalding may occur. Keep children away from the EasyVue Lid. - Operate the Robotic Cooker on a level surface well away from any hot gas or electrical burner, heat source, combustible spray cans or pressurized items.
- Do not operate the Robotic Cooker outdoors.
- Never operate the Robotic Cooker with a damaged cord or plug or one that has malfunctioned or been damaged in any way. Immediately contact Customer Service for analysis.
- DO NOT add unauthorized accessory attachments. Such use may result in electric shock, injury or fire.
- Use only factory cord supplied; NEVER add extension cords. When done using, switch control to OFF then pull plug from outlet.
- DO NOT operate the Robotic Cooker when empty.
- Do not use the Robotic Cooker for any use other than intended. Do not use Removable Cooking Pot on a stovetop or other heat source.
SAVE THESE INSTRUCTIONS
FOR HOUSEHOLD USE ONLY

Electrical Polarized Plug: This Robotic Cooker has a polarized plug (one blade is wider than the other). To reduce the risk of electrical shock, the plug is intended to be used by inserting it into the electrical outlet only one way. If the plug does not fit securely into the outlet, turn the plug and re-insert. Do not modify this plug. If the plug does not fit the outlet securely, call a qualified electrician for assistance. DO NOT use this plug with extension cords of any kind.

This product contains a chemical known to the State of California to cause cancer.
This product contains a chemical known to the State of California to cause birth defects or other reproductive harm.
FEATURES & FUNCTIONS

Removable Cooking Pot
The Removable Cooking Pot has a nonstick interior and must ALWAYS be used when cooking in the Robotic Cooker.
- The Cooking Pot must be inserted correctly into the Locking Pot Slot or the cooker will not operate.
The Cooking Pot has a MAX fill line for liquids; do not overfill past the line. When using oil for cooking, limit oil to no more than MAX fill line (1-inch deep) for safety purposes. If liquids need to be added to food prior to cooking, FIRST place Removable Cooking Pot in Cooker, then slowly add liquid to the pot. Do not fill past the MAX fill line. Do not allow liquid to spill into the heating element area or in housing base, as electric shock can occur. If liquids need to be added to food DURING cooking, use pot holders to open the Lid. Slowly add liquid to the pot. Do not allow liquid to spill into the heating element area or in housing base, as electric shock can occur.

ALWAYS USE POT HOLDERS OR OVEN MITTS WHEN HANDLING OR REMOVING HOT FOODS OR LIQUIDS IN THE REMOVABLE COOKING POT.
Robotic Cooker Base

-
Locking Pot Slot: The Robotic Cooker Base has a locking pot slot. Properly fit the Removable Robotic Cooker Pot into that slot for proper usage. The appliance will not work if the Pot is not inserted correctly into the slot.
Auto Circulator Control: The heat circulator for even temperature distribution. - Precise Heating Element: The thermostatically controlled heat source.
- Micro Switch: Located inside the Cooking Base wall, the switch will automatically shut the unit OFF if the Robotic Cooker Pot is missing or not seated properly within the slot.
- EasyLift Cooker Base Handles: Located on the bottom of the unit, these handles assist in lifting the base. Use pot holders or mitts when unit is hot.
- EasyVue Lid: (see reference F) The lid sits securely on top of the Robotic Cooker Base and fully covers the Removable Cooking Pot. Use caution when moving the lid up or down and always use pot holders if the unit is hot. Always close the EasyVue Lid when cooking. Before heating the Cooker, securely close the lid and set the Control Panel to the cooking method you choose. Do not cook with the Lid open.
![]()
Use caution when opening the lid while food is cooking. Serious burns or scalding can occur from hot air or steam. When steaming, hot water will escape when the lid is opened. Use pot holders or mitts while opening and closing the lid. Opening the lid while cooking will increase cooking times.

Auto-Stir Spatula
The exclusive Auto-Stir Spatula slowly mixes foods as they cook, allowing a completely hands-free process. The Spatula is connected for cooking in the Stir-Fry and Stew modes ONLY and can be used to sauté foods, make sauces, or create a continuous flow of movement for any food that needs constant attention.
To assemble the Auto-Stir Spatula, follow these steps:
- The Spatula is connected to the Stirring Rod, which sits in the small Divot of the Removable Cooking Pot and can be inserted or removed as desired. Note that the Stirring Rod is spring-loaded and can flex up or down as needed.
- To insert the Auto-Stir Spatula, place the Removable Cooking Pot in the Cooker base. Lightly turn the pot until it slips into the Locking Pot Slot (fig 1 & 2). Place the Auto- Stir Spatula in the Removable Cooking Pot (fig 3). Note the Divot in the center of the Pot.
Press down lightly to compress the spring (fig 4). Move the Spatula until it is straight and centered on top of the Divot (fig 5). Release the spring. When the Spatula is correctly in place, it will fit in the Divot on the bottom and pop up to fit securely in the top (fig 6).
NOTE: You may need to slightly turn the Spatula clockwise until you feel and hear it pop into place


- The Stir-Fry or Stew modes can be used with the Auto-Stir Spatula. Add or subtract temperatures and times as needed.
- Do not interfere with the function of the Spatula by forcing movement, using other spatulas, ladles, spoons, etc.
- To remove the Auto-Stir Spatula, wait until the Cooker cools down slightly. Using a pot holder, press down lightly on the top of the Stirring Rod until it dislodges from the top. Pull the Rod toward you and remove the accessory.
(Note: Removal of Auto-Stir Spatula is the reverse of the above assembly) - Cool completely on a protected surface, then wash and dry.
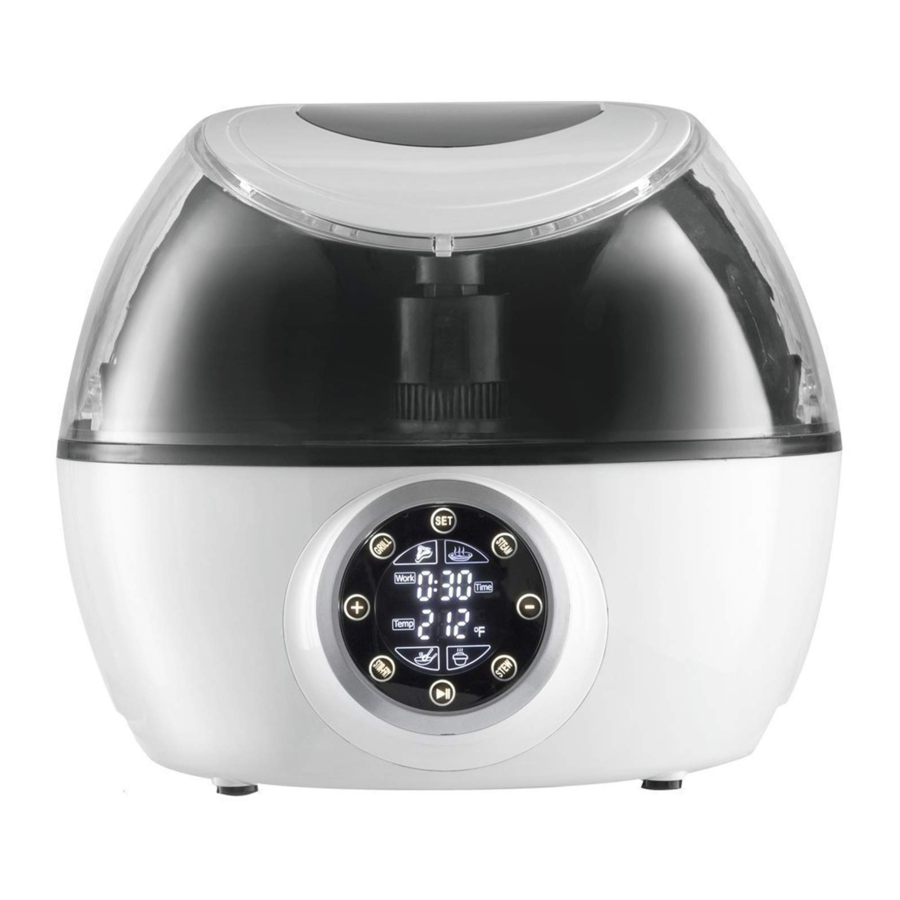
PRE-PROGRAMMED CONTROL PANEL

THE PRE-PROGRAMMED CONTROL PANEL houses the electronic platform for 10 Cooking Methods, including Auto Modes. There are 2 (two) cooking process options, plus the options to Preset (Delay Start) cooking times or change times and temperatures while cooking:
COOK WITH AUTO TEMP & TIME
Before use, plug in polarized plug as directed.
- Select and press desired Cooking Mode icon on Control Panel (add Auto-Stir Spatula, if using)
- Control Panel will display Auto Work (Cook) time + Auto Temp times. (Note: to add Preset/Delay Start to cooking process, see Part III)
- Press Start/Pause icon on Control Panel to start cooking process.
- Control Panel will display time countdown in hours/minutes throughout cooking process.
- Cooker will BEEP 10 (ten) times to indicate cooking process is complete.
NOTE: To reset cooking process to Auto, press Start/Pause icon and cooking mode settings will return to Auto settings.
NOTE: To change Auto Modes while cooking, Press the Start/Pause icon.
Cooking mode settings will return to Auto settings. Reset mode as desired.
Note that the high heat settings, StirFry and Grill, must cool down before changing to Stew or Steam modes. Allow unit to cool, and then restart process in desired mode.
AUTO TEMP & TIME CHART
| Auto Mode | Cooking Time | Cooking Temp | Auto-stir Spatula |
| Steam | 30 min | 212°F | no |
| Grill | 20 min | 428°F | no |
| Stew | 1 hour | 194°F | yes |
| Stir-fry | 30 min | 428°F | yes |
COOK WITH MANUAL TEMP & TIME
Before use, plug in polarized plug as directed.
- Select and press desired Cooking Mode icon on Control Panel. (add Auto-Stir Spatula, if using)
- Control Panel will display Auto Work (Cook) time + Auto Temp times.
- To change Temperature:
- Press Set icon until Temp display flashes.
- Press + icon to increase temperature.
- Press — icon to decrease temperature.
- To change Work (Cook) Time:
- Press Set icon until Work (Cook) Time display flashes.
- Press + icon to increase Work (Cook) time.
- Press — icon to decrease Work (Cook) time. When Control Panel display stops flashing, new Work (Cook) time is set.
(Note: to add Preset/Delay Start to cooking process)
- When desired Temperature and Time settings are set, Press Start/ Pause icon to begin cooking process.
- Cooker will BEEP 10 (ten) times to indicate cooking process is complete.
NOTE: To change Cooking Temp and/or Time DURING cooking process, press Start/Pause icon and follow Steps 2-4 above to change settings.
NOTE: To change Auto Modes while cooking, Press the Start/Pause icon.
Cooking mode settings will return to Auto settings. Reset mode as desired.
Note that the high heat settings, Stir- Fry and Grill, must cool down before changing to Stew or Steam modes. Allow unit to cool, and then restart process in desired mode
MANUAL TEMP & TIME – MINIMUMS/MAXIMUMS
| Auto Mode | Flexible Times | Flexible Temps |
| Steam | 1 min – 1 hour | 194° - 212°F |
| Grill | 1 min – 1 hour | 212° - 428°F |
| Stew | 1 min – 8 hours | 122° - 194°F |
| Stir-fry | 1 min – 1 hour | 122° - 428°F |
ADDING PRESET (DELAY START)
The Cook-a-Riffic Robotic Cooker offers a Preset (Delay Start) feature for your convenience. To cook adding a Preset (Delay Start) time on the Control Panel, follow these instructions.
Please note the following for your safety:
- Do not use Preset (Delay Start) for uncooked beef, poultry, pork or any other meat, including fish and shellfish. Do not allow these foods to sit at room temperature in the Cooker. Cook it immediately to prevent the unwanted growth of potentially dangerous bacteria.
- Do not use Preset (Delay Start) for dairy foods such as milk, cream and yogurt and other foods such as eggs or cheese. Cook these foods immediately to prevent the unwanted growth of potentially dangerous bacteria.
- Press Set icon until Preset (Delay Start) time display flashes.
- Press + icon or — icon to set Preset time.
- When Preset (Delay Start) time display stops flashing, delay time countdown begins. DO NOT PRESS Start/Pause icon.
- Control Panel will alternately display Work (Cook) time and Preset (Delay Start) time.
- When Preset (Delay Start) time is done, Work (Cook) time begins automatically. Preset (Delay Start) time will no longer be displayed on Control Panel.
- Cooker will BEEP 10 (ten) times when cooking process is complete.
NOTE: To change Preset (Delay Start) time after countdown has begun, press Start/Pause icon and follow steps above to restart countdown process with new Preset (Delay Start) time.
BEFORE FIRST USE & MAINTENANCE
BEFORE FIRST USE
- Place the Robotic Cooker on a level, flat surface that is clean and dry.
- Ensure that the Robotic Cooker is several inches away from obstructions, such as walls, cabinets, doors, and other appliances. Allow enough room above the Cooker so the lid can be fully opened.
- Wash the Removable Cooker Pot in warm, sudsy water. Dry thoroughly.
- Use a soft damp cloth to clean the exterior of the Cooker Base and EasyVue Lid. Dry with a paper towel or soft cloth.
- Read safety instructions.
- Insert the Removable Cooking Pot into the Cooker Base to connect the Pot to the Locking Pot Slot in the Base.
- Enjoy!
MAINTENANCE
ALWAYS allow the Robotic Cooker to cool completely before cleaning.
Unplug the Robotic Cooker before cleaning.
After each use, clean and dry the Robotic Cooker. Use a damp cloth to clean the Cooker Base and EasyVue Lid. DO NOT immerse the Base in water. Use nonabrasive soap only.
After each use, the Removable Cooking Pot may be placed in the dishwasher or washed by hand with the other parts.
After each use, the Auto-Stir Spatula may be placed in the dishwasher or washed by hand with the other parts.
STEP-BY-STEP COOKING
The 4 (four) Auto Modes in your Cook-a-riffic Robotic Cooker are only the starting place to create delicious and amazing dishes! With various times and temperatures already preset by the factory, you can either use the Auto Modes in a simple 1-2-3 Step process, or you can start with Auto Mode and add or subtract Times and Temperatures to include several additional cooking methods from there.
The following 10 cooking methods can all be utilized in the Cooker and we encourage you to try new dishes along with your family favorites, as well. The sky is the limit with your Cook-a-riffic Robotic Cooker!
STIR-FRY MODE
- Stir-Frying
- Sauté
- Pan-Fry
- Sauces
STEW MODE
- Stew
- Slow-Cook
- Soup
STEAM MODE
- Steam
GRILL MODE
- Grill
- Bake
Stir-Fry

Stir-Frying
Use Auto Stir-Fry Mode with Auto-Stir Spatula.
Stir-frying is an ancient Asian form of cooking that includes high heat and little oil. Foods, such as vegetables and meat are cut into uniform pieces and are stirred continuously as they cook to perfection.
The results offer tender cuts of meat and crisp-tender vegetables, a delicious combination.
Your Robotic Cooker offers the unique Auto-Stir Spatula to accomplish the movement of food especially needed for this cooking method. It is truly a handsfree operation. The following hints and tips will help make stir-frying an easy and delicious process:
Cut vegetables into thin slices or small cubes. If sizes are uneven, food will not be cooked and ready at the same time.
Cut beef, poultry, pork, lamb and seafood into thin, evenly-sized slices. The meat should cook very quickly for best results.
If needed, partially freeze cuts of meat before slicing to assist in even cuts.
Choose a sauce or make your own to complement the foods you are frying.
Use about ½ to ¾ cup sauce for a typical stir-fry of meat and vegetables to feed four people.
Sauté
Use Auto Stir-Fry Mode with Auto-Stir Spatula
The sauté method of cooking is one where foods are cooked quickly with continual stirring. The Auto-Stir Spatula perfectly fits this method for all your sauté dishes. The following hints and tips will help make your sautés wonderfully flavorful and cooked deliciously well:
Pour 1-2 tablespoons oil into the Removable Cooking Pot before adding foods. Add uniformly chopped onions, garlic, celery, carrots and other ingredients as desired.
Select tender cuts of meat and cut or slice them uniformly for best results.
Add sauces or small amounts of broth as needed, carefully following safety instructions if opening the lid while cooking.
Depending on foods to be sautéed, you can choose Manual temperatures and times to ensure foods are not undercooked or overcooked.
Use the Grill Mode to brown or sear meats at high temperatures.
Pan-Fry
Use Auto Stir-Fry Mode to start;
Select Manual temps and times as directed.
Do not use the Stir-Fry Spatula. The following are hints and tips to help you achieve frying success:
Use only a small amount of oil when pan frying. The MAX fill line in the Removable Cooking Pot is a depth of 1-inch. Do not overfill past the line or oil burns could occur.
When frying foods such as chicken, heat the Removable Cooking Pot with the oil added for a few minutes at 375°F to properly prepare the oil for the food.
Carefully use tongs to add the food to be fried, avoiding splatters by gently placing the food into the Removable Cooking Pot. Avoid oil spills and splatters that could drip into the heating element or Cooker Base.
Always close the EasyVue Lid when pan frying, as this will help cook foods faster.
When the Robotic Cooker BEEPs and food is cooked, use a meat thermometer to test poultry or other cuts of meat to determine if it is safe for consumption. If needed, continue frying before serving.
Always allow foods to drain on paper towels after frying. Line a large platter with several layers of paper towels and drain. Serve foods while warm.
Sauces
Use the Auto Stir-Fry Mode with Auto-Stir Spatula
Many sauces, such as creamy cheese or butter-based, can be a time-consuming process of stirring and stirring over very low heat. Sauces can be delicate in structure and break down, so handstirring is often required. With the Auto-Stir Spatula feature, your Robotic Cooker now takes over effortlessly! Here are some helpful hints and tips for making sauces in your Cooker:
Depending on the sauce you are making, you may want to use the Manual mode to decrease the temperature and time needed. Refer to your recipe for best results.
Many sauces start with a roux, or mixture of butter and flour melted and cooked together. Use the Stir-Fry Mode with the Auto-Stir Spatula to create the roux and then add liquids such as cream, milk, broth or wine as your recipe directs.
Use lower temperatures to make tomato based pasta sauces or other sauces that sit and simmer for a long period of time.
This will help reduce splatters and offer a more fresh flavor profile overall.
Stew

Use the Auto Stew Mode
Stew practically cooks itself inside your Robotic Cooker! Use the Auto Stew Mode to set the time and temperature and walk away until it's done. Here are some handy tips for usage:
Use cuts of meat such as chuck roast and chuck steak that will become tender within the cooking time. Meat should be no more than 2-inches thick and cut into 1-inch cubes.
Add frozen, thawed mixed vegetables for a quick addition to stew. Spread around the meat pieces.
Try easy classic recipes such as Coq au Vin, a superbly simple dish of stewed chicken thighs with mushrooms and a wine sauce. Your Auto Stew Mode will cook everything perfectly. Serve over rice or pasta for an incredible one-dish dinner.
Slow Cook
Use Auto Stew Mode;
Select Manual temperatures and times as directed.
Slow cooked meals are the favorite of every busy cook. Although many people already have favorite recipes, some easy hints and tips follow:
Slow cooked foods don't need much liquid, but there should be about ½ cup in the Removable Cooking Pot to start.
Foods will cook over a long period of time and excess moisture will self-create liquid, however check occasionally during the cooking period to ensure the contents of the Pot do not become dry.
If so, carefully open the EasyVue Lid andm add a small amount of liquid.
Fill the Removable Cooking Pot at least halfway with food for best slow-cooking results.
Cut all ingredients into uniform sizes for best results.
Use cuts of meat with a high fat content to help break down the connective tissue of meat and make it tender. Select pot roasts, chuck steak or roast, cross-rib roasts or meaty chops or ribs.
Seafood and shellfish should not be added to a slow-cooked dish until the last 1-1½ hours of cooking. Refer to your recipe for directions.
Do not place frozen, unthawed meat or seafood into the Removable Cooking Pot for slow-cooking.
Carefully check the Preset (Delay Start) instructions for important safety information regarding cooking meats. It is dangerous to allow meat or seafood to sit at room temperature for even short amounts of time without heating. Refer to www.foodsafety.gov for full details regarding food safety.
Soup
Use Auto Stew Mode;
Select Manual temperatures and times as directed.
Make satisfying, hearty soups with ease with your Robotic Cooker. With a capacity to hold 8 cups, the Removable Cooking Pot is a quick and delicious way to make soup for the entire family without tending the stovetop constantly. Here are a few tips for creating delectable soups:
Start delicious soups with a combination of the vegetables and meat your family loves. Cut all ingredients into a uniform size so all ingredients will cook at the same rate.
Soups don't typically require more than 1-2 hours to simmer. You may want to simmer meat in broth first and add vegetables about 30 minutes before serving so that they remain crisp-tender.
Add pasta or rice in the last 45 minutes of cooking and ensure the liquid-to-pasta proportions are correct. The pasta or rice will absorb liquid and swell while cooking.
Remove any large herbs or bay leaves used in simmering before serving.
Steam

Use Auto Steam Mode.
Steaming is a very healthful and nutritionally sound cooking method. It helps retain many vitamins and minerals that can be lost through other methods.
Steaming offers very tender results and, as such, is perfectly suited to seafood, vegetables and other foods that break down quickly with moist heat. The following hints and tips will help you create quick and easy steamed success with your Robotic Cooker:
ALWAYS use a steamer rack inside the Removable Cooking Pot. Racks can be found in most stores or via online ordering. DO NOT steam without the Removable Cooking Pot as electrical shock can occur if the heating element is exposed to moisture or liquid.
Place the steamer rack inside the Removable Cooking Pot, then place food directly on the rack or inside a heatproof plate or dish on top of the rack. Make sure the lid can close completely before starting the Auto Steam process.
Place at least 1-inch water in the Removable Cooking Pot to allow the Cooker to steam efficiently. If steaming for more than 20 minutes, fill the water to the MAX fill line.
If the Removable Cooking Pot becomes completely dry, the Cooker will automatically shut off. Allow to cool, then re-start the process.
Grill

Use Auto Grill Mode.
Grilling is quick and simple when using the Robotic Cooker. The temperature can be increased as high as 428°F, which means your meat will be seared and grilled to a delicate char on the exterior with a tender and flavorful interior.
Follow these tips for easy grilling in the Robotic Cooker:
Select tender cuts of meat that grill without drying out, such as ribeye steak, filet cuts, thick chops, London broil, top sirloin, etc. Remove excess fat, if needed, before grilling.
Save the seasonings! Do not put seasonings onto meat prior to grilling, as they can dry the meat and remove moisture. Save your seasonings until the last minute of grilling for best results.
For a restaurant-quality final touch, place a pat of butter on grilled meats just before serving.
Bake
Use Auto Grill Mode;
Select Manual temperatures and times as directed.
With the versatile nature of the Robotic Cooker, you can easily and effortless bake in your Cooker as well as grill, steam or slow cook! Here are some handy hints for using your Robotic Cooking for baking:
Set the temperatures and times manually to bake as typically done in a conventional oven. Use ONLY the Removable Cooking Pot when baking. Baked foods will cook faster than normal; watch carefully to avoid burning.
The heating element is close to the bottom of the Removable Cooking Pot.
If baking a heavy-density food, such as cheesecake, use lower temperatures to ensure the bottom does not burn before the top of the baked food is cooked.
Lightly coat the Removable Cooking Pot with cooking spray before adding ingredients. Do not place other baking pans inside the Pot. Do not stack pans on top of the Removable Cooking Pot.
GOURMIA IN YOUR KITCHEN
Did you know? Although Gourmia is the new kid on the block, we've already established ourselves as one of the leading manufacturers of creative and innovative kitchen products.
Check out these new kitchen appliances and check our website often for new product release information @ www.gourmia.com
Why not Add these Best-selling  Appliances to your Kitchen!


TROUBLESHOOTING
In the unlikely event that you experience a problem with your device, please take a couple of minutes to check these possible causes prior to contacting customer support:
| PROBLEM | POSSIBLE CAUSE | SOLUTION |
The control panel fails to illuminate | No Power | Make sure the appliance is plugged in. Check that your socket is switched on or try another socket. |
| The control panel fails to illuminate | The pan is not correctly located within the appliance | Ensure the pan is located in the correct position |
| Just finished the Grill/Stir-fry function in temperature over 212°F and want to change into Steam/Stew function right away | Stop the appliance to cool it before restarting. | |
The code E1 is shown in the LED display | The thermal sensor disconnected or failed | Contact customer service for assistance |
The code E2 is shown in the LED display | The thermal sensor experienced a short circuit | Contact customer service for assistance |
The code E3 is shown in the LED display | The appliance overheated. | Unplug the appliance and let it cool down before resuming. |
WARRANTY & SERVICE
This Limited Warranty is for one full year from the date of purchase. It is applicable to the original purchaser only and is not transferable to a third party user. Repair or replacement of defective parts is solely at the seller's discretion. In the event that repair isn't possible, the seller will replace the product/part. If product repair/replacement won't suffice, the seller has the option of refunding the cash value of the product or component returned.
Product defects not covered under the Warranty provisions include normal wear and damage incurred from use or accidental negligence, misuse of instruction specifications or repair by unauthorized parties. The manufacturing company is not liable for any incidental or consequential damages incurred by such circumstances.
For Customer Service or Questions, Please call: 888-552-0033
© 2016 Gourmia www.Gourmia.com
The Steelstone Group
Brooklyn, NY
All rights reserved. No portion of this manual may be reproduced by any means whatsoever without written permission from The Steelstone Group, except for the inclusion of quotations in a media review.
Although every precaution has been taken in the preparation of this manual, The Steelstone Group assumes no responsibility for errors or omissions. Nor is any liability assumed for damages resulting from the use of the information contained herein. Although every effort has been made to ensure that the information contained in this manual is complete and accurate, The Steelstone Group is not engaged in rendering professional advice or services to the individual consumer; further, The Steelstone Group shall not be held responsible for any loss or damage allegedly arising from any information or suggestion in this manual.

Documents / Resources
References
Download manual
Here you can download full pdf version of manual, it may contain additional safety instructions, warranty information, FCC rules, etc.
Download Gourmia GCR1700 - COOK-A-RIFFIC ROBOTIC COOKER with AUTO-STIR SPATULA MANUAL
Advertisement


Need help?
Do you have a question about the GCR1700 and is the answer not in the manual?
Questions and answers