iRobot Roomba Combo j7 Robot Vacuum and Mop Manual
- User manual ,
- Owner's manual (49 pages) ,
- Manual (97 pages)
Advertisement
- 1 About your Roomba Combo Robot Vacuum & Mop
- 2 Using Your Roomba Combo Robot Vacuum & Mop
- 3 Cleaning
- 4 Troubleshooting
-
5
Care and Maintenance
- 5.1 Care and Maintenance Instructions
- 5.2 Cleaning the Mopping Pad
- 5.3 Emptying the Bin
- 5.4 Cleaning the Filter
- 5.5 Cleaning the Charging Contacts
- 5.6 Cleaning the Full Bin Sensors
- 5.7 Cleaning the Multi-Surface Brushes
- 5.8 Cleaning the Front Caster Wheel
- 5.9 Cleaning the Filter
- 5.10 Cleaning the Edge-Sweeping Brush
- 5.11 Cleaning the Sensors, Camera Window and Charging Contacts
- 6 Documents / Resources
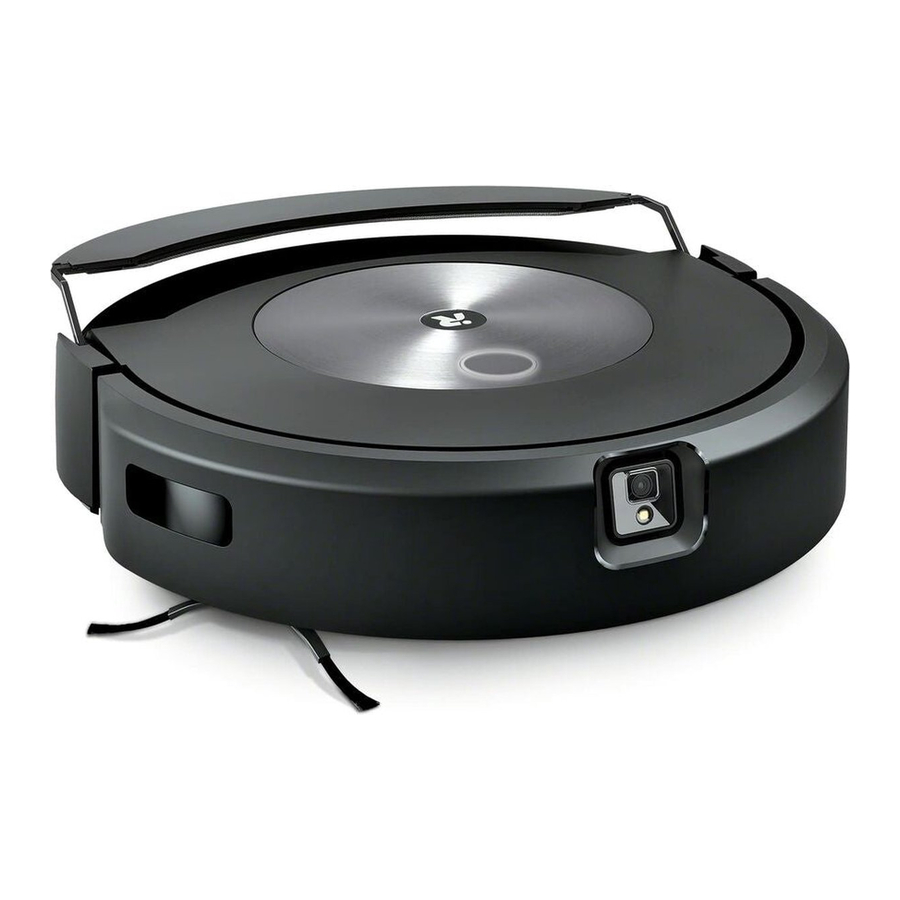
About your Roomba Combo™ Robot Vacuum & Mop

Using Your Roomba Combo™ Robot Vacuum & Mop
Positioning the Home Base™ Charging Station

 Note: Do not place your Home Base™ in direct sunlight. Ensure the area around the dock is free of clutter to improve docking performance.

To prevent the risk of your robot falling downstairs, ensure that the charging station is placed at least 4 feet (1.2 meters) away from stairs.
Download the iRobot Home App and Connect to Wi-Fi®


- Follow step-by-step instructions to set up your Roomba Combo™.
- Set up PrecisionVision Navigation to avoid obstacles in real time.
- Set an automatic cleaning schedule and customize cleaning preferences.
- Create smart maps to tell your robot where, when and how to clean.
Charging

- Place the robot on the charging station to activate the battery.
![]() Note: Your robot comes with a partial charge, but we recommend that you charge the robot for 3 hours prior to starting the first cleaning job.
Note: Your robot comes with a partial charge, but we recommend that you charge the robot for 3 hours prior to starting the first cleaning job.
![]()
When your robot is fully charged, the light ring indicator will intermittently pulse white at the rear. - The robot uses a small amount of power whenever it is on the charging station. You can put the robot in a further-reduced power state when not in use. For instructions and more details on this Reduced Power Standby Mode, refer to the FAQ page on our website.
- For long-term storage, turn off the robot by removing it from the charging station and holding down the clean button for 3 seconds with one wheel off the ground. Store the robot in a cool, dry place.

Cleaning

- Your robot will automatically explore and clean your home in neat rows, avoiding obstacles using its front-facing camera. It will return to the charging station at the end of a cleaning job and whenever it needs to recharge.
![]()
Your robot is able to recognize and avoid objects. However, it is still recommended to remove excess clutter before cleaning. - To end a job and send the robot back to its charging station, hold the clean button down for between 2-5 seconds. A blue light ring pattern will indicate that the robot is seeking the charging station.
- When your robot detects an especially dirty area, it will engage Dirt Detect™ mode, moving in a forward/backward motion to clean the area more thoroughly. The light ring indicator will flash blue.
![]()
When your robot senses that its bin needs to be emptied, the light ring indicator will illuminate in a red sweeping motion toward the rear.


Vacuuming
- To start a vacuum-only cleaning job from your robot, empty the tank or detach the mopping pad before pressing the clean button.
Mopping
- Your robot is able both vacuum and mop at the same time. To start a vacuum and mop cleaning job from your robot, fill the tank, attach a mopping pad, and press the clean button.
- When your robot encounters carpet during it's cleaning job, it will lift and tuck the mopping pad away.
![]()
- After completing your mopping and vacuum cleaning job, make sure to empty the water tank and replace the mopping pad.

To prevent damaging your robot, do not manually stow the mopping pad plate onto the pad shelf.
- Press bin release button to remove bin.
![]()
- Fill tank with water and compatible cleaning solution.
![]()
- Attach mopping pad.
![]()
- Place bin back in the robot.
![]()


Cleaning Solution
For best results when mopping, use Bona® Hardwood or Hard-Surface Floor Cleaning Solutions. Both solutions are suitable for most well-sealed hard floors.

Sample Concentrate Packets
Included in box
1 Packet per tank
Mix to manufacture instruction and pour into tank.

Retail Ready-to-Use Bottles
Sold separately
Fill the tank with cleaning solution. No water is necessary.

 Only certain cleaning solutions can be safely used with your robot. A full list of compatible cleaning solutions can be found on answers. irobot.com/s/roomba-combo-cleanser or by visiting the app. Please do not use other cleaning solutions or bleach-based products.
Troubleshooting
- Your robot will tell you something is wrong by playing an audio alert and turning the light ring indicator red. Press the clean button or tap the bumper for details. Check the iRobot Home App for further support.
![]()
- After 90 minutes of inactivity off the charging station, the robot will automatically end its cleaning job.
- To factory reset your robot, remove the dust bin and hold the clean button down for seven (7) seconds. A sound will let you know when the factory reset has been completed. Press the clean button down once more to confirm.

Battery Safety & Shipping
For best results, only use the iRobot Lithium Ion Battery that comes with your robot.
Lithium ion batteries and products that contain lithium ion batteries are subject to stringent transportation regulations. If you need to ship this product for service, travel or any other reason, you MUST follow the below shipping instructions.
- Battery MUST be turned off before shipping.
- Turn off the battery by removing the robot from the charging station and holding down the clean button for 3 seconds with one wheel off the ground. All indicators will turn off.
- Package the robot securely for shipping.
- If you need further assistance, contact our Customer Care team or visit global.irobot.com.
Care and Maintenance
Care and Maintenance Instructions
To keep your robot running at peak performance, perform the procedures in the following sections.
There are additional instructional videos in the iRobot Home App. If you notice the robot picking up less debris from your floor, empty the bin, clean the filter and clean the brushes.
| Part | Care Frequency | Replacement Frequency* |
| Mopping Pad | Clean after a mopping job | After 30 washes. |
| Bin | Wash bin as needed | |
| Filter | Clean once a week (twice a week if you have a pet). Do not wash. | Every 2 months |
| Charging Contacts | Clean every 2 weeks | |
| Full Bin Sensor | Clean every 2 weeks | |
| Front Caster Wheel | Clean every 2 weeks | Every 12 months |
| Edge-Sweeping Brush and Multi-Surface Brushes | Clean once a month (twice a month if you have a pet) | Every 12 months |
| Sensor, Camera Window and Pad Shelf | Clean once a month |
Note: iRobot manufactures various replacement parts and assemblies. If you think you need a replacement part, please contact iRobot Customer Care for more information.
* Replacement frequency may vary. Parts should be replaced if visible wear appears.
Cleaning the Mopping Pad
Note: You can clean your mopping pads two ways: either by hand washing, or in a washing machine.
HAND WASHING
Thoroughly wash the pad with warm water.

MACHINE WASHING
Wash using the warm cycle, then air dry. Do not put in dryer. Do not wash with delicates.

Emptying the Bin
- Press bin release button to remove bin.
![]()
- Open bin door to empty bin.
![]()
- Place bin back in the robot.
![]()


Cleaning the Filter
- Remove the bin. Remove the filter by grasping both ends and pulling out.
![]()
- Remove debris by tapping the filter against your trash container.
![]()
- Reinsert filter with ridged grips facing out. Place bin back in the robot.


The robot will not run if the filter is not installed correctly. Replace the filter every two months.
Cleaning the Charging Contacts
- Wipe the charging contacts with a clean, dry cloth.
![]()

Cleaning the Full Bin Sensors
- Remove and empty the bin.
![]()
- Wipe the inner sensors with a clean, dry cloth.
![]()
- Wipe the bin door with a clean, dry cloth.
![]()
- Clear any debris from the vacuum path.
![]()


Cleaning the Multi-Surface Brushes
- Pinch the brush frame release tab, lift the tab, and remove any obstructions.
![]()
- Remove the brushes from the robot. Remove the brush caps from the ends of the brushes. Remove any hair or debris that has collected beneath the caps. Reinstall the brush caps.
![]()
- Remove any hair or debris from the square and hexagonal pegs on the opposite side of the brushes.
![]()
- Reinstall the brushes in the robot. Match the shape of the brush pegs with the shape of the brush icons in the cleaning head module.
![]()


Cleaning the Front Caster Wheel

- Pull firmly on the front wheel module to remove it from the robot.
- Pull firmly on the wheel to remove it from its housing (see illustration below).
- Remove any debris from inside the wheel cavity.
- Reinstall all parts when finished. Make sure the wheel clicks back into place.
A front wheel clogged with hair and debris could result in damage to your floor. If the wheel is not spinning freely after you have cleaned it, please contact Customer Care.
Cleaning the Filter
Do not wash the filter. Remove the filter before washing the bin.
- Release the bin, remove the filter, and open the bin door.
- Rinse the dust bin and water tank using warm water.
![]()
![]() Note: Bin is not dishwasher safe.
Note: Bin is not dishwasher safe. - Make sure bin is completely dry. Reinsert filter and place bin back in the robot.

Cleaning the Edge-Sweeping Brush
- Use a coin or small screwdriver to remove the screw holding the Edge-Sweeping Brush in place.
![]()
- Pull to remove the Edge-Sweeping Brush. Remove any hair or debris, then reinstall the brush.

Cleaning the Sensors, Camera Window and Charging Contacts

- Wipe sensors, camera window and pad shelf with a clean, dry cloth.
![]() Note: You can clean your mopping pads two ways: either by hand washing, or in a washing machine.
Note: You can clean your mopping pads two ways: either by hand washing, or in a washing machine.
Do not spray cleaning solution or water onto the sensors or sensor openings.

Documents / Resources
References

Download manual
Here you can download full pdf version of manual, it may contain additional safety instructions, warranty information, FCC rules, etc.
Advertisement


Need help?
Do you have a question about the Roomba Combo j7 and is the answer not in the manual?
Questions and answers