Advertisement
INTRODUCTION
Thank you for purchasing the Elite Gourmet Air Fryer. Your new Air Fryer has a variety of functions to handle a wide array of cooking tasks. With its easy to use Digital Quick Menu and Temperature & Timer Controls, you can fry, cook, or even bake your favorite meals and snacks with ease! Best of all you will be cooking healthier without the addition of oil. Not only can you cook foods without the mess of oil but you can cook faster which saves you time and energy. Unlike most conventional deep fryers, the Air Fryer's unique vapor system combined with circulating hot air will automatically make foods crispier and of course healthier without oil. We hope you enjoy your new Elite Gourmet Air Fryer and start cooking healthier today!
IMPORTANT SAFEGUARDS
The Elite Brand takes consumer safety very seriously. Products are designed and manufactured with our valued consumers' safety in mind. Additionally, we ask that you exercise a level of caution when using any electrical appliance by following all instructions and important safeguards.
READ ALL INSTRUCTIONS BEFORE USE AND SAVE FOR FUTURE REFERENCE

When using electrical appliances, basic safety precautions should always be followed as below:
- Read all instructions.
- UNPLUG FROM OUTLET WHEN NOT IN USE AND BEFORE CLEANING.
- Allow to cool before cleaning or handling, putting on or taking off parts.
- Do not touch hot surfaces. Use handles or knobs.
- To protect against electric shock, do not place any part of the Air Fryer Oven in water or other liquids. See instructions for cleaning.
- This appliance should not be used by or near children or individuals with certain disabilities.
- Do not operate any appliance with a damaged cord or plug, or after the appliance has malfunctioned or has been dropped or damaged in any way, or is not operating properly. Return the Air Fryer Oven to the store or retailer where purchased for examination or repair or adjustment.
- The use of accessory attachments not recommended by Elite may cause injury.
- Do not use outdoors.
- Do not let cord hang over the edge of the table or countertop, where it could be pulled on inadvertently by children or pets, or touch hot surfaces, which could damage the cord.
- Do not place Air Fryer Oven on or near a hot gas or electric burner or in a heated oven.
- Extreme caution should be exercised when using containers constructed of materials other than metal or glass in the oven.
- To avoid burns, use extreme caution when removing Air Fryer Oven accessories or disposing of hot grease.
- When not in use, always unplug the unit. Do not store any materials other than manufacturer's recommended oven-proof accessories in this Air Fryer Oven.
- Do not place any of the following materials in the Air Fryer Oven: paper, cardboard, plastic and similar products.
- Oversize foods and utensils must not be inserted in the Air Fryer Oven, as they may involve a risk of fire or electric shock.
- A fire may occur if the Air Fryer Oven is covered or touching flammable materials such as curtains, draperies or walls, when in operation.
- Do not store any items on top of the appliance when in operation. Do not operate under wall cabinets.
- Do not clean with metal scouring pads. Pieces can break off the pad and touch electrical parts, involving a risk of electric shock.
- Do not attempt to dislodge food when the Air Fryer Oven is plugged into electrical outlet.
![]()
To avoid possibility of fire, NEVER leave Air Fryer Oven unattended during use.- Use recommended temperature settings for all cooking/baking, roasting and Air Frying.
- Do not rest cooking utensils or baking dishes on glass door.
- Do not operate your appliance in an appliance garage or under a wall cabinet.
- When storing in an appliance garage, always unplug the unit from the electrical outlet. Not doing so could create a risk of fire, especially if the appliance touches the walls of the garage or the door touches the unit as it closes.
- Extreme caution must be used when moving an appliance containing hot oil or other hot liquids.
- To disconnect, turn any control to "off", then remove plug from wall outlet.
SAVE THESE INSTRUCTIONS.
THIS PRODUCT IS FOR HOUSEHOLD USE ONLY.
SHORT CORD PURPOSE
 NOTE: A short power cord is provided to reduce the risk of personal injury resulting from becoming entangled in or tripping over a long cord.
Longer power-supply cords or extension cords are available and may be used if care is exercised in their use. If an extension cord is used:
- the marked electrical rating of the extension cord should be at least as great as the electrical rating of the product;
- the extension cord should be arranged so that it will not drape over the counter top or tabletop where it can unintentionally be pulled on or tripped over by children or pets.
POLARIZED PLUG
If this appliance is equipped with a polarized plug (one blade is wider than the other), please follow the below instructions:
To reduce the risk of electrical shock, this plug is intended to fit into a polarized outlet only one way. If you are unable to fit the plug into the electrical outlet, try reversing the plug. If the plug still does not fit, contact a qualified electrician. Never use the plug with an extension cord unless the plug can be fully inserted into the extension cord. Do not alter the plug of the product or any extension cord being used with this product. Do not attempt to defeat the safety purpose of the polarized plug.
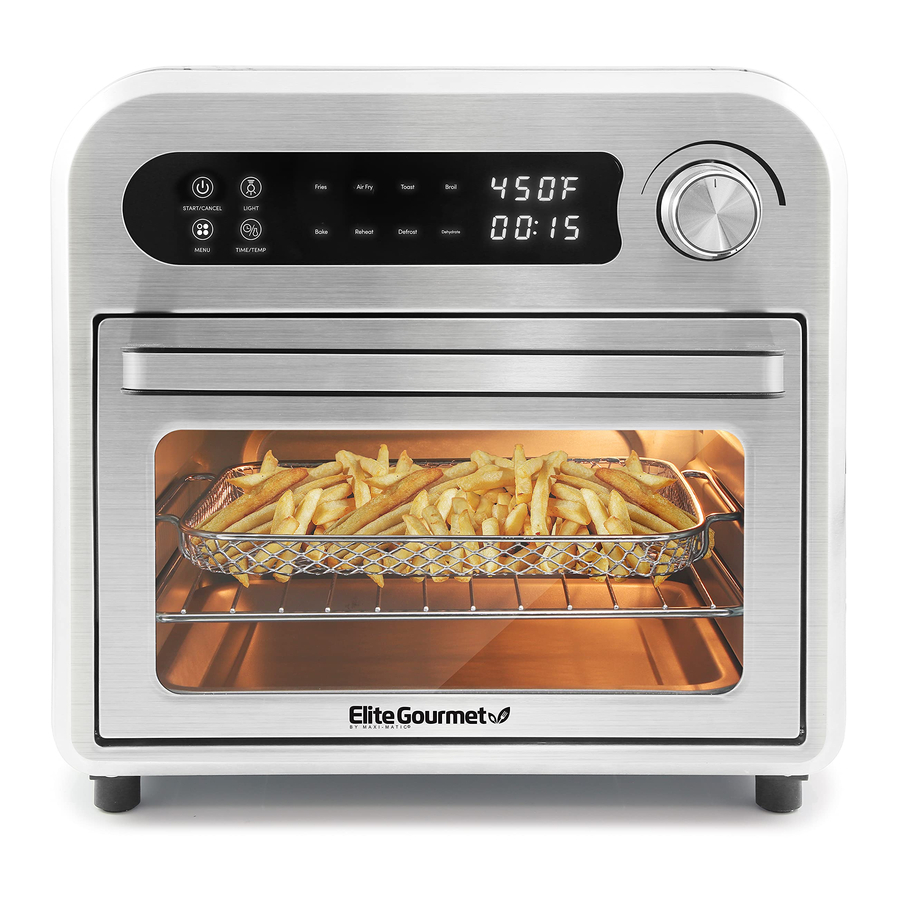
PARTS IDENTIFICATION

- Digital Control Panel
- Oven Timer/Temperature Dial
- Door Handle
- Interior Oven Light
- Tempered Glass Door
- Air Fryer Basket
The Air Fryer Basket is grated to allow air to pass through the basket for even cooking. The Air Fryer Basket should be placed in the middle rack position unless a recipe states otherwise. - Oven Rack
Use for toasting and broiling. - Baking Pan/Drip Tray
Use alone when baking or roasting. The Baking Pan/Drip Tray can be placed in any of the three rack positions. To ensure food doesn't stick use a little oil or butter to coat the pan. - Slide-Out Crumb Tray
The removable crumb tray slides out from the bottom front of the Air Fryer Oven for easy cleaning. Always ensure that the crumb tray is placed underneath the bottom whenever the oven is being used.
CONTROL PANEL

- POWER/START BUTTON
Tap once to power on unit. Tap once to START or STOP cooking. - MENU BUTTON
Use this button to toggle through the different menu functions. - OVEN INTERIOR LIGHT
Tap to turn the light On or Off. - TIMER/TEMPERATURE ADJUST BUTTON
Tap to select either timer or temperature for adjusting. - PRESET MENU ICONS
Fries, Chicken, Bread, Steak, Cake, Pizza, Warm, Dehydrate. - TEMPERATURE DISPLAY
Digital display for working of temperature. - TIME DISPLAY
Digital display of cooking time. - TIME/TEMPERATURE ADJUSTING KNOB
Turn to adjust desired time/temperature.
BEFORE FIRST USE
- Before using your Air Fryer Oven for the first time, carefully remove all packaging material and recycle appropriately.
- Remove the parts from the box and wash the accessories with warm, soapy water and a non-abrasive sponge. They are also dishwasher safe.
![]()
DO NOT IMMERSE THE MAIN HOUSING IN WATER. Wipe the interior and exterior of appliance clean with a damp cloth. - Place the appliance on a flat, horizontal and stable surface (make sure surface is heat-resistant). Place away from walls and other appliances. Leave approximately 4 inches of space from nearby objects.
OBJECTS SHOULD NOT BE STORED ON THE TOP OF THE OVEN. IF THEY
ARE, REMOVE ALL OBJECTS BEFORE YOU TURN ON YOUR OVEN. THE EXTERIOR WALLS GET VERY HOT WHEN IN USE. KEEP OUT OF REACH OF CHILDREN.

HOW TO USE
NOTE:
- The initial 15 minutes of use may result in smell and smoke. This is normal and harmless and comes from the protective substance applied to the heating elements during manufacturing.
- At any time during cooking, the time and temperature can both be adjusted by pressing the Timer/Temperature Adjust Button and turn the Knob. There is no need to tap the START button after adjusting the time and/or temp.
- Press the Oven Interior Light to turn on the oven light to check the cooking progress.
- If Air Fryer Oven goes to Sleep Mode while plugged in, lightly tap control panel & power button will illuminate.
MANUALLY PROGRAM TIME AND TEMPERATURE:
- Place the Air Fryer Oven on a stable, horizontal, heat-resistant, and leveled surface.
- Plug the Air Fryer Oven into an electrical wall outlet. You will hear a beep and the Power Button will illuminate.
- Gently tap the Power Button and the LED screen will illuminate.
- Tap the Timer/Temperature Adjust Button, the temperature display will start to blink. Turn the Knob to select desired temperature.
- Tap the Timer/Temperature Adjust Button again, the cook time will start to blink. Turn the Knob to select desired cooking time.
- Press the Power Button to start cooking.
NOTE: You can stop cooking at any time by pressing the Power Button.

During cooking, the Air Fryer Oven will be very hot, only use the Door Handle or oven mitts.
SELECT A QUICK MENU FUNCTION:
- Place the Air Fryer Oven on a stable, horizontal, heat-resistant, and leveled surface.
- Plug the Air Fryer Oven into an electrical wall outlet. You will hear a beep and the Power Button will illuminate.
- Gently tap the Power Button, you will hear a beep and the LED screen will illuminate.
- Tap the Menu Button to toggle through the different menu functions. The preset's default time and temperature will be displayed.
| ICON | MENU | TEMPERATURE | COOK TIME |
 | FRIES | 450°F | 15 min |
 | CAKE | 275°F | 45 min |
 | CHICKEN | 450°F | 20 min |
 | PIZZA | 400°F | 8 min |
 | TOAST | 450°F | 6 min |
 | WARM | 140°F | 30 min |
 | STEAK | 450°F | 7 min |
 | DEHYDRATE | 140°F | 60 min |
- Press the Power Button to start cooking.
NOTE: You can stop cooking at any time by pressing the Power Button.
During cooking, the Air Fryer Oven will be very hot, only use the Door Handle or oven mitts.
WHEN FRYING IS COMPLETE:
- When the timer completes its countdown, the air fryer will beep five times and stop heating - this signals it is time to remove your food.
- Carefully open the glass door using the door handle. Check that your foods are ready. If not, then close the glass door and set the timer for a few more minutes.
- Empty the contents into a bowl or onto a plate using nonmetallic tongs or a scoop.
- When the next batch of ingredients is ready, the air fryer oven is instantly ready to use again.
- Remove the power cord from the electrical outlet if not in use.
NOTE:
- Switch off the appliance manually by pressing POWER at any time.
- The FAN motor will continue to operate in order to cool down the air fryer oven, this will stop within approximately 30 seconds.
CLEANING & MAINTENANCE
The Air Fryer Oven should be cleaned thoroughly after every use.
- Make sure the Power Cord is disconnected from the electrical outlet and that the appliance has cooled down before attempting to clean.
- Do not use abrasive cleaners, as they will damage the finish. Simply wipe the exterior with a clean, damp cloth and dry thoroughly. Apply the cleansing agent to a cloth, not directly onto the oven, before cleaning.
- To clean interior walls, use a damp cloth and a mild liquid soap solution or a spray solution on a sponge. Never use harsh abrasives or corrosive products. These could damage the oven surface. Never use steel wool pads, etc., on interior of oven.
- Oven Rack, Baking Pan, Air Fryer Basket and Crumb Tray should be hand-washed in hot, sudsy water or use a nylon scouring pad or nylon brush. They are also dishwasher safe.
- After cooking greasy foods and after your oven has cooled, always clean top interior of oven. If this is done on a regular basis, your oven will perform like new. Removing the grease will help to keep toasting consistent, cycle after cycle.
- To remove crumbs, slide out the Crumb Tray and discard crumbs. Wipe clean and replace. To remove baked-on grease, soak the tray in hot, sudsy water or use nonabrasive cleaners. Never operate the oven without the Crumb Tray in place.
- Any other servicing should be performed by an authorized service representative.
- When opening the glass door, be careful of steam. Keep hands and face away from the opening.
- After cooking, the air fryer basket, rack, or pan will be extremely hot to the touch. Do not touch surfaces of the basket, rack, or pan directly.
COOKING TIME CHART
NOTE:
- All information is for reference only and can be adjusted according to the user's preference. They are approximations as foods differ in size and density. Cooking temperatures and times cannot be guaranteed.
- STIR means the recipe requires mixing the contents mid-way through cooking.
| INGREDIENTS | AMOUNT (ounces) | TIME (minutes) | TEMP. (°F) | STIR | NOTES |
| POTATOES | |||||
| Thin frozen fries | 15 ~ 25 | 9-16 | 390 | STIR | |
| Thick frozen fries | 15 ~ 25 | 11-20 | 390 | STIR | |
| Homemade fries (0.3"x0.3") | 15 ~ 30 | 16-10 | 390 | STIR | add 1/2 tbsp of oil |
| Homemade potato wedges | 15 ~ 30 | 18-22 | 355 | STIR | add 1/2 tbsp of oil |
| Homemade potato cubes | 15 ~ 25 | 12-18 | 355 | STIR | add 1/2 tbsp of oil |
| Homemade potato chips | 10 | 10-11 | 320 | ||
| MEAT | |||||
| Steaks | 6 ~ 18 | 8-12 | 355 | ||
| Pork chops | 6 ~ 18 | 10-14 | 355 | ||
| Hamburgers | 6 ~ 18 | 7-14 | 355 | ||
| Drumsticks | 6 ~ 18 | 18-22 | 355 | ||
| Chicken wings | 15 ~ 20 | 18-22 | 390 | ||
| Chicken strips | 6 ~ 18 | 14-16 | 355 | ||
| SNACKS | |||||
| Egg rolls | 6 ~ 18 | 8-10 | 390 | STIR | Use oven-ready |
| Frozen chicken nuggets | 6 ~ 18 | 6-10 | 390 | STIR | Use oven-ready |
| Frozen fish sticks | 6 ~ 14 | 6-10 | 390 | Use oven-ready | |
| Fish fillet in batter | 6 ~ 18 | 10-16 | 355 | STIR | |
| Battered shrimp | 6 ~ 18 | 10-16 | 355 | STIR | |
| Frozen cheese sticks | 6 ~ 14 | 8-10 | 355 | Use oven-ready | |
| Stuffed veggies | 6 ~ 14 | 10 | 320 | ||
| Mushrooms | 6 ~ 14 | 10 | 320 | ||
| Onion Rings | 6 ~ 18 | 10-16 | 355 | ||
| BAKING | |||||
| Cake | 10 | 20-25 | 320 | Use ovensafe dish | |
| Quiche | 15 | 20-22 | 355 | Use ovensafe dish | |
| Muffins | 10 | 15-18 | 390 | Use oven-safe muffin cups | |
| Sweet snacks | 15 | 20 | 320 | Use ovensafe dish | |
HINTS & TIPS
- Smaller cuts of food usually require a slightly shorter cooking time than larger foods.
- A larger amount of food only requires a slightly longer cooking time and a smaller amount of food only requires a slightly shorter cooking time.
- Stirring or shaking smaller foods mid-way through the cooking process will improve the end result and can help cook more evenly.
- Adding a small amount of oil to fresh potatoes can result in a crispier result. Cook your ingredients in the air fryer within a few minutes after adding the oil.
- Do not air fry extremely greasy foods such as sausages in the air fryer.
- Snacks that can be prepared in an oven can also be prepared in the air fryer.
- The air fryer can also reheat foods. To reheat foods, set the temperature to 300°F for up to 10 minutes.
- To cook frozen foods, add an additional 3-5 minutes to your cook time.
NOTE:
- Add 3 minutes to the cooking time if you begin cooking while the air fryer is still cold.
- Do not cook frozen, raw foods in the air fryer.
HOMEMADE FRENCH FRIES:
- The optimum amount for air frying crispy fries is 17.5oz. or a little over 1 lb.
- When making your own French fries, follow these steps:
- Peel potatoes and slice them into strips.
- Wash and dry them thoroughly.
- Mix potato strips in a bowl with ½ tablespoon of olive oil, make sure they are evenly coated.
- Using your hands or tongs, place the potato strips onto the frying rack.
TROUBLESHOOTING GUIDE
| PROBLEM | POSSIBLE CAUSE | SOLUTION |
| The air fryer does not work. | The appliance is not plugged in. | Plug the Power Cord into an electrical outlet. |
| The appliance is defective. | Contact customer service at www.maxi-matic.com | |
| Food is not completely cooked/fried. | There is too much food in the oven. | Use smaller batches of food. Small batches of food will cook more evenly. |
| The cooking temperature is set too low. | Increase the temperature setting. Check "Cooking Time Chart" found in this manual. | |
| The cooking time is too short. | Increase the time setting. Check "Cooking Time Chart" found in this manual. | |
| Food is raw and frozen solid. | Raw frozen foods should be thawed before cooking in the air fryer. Exceptions to this are pre-cooked frozen foods. | |
| Food is unevenly cooked. | Certain foods need to be stirred mid-way through the cooking process. | Foods that overlap inside the Air Fryer Basket need to be stirred mid-way through cooking. |
| Fried snacks are not crispy. | You used a type of snack meant to be prepared in a traditional deep fryer. | Use oven snacks or lightly brush some oil onto the snacks for a crispier result. |
| I cannot close the Glass Door properly. | The oven rack, bake pan, or air fryer basket is not properly placed inside. | Make sure there is no obstruction for the glass door to close properly. |
| White smoke is emitting out of the appliance during use. | You are preparing food with a high oil content. | When cooking with oily foods, oil will drain into the drip tray. When the air fryer heats up, the drip tray heats up the oil and produces white smoke. This does not adversely affect the air fryer or your cooking process. |
| The accessories has built-up oil residue from previous uses. | White smoke is caused by oil leftover on the accessories. Make sure to thoroughly clean each accessories after every use. | |
| Home-made French fries are coming out unevenly cooked. | Your potatoes are not fresh or are frozen. | Make sure to use fresh and firm potatoes, not frozen potatoes, for home-made French fries. |
| Potato strips were not well rinsed prior to frying. | Thoroughly rinse sliced potato to remove all starch prior to frying. | |
| Home-made French fries are not crispy after air frying. | Crispy results are directly linked to the amount of oil used and water content of the potato. | Potato strips need to be thoroughly dried before adding oil. |
| Slice potato strips thinner if you want them crispier. | ||
| Use a bit more oil on the potato strips prior to frying if you want crispier results. |
Questions?
We're here to help!
Visit: www.maxi-matic.com
for support on this product.

Documents / Resources
References

Download manual
Here you can download full pdf version of manual, it may contain additional safety instructions, warranty information, FCC rules, etc.
Download Elite Gourmet EAF1010D - 10L Digital Air Fryer Oven Manual
Advertisement


Need help?
Do you have a question about the EAF1010D and is the answer not in the manual?
Questions and answers