Table of Contents
Advertisement
Quick Links
Original Instruction
DSC-5000MK2
facebook.com/denverelectronics
Before operating this vehicle, read all the instructions for safe assembly and operations. User's manual can
guide you through the functions and usage of Electric kick scooter. Before using this scooter, familiarize
yourself with how to operate, so that you can keep the scooter in the best condition possible.
11
Advertisement
Table of Contents

Subscribe to Our Youtube Channel
Related Manuals for Denver DSC-5000MK2


Summary of Contents for Denver DSC-5000MK2
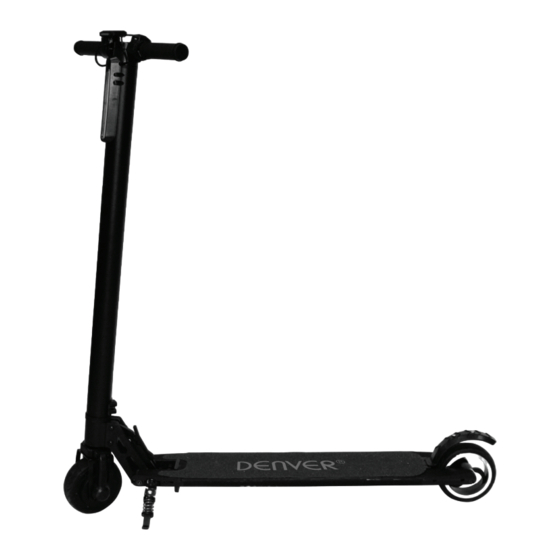
- Page 1 Original Instruction DSC-5000MK2 facebook.com/denverelectronics Before operating this vehicle, read all the instructions for safe assembly and operations. User’s manual can guide you through the functions and usage of Electric kick scooter. Before using this scooter, familiarize yourself with how to operate, so that you can keep the scooter in the best condition possible.
- Page 2 1. Prod uct and d Access sories Thro ottle Electric brak Mechan nical brake Clasp Left t Right ...
-
Page 3: Folding Steps
2. Folding steps 1. Unfolding: 1) Stand the scooter on its wheels, press the unlock clasp. 2) Raise the handle slowly. 3) Unfolding process finished when you hear the “click”. 2. Folding 1) Hold the clasp and pull it outward 2)Press the front tube of scooter downward (Attention: The limit position must be put right.) 3)After a click, folding process finishes. ... - Page 4 3. Right t and Le ft Handl lebar as ssembly 1) Parts in side the pa ckaging: tw wo handleba ars 2) Assemb bly methods s: Loosen th he screw on the ha andlebar, ro otate the ax le t o make the e meter scre een upward ds while the e h handlebar a nd display s screen turn ...
- Page 5 4. Charg ger conn nection Plug the adapter int t o the charg ging port ...
-
Page 6: Safety Instruction
5. Safety Instruction We recommend always wearing helmet and protective gear like elbow, knee and wrist protectors to ensure your personal safety. Also make sure you have read the user manual, to ensure you know how to ride it in a safe and fun way. Please also pay attention to the rules your country has regarding use of such products. In many countries it is not allowed to ride on public roads and places. Only on closed courts. It is always your own personal responsibility to live up to these rules. Even in countries where there are not any written rules, please keep in mind that you should always ensure your own and others safety. ... -
Page 7: Daily Maintenance
6. Daily Maintenance • Storage and cleaning If your kick‐scooter gets dirty, please clean it with a damp cloth. (you can use a stiff brush first to get the worst dirt off and then use a cloth afterwards to clean it.). It is also possible to use a little toothpaste if the dirt is stuck. Remember to clean with damp cloth after this. Please make sure to keep the kick scooter turned off while cleaning it, and make sure to cover the charging input to avoid problems with the electronics. Please notice: Do not use alcohol, gas, kerosene or other corrosive and volatile chemical solvents. This can damage both the appearance and the internal structure of the kick scooter. You may not use pressured water‐gun or running water either. Please store your kick scooter in a dry and cool environment when not in use. Avoid leaving it outdoors, ... -
Page 8: Instrument Menu
7. Instrument menu For better operation, please read the instructions carefully. 7.1 Appearance Mileage/ Speed i ndi cato r Total mileage Gear range Speed up key Power Switch Battery indicator 7.2 Keyboard There are 3 instruments: Power on/off key , switch key , Speed up key , the different functional and role exchanged by long press or short press the keys.Press any two keys at the same time will perform other function and role. ... - Page 9 7.3 Operation Instructions Long press instrument key, instrument panel display white light, the scooter is on. Push scooter and press the throttle near your right thumb, the scooter starts; continue to press the throttle, the speed increases, loosening the throttle, the speed decreases. The left hand side is the electronic brake, press the electronic brake to execute the brake functions, release the electronic brake to cancel the brake function. Heel touch on the mechanical brake, can implement the mechanical brake, as shown in figure. Long press the instrument key, instrument blue light disappears, the scooter power off. Mechanical brake Figure (3) 7.4 Parameter Settings Long press key + at the same time enter to the SET (parameter setting), followed by zero or non‐zero start, the motor pole log ratio, wheel diameter settings. 1). Short press ...
-
Page 10: Parameter Table
8. Parameter table Performance Item Parameter Folding size(MM 1010*415*245 Developed Size(MM) 924*415*997 Size Carton size (MM) 1030*175*254 Quality Max Load(KG) 125KG Empty Quality(KG) 8.0KG Ride Condition Age(Year) 16‐50 Height(CM) 130~200CM Max Speed(KM/H) 24km/h Endurance(KM) 12~15km Max. grade ability 20° Hardened pavement, flat asphalt pavement, below 20 degrees the ramp, No higher than the 10CM stair, no more Scooter ... - Page 11 WARNING 1.1. The risk of driving Learn how to drive safely before you drive fast on the Escooter. ‐ Failing, losing control, crashing, including violating the rules in the user’s manual can lead to injury. ‐ Speed and range may differ based on rider weight, terrain, temperature, and driving style. ‐ Make sure to wear helmet and protective clothing before using the Escooter. ‐ Make sure to read the manual carefully before using the Escooter. ‐ Only for use in dry weather. ‐ We do not recommend the use of any Escooters on public roads ‐ Please make sure to check with your national laws in your country for usage this product. 1.2. The preparation before operation Before using, the battery should be fully charged. 1.3. The weight limitation of the operator The reason of the weight limitation: ...
- Page 12 • Speed and driving style: Keeping a steady speed will increase the driving distance, on the contrary, frequent start, stop, acceleration, deceleration will reduce the distance. 3. Safe driving This chapter will focus on safety, knowledge and warnings. Before operating this vehicle, read all the instructions for safe assembly and operation. Before starting, familiarize yourself with how to operate, so that you can keep the Escooter in the best condition. • When you are driving the Escooter, make sure that all safety measures are taken. You should be wearing a helmet, knee pads, elbow pads and other protective gear. • The driver should not wear loose or hanging clothing, shoelaces, etc. that can get caught in the wheels of the Escooter. • Escooter is only for personal entertainment. You are not allowed to ride it on public streets. • Escooter is not allowed on the motor vehicle lanes. • Children, the elderly, pregnant women are not allowed to drive. • Persons with reduced balancing capacity should not drive the Escooter. • Do not drive the Escooter under the influence of alcohol or any other substance. • ...
- Page 13 • Jumping on or off the Escooter can and will cause damage that is not covered by warranty. Risk of personal injury. Personal damage or abuse related to “trick riding” is not covered by the company and voids any warranty. 4. Charging steps • Make sure that the Escooter, the charger and the DC power socket on the Escooter are kept dry. • Note: ONLY use the supplied charger labelled XHK‐916‐29420 with the following output voltage to charge this Escooter: 29.4V ‐ 2.0A. • Using another charger may damage the product or create other potential risks. • Plug the power adapter into the DC power port of the scooter and a standard power outlet. Make sure the green indicator on the adaptor lights up. • When the red indicator lights on the charger indicate charging properly, otherwise check if the line is connected properly. • When the indicator light on the charger changes from red to green, this indicates that the battery is fully charged. • In this case, please stop charging. Over charging will affect the battery life. • Charging may take up to 2‐3 hours. Do not charge the battery for more than 3 hours. Disconnect the charger from the balance board and the power supply after 3 hours. Overcharging will reduce the lifetime of the battery. ...
- Page 14 Only use the DC connector to connect with the DC cable from the charger that comes with the Escooter! • Do not insert any foreign objects into DC connector! • Always keep the protective cap plugged onto the DC connector! • Only take off the cap when charging the Escooter! • After charging finished take out the DC plug and put on the protective cap onto the DC connector again! Make sure that water and other liquids do not enter the internal parts of the Escooter as this may permanently damage the electronics/batteries of the Escooter. There is a risk of personal injury. • To protect user safety, users are forbidden to open the scooter, or you give up your warranty rights ...
- Page 15 ALL RIGHTS RESERVED, COPYRIGHT DENVER ELECTRONICS A/S Electric and electronic equipment and included batteries contains materials, components and substances that can be hazardous to your health and the environment, if the waste material (discarded electric and electronic equipment and batteries) is not handled correctly. Electric and electronic equipment and batteries is marked with the crossed out trash can symbol, seen below. This symbol signifies that electric and electronic equipment and batteries should not be disposed of with other household waste, but should be disposed of separately. ...
- Page 16 10748-07/17/00001 to 10748-07/17/03445...
Need help?
Do you have a question about the DSC-5000MK2 and is the answer not in the manual?
Questions and answers
Comment démonter la batterie pour la remplacer dsc 5000