Table of Contents
Advertisement
Quick Links
OWNER'S MANUAL
LAUNDRY CENTER
Before beginning installation, read these instructions
carefully. This will simplify installation and ensure that the
product is installed correctly and safely. Leave these
instructions near the product after installation for future
reference.
ENGLISH
WK1310BST
MFL71955208
Rev.00_020923
FHT1013SWBG
Copyright © 2023 LG Electronics Inc. All Rights Reserved.
www.lg.com
Advertisement
Table of Contents

Related Manuals for LG WK1310BST


Summary of Contents for LG WK1310BST
- Page 1 This will simplify installation and ensure that the product is installed correctly and safely. Leave these instructions near the product after installation for future reference. ENGLISH WK1310BST FHT1013SWBG www.lg.com MFL71955208 Rev.00_020923 Copyright © 2023 LG Electronics Inc. All Rights Reserved.
-
Page 2: Table Of Contents
Control Panel and Programme Table............27 Extra Options and Functions ................31 OPERATION-DRYER Operation Overview..................34 Preparing the Laundry ..................35 Control Panel and Programme Table............37 Extra Options and Functions ................42 SMART FUNCTIONS Using LG ThinQ Application................45 Smart Diagnosis ....................48 MAINTENANCE Washer ......................49 Dryer ........................52 TROUBLESHOOTING... - Page 3 Washer ......................56 Dryer ........................63 Common......................68...
-
Page 4: Safety Instructions
SAFETY INSTRUCTIONS SAFETY INSTRUCTIONS READ ALL INSTRUCTIONS BEFORE USE The following safety guidelines are intended to prevent unforeseen risks or damage from unsafe or incorrect operation of the appliance. The guidelines are separated into ‘WARNING’ and ‘CAUTION’ as described below. Safety Messages This symbol is displayed to indicate matters and operations that can cause risk. - Page 5 SAFETY INSTRUCTIONS • Children should be supervised to ensure that they do not play with the appliance. • The inlet water pressure must be between 50 kPa and 800 kPa. • Use a new hose or hose-set supplied with the appliance. Reusing old hoses can cause a water leak and subsequent property damage.
- Page 6 SAFETY INSTRUCTIONS • The appliance must not be supplied through an external switching device, such as a timer, or connected to a circuit that is regularly switched on and off by a utility. • Remove clothes from the product immediately when drying is complete or the power is turned off during the drying process.
- Page 7 SAFETY INSTRUCTIONS power plug. The power plug must be plugged into an appropriate outlet socket that is installed and earthed / grounded in accordance with all local codes and ordinances. • Improper connection of the equipment-grounding conductor can result in risk of electric shock. Check with a qualified electrician or service personnel if you are in doubt as to whether the appliance is properly grounded.
- Page 8 • Do not touch the door during a high temperature programme. • In case of a water leak from the appliance or flood, disconnect the power plug and contact the LG Electronics customer information centre. • Turn off water taps to relieve pressure on hoses and valves and to minimize leakage if a break or rupture should occur.
- Page 9 • Only qualified service personnel from LG Electronics service centre should disassemble, repair, or modify the appliance. Contact an LG Electronics customer information centre if you move and install the appliance in a different location.
-
Page 10: Installation
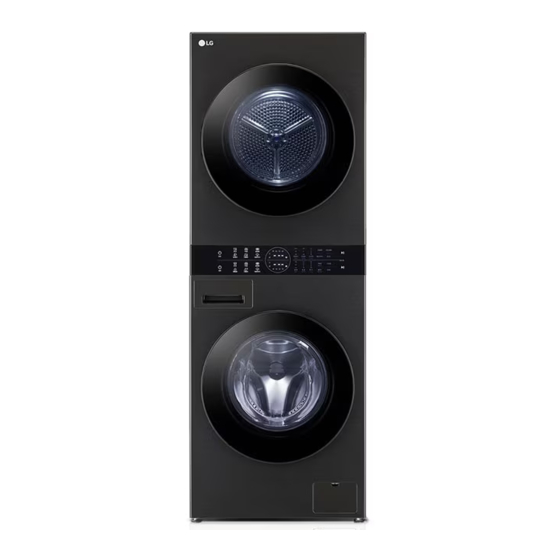
INSTALLATION INSTALLATION Parts and Specifications NOTE • Appearance and specifications may change without notice to improve the quality of the appliance. Front View Drain Hose Drain Pump Filter Drain Pump Filter Cover Leveling Feet Rear View Control Panel Lint Filter Dryer Drum Dryer Door Detergent Dispenser Drawer... - Page 11 INSTALLATION Drain Hole (for Dryer) Cold / Hot Water Inlet (for Washer) Transit Bolts Drain Hose (for Washer) Power Cord (for Washer)
- Page 12 INSTALLATION Accessories Cable Ties (5 EA) Connecting Supply Hose Water Drain Hose (for (for Washer) Dryer) Band Clamps (5 EA) Spanner Caps for Covering Transit Bolt Holes Anti-slip Sheets Screws (2 EA) Drain Hose Connector Elbow Bracket for Dry Rack Securing Drain Hose *1 This accessory is only available on some models.
- Page 13 • The included accessories vary depending on the model you purchased. Specifications Model WK1310BST FHT1013SWBG Power supply 220 V~, 50/60 Hz Dimension (Width X Depth X Height) 600 mm X 660 mm X 1655 mm...
-
Page 14: Installation Place Requirements
INSTALLATION Installation Place 30 cm Requirements 60 cm Before installing the appliance, check the following information to make sure that the appliance 5 cm should be installed in a correct place. 20 cm Installation Location 66 cm • This appliance must be installed on firm flooring 118 cm to minimize vibration during the spin cycle. - Page 15 • You can purchase rubber cups (part No. MJB65174401, MJB65174501) from the LG • The appliance performs best at a room service centre. temperature of 23 ℃.
-
Page 16: Unpacking The Appliance
Repairs carried out by inexperienced persons may cause injury or serious malfunctioning. Contact your local authorised LG repairer. • The power plug must be plugged into an appropriate outlet socket that is installed and grounded/earthed in accordance with all local codes and ordinances. -
Page 17: Connecting The Water Supply Hose
INSTALLATION Checking the Rubber Seal • Locate the hole caps included in the accessory pack or attached on the back. Two rubber seals are supplied with the water supply hose. They are used for preventing water leaks. Connection to taps is sufficiently tight. •... - Page 18 INSTALLATION Remove the guide plate if the tap is too large Remove the guide plate if the tap is too large to fit the adapter. to fit the adapter. Push the adapter onto the end of the tap so Push the adapter onto the end of the tap so that the rubber seal is connected to be that the rubber seal is connected to be watertight.
-
Page 19: Installing The Drain Hose
INSTALLATION Installing the Drain Hose Connecting the Hose to the Appliance Connecting the Drain Hose to the Dryer Screw the supply hose to the water inlet valve on the back of the appliance. Insert the hose clamp onto the drain hose of the dryer. - Page 20 INSTALLATION band clamp to keep the washer hose in Use the provided tie strap to secure the 2 place. drain hoses in place. Use the band clamp on the short drain hose (not included) to attach it to the bottom opening of the drain hose connector.
-
Page 21: Levelling The Appliance
INSTALLATION connector helps avoid siphoning, odours, or • If the appliance rocks when pushing the top improper draining. plate of the appliance diagonally, adjust the feet again. • Make sure the drain hoses are not kinked or pinched. This is a potential cause of drainage •... - Page 22 • Do not install the washing machine on a plinth, purchased. stand or elevated surface unless it is If you install the appliance on a slippery surface, it manufactured by LG Electronics for use with this may move because of excessive vibration. model. Incorrect levelling may cause malfunction through noise and vibration.
-
Page 23: Operation-Washer Operation Overview
OPERATION-WASHER OPERATION-WASHER Operation Overview CAUTION Using the Washer • Remove items from the flexible door seal gasket to prevent clothing and door seal damage. Before the first wash, select the Cotton wash programme and add a half amount of the detergent. -
Page 24: Preparing The Wash Load
OPERATION-WASHER • When the cycle is finished, a melody will Symbol Wash / Fabric type sound. Immediately remove your clothing from the appliance to reduce wrinkling. • Do not wash Preparing the Wash Load NOTE • The dashes under the symbol give you Sorting the Clothes information about the type of fabric and the maximum allowance of mechanical stress. -
Page 25: Adding Detergents And Softeners
OPERATION-WASHER Adding Detergents and NOTE Softeners • Do not let the detergent harden. Doing so may lead to blockages, poor rinse performance or Detergent Dosage odour. • Full load: According to manufacturer’s • Detergent should be used according to the recommendation. - Page 26 OPERATION-WASHER Adding Water Softener • Be careful not to get a hand caught in the drawer while closing. A water softener, such as anti-limescale can be • It is normal for a small amount of water to used to cut down on the use of detergent in areas remain in the dispenser compartments at with high water hardness level.
-
Page 27: Control Panel And Programme Table
• To use the extra functions, press and hold the corresponding button for 3 seconds. The corresponding symbol lights up in the display. Remote With the LG ThinQ app, you can use a smartphone to control your appliance remotely. • In order to use this function, refer to SMART FUNCTIONS. Wi-Fi Press and hold the Wash button for 3 seconds to initiate the connection of the appliance to the LG ThinQ application. - Page 28 Beep sound can be turned on or off only through the LG ThinQ application.
- Page 29 OPERATION-WASHER Washing Programme Cotton 40 °C (Cold to 95 °C) Max. Load: Rating Description Washes normally soiled clothes by combining various drum motions. • Pressing the Start/Pause button without selecting a programme will cause the Cotton programme to begin immediately, using the default settings. Max Load: 2.5 kg (1 down Duvet Cold (Cold to 40 °C)
- Page 30 OPERATION-WASHER • Cotton + 40 ℃ + Rinse 1 + Spin 1400 (Half Load) *1 They are the most efficient programmes in terms of combined energy and water consumptions for washing that type of cotton clothes. *2 The test results depend on water pressure, water hardness, water inlet temperature, room temperature, type and amount of load, degree of soiling utilized detergent, fluctuations in the main electricity supply and chosen additional options.
-
Page 31: Extra Options And Functions
OPERATION-WASHER Extra Options and Add detergent. Functions Select a washing programme. Customizing a Washing Programme Customize the washing programme (Wash, Each programme has default settings that are selected automatically. You may also customize Rinse, Spin, and Temp.) as necessary. these settings using these buttons. Wash Press the Start/Pause button. - Page 32 OPERATION-WASHER Follow the next steps to use a special After the washing programme is finished, load option. items into the dryer and close the door. Press the Power button. Press the Start/Pause button of the dryer. • The dryer display shows the estimated Select a washing programme.
- Page 33 OPERATION-WASHER Settings Child Lock Use this option to disable the controls. This function can prevent children from changing cycles or operating the appliance. NOTE • Once this function is set, all buttons are locked except the Power button. • When the controls are locked, and the remaining time are alternatively shown on the display during the wash while this function is...
-
Page 34: Operation-Dryer Operation Overview
OPERATION-DRYER OPERATION-DRYER Operation Overview Press the cycle button repeatedly until the desired cycle is selected. Using the Dryer • If you press the Start/Pause button without choosing a programme, the appliance will Before the first cycle, set the appliance to dry for 5 proceed with the Cotton programme. -
Page 35: Preparing The Laundry
OPERATION-DRYER a short period of time if possible to help display to pause during active drying. The ventilate the drum after use. remaining time will then continue when it is the actual time that remains. WARNING • Make sure to empty all pockets. Items such as nails, hair clips, matches, pens, coins and keys •... - Page 36 OPERATION-DRYER Checking the Fabric Care Label The symbols on the fabric care label tell you about the fabric content of your clothes and how it should be dried. Symbol Description Tumble Dry Permanent Press / Crease Resistant Gentle / Delicate Do not Tumble Dry Do not Dry High Heating...
-
Page 37: Control Panel And Programme Table
OPERATION-DRYER Control Panel and Programme Table Control Panel Features Description Power On/Off button • Press the button to turn the appliance on. Hold again to turn the appliance off. • Pressing the Power button during a programme will cancel that programme and any load settings will be lost. - Page 38 This function can be turned on or off only through the LG ThinQ application.
- Page 39 OPERATION-DRYER Description lights up or blinks while the condenser is being washed or the thawing mode is operating. • Condenser cleaning operates every 30 drying cycles. NOTE • Drying times will be longer than usual when the condenser is being washed. •...
- Page 40 OPERATION-DRYER Max. Load 2.5 kg (1 down Programme Duvet Capacity duvet ) Description Use this programme for drying blankets or bulky items such as pillows, blankets, comforters, sheets or pet bedding. Dry Level Not adjustable Max. Load Programme Delicates 1.5 kg Capacity Description Use this programme for drying dress shirts/blouses, nylons, lingerie, or sheer and...
- Page 41 OPERATION-DRYER Programme Dry Mode Energy Mixed Fabric Time Quick Dry Time *1 This option is automatically included in the programme. NOTE • Only Cotton and Mixed Fabric programmes are available to select dryness level. • Anti Crease option can be selected for every drying programme. •...
-
Page 42: Extra Options And Functions
OPERATION-DRYER Extra Options and Select a drying programme. Functions Customize the drying programme (Dry Mode, Customizing a Drying Dry Level, and Time Dry) as necessary. Programme Each programme has default settings that are Hold the Start/Pause button. selected automatically. You may also customize these settings using these buttons. - Page 43 Please contact LG Electronics Customer Information Centre or visit the LG Website at http://www.lg.com for purchase. Close the door. Open the door.
- Page 44 OPERATION-DRYER NOTE • Once this function is set, all buttons are locked except the Power button. • When the controls are locked, and the remaining time are alternatively shown on the display during the dry while this function is engaged. •...
-
Page 45: Smart Functions
You can download new and special cycles that are notifications on a smartphone. The notifications not included in the basic cycles on the appliance. are triggered even if the LG ThinQ application is A variety of specialty cycles specific to the appliance off. - Page 46 • If the firewall on your wireless router is enabled, Run the LG ThinQ app and sign in with your disable the firewall or add an exception to it. existing account or create an LG account to •...
- Page 47 Put the clothes into the drum. Touch the Delay End and set the delay time. Press the Power button. Start a cycle from the LG ThinQ application on your smartphone. Press and hold Dry Level button for 3 seconds to enable the remote control function.
-
Page 48: Smart Diagnosis
LG ThinQ application. • Launch the LG ThinQ application and select the Smart Diagnosis feature in the menu. Follow the instructions provided in the LG ThinQ application. -
Page 49: Maintenance
MAINTENANCE MAINTENANCE WARNING • Unplug the appliance before cleaning to avoid the risk of electric shock. Failure to follow this warning may result in serious injury, fire, electric shock, or death. • Never use harsh chemicals, abrasive cleaners, or solvents to clean the appliance. They may damage the finish. - Page 50 MAINTENANCE weeks in addition to the regularly prompted so, or more often if the water is very hard or intervals. contains traces of limescale. • Turn off the water supply taps to the appliance if NOTE the appliance is to be left for a certain period of time (e.g.
- Page 51 MAINTENANCE under the dispenser drawer and not dispense Open the cover cap and pull out the drain tube. completely. Remove the drawer and inserts and check for build-up of cleaning products once or twice a month. Remove the detergent dispenser drawer by pulling the drawer straight out until the drawer stops.
-
Page 52: Dryer
MAINTENANCE Dryer • Open the filter by unfolding it in the direction of the arrow. WARNING • Remove the power plug when you clean the appliance. Not removing the plug may result in electric shock. Cleaning the Lint Filter Clean a large cluster of lint first, then clean the residual lint using vacuum cleaner or washing CAUTION under running water. - Page 53 MAINTENANCE Close the outer filter while pushing the side CAUTION of the filter. • When the lint drops into the filter inlet, it may cause degradation of drying performance and increase in drying time. Pull out the outer filter. Remove the inner filter. NOTE •...
- Page 54 MAINTENANCE Wiping the Moisture Sensor NOTE This device senses the moisture level of the clothes • Warm air is expelled through the ventilation grill. during operation, which means it must be cleaned • Adequate room ventilation should be provided regularly to remove any build-up of lime scale on to avoid the contamination of air into the room the surface of the sensor.
- Page 55 MAINTENANCE operation. However, you can clean the condenser Press the Condenser Care button. manually if you want to clean it more often. CAUTION Hold the Start/Pause button to start the • Remove all of the clothes from the appliance. cleaning of the condenser. •...
-
Page 56: Troubleshooting
Operation of your appliance can lead to errors and malfunctions. The following tables contain possible causes and notes for resolving an error message or malfunction. It is recommended to read the tables carefully below in order to save your time and money that may cost for calling to LG Electronics service centre. - Page 57 • Close the door and make sure that nothing is caught under the door preventing it from closing completely. Door sensor malfunctions. • Close the door. Please call LG service centre. You can find your local LG service centre phone number in the warranty card. This is a control error.
- Page 58 TROUBLESHOOTING Symptoms Possible Cause & Solution Thumping sound The clothes may be out of balance. • Pause the programme and redistribute the clothes after the door unlocks. Vibrating noise Package materials are not removed. • Remove package materials. The clothes may be unevenly distributed in the drum. •...
- Page 59 TROUBLESHOOTING Symptoms Possible Cause & Solution Appliance does not Circuit breaker/fuse is tripped/blown. operate. • Check house circuit breakers/fuses. Replace fuses or reset breaker. The appliance should be on a dedicated branch circuit. The appliance will resume the programme where it stopped once power is restored. Control needs to be reset.
- Page 60 TROUBLESHOOTING Symptoms Possible Cause & Solution Detergent is not Drain Pump Filter may be blocked. dispensed • Clean the Drain filter. incompletely or not dispensed at all. Cycle time is longer The load is too small. than usual. • Add more items to allow the appliance to balance the loads. Heavy articles are mixed with lighter items.
- Page 61 TROUBLESHOOTING Performance Symptoms Possible Cause & Solution Poor stain removal Previously set stains. • Articles that have been previously washed may have stains which have been set. These stains may be difficult to remove and may require hand washing or pre-treating to aid in stain removal. Staining Bleach or softener is dispensed too soon.
- Page 62 TROUBLESHOOTING Odour Symptoms Possible Cause & Solution Musty or mildewy Inside of drum is not cleaned properly. odour in appliance • Run the Tub Clean function regularly. Odours can occur if the drain hose is not properly installed, causing siphoning (water flowing back inside of the appliance). •...
- Page 63 TROUBLESHOOTING Dryer Error Messages Symptoms Possible Cause & Solution The door has been opened while the appliance is in operation or the appliance is being operated without the door being closed properly. DOOR ERROR • Close the door completely. • If is not released, call for service.
- Page 64 The door is closed while clothes or foreign substance is caught in the door. • Check if clothes or foreign substance is caught in the door before using the appliance. If water leaks continuously, contact the LG Electronics Customer Information Centre. Appliance runs and This is how the anti crease option works.
- Page 65 TROUBLESHOOTING Performance Symptoms Possible Cause & Solution Clothes take too long Load is not properly sorted. to dry. • Separate heavy items from lightweight items. Larger and heavier items take longer to dry. Light items in a load with heavy items can fool the sensor because the light items dry faster.
- Page 66 TROUBLESHOOTING Symptoms Possible Cause & Solution Greasy or dirty spots Clean and dirty clothes are being dried together. are left on clothes. • Use the appliance to dry only clean items. Soil from dirty clothes can transfer to the clean clothes in the same or later loads. Clothes were not properly cleaned or rinsed before being placed in the appliance.
- Page 67 TROUBLESHOOTING Symptoms Possible Cause & Solution Clothes have damp Very large load or very small load. Single large item such as a blanket or spots after a Dry comforter. programme. • If items are too tightly packed or too sparse the sensor may have trouble reading the dryness level of the load.
- Page 68 • Find the Wi-Fi network connected to your smartphone and remove it, then not connected to the register your appliance on LG ThinQ. Wi-Fi network. Mobile data for your smartphone is turned on. • Turn off the Mobile data of your smartphone and register the appliance using the Wi-Fi network.
- Page 69 Memo...
- Page 70 Memo...
- Page 71 Memo...
Need help?
Do you have a question about the WK1310BST and is the answer not in the manual?
Questions and answers