Table of Contents
Advertisement
Scan to see the online manual.
OWNER'S MANUAL
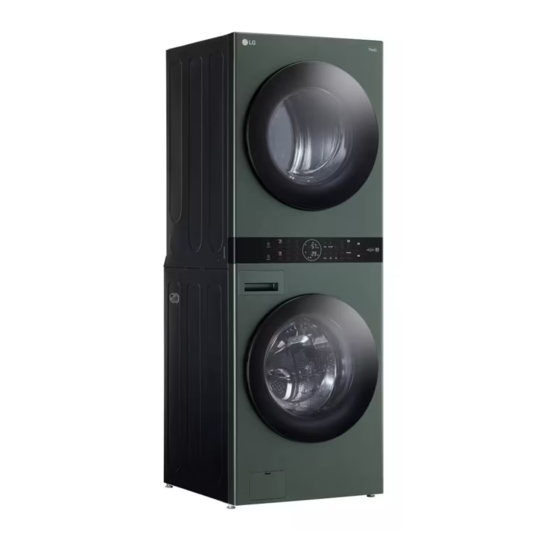
WASHTOWER
Read this owner's manual thoroughly before operating the
appliance and keep it handy for reference at all times.
ENGLISH
WKEX200H*A / WKGX201H*A
www.lg.com
MFL71485405
Copyright © 2020-2024 LG Electronics Inc. All Rights Reserved.
Rev.12_022824
Advertisement
Chapters
Table of Contents

Related Manuals for LG WKEX200HGA.AGGEEUS


Summary of Contents for LG WKEX200HGA.AGGEEUS
- Page 1 Scan to see the online manual. OWNER'S MANUAL WASHTOWER Read this owner's manual thoroughly before operating the appliance and keep it handy for reference at all times. ENGLISH WKEX200H*A / WKGX201H*A www.lg.com MFL71485405 Copyright © 2020-2024 LG Electronics Inc. All Rights Reserved. Rev.12_022824...
-
Page 2: Table Of Contents
Cycle Modifiers Options and Extra Functions 25 OPERATION-DRYER Using the Dryer Control Panel Dry Cycles Cycle Modifiers Options and Extra Functions 33 SMART FUNCTIONS Using LG ThinQ Application Smart Diagnosis Function 37 MAINTENANCE Washer Dryer 45 TROUBLESHOOTING Washer Dryer Common... - Page 3 IMPORTANT SAFETY INSTRUCTIONS IMPORTANT SAFETY INSTRUCTIONS READ ALL INSTRUCTIONS BEFORE USE Safety for a Dryer WARNING Fire Hazard Failure to follow safety warnings exactly could result in serious injury, death or property damage. Do not install a booster fan in the exhaust duct. Install all clothes dryers in accordance with the installation instructions of the manufacturer of the dryer.
- Page 4 IMPORTANT SAFETY INSTRUCTIONS WARNING - Risk of Fire Install the clothes dryer according to the manufacturer’s instructions and local codes. Clothes dryer installation must be performed by a qualified installer. • Do not install a clothes dryer with flexible plastic venting materials. If •...
-
Page 5: Important Safety Instructions
IMPORTANT SAFETY INSTRUCTIONS • To reduce the risk of severe injury or death, follow all installation instructions. • Refer to the INSTALLATION INSTRUCTIONS for detailed grounding procedures. Installation instructions are packed with the appliance for the installer’s reference. If the appliance is moved to a new location, have it checked and reinstalled by qualified service personnel. - Page 6 • Use this appliance only for its intended purpose. • If the product has been submerged in water, sitting in standing water, or waterlogged, do not come in contact with the product and immediately contact an LG Electronics Customer Information Center for instructions before resuming use.
- Page 7 IMPORTANT SAFETY INSTRUCTIONS • Do not put oily or greasy clothing, candles or flammable materials on top of the appliance. • Keep the area underneath and around your appliances free of combustible materials (lint, paper, rags, etc.), gasoline, chemicals and other flammable vapors and liquids. •...
- Page 8 IMPORTANT SAFETY INSTRUCTIONS • Disconnect this appliance from the power supply before cleaning and attempting any user maintenance. Turning the controls to the OFF position does not disconnect this appliance from the power supply. • Remove any dust or foreign matter from the power plug pins. •...
-
Page 9: Product Overview
PRODUCT OVERVIEW PRODUCT OVERVIEW Product Features The images in this guide may be different from the actual components and accessories, which are subject to change by the manufacturer without prior notice for product improvement purposes. Front View Rear View Control Panel Power Cord (for Gas Models) Lint Filter Terminal Block Access Panel (for Electric... - Page 10 • For your safety and for extended product life, use only authorized components. The manufacturer is not responsible for product Included Accessories malfunction, property damage or bodily injury caused by the use of separately purchased unauthorized components, parts, or non-LG products. Non-skid Pads Hole Caps Wrench Y Connector...
-
Page 11: Operation-Washer
OPERATION-WASHER OPERATION-WASHER Using the Washer WARNING • To reduce the risk of fire, electric shock, or injury to persons, read the SAFETY INSTRUCTIONS before operating this appliance. Operation Overview Adjust settings. • Default settings for the selected cycle can Sort laundry and load the washer. be changed, if desired, using the cycle modifier and option buttons. - Page 12 12 OPERATION-WASHER Sorting Laundry CAUTION • Clothing or articles that are waterproof or water-resistant must be washed in the Waterproof, Bedding, Bulky/Large, or Jumbo Wash cycle only. (Examples include water resistant clothing, mattress covers, outdoor clothes, and plastic mats.) Failure to do so may result in personal injury or damage to the washer, clothes, walls, floor, and surrounding objects due to abnormal vibration.
- Page 13 OPERATION-WASHER Category Label Directions Hand wash Machine wash, Normal cycle Washing Perm Press/Wrinkle Resistant setting (which has a cool down or cold spray before the slower spin) Gentle/Delicate setting (slow agitation and/or reduced wash time) Do not wash Do not wring Water Temperature Warm Cold/Cool...
-
Page 14: Adding Cleaning Products
14 OPERATION-WASHER Small Items Powdered detergent • Do not wash a single small item. Add enough Single-Use Detergent Packs / Gel or similar items to the load to prevent an out-of- Tablet Detergents balance load. • Wash small, light items in a mesh bag. Small •... - Page 15 OPERATION-WASHER - Make sure to remove them when using Gently close the detergent dispenser drawer powdered detergent. Powdered detergent will before starting the cycle. not dispense with the liquid detergent cup and • Slamming the drawer closed may result in insert in place.
- Page 16 16 OPERATION-WASHER Fabric Softener Compartment This compartment holds fabric softener, which is automatically dispensed during the final rinse cycle. Either powdered or liquid fabric softener may be used. • Do not exceed the maximum fill line. Using too much fabric softener may stain clothes or cause buildup on fabrics or in the washer.
-
Page 17: Control Panel
OPERATION-WASHER Control Panel Control Panel Features for the Washer Power On/Off Button • Press this button to turn the washer on or off. • Pressing this button during a cycle will cancel that cycle and any load settings will be lost. •... - Page 18 When the washer is connected to a home Wi-Fi network, the icon on the control panel is lit. - To connect the washer to the LG ThinQ application, press and hold the Temp. button for 3 seconds. Time and Status Display Wi-Fi Indicator •...
- Page 19 OPERATION-WASHER NOTE • The AI DD functionality may vary depending on the environment and model. Cycle Status Indicators • These LEDs will blink when a cycle is selected to indicate which stages will run. • When a cycle is running, the LED for the active stage will blink, and the LEDs for the remaining stages will remain steady.
-
Page 20: Wash Cycles
20 OPERATION-WASHER Wash Cycles The wash cycles are designed for specific types of wash loads. Select the cycle that best matches the load contents for maximum wash performance and fabric care. See Sorting Laundry section for best results, and follow the fabric care labels on your garments. For a guide to fabric care symbols, see Sorting Laundry section. - Page 21 Use a smartphone to download a specialized cycle to this cycle position. • The default cycle is Rinse+Spin. This cycle is also available for download. • Refer to the LG ThinQ application to see the cycles available for download. Wash Temp.
- Page 22 22 OPERATION-WASHER Cycle Steam Turbo Wash Extra Rinse Pre-wash Delicates Heavy Duty † Speed Wash Downloaded default: Rinse+Spin...
-
Page 23: Cycle Modifiers
OPERATION-WASHER Cycle Modifiers • Some fabrics, such as delicates, require a slower spin speed. About Modifier Buttons Soil Each cycle has default settings that are selected Adjusting the soil level setting will modify the cycle automatically. You can also customize these times and/or wash actions. - Page 24 24 OPERATION-WASHER • Once this function is set, all buttons are locked WARNING except the Power button. • Do not touch the door during steam cycles. The • When the controls are locked, and the door surface can become very hot and can cause remaining time are alternately shown on the severe burns.
-
Page 25: Operation-Dryer
OPERATION-DRYER OPERATION-DRYER Using the Dryer Begin Cycle. • Press the Start/Pause button to begin the WARNING cycle. The cycle can be paused at any time either by opening the door or by pressing • To reduce the risk of fire, electric shock, or injury the Start/Pause button. - Page 26 26 OPERATION-DRYER Fabric Care Labels • Close zippers, hooks and drawstrings to prevent these items from snagging or tangling on other Many articles of clothing include a fabric care label. clothes. Using the chart below, adjust the cycle and option selections to care for your clothing according to NOTE the manufacturer's recommendations.
-
Page 27: Control Panel
- With the LG ThinQ app, you can use a smartphone to control your appliance remotely. • Wi-Fi - Press and hold the Temp. button for 3 seconds to initiate the connection of the appliance to the LG ThinQ application. - Page 28 28 OPERATION-DRYER Time and Status Display Wi-Fi Indicator • This indicator is lit when the product is connected to a home Wi-Fi network. Remote Start Indicator • This indicator lights up when the Remote Start feature is activated. Flow Sense Indicator •...
-
Page 29: Dry Cycles
OPERATION-DRYER Dry Cycles Cycle Guide The appliance automatically sets the dryness level and temperature at the recommended setting for each cycle. The estimated time remaining will be shown in the display. • Temperature: Low > Medium Low > Medium > Medium High > High •... - Page 30 Use a smartphone to download a specialized cycle to this cycle position. • The default cycle is Perm. Press. This cycle is also available for download. • Refer to the LG ThinQ application to see the cycles available for download. Temp.
-
Page 31: Cycle Modifiers
OPERATION-DRYER Cycle Modifiers • A chime will sound twice and the LED will not light up if the selected option is not allowed for the selected cycle. About Modifier Buttons Each cycle has default settings that are selected Steam automatically. Customize these settings using the cycle modifier buttons. - Page 32 32 OPERATION-DRYER Control Lock NOTE Use this function to disable the controls. This • Do not use Steam Fresh with items such as function can prevent children from changing wool, wool blankets, leather jackets, silk, wet cycles or operating this dryer. clothes, lingerie, foam products, or electric blankets.
-
Page 33: Smart Functions
Internet service provider or refer to your has problems, you will receive a push wireless router manual. message. • LG ThinQ is not responsible for any network • Settings connection problems or any faults, malfunctions, - Set various options on the appliance and in the or errors caused by network connection. - Page 34 Cloud Cycle Using the Washer/Dryer Remotely Use the LG ThinQ app to start cycles with various options. Cloud cycles are deleted from the Remote Start appliance once the power is turned off. Use a smartphone to control your appliance remotely.
-
Page 35: Smart Diagnosis Tm Function
LG ThinQ application. the user’s authority to operate the equipment. • Launch the LG ThinQ application and select the FCC RF Radiation Exposure Statement Smart Diagnosis feature in the menu. Follow... - Page 36 36 SMART FUNCTIONS the instructions for audible diagnosis provided in the LG ThinQ application. Press the Power button to turn on the appliance. • Do not press any other buttons. Hold the mouthpiece of your phone in front of the appliance.
-
Page 37: Maintenance
MAINTENANCE MAINTENANCE WARNING • To reduce the risk of fire, electric shock, or injury to persons, read this entire owner’s manual, including the SAFETY INSTRUCTIONS, before operating this appliance. • Unplug the appliance before cleaning to avoid the risk of electric shock. Failure to follow this warning can cause serious injury, fire, electric shock, or death. - Page 38 38 MAINTENANCE • For other drum cleaning products, follow • Mineral scale and other spots may be removed the cleaner manufacturer’s instructions and from the stainless steel drum using a soft cloth recommendations. soaked in stainless steel cleaner. • Do not exceed the maximum fill line when •...
- Page 39 MAINTENANCE Cleaning the Water Inlet Filters • Do not use soap when cleaning the drawer and inserts. If the washer does not fill properly, an error message will appear on the display. The inlet valve filter screens could be clogged by hard water scale, Wipe off any moisture with a dry towel or sediment in the water supply, or other debris.
- Page 40 40 MAINTENANCE Rinse filters thoroughly and press them back into place. Flush then reattach the water hoses. • Before reattaching the water inlet hoses, flush them by running several gallons of water through them into a bucket or drain, preferably with the faucets wide open for maximum flow.
- Page 41 MAINTENANCE Add 1 gallon of nontoxic recreational vehicle (RV) antifreeze to the empty drum and close the door. • Never use automotive antifreeze. Turn on the washer and press the Spin button. Press the Start/Pause button to start the Close the drain pump filter cover. drain pump for 1 minute.
- Page 42 42 MAINTENANCE Immerse the water inlet hoses in hot water to thaw them. Reconnect the water inlet hoses to the water inlets of the washer and to the faucets. • See Connecting the Water Inlet Hoses for details. Turn on the faucets. Press the Power button to turn on the washer.
-
Page 43: Dryer
MAINTENANCE Dryer Cleaning the Lint Filter Always clean the lint from the filter after every Regular Cleaning cycle. Cleaning the Exterior Proper care of your appliance can extend its life. The outside of the appliance can be cleaned with warm water and a mild, nonabrasive household detergent. - Page 44 44 MAINTENANCE NOTE • NEVER operate the appliance without the lint filter in place.
-
Page 45: Troubleshooting
TROUBLESHOOTING TROUBLESHOOTING The appliance is equipped with an automatic error-monitoring system to detect and diagnose problems at an early stage. If the appliance does not function properly or does not function at all, check the following before you call for service. Washer FAQs: Frequently Asked Questions Why does my washer make loud banging noises while it is filling with water? - Page 46 46 TROUBLESHOOTING Problem Possible Cause & Solution Water supply connected with leak-limiting hoses. • The use of hoses designed to limit leaks is not recommended. Leak limiting hoses can trip INLET ERROR falsely and prevent the washer from filling. The load is too small. •...
- Page 47 TROUBLESHOOTING Problem Possible Cause & Solution Vibration sensor malfunctions. • Call for service. VIBRATION SENSOR ERROR Noises Problem Possible Cause & Solution Clicking Door lock sounds when the door locks or unlocks. • Normal operation Spraying or hissing Water spraying or circulating during the cycle •...
- Page 48 48 TROUBLESHOOTING Problem Possible Cause & Solution Banging noise when Plumbing in the home moves or flexes when the water valves in the washer shut off. the washer is filling • Water hammer is not caused by a defect in the washer. Install water hammer arrestors with water.
- Page 49 TROUBLESHOOTING Problem Possible Cause & Solution Incomplete or no Detergent compartments clogged from incorrect filling. dispensing of • Make sure that detergent and additives are put into the correct dispenser compartments. detergent • For all detergent types, always make sure that the dispenser drawer is fully closed before the start of the cycle.
- Page 50 50 TROUBLESHOOTING Problem Possible Cause & Solution Washer is not filling Filter is clogged. properly. • Make sure that inlet filters on the fill valves are not clogged. Refer to Cleaning the Water Inlet Filters in MAINTENANCE. Inlet hoses may be kinked. •...
- Page 51 TROUBLESHOOTING Problem Possible Cause & Solution Hot and cold water inlet hoses are reversed. Wrinkling • Hot water rinse can set wrinkles in garments. Check the inlet hose connectors. Staining Bleach or softener dispensed too soon. • Dispenser compartment was overfilled or closed too quickly, causing the bleach or softener to dispense immediately.
-
Page 52: Dryer
52 TROUBLESHOOTING Dryer FAQs: Frequently Asked Questions When I press a button, why does my dryer beep and then nothing happens? The Control Lock feature is turned on. To turn off Control Lock, turn the dryer on, then press and hold the button that has Control Lock on or under it for 3 seconds. - Page 53 TROUBLESHOOTING Operation Problem Possible Cause & Solution The Flow Sense After clearing the restrictions, the Flow Sense ) system requires multiple, consecutive cycles to determine that the performance value has improved before the ) indicator remains active after Flow Sense ) indicator is reset.
- Page 54 54 TROUBLESHOOTING Problem Possible Cause & Solution The appliance does Energy Saver option is selected. (on some models) not heat. • If using the Normal cycle, deselect the Energy Saver option that is selected by default. This option reduces energy use by adding an air dry section to the beginning of the cycle. It is normal to feel no heat at the beginning of the cycle while in Energy Saver mode.
- Page 55 TROUBLESHOOTING Problem Possible Cause & Solution Excess static in Fabric softener is not used or is used incorrectly. clothes after drying. • Use a fabric softener or the Reduce Static option, if available, to reduce static electricity. Be sure to follow the manufacturer’s instructions. Clothes dried too long (overdried).
- Page 56 56 TROUBLESHOOTING Indicator Messages Problem Possible Cause & Solution Flow Sense indicator Exhaust system is too long or has too many turns/restrictions. ) shows four bars • Install a shorter or straighter duct run. See the Installation Instructions for details. during the drying Partial blockage of the ductwork due to lint buildup or other foreign object.
-
Page 57: Common
During Wi-Fi setup, the app is requesting a password to connect to the product (on certain phones). • Locate the network name which starts with "LG" under Settings > Networks. Note the last part of the network name. - If the network name looks like LGE_Appliance_XX-XX-XX, enter lge12345. -
Page 58: Limited Warranty
Should your LG Washer/Dryer ("Product") fail due to a defect in materials or workmanship under normal and proper use, during the warranty period set forth below, LG will, at its option, repair or replace the Product. This limited warranty is valid only to the original retail purchaser of the Product ("You") and applies only when purchased lawfully and used within the United States including U.S. - Page 59 Or by mail: LG Electronics Customer Service P.O. Box 240007 Huntsville, AL 35813 ATTN: CIC PROCEDURE FOR RESOLVING DISPUTES: ALL DISPUTES BETWEEN YOU AND LG ARISING OUT OF OR RELATING IN ANY WAY TO THIS LIMITED WARRANTY OR THE PRODUCT SHALL BE RESOLVED EXCLUSIVELY THROUGH BINDING ARBITRATION, AND NOT IN A COURT OF GENERAL JURISDICTION.
- Page 60 Notice of Dispute. In the event you intend to commence an arbitration proceeding, you must first notify LG in writing at least 30 days in advance of initiating the arbitration by sending a letter to LG at LG Electronics USA, Inc. Attn: Legal Department- Arbitration 111 Sylvan Avenue, Englewood Cliffs, NJ 07632.
- Page 61 LIMITED WARRANTY Opt Out. You may opt out of this dispute resolution procedure. If you opt out, neither you nor LG can require the other to participate in an arbitration proceeding. To opt out, you must send notice to LG no later than 30 calendar days from the date of the first consumer purchaser’s purchase of the product by...
- Page 62 62 Memo...
- Page 63 Memo...
- Page 64 LG Customer Information Center For inquiries or comments, visit www.lg.com or call: U.S.A. 1-800-243-0000 1-888-542-2623 CANADA Register your product Online! www.lg.com...
- Page 65 INSTALLATION MANUAL WASHTOWER Read this installation manual thoroughly before installing the appliance and keep it handy for reference at all times. ENGLISH WKEX200H*A / WKGX201H*A www.lg.com MFL71728904 Copyright © 2020-2023 LG Electronics Inc. All Rights Reserved. Rev.10_071423...
- Page 66 TABLE OF CONTENTS IMPORTANT SAFETY INSTRUCTIONS READ ALL INSTRUCTIONS BEFORE USE WARNING STATEMENTS CAUTION STATEMENTS PRODUCT OVERVIEW Product Features 11 INSTALLATION Before Installing Choosing the Proper Location Unpacking and Removing Shipping Material Connecting Electric Dryers Installing the Dryer Side Vent Kit Venting the Dryer Connecting Gas Dryers Connecting the Water Inlet Hoses...
- Page 67 IMPORTANT SAFETY INSTRUCTIONS IMPORTANT SAFETY INSTRUCTIONS READ ALL INSTRUCTIONS BEFORE USE Safety for a Dryer WARNING Fire Hazard Failure to follow safety warnings exactly could result in serious injury, death or property damage. Do not install a booster fan in the exhaust duct. Install all clothes dryers in accordance with the installation instructions of the manufacturer of the dryer.
- Page 68 IMPORTANT SAFETY INSTRUCTIONS WARNING - Risk of Fire Install the clothes dryer according to the manufacturer’s instructions and local codes. Clothes dryer installation must be performed by a qualified installer. • Do not install a clothes dryer with flexible plastic venting materials. If •...
-
Page 69: Important Safety Instructions
IMPORTANT SAFETY INSTRUCTIONS • To reduce the risk of severe injury or death, follow all installation instructions. • Refer to the INSTALLATION INSTRUCTIONS for detailed grounding procedures. Installation instructions are packed with the appliance for the installer’s reference. If the appliance is moved to a new location, have it checked and reinstalled by qualified service personnel. - Page 70 • Use this appliance only for its intended purpose. • If the product has been submerged in water, sitting in standing water, or waterlogged, do not come in contact with the product and immediately contact an LG Electronics Customer Information Center for instructions before resuming use.
- Page 71 IMPORTANT SAFETY INSTRUCTIONS • Do not store or use gasoline or other flammable vapors and liquids in the vicinity of this or any other appliance. • Do not mix chlorine bleach with ammonia or acids such as vinegar. Follow package directions when using laundry products.
-
Page 72: Caution Statements
IMPORTANT SAFETY INSTRUCTIONS • Remove the door(s) before the appliance is removed from service or discarded to avoid the danger of children or small animals getting trapped inside. • Make sure the dispenser drawer or lid is closed at all times when not being filled with laundry products. •... -
Page 73: Product Overview
PRODUCT OVERVIEW PRODUCT OVERVIEW Product Features The images in this guide may be different from the actual components and accessories, which are subject to change by the manufacturer without prior notice for product improvement purposes. Front View Rear View Control Panel Power Cord (for Gas Models) Lint Filter Terminal Block Access Panel (for Electric... - Page 74 • For your safety and for extended product life, use only authorized components. The manufacturer is not responsible for product Included Accessories malfunction, property damage or bodily injury caused by the use of separately purchased unauthorized components, parts, or non-LG products. Non-skid Pads Hole Caps Wrench Y Connector...
-
Page 75: Installation
INSTALLATION INSTALLATION Before Installing Installation Overview Please read the following installation instructions first after purchasing this appliance or transporting it to another location. Choosing the Proper Location WARNING Unpacking and Removing Shipping Material • Read all installation instructions completely before installing and operating the appliance. It Connecting the Electric Dryer is important that you review this entire manual before installing and using the appliance. - Page 76 12 INSTALLATION WARNING • Store and install the appliance where it will not be exposed to temperatures below freezing or exposed to outdoor weather conditions. Failure to follow this warning can cause product or part failure, serious injury, fire, electric shock, or death.
-
Page 77: Choosing The Proper Location
INSTALLATION Choosing the Proper for wall, door, or floor moldings that may increase the required clearances. Location Check the following requirements for the install location before installing the appliance. • Allow for sufficient space between the walls and the appliance for installation. •... - Page 78 14 INSTALLATION Exhaust Installation spacing for Recessed Area or Closet Installation • Choose a location that allows for proper exhaust installation. A gas dryer must be exhausted to the outdoors. Power Outlet • The power outlet must be within 60 inches (1.5 m) of either side of the appliance.
-
Page 79: Unpacking And Removing Shipping Material
INSTALLATION Unpacking and Removing Shipping Material Unpacking Shipping Material * This feature is only available on some models. Lifting the Appliance off the Foam Base • After removing the carton and shipping Install the hole caps. material, lift the appliance off the foam base. •... - Page 80 16 INSTALLATION cord is to be used, or where grounding through WARNING the neutral conductor is prohibited. • The power cord (pigtail) connection between the wall receptacle and the dryer terminal block IS NOT supplied with the dryer. Type of pigtail and Four-Wire Power Cord gauge of wire must conform to local codes and with instructions on the following pages.
- Page 81 INSTALLATION Attach the power cord ground wire to the Remove the terminal block access cover on green ground screw. the upper back of the appliance. Tighten all screws securely. Install UL-listed strain relief into the power cord through-hole. Reinstall the terminal block access cover. Thread the 4-wire #10 AWG minimum copper power cable prepared in step 1 through the strain relief.
- Page 82 18 INSTALLATION UL-Listed 3-Wire Power Cord Attach the two hot leads (black and red) of the power cord to the outer terminal block screws. Attach the neutral (white) wire to the center terminal block screw. White Wire moved from Ground Screw Hot Leads of Power Cord (Black and Red) Connect the external ground (if required by local codes) to the green ground screw.
-
Page 83: Installing The Dryer Side Vent Kit
NOTE screws. • An adapter kit, part number 383EEL9001B, may be purchased from your LG retailer. This kit Attach the neutral (white) wire to the center contains duct components necessary to change the appliance vent location. -
Page 84: Venting The Dryer
20 INSTALLATION • To reduce the risk of fire, combustion, or accumulation of combustible gases, DO NOT exhaust dryer air into an enclosed and unventilated area, such as an attic, wall, ceiling, crawl space, chimney, gas vent, or concealed space of a building. •... -
Page 85: Connecting Gas Dryers
INSTALLATION Ductwork Number of 90° Maximum length of 4-inch diameter rigid Wall Cap Type Elbows metal duct Recommended 65 ft. (19.8 m) 55 ft. (16.8 m) 47 ft. (14.3 m) 36 ft. (11.0 m) 28 ft. (8.5 m) a: 4 ‘’ (10 cm) Use for only short run installations 55 ft. - Page 86 22 INSTALLATION Electrical Requirements for Gas tubing should be used for lengths in excess of 20 ft. (6.1 m). Models • To prevent contamination of the gas valve, purge the gas supply of air and sediment before WARNING connecting the gas supply to the dryer. Before •...
-
Page 87: Connecting The Water Inlet Hoses
Old hoses could Turn on your laundry room’s gas supply. leak or burst causing flooding and property damage. Contact an LG Customer Information Center for assistance in buying hoses. Check all pipe connections (both internal and external) for gas leaks with a noncorrosive leak-detection fluid. -
Page 88: Connecting The Drain Hose
24 INSTALLATION Required Accessories Flush out the inlet hoses. • After the hoses are connected, turn on the water faucets and flush out any foreign substances such as dirt, sand, or sawdust. • Let the water drain into a bucket, and check the water temperature to make sure you’ve Hot and Cold Water Hoses (for Washer) connected the hoses to the correct faucets. - Page 89 INSTALLATION WARNING • The drain hose should always be properly secured. Failure to properly secure the drain hose can result in flooding and property damage. NOTE • The drain must be installed in accordance with any applicable local codes and regulations. Use the provided tie strap to secure the •...
-
Page 90: Leveling The Appliance
26 INSTALLATION How to Level the Appliance Hang the end of the drain hose over the side of the laundry tub. Position the appliance in its final location. • Take special care not to pinch, strain, or crush the water and drain hoses. If you have a carpenter’s level , you can use it to check that the appliance is level. -
Page 91: Final Installation Check
INSTALLATION Final Installation Check WARNING • Do not raise the front of the appliance with a Connecting the Washer to the wood block or similar object. Doing so can cause Power Supply serious injury or death. Plug the washer into a 120 VAC, 60 Hz grounded 3- prong outlet. - Page 92 28 INSTALLATION Load the washer with 6 thick bath towels NOTE (approximately 6 pounds). • If all air is not purged from the gas line, the gas igniter may turn off before the main burner ignites. If this happens, the igniter will reattempt Press the Power button.
- Page 93 INSTALLATION also be shown with error codes. See the Error chart on the next page for error code details Possible Cause & Solution Code and solutions. Electric dryer power cord is not • If the Flow Sense( ) display indicates that connected correctly, or house power the exhaust system is severely restricted, supply is incorrect.
- Page 94 30 INSTALLATION Too many elbows or exhaust too long Check for blockages and lint buildup. Make sure the ductwork is not crushed or restricted.
-
Page 95: Appendix
APPENDIX APPENDIX Disassembly Disassembling the Washer and Dryer The washer and dryer cannot be disassembled and installed for use side by side. If it is necessary to disassemble the appliance in order to move or reinstall it, follow these instructions. Disconnect the wire harnesses from the WARNING washer... - Page 96 32 APPENDIX WARNING • Protect your hands and arms from sharp edges of the panel frame exposed on the top of the washer. • To avoid strain injuries, use 2 or more people to lift the dryer. NOTE • When assembling the appliance, proceed in reverse order.
- Page 97 Memo...
- Page 98 34 Memo...
- Page 99 Memo...
- Page 100 LG Customer Information Center For inquiries or comments, visit www.lg.com or call: U.S.A. 1-800-243-0000 1-888-542-2623 CANADA Register your product Online! www.lg.com...
Need help?
Do you have a question about the WKEX200HGA.AGGEEUS and is the answer not in the manual?
Questions and answers