Table of Contents
Advertisement
Available languages
Available languages
Quick Links
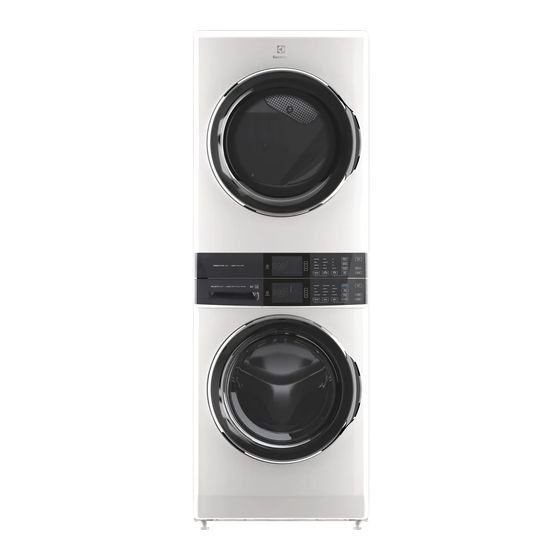
Installation* for Electrolux Laundry Center
*Please refer to the Use & Care manual provided with this appliance for further details.
WARNING - RISK OF FIRE
Read all the following instructions before installing and using this appliance.
• The installation and service of this Laundry Center must be performed by a qualified installer, service
agency or the gas supplier.
• THIS EQUIPMENT HAS TWO CONNECTIONS TO THE POWER SUPPLY. DISCONNECT BOTH
POWER SUPPLY CONNECTIONS BEFORE SERVICING. Each appliance shall be connected to an
individual branch circuit only. The washer and dryer must be on separate circuits.
• DO NOT install a clothes dryer with flexible plastic or flexible foil venting material. Flexible venting
materials are known to collapse, be easily crushed and trap lint. These conditions will obstruct clothes
dryer airflow and increase the risk of fire.
• Ensure the entire dryer exhaust system is clean and free of lint and debris prior to the installation of your new
Laundry Center. The entire exhaust system should be inspected and cleaned a minimum of every 18 months
with normal usage. Failure to comply with cleaning your exhaust system will increase the RISK of FIRE.
• For your safety the information in this manual must be followed to minimize the risk of fire or explosion
or to prevent property damage, personal injury or loss of life. Do not store or use gasoline or other
flammable vapors and liquids in the vicinity of this or any other appliance.
• Install the appliance according to the manufacturer's instructions and local codes.
• The electrical service to the appliance must conform with local codes and ordinances and the latest edition of
the National Electrical Code, ANSI/NFPA 70, or in Canada, the Canadian Electrical Code CSA C22.1 part 1.
• To avoid back or other injury, have more than one person move or lift the appliance.
• Do not stack this appliance on a pedestal.
• Turn off power at the circuit breaker or fuse box before installation.
The instructions in this manual and all other literature included with this appliance are not meant to cover
every possible condition and situation that may occur. Good safe practice and caution MUST be applied
when installing, operating and maintaining any appliance.
1
Removing Foam Packaging and Shipping Hardware
Tape doors closed. Do not allow the unit to fall.
1. Carefully tilt
3. Return unit
forward.
upright.
2. Remove
4. Twist and
plug.
slide unit to
rear of pad.
6. Return unit
7. Remove
upright.
and save
the shipping
bolts.
8. Insert hole
plugs (in
bag).
2
Leveling the Laundry Center
1. Place a level on top of the laundry center with the
unit within 3 ft (1m) of the final location.
2. Use an adjustable wrench to adjust the leveling
legs so the unit is level front-to-rear and
side-to-side, and stable corner-to-corner.
3. Press down on alternate corners and sides and feel
for the slightest movement. Adjust the appropriate
leg(s) so the unit sits solidly on the floor on ALL four
legs. Keep the leveling leg extension at a minimum
for best performance of the laundry center.
For support in the U.S. call 1-877-4ELECTROLUX (1-877-435-3287) or visit www.electroluxappliances.com. For support in Canada call 1-800-265-8352 or visit www.electroluxappliances.ca.
3
Connecting Water Line (steam dryer models only)
If this is not a steam model, skip to section 4
1. Inspect all hoses for rubber washers prior to use.
2. Run water from cold outlet to clear contaminants.
3. Connect the dryer Assembly Hose Kit hose extensions
from the cold supply to the "Y" connector, then from the
"Y" connector to the water inlet on the dryer.
4. Attach the washer cold water supply line to the "Y"
connector.
5. Tighten all connections by hand, then tighten additional
2/3 turn with pliers.
6. Turn on water and check for leaks.
Assembly Hose Kit P/N 5304495002 is not included with
purchase of steam model and MUST be
purchased separately.
For detailed information, refer to "Connecting the Water (Steam Models Only)" in the
Installation sections of the Use & Care manual provided with this laundry center.
4
Connecting the Water line (washer)
• Skip steps 1 and 2 below if this model has a
steam dryer.
• Inlet hoses are not included and MUST be
purchased separately.
1. Run some water from the hot and cold faucets
to flush the water lines and remove particles
that might clog the water valve screens and
to determine which faucet is hot and which is
cold supply.
2. Check to ensure that the inlet hoses have the
rubber washer firmly in place.
5. Tilt backward
3. Connect the HOT hose to the RED connection
and remove
on the washer and the COLD hose to the
pad.
BLUE connection on the washer. Tighten by
hand until snug. Then tighten each supply
connection another 2/3 turn with pliers. Do
not cross thread or over-tighten these
connections.
For detailed information, refer to "Connecting the Water" in the Installation sections of
the Use & Care manual provided with this laundry center.
5
1
2
3
Connecting the Drain (Washer)
4
2
3
4
1. Verify the anti-siphon disc is in place.
2. Form a "U" shape on the end of the drain hose with the hose pointed toward the drain.
Place the formed end in a laundry tub or a standpipe and secure the drain hose with
the cable tie (provided in the enclosure package) to the standpipe, inlet hose, laundry
tub, etc. so the hose does not pull out from the force of the water.
3. Run the washer through a complete cycle, checking for water leaks and proper
operation.
NOTE
The standpipe inside diameter must be 1-1/4" (3.2 cm) minimum. There
must be an air gap around the drain hose in the standpipe. A snug hose fit
can cause a siphoning action.
For detailed information, refer to "Connecting the Drain" in
the Installation sections of the Use & Care manual provided
with this laundry center.
Short Hose
"Y" Connector
Water Inlet
(steam)
Cold Water Supply
Hose to Washer
4. Connect the HOT inlet
hose to the HOT water
supply and the COLD
inlet hose to the COLD
water supply, or to the
"Y" connector (section 3)
if this is a steam model.
5. Tighten by hand until
snug. Then tighten
each supply connection
another
2/3 turn with pliers.
Do not bend, kink
or pinch water inlet
hoses.
6. Turn on the water and check for leaks.
Anti-Siphon
Disc
Insert Less
Than 8.5"
(21.5 cm)
Cable Tie
Leave these instructions with the customer.
TO INSTALLER:
SAVE THESE INSTRUCTIONS FOR FUTURE REFERENCE.
6
Electrical Requirements
Electric Dryer
1. CIRCUIT - Individual 30A branch circuit fused with 30A time delay fuses or circuit breakers.
2. POWER SUPPLY - 3-wire or 4-wire, 240V, single phase, 60Hz, AC. The power cord is NOT supplied with unit.
3. OUTLET RECEPTACLE - NEMA 10-30R or NEMA 14-30R receptacle to be located so the power
supply cord is accessible when the dryer is in the installed position.
Gas Dryer and Washer
1. CIRCUIT - Individual, properly polarized and grounded 15A branch circuit fused with 15A time delay
fuse or circuit breaker.
2. POWER SUPPLY - 2 wire, with ground, 120V single phase, 60Hz, AC.
3. OUTLET RECEPTACLE - Properly grounded 3-prong receptacle to be located so the power supply
cord is accessible when the washer is in an installed position.
7
Connecting or Constructing Vent Exhaust (Dryer)
Exhaust system must be
vented outside with approved
vent hood. No screen or grate
of any mesh size is allowed
to cover the exhaust opening.
• Use only 4 inch rigid or semi-rigid metal ducting.
• Clean lint from duct system.
• Use only metal foil tape to connect ducts (no screws).
4" (10.2 cm)
• Use 4" (10.2 cm) clamp to connect dryer & exhaust
0
system.
• Use 90° quick-turn elbow to vent left or right from
1
dryer. Never exceed more than 4 - 90˚ elbows in
2
the exhaust duct system.
See Clearance Requirements in the Pre-Installation
3
sections of the Use & Care manual provided with this
4
laundry center.
8
Connecting to Gas or Electric (Dryer)
Gas Dryer
Electric Dryer
1. Apply approved thread sealant.
2. Wrench-tighten gas line.
3. Open gas valve and check for leaks with soapy
30 AMP
water.
Don't Move
White Wire
Open
Close
Manual Shutoff
For detailed information, refer to the
DANGER
Installation sections of the Use & Care
manual provided with this laundry
center.
If using LP (Liquid Propane) STOP and install the
LP kit before operating your gas dryer.
9
Completing the Installation
1. Plug both power cords into grounded outlets.
2. Turn on the power at a circuit breaker/fuse box. Carefully slide the laundry center to its final position.
Recheck leveling and rock corners for stability. See "2 Leveling the Laundry Center". Remove and
discard any tape on doors.
3. Run the washer through a complete cycle, checking for water leaks and proper operation.
4. Run the dryer for a few minutes to check for proper operation.
5. If you have any questions during initial operation, please review the troubleshooting section in the Use
& Care manual before calling for service.
MAXIMUM LENGTH*
of 4" (10.2 cm) Rigid Metal Duct
VENT HOOD TYPE
(Preferred)
2.5" (6.35 cm)
louvered
125 ft. (38 m)
110 ft. (33.5 m)
115 ft. (35 m)
100 ft. (30.5 m)
105 ft. (32 m)
90 ft. (27.5 m)
95 ft. (29 m)
80 ft. (24.5 m)
85 ft. (26 m)
70 ft. (21.5 m)
30 AMP
Move
White Wire
White
Wire
Green
Wire
Black
or
Red
Wire
Install
U.L.-Approved Strain Relief
A25903101 (2303)
Advertisement
Table of Contents

Related Manuals for Electrolux ELTE760CAW


Summary of Contents for Electrolux ELTE760CAW
- Page 1 Installation* for Electrolux Laundry Center Leave these instructions with the customer. TO INSTALLER: SAVE THESE INSTRUCTIONS FOR FUTURE REFERENCE. *Please refer to the Use & Care manual provided with this appliance for further details. Electrical Requirements WARNING - RISK OF FIRE...
- Page 2 Installation* de l’ensemble laveuse/sécheuse Electrolux À L’INSTALLATEUR : Laissez ces instructions au client. CONSERVEZ CES INSTRUCTIONS POUR CONSULTATION ULTÉRIEURE. *Veuillez consulter le manuel d’utilisation et d’entretien fourni avec cet appareil pour plus de détails. Exigences électriques AVERTISSEMENT – RISQUE D’INCENDIE Raccordement de l’eau (modèles de sécheuses à vapeur seulement) Sécheuse électrique...
- Page 3 Instalación* para Electrolux Laundry Center AL INSTALADOR: Deje estas instrucciones al cliente. GUARDE ESTAS INSTRUCCIONES PARA PODER CONSULTARLAS EN EL FUTURO. * Consulte el manual de uso y cuidado proporcionado con este electrodoméstico para obtener más detalles. Conexión de la tubería de agua Requisitos eléctricos...
Need help?
Do you have a question about the ELTE760CAW and is the answer not in the manual?
Questions and answers