Electrolux EWX147410W User Manual
Hide thumbs
Also See for EWX147410W:
- User manual (64 pages) ,
- User manual (36 pages) ,
- User manual (36 pages)
Table of Contents
Advertisement
Advertisement
Table of Contents

Related Manuals for Electrolux EWX147410W


Summary of Contents for Electrolux EWX147410W
- Page 1 EWX147410W EN WASHER DRYER USER MANUAL...
-
Page 2: Table Of Contents
17. TECHNICAL DATA...................37 WE’RE THINKING OF YOU Thank you for purchasing an Electrolux appliance. You’ve chosen a product that brings with it decades of professional experience and innovation. Ingenious and stylish, it has been designed with you in mind. So whenever you use it, you can be safe in the knowledge that you’ll get great results every time. -
Page 3: Safety Information
ENGLISH SAFETY INFORMATION Before the installation and use of the appliance, carefully read the supplied instructions. The manufacturer is not responsible if an incorrect installation and use causes injuries and damages. Always keep the instructions with the appliance for future reference. 1.1 Children and vulnerable people safety WARNING! Risk of suffocation, injury or permanent disability. - Page 4 Connect the mains plug to the mains socket only at the • end of the installation. Make sure that there is access to the mains plug after the installation. The ventilation openings in the base (if applicable) must •...
-
Page 5: Safety Instructions
ENGLISH Fabric softeners, or similar products, should be used as • specified by the fabric softener instructions. Remove all objects from pockets such as lighters and • matches. Never stop the wash dryer before the end of the drying • cycle unless all items are quickly removed and spread out so that the heat is dissipated. -
Page 6: Water Connection
• Do not pull the mains cable to • Do not touch the glass of the door disconnect the appliance. Always pull while a programme operates. The the mains plug. glass can be hot. • Do not touch the mains cable or the •... -
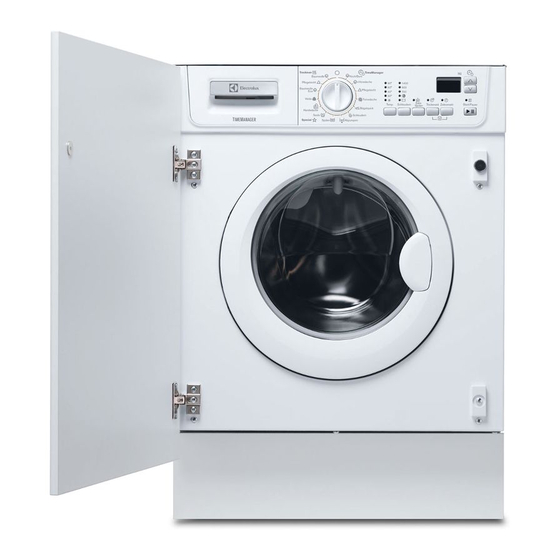
Page 7: Product Description
ENGLISH 3. PRODUCT DESCRIPTION 3.1 Appliance overview Detergent dispenser Turn the device clockwise, until the groove is horizontal. Control panel You cannot close the door. Door handle Rating plate Drain pump filter Feet for the appliance level Water drain hose Mains cable Water inlet hose To close the door, turn the device... -
Page 8: Control Panel
4. CONTROL PANEL 4.1 Control panel description 90° 1400 60° 40° 30° Programme knob Drying time button - Drying time Temperature button - Temperature Delay start button - Delay Start Cold position Display Spin reduction button - Spin Time Manager buttons •... - Page 9 ENGLISH Soil degree indicators: Intensive Normal Daily Light Quick Quick Refresh Super Refresh When you select a programme, the display shows the indicator of the soil degree automatically proposed by the appliance. Child safety lock (see chapter «Settings»). Digit area: •...
-
Page 10: Programmes
Washing programme phase indicators: Wash Rinses Drain Spin Drying By selecting the wash programme, the washing programme indicators corre- sponding to the various phases making up the programme are shown. After you have pressed the Start/Pause button, only the indicator of the running phase stays on. - Page 11 ENGLISH Programme Maximum Programme description Temperature load (Type of load and soil level) range Reduced load Maximum spin speed 7 kg To spin the laundry and to drain the water in the drum. All fabrics. 1400 rpm Spin To drain the water in the drum. All fabrics. 7 kg Drain 7 kg...
- Page 12 Programme Maximum Programme description Temperature load (Type of load and soil level) range Reduced load Maximum spin speed Drying programme for cotton items. 4 kg Cottons Drying 1) If you select the Super Quick, Refresh or Super Refresh option by pressing buttons Time Manager, we recommend that you reduce the maximum load as indicated in the programmes for cottons, synthetics and delicates.
-
Page 13: Consumption Values
ENGLISH 5.2 Programmes for timed drying Dryness Level Type of fabric Load Spin Suggested (kg) speed duration (rpm) (mins) Extra Dry Cottons and Linen 1400 215 - 220 For towelling materials (bathrobes, bath towels, 1400 160 - 180 etc) 1400 95 - 105 Cottons and Linen 1400... -
Page 14: Options
Programmes Load Energy Water con- Approximate pro- (kg) con- sumption gramme duration sumption (litre) (minutes) (kWh) Wool/Handwash 30 °C 0.25 1) «Cotton Energy Saving programme » at 60°C with a load of 7 kg is the reference pro- gramme for the data entered in the energy label, in compliance with EEC 92/75 standards. -
Page 15: Settings
ENGLISH The button indicator illuminates. The display shows the selected delay value. Washing Type of fab- Soil level cycle rics 7.7 Time Manager To refresh Super Re- Press this button to increase or decrease few items on- fresh the programme duration proposed by the appliance. -
Page 16: Before First Use
• Before you press Start/Pause : the indicator comes on/goes off in appliance cannot start. the display. You can activate this option in two ways: • After you press Start/Pause: the options and the programme knob are locked. 9. BEFORE FIRST USE 1. -
Page 17: Starting A Programme
ENGLISH 10.4 Switching the appliance on To cancel the Delay Start: a. Press the Start/Pause button to and setting a programme set the appliance to pause. The related indicator flashes. 1. Turn the programme knob to switch b. Press the Delay Start button until the appliance on and to set the required programme: the display shows... -
Page 18: Daily Use - Drying Only
10.8 Cancelling a running • In the display the value come programme on. The Start/Pause indicator goes off. • When the door lock indicator goes 1. Turn the programme knob to On/Off off, you can open the door. position to cancel the programme. -
Page 19: Daily Use - Washing & Drying
ENGLISH 11.1 Timed drying The indicator illuminates. The door is locked. WARNING! If you set only 10 minutes of Make sure that the water drying phase, the appliance tap is open. performs only a cooling The recommended load size is 4 kg for phase. -
Page 20: Hints And Tips
12.2 Non-Stop programme - 12.3 End of the programme Washing and Timed Drying The appliance stops automatically. The acoustic signals sound (if they are active). 1. Load the laundry one item at a time. For more information see 'At the end of Turn the programme knob to the set the drying programme "... -
Page 21: Ecological Hints
ENGLISH • Empty the pockets and unfold the • If your appliance has not the detergent items. dispenser with the flap device, add the • Turn inside out multilayered fabrics, liquid detergents with a dosing ball wool and items with painted (supplied by the detergent's illustrations. -
Page 22: Care And Cleaning
13.10 Additional drying • Anoraks. • Sleeping bags If, at the end of the drying programme, the • Fabrics with residue of hair sprays, nail laundry is still damp, set a short drying solvents or similar. cycle again. • Garments with foam-rubber or materials similar to foam-rubber. -
Page 23: Door Seal
ENGLISH 14.4 Door seal Regularly examine the seal and remove all objects from the inner part. 14.5 Cleaning the detergent dispenser 14.6 Cleaning the drain filter WARNING! Before unscrewing the pump The pump should be inspected regularly cover, switch the appliance and particularly if: off and remove the mains •... - Page 24 1. Unplug the appliance. WARNING! 2. If it is necessary, wait until the water When the appliance is in use has cooled down and depending on the programme selected there can be hot water in the filter. Never remove the filter cover...
-
Page 25: Frost Precautions
ENGLISH 7. Check carefully whether the pump impeller rotates (it rotates jerkily). If it doesn’t rotate, please contact your Service Centre. 8. Put the cap back on the emergency emptying hose and place the latter back in its seat. Replace the filter into the pump by inserting it correctly into the special guides. -
Page 26: Troubleshooting
2. Close the water tap. 1. Disconnect the mains plug from the 3. Place the end of the emergency mains socket. emptying hose and that of the inlet 2. Close the water tap. hose in a bowl placed on the floor and 3. - Page 27 ENGLISH 15.2 Possible failures Problem Possible cause/solution The programme does Make sure that the mains plug is connected to the mains not start. socket. Make sure that the appliance door is closed. Make sure that there is not a damaged fuse in the fuse box. Make sure that the Start/Pause has been pressed.
- Page 28 Problem Possible cause/solution There is water on the Adjust manually the items in the tub and start the spin phase floor. again. This problem may be caused by balance problems. Make sure that the couplings of the water hoses are tight and there is not water leakages.
-
Page 29: Installation
ENGLISH Problem Possible cause/solution In case of an excessive • Thoroughly clean the empty drum, the gasket and the amount of fluff in the door with a wet rag. drum, refer to section • Perform a rinse cycle. «FLUFF IN THE FAB- •... - Page 30 Remove the internal film. Open the door. Remove the polystyrene piece from the door seal and all the items from the drum. Put one of the polystyrene packaging elements on the floor behind the appliance. Carefully put down the appliance with the rear side on it.
- Page 31 ENGLISH Remove the polystyrene block fitted on the door seal (if present). Pull out all items from the drum. Remove the power supply cable and the drain hose from the hose holders. Remove the three bolts. Use the key supplied with the appliance.
-
Page 32: Positioning And Levelling
16.2 Positioning and levelling • Install the appliance on a flat hard floor. • Make sure that air circulation around the appliance is not impeded by carpets, rugs etc. • Level the appliance by raising or lowering the feet. -
Page 33: Water Drainage
ENGLISH • Connect the water inlet hose to the cold water tap with 3/4 thread. CAUTION! Make sure that there are no leaks from the couplings. Do not use an extension hose if the inlet hose is too short. Contact the service centre for the replacement of the inlet hose. - Page 34 To a stand pipe with vent-hole • Directly into a drain pipe at a height of not less than 60 cm (23.6”) and not more than 100 cm (39.3”). Refer to the illustration. • The end of the drain hose must always be ventilated , i.e.
-
Page 35: Preparation And Assembly Of The Door
ENGLISH 16.6 Building in This appliance has been designed to be built 600 mm into the kitchen furniture. The recess should have the dimensions shown in this picture. min. 596 mm 555 mm 560 mm min. 820 mm 818 mm 75 mm 60 mm 170 mm... - Page 36 Hinges To mount the hinges it is necessary to drill two holes (dia. 35 mm, depth12.5-14 mm depending on the depth of door furniture) on the inner side of the door. The distance between the holes hobs fixing centres must be 416 mm. The distance from...
-
Page 37: Technical Data
ENGLISH 17. TECHNICAL DATA Dimension Width/ Height/ Depth/ 596 mm/ 820 mm/ 544 mm/ 544 Total depth Electrical connection Voltage 220-230 V Overall power 2000 W Fuse 10 A Frequency 50 Hz Level of protection against ingress of solid parti- IPX4 cles and moisture ensured by the protective cov- er, except where the low voltage equipment has... - Page 38 www.electrolux.com...
- Page 39 ENGLISH...
- Page 40 www.electrolux.com/shop...
Need help?
Do you have a question about the EWX147410W and is the answer not in the manual?
Questions and answers