Table of Contents
Advertisement
8EAR8
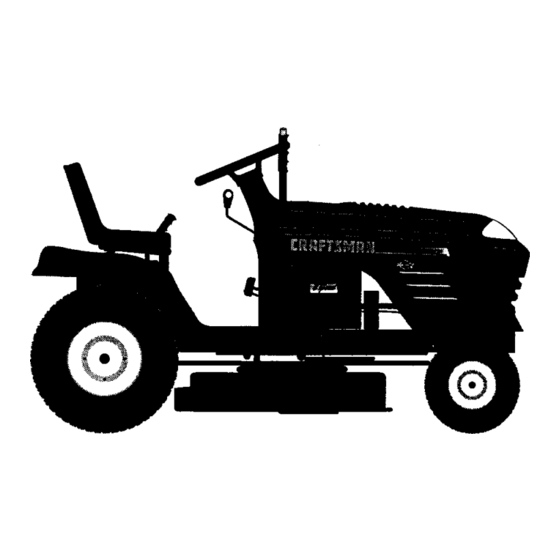
£RnFTXMaN°
Vl
11
MODEL NUMBER 917.259561
OWNER'S MANUAL
• Assembly
• Operation
• Customer Responsibilities
• Service and Adjustments
oRepair Parts
CAUTION:
Read
and follow
all safety
rules and instructions
before operating
this equipment.
FOR CONSUMER ASSISTANCE HOT LINE, CALL THIS TOLL FREE NUMBER: 1-800-659-5917
Advertisement
Table of Contents

Related Manuals for Craftsman CRAFTSMAN 917.259561


Summary of Contents for Craftsman CRAFTSMAN 917.259561
- Page 1 8EAR8 £RnFTXMaN° MODEL NUMBER 917.259561 • Assembly • Operation • Customer Responsibilities • Service and Adjustments oRepair Parts CAUTION: Read and follow FOR CONSUMER ASSISTANCE HOT LINE, CALL THIS TOLL FREE NUMBER: 1-800-659-5917 all safety rules and instructions OWNER'S MANUAL before operating this equipment.
- Page 2 Safe Operation IMPORTANT: THIS CUTTING MACHINE FAILURE TO OBSERVE THE FOLLOWING GENERAL OPERATION • Read, understand, and follow all instructions in the manual and on the machine before starting. • Only allow responsible adults, who are familiar with the instructions, to operate the machine. Clear the area of ob ects such as rocks, toys, wire, etc., wh ch cou d be p cked up and thrown by the blade.
-
Page 3: Product Specifications
LIMITED TWO YEAR WARRANTY ON CRAFTSMAN RIDING EQUIPMENT For two (2) years from the date of purchase, if this Craftsman Riding Equipment is maintained, lubricated and tuned up according to the instructions in the owner's manual, Sears will repair or replace, free of charge, any parts found to be defective in material or workmanship. -
Page 4: Table Of Contents
SAFETY RULES ..PRODUCT SPECIFICATIONS ..3 CUSTOMER RESPONSIBILITIES ... 3, 15-19 WARRANTY TABLE OF CONTENTS INDEX ... TRACTOR ACCESSORIES ASSEMBLY ... INDEX Accessories ... Adjustments: Brake ..22 Carburetor ... Mower: Front-To-Back ... Side-To-Side ... Throttle Control Cable ... 24 Air Filter, Engine ... - Page 5 ACCESSORIES AND ATTACHMENTS These accessodoo and attachments wereavailablethrough mostSearsretailoutlets and servicecenterswhenthetractorwaspumhased. MostSears stores can orderthese itemsfor you whenyou providethe modelnumberof yourtractor. ENGINE SPARK PLUG GAS CAN PERFORMANCE Sears offers a wide vadety of attachments that fit your tractor. Many of these are listed below with brief explanations of how they can help you.
- Page 6 CONTENTS (1) Locknut 5/16-18 (1) Shoulder _i" Bolt 5/16-18 17/32 x 1-3/16.x 12 Gauge (1)Washer (1) Lock Washer (2) Lock #10 x 5/8 (2) Screws Wash#_O 2) Washers 3/16 x 3/4 x 16 Gauge (2) Hex Bolts 1/4-20 x 3/4 (2) Hex Nuts 1/4-20 ._)Washers 9/32 x 5/8 x 16 Gauge...
- Page 7 Your new tractor has been assembled at the factory with exception of those parts left unassembled for shlpplng purposes. To ensure safe and proper operation of your tractor all parts and hardware you assemble must be tightened securely. Use the correct tools as necessary to insure proper tightness. TOOLS REQUIRED FOR ASSEMBLY...
- Page 8 HOW TO SET UP YOUR TRACTOR CONNECT BATTERY (See Fig. 2) CAUTION: Do not short battery terml- nals by allowing a wrench or any other object to contact both terminals at the same time. Before connecting battery, remove metal bracelets, bands, rings, etc.
- Page 9 GAUGE WHEEL MOUN_NG BRACKET "_. LOCKNUT 3/8" WASHER GAUGE WHEEL FIG. 4 INSTALL MULCHER PLATE (See Figs. 5 & • Install two latch hooks to mulcher plate using screw, washer, lock washer, and weld nut as shown. NOTE: Pre-assemble weld nut to latch hook by inserting weld nut from the top with hook pointing down.
- Page 10 OPERATION These symbols may appear on your tractor or in literature supplied with the product. Learn and understand their meaning. BAI-rERY CAUTION OR REVERSE FORWARD FAST SLOW WARNING ENGINE ON ENGINE OFF OIL PRESSURE CLUTCH LIGHTS ON LIGHTS OFF FUEL CHOKE MOWER HEIGHT DIFFERENTIAL...
- Page 11 KNOW YOUR TRACTOR READ THIS OWNER'S MANUAL Comparethe illustrations w ithyourtractortofamiliadzeyourself w iththe locations ofvarious controlsand adjustments. Save this manualfor future reference. AMMETER CHOKE THROTTLE CONTROL CLUTCH/BRAKE PEDAL HEIGHT ADJUSTMENT KNOB Our tractors conform to the safety standards of the American National Standards Institute. ATTACHMENT CLUTCH LEVER: mower blades, or other attachments mounted to your...
- Page 12 The operation of any tractor can result In foreign objects thrown into the eyes, which can result In severe eye damage. Always wear safety glasses or eye shields while operating your tractor or performing any adjustments or repairs. We recommend a wide vision safety mask over the spectacles or standard safety glasses.
-
Page 13: Carburetor
TO OPERATE MOWER (See Fig. 9) Your tractor isequipped with an operator presence sensing switch. Any attempt by the operator to leave the seat with the engine running and the attachment clutch engaged will shut off the engine. • Select desired height of cut. •... - Page 14 TO START ENGINE (See Fig. 8) When starting the engine for the first time or if the engine has run out of fuel, it will take extra cranking time to move fuel from the tank to the engine. • Sit on seat in operating position, depress clutch/brake pedal and set parking brake.
- Page 15 CUSTOMER MAINTENANCE SCHEDULE FILL IN DATES AS You COMPL REGU R BERV,CE Check Tire Pressure Check Brake Operati°n Check for Loose Fasteners Sharpen/Replace Mower Blades LubricationChart Check Battery Level/Recharge, Clean Battery and Terminals Check Transaxle Cooling Adjust Blade Belt(s) Tension Adjust MotionDrive Belt(s) Tension Check Engine Oil Level Change Engine Oil...
- Page 16 CUSTOMER TRACTOR Always observe safety rules when performing any mainte- nance. BRAKE OPERATION If tractor requires more than six (6) feet stopping distance at high speed in highest gear, then brake must be adjusted. (See "TO ADJUST BRAKE" in the Service and Adjust- ments section of this manual).
- Page 17 CUSTOMER BATTERY Your tractor has a battery charging system which is suffi- cient for normal use. However, periodic charging of the battery with an automotive charger will extend its life. • Keep battery and terminals clean. • Keep battery bolts tight. •...
- Page 18 CUSTOMER FILTER (See Flg. 16) Your engine will not run pmpedy using a dirty air filter. Clean the foam pre-cleaner after every 25 hours of opera- tion or every season. Service paper cartridge every 100 hours of operation or every season, whichever occurs first. Service air cleaner more often under dusty conditions.
- Page 19 CUSTOMER RESPONSIBILITIES MUFFLER Inspect and replace corroded muffler and spark an'ester (if equipped) as it could create a fire hazard and/or damage. SPARK PLUGS Replace spark plugs at the beginning of each mowing season or after every 100 hours of operation, whichever occurs first.
- Page 20 SERVICE ANDADJUSTMENTS CAUTION: BEFORE PERFORMING ANY SERVICE OR ADJUSTMENTS: Place gearshift lever In neutral (N) posltlon. Depress clutch/brake Place attachment clutch in "DISENGAGED" • Turn ignltlon key "OFF" and remove key. • Make sure the blades and all moving parts have completely stopped. •...
-
Page 21: Side-To-Side
SERVICE AND ADJUSTMENTS TO LEVEL MOWER HOUSING Adjust the mowerwhiie tractor is parked on level ground or driveway. Make sure tires are properly inflated (See "PRODUCT SPECIFICATIONS" on page 3of this manual). If tires are over or underinflated, you will not properly adjust your mower. - Page 22 SERVICE AND ADJUSTMENTS TO REPLACE MOWER BLADE (See Flg. 24) The mower blade ddve belt may be replaced without tools. Park the tractor on level surface. Engage parking brake. BELT REMOVAL - • Remove mower from tractor (See "TO REMOVE MOWER"...
- Page 23 SERVICE AND ADJUSTMENTS TRANSAXLE SHIFTER LINKAGE AND AD- JUSTMENT (See Figs. 27 and 28) The transaxle should be in neutralwhen the gear shift lever is in the neutral (N) (lock gate) position. The adjustment is preset at the factory; however, if adjustment is needed, proceed as follows: Make sure transaxle is in neutral (N).
-
Page 24: To Replace Headlight Bulb
SERVICE AND ADJUSTMENTS FIG. 30 TO REPLACE HEADLIGHT • Raise hood. • Pull bulb holder out of the hole in the backside of the grill. • Replace bulb in holder and push bulb holder securely back into the hole in the backside of the grill. •... - Page 25 SERVICE AND ADJUSTMENTS While still holding throttle lever against idle speed screw, turn idle mixture screw in (clockwise) until engine begins to die and then turn out (countemlock- wise) until engine runs rough. Turn screw to a point midway between those two positions. Continue to hold throttle lever against idle speed screw and adjust idle speed screw to obtain 1200 RPM, ifthe igovemed idle spring is red, or 900 RPM, ifthe governed...
-
Page 26: Storage
Immediately prepare your tractor for storage at the end of the season or if the tractor will not be used for 30 days or more. gasoline In the tank inside a building where fumes may reach an open flame CAUTION: Neverstorethetractorwith or spark. - Page 27 TROUBLESHOOTING CAUSE PROBLEM Will not start 1. Out of fuel. Enginenot'CHOKED" propedy. Engineflooded. 4. Bad sparkplug. 5. Dirtyair filter. 6. Dirtyfuelfilter. 7. Water in fuel. 8. Looseor damagedwidng. 9. Carburetoroutof adjustment. 10. Enginevalvesout of adjustment. Hard to start 1. Dirtyair filter. Bad sparkplug.
- Page 28 TROUBLESHOOTING PROBLEM CAUSE Engine oontlnues to run Faulty operator-safety presence control system. when operator leaves eeet with attachment clutch engaged Poorcut-uneven 1. Wom, bent or loose blade. Mower deck notlevel. Buildupof grass,leaves, and trashundermower. Bent blade mandrel. Cloggedmower deck ventholes frombuildupof grass,leaves, andtrash aroundmandrels.
- Page 29 TRACTOR - - MODEL NUMBER 917.259561 SCHEMATIC WHITE ---( ,G L< IGNITION SWITCH • IGNITION SWITCH POSITION CIRCUIT "MAKE" G + M + L NONE RUN/LIGHT B + L A + Y B + L NONE START B + L + S NONE BA'I-FERY FUSE 3OAMP.
- Page 30 REPAIR PARTS TRACTOR ELECTRICAL - - MODEL NUMBER 917.259561...
- Page 31 Cable, Ground 121305X Switch, Seat 140301 Switch, ignition 4 Position 124211X Nut, Ignition 141226 Cover, ignition Switch 109310X Key, Molded, Craftsman 156442 Harness, Ignition 71110408 Bolt BIk Fin Hex 1/4-20 UNC x 1/2 131563 Cover, Terminal 145673 Solenoid 73640400 Nut Keps BIk Hex 1/4-20 UNC...
- Page 32 REPAIR PARTS TRACTOR - - MODEL NUMBER 917,259561 CHASSIS AND ENCLOSURES...
- Page 33 REPAIR PARTS TRACTOR - -MODEL NUMBER 917,259561 CHASSIS AND ENCLOSURES PART DESCRIPTION 159527 Chassis 140356 Drawbar 17490612 Screw, Thd., Roll. 3/8-16 x 3/4 Type TT STD551025 Washer 13/32 x 3/4 x 16 Gauge 155272 Bumper Hood/Dash 150156X011 Dash, Silkscreened STD533710 Bolt, Carriage 3/8-16 x 1 155927 Panel, Dash, LH...
- Page 34 REPAIR PARTS TRACTOR DRIVE B 87 - - MODEL NUMBER 18 113 917.259561 • 26...
- Page 35 REPAIR PARTS TRACTOR - - MODEL NUMBER 917.259561 DRIVE PART DESCRIPTION Transaxle (See Breakdown) Peerless 930-057A 146682 Spring, Return, Brake 123666X Pulley, Transaxle 12000028 Ring, Retainer 121520X Strap, Torque 17490512 Screw, Thd., Roll. 5/16-18 x 3/4 154792 Rod Shifter Fender STLT STD561210 Pin, Cotter 105701X...
- Page 36 REPAIR PARTS TRACTOR - - MODEL NUMBER 917,259561 STEERING ASSEMBLY t e f_ "1 37---_ !Y----...
- Page 37 REPAIR PARTS TRACTOR STEERING ASSEMBLY NOTE: All component dimensions given in U.S. inches - - MODEL NUMBER PART DESCRIPTION 139768 Steering Wheel 154427 Axle Assembly STMP Dropped STL 156483 Spindle Assembly, L.H. 157473 Spindle Assembly, R.H. 6266H Bearing, Race, Thrust, Hardened 121748X Washer 25/32 x 1-5/8 x 16 Gauge 19272016...
- Page 38 REPAIR PARTS TRACTOR SEAT ASSEMBLY PART DESCRIPTION 140123 Seat 140551 Bracket Pnt Pivot Seat (blk) 74760616 Bolt Fin Hex 3/8-16 UNC x 1 19131610 Washer Flat 13/32 x 1 x 10 Ga 145006 Clip Push-In STD541437 Nut Lock Hex W/Ins 3/8 -16 UNC 124181X Spring Seat Cprsn 2 250 BIk Zi "8...
- Page 39 TRACTOR DECALS PART DESCRIPTION 156439 Decal, Fender Danger Sears 160876 Decal, Engine 19.5 HP Turbo 160284 Decal, Hood Rh Craftsman 160285 Decal, Hood Lh Craftsman 160879 Decal, Engine Radius 133644 Decal, Maint Customer Sears Dora 150927 Decal, Panel Side B&S...
- Page 40 REPAIR PARTS TRACTOR - - MODEL NUMBER 917.259551 ENGINE "10 Spark Arrester...
- Page 41 REPAIR PARTS TRACTOR ENGINE NOTE: All component dimensions given in U.S. inches - - MODEL NUMBER 9 7.259561 PART DESCRIPTION 151273 Control Throt Paddle 17720410 Screw Hex Thd Cut 1/4-20 x 5/8 T Engine(See Breakdown) Bdggs Model No. 351777-1036-A1 149723 Muffler Exhaust 122434X Exhaust Asm.
- Page 42 REPAIR PARTS TRACTOR MOWER LIFT - - MODEL NUMBER 917.259561 25 24 /"...
- Page 43 REPAIR PARTS TRACTOR MOWER LIFT - - MODEL NUMBER 917.259561 PART DESCRIPTION 159460 Wire Assy., Inner, with Plunger 159471 Shaft Asm. Lift 105767X Pin Groove 12000002 E Ring #5133-62 Washer 21/32 x 1 x 21 Ga. 19211621 120183X Bearing Nylon 125631X Gdp Handle Fluted 122365X...
- Page 44 REPAIR PARTS TRACTOR MOWER DECK - .MODEL NUMBER 917,259561 _"_ 114--_, [_ 101_ 04 106 ,_r"--. 106_ >21 /'23 _117 %..116...
- Page 45 REPAIR PARTS TRACTOR MOWER DECK PART DESCRIPTION Mower Housing 144393 Bolt STD533107 138017 Bracket Assembly,Sway Bar, Front 138440 Bracket Assembly, Sway Bar STD624008 Retainer Spring 130832 Arm, Suspension, Rear Bolt, Hex 3/8-24 x 1.25 Grade 8 850857 Washer, Lock STD551137 Washer, Hardened 140296 134149...
- Page 46 REPAIR PARTS TRACTOR - - MODEL NUMBER 917.259561 PEERLESS TRANSAXLE - MODEL NUMBER 930-057A MQOELand _;E_At NUMBERS HERE...
-
Page 47: Replacement
REPAIR PARTS TRACTOR PEERLESS TRANSAXLE - MODEL NUMBER REF PART DESCRIPTION 772108A Cover, Transaxle 780086A Bearing, Needle 770102A Case, Transaxle 776260A Shaft, Counter 776219B Shaft and Pinion Assembly, Output 778139 Gear, Output, 35 Teeth 778136 Gear, Spur, 15 Teeth, Steel 792136A Key, Shift 792047... - Page 48 REPAIR PARTS TRACTOR BRIGGS & STRATTON ENGINE 823, 552A_ 1022 1023 1031 1030 - - MODEL NUMBER 917.259561 - MODEL NUMBER 351777, TYPE NUMBER TO INSTALL. SEE REPAIR . REQUIRES SPECIAL TOOLS INSTRUCTION MANUAL. _ 613 102, 1036-A1 lo_, 6340 122_...
- Page 49 REPAIR PARTS TRACTOR -- MODEL NUMBER 917.259561 BRIGGS & STRA'I-rON ENGINE - MODEL NUMBER 351777, TYPE NUMBER 1036-A1 1125 1975 _117A 38_ _. I,,71 I_ 5''...
- Page 50 REPAIR PARTS TRACTOR - - MODEL NUMBER 917.259561 BRIGGS & STRATTON ENGINE - MODEL NUMBER 351777, TYPE NUMBER 1036-A1 209A 116A , 354_ 819A 19 _1014 1004 L358 GASKET...
- Page 51 REPAIR PARTS TRACTOR - - MODEL NUMBER 917.259561 BRIGGS & STRA'rTON ENGINE 657 '_ 985 0_ 1019 LABEL KIT 1054 - MODEL NUMBER 351777, 308.1 TYPE NUMBER 1036-A1...
- Page 52 REPAIR PARTS TRACTOR- - MODEL NUMBER 917.259561 BRIGGS & STRATTON ENGINE - MODEL NUMBER 351777, TYPE NUMBER 1036-A1 5101 188A 76 I 1022 117A BREATHER GASKET SET 121 CARBURETOR 1033 VALVE OVERHAUL...
- Page 53 REPAIR PARTS TRACTOR - - MODEL NUMBER 917.259561 BRIGGS & STRATrON ENGINE - MODEL NUMBER 351777, TYPE NUMBER 1036-A1 KEY PART NO. NO. DESCRIPTION 808093 Cylinder Assembly 807687 Bearing, Cylinder 805101 * Seal, Oil 807821 Head, Cylinder, Cylinder #1 807822 Head, Cylinder, Cylinder #2 805193 ** Washer, Cylinder Head...
-
Page 54: Spark Plugs
REPAIR PARTS TRACTOR BRIGGS & STRATTON ENGINE - MODEL NUMBER 351777, TYPE NUMBER 1036-A1 KEY PART NO. NO. DESCRIPTION 494990 Motor, Stader 94004 Bolt, Thru 494439 Screen, Rotating 806028 Nut, Hex 492341 Armature, Magneto 805407 Screw, Mounting 491055 Plug, Spark 805169 Screw, Hex Head 92791... - Page 55 SUGGESTED GUIDE FOR SIGHTING SLOPES FOR SAFE OPERATION Operate your Tractor up and down the face of slopes (not greater than 15°), never across the face. Make turns gradu- ally to prevent tipping or loss of control. Exercise extreme caution when changing direction on slopes. ONLY RIDE UP AND DOWN HILL, NOT ACROSS HILL SIGHT AND HOLD THIS LEVEL WITH...
- Page 56 SEARS OWNER'S MANUAL MODEL NO. 917.259561 IF YOU NEED REPAIR SERVICE OR PARTS: FOR REPAIR SERVICE, CALL THIS TOLL FREE NUMBER: 1-800-4-REPAIR (1-800-473-7247) FOR REPLACEMENT PARTS INFORMATION AND ORDERING, CALL THIS TOLL FREE NUMBER: 1-800-FON-PART (1-800-366-7278) FOR CONSUMER ASSISTANCE HOT LINE, CALL THIS TOLL FREE NUMBER: 1-800-659-5917 160872...
Need help?
Do you have a question about the CRAFTSMAN 917.259561 and is the answer not in the manual?
Questions and answers