Page 1
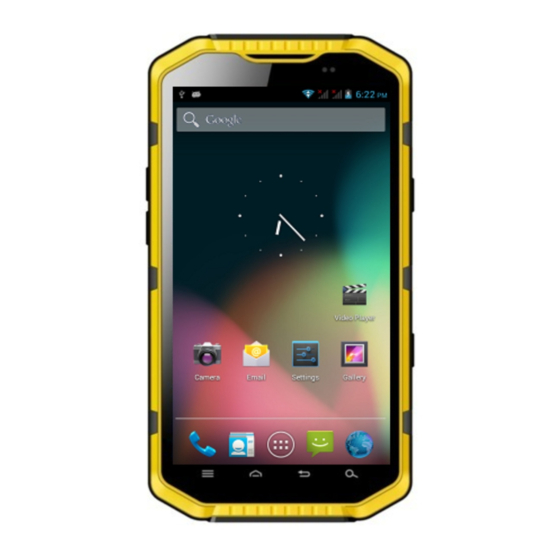
RugGear APEX(RG970) Smartphone User manual 1 ...
Page 2
Please Read Before Proceeding Safety Precautions Please read the safety precautions carefully to ensure the correct use of your mobile phone. Despite the nature of this rugged device, avoid hitting, throwing, dropping, crushing, bending and puncturing your mobile phone. Avoid using your mobile phone in a damp environment, such as the bathroom. Prevent your mobile phone from being intentionally soaked or washed in liquid. Do not switch on your mobile phone when it is prohibited to use phones or when the phone may cause interference or danger. Do not use your mobile phone while driving. Follow any rules or regulations in hospitals and health care facilities. Switch off your mobile phone near medical equipment. Switch off your mobile phone in aircraft. The phone may cause interference to control equipment of the aircraft. Switch off your mobile phone near high‐precision electronic devices. The phone may affect the performance of these devices. ...
Page 3
Legal Notice The product described in this manual may include copyrighted software and possible licensors. Customers shall not in any manner reproduce, distribute, modify, decompile, disassemble, decrypt, extract, reverse engineer, lease, assign, or sublicense the said software or hardware, unless such restrictions are prohibited by applicable laws or such actions are approved by respective copyright holders under licenses. Notice Some features of the product and its accessories described herein rely on the software installed, capacities and settings of the local network, and may not be activated or may be limited by local network operators or network service providers. Thus, the descriptions herein may not exactly match the product or its accessories you purchase. The manufacturer reserves the right to change or modify any information or specifications contained in this manual without prior notice or obligation. The manufacturer is not responsible for the legitimacy and quality of any products that you upload or download through this mobile phone, including but not limited to the text, pictures, music, movies, and non‐built‐in software with copyright protection. Any consequences arising from the installation or usage of the preceding products on this mobile phone shall be your responsibility. NO WARRANTY The contents of this manual are provided “as is.” Except as required by applicable ...
Welcome to the RG970 Smartphone.................. 6 Getting to Know Your Mobile Phone ....................6 Key functions at your fingertips ......................6 Getting Started with Your Mobile Phone .................. 7 Powering On or Off Your Mobile Phone .................. 9 Getting to Know the Home Screen .................... 9 Using the Touchscreen ........................ 9 Locking and Unlocking the Screen .................... 10 Display........................... 10 Display layout .......................... 10 Notification Panel ........................ 10 Shortcut Icons.......................... 11 Folders............................12 Wallpapers............................12 Using the USB Mass Storage......................12 Using the Airplane Mode.........................12 Phone.......................... 12 Making a Call .......................... 13 Answering and Rejecting a Call ......................13 Other Operations During a Call......................14 Using Call log.............................14 People ............................ 14 Communicating with Your Contacts....................15 Using the Onscreen Keyboard ......................16 Messaging............................ 16 SMS and MMS...........................17 Getting Connected......................... 19 GPRS/3G............................19 Wi‐Fi.............................. 19 Browser ............................ 20 Bluetooth............................ 21 Entertainment..........................22 Taking Photos and Recording Videos................... 22 Enjoying Music .......................... 24 Listening to FM Radio ........................ 25 Google Services ........................... 25 Using Maps ........................... 27 ...
Page 5
Using the Calendar........................ 30 Using the Alarm......................... 31 Using the File Manager...................... 32 Calculator .......................... 32 Managing Your Mobile Phone....................32 Setting the Date and Time...................... 33 Setting the Display ........................ 33 Setting Phone Ringtone ...................... 33 Setting Phone Services ...................... 34 Protecting Your Mobile Phone....................34 Managing Applications ...................... 35 Ways to Free Up Your Mobile Phone Memory................35 Resetting Your Mobile Phone.................... 35 Specifications .......................... 36 Appendix...........................37 Warnings and Precautions....................... 37 Accessories ..........................38 Cleaning and Maintenance...................... 39 Emergency Call........................ 40 CE SAR Compliance ........................ 40 Disposal and Recycling Information .................. 40 5 ...
Welcome to the RG970 Smartphone The RG970 is waterproof IPX8, dustproof IP6X. Yet it also features a capacitive touch control panel through excellent scratch resistant glass, and is powered by Android, offering Google suite applications, including access to thousands of Android applications through Google Play Store. As well as being a rugged mobile phone, with it you’ll be able to enjoy web browsing, messaging, music and more with its high capacity battery and expandable memory up to 32GB. Getting to Know Your Mobile Phone Phone at a Glance Power off: Press and hold the power key button for 3 seconds, select ‘power off’ in the menu option. ...
Page 7
2. Put the Sim Card in the holder: Put the SIM card into the slot touching the SIM contacts of the :Does not support the use of telecommunications SIM card to phone as shown in Jig‐2:(Note use!) 3. Open T‐Flash card holder and insert T‐Flash card into the slot, then close T‐Flash card holder as shown in Jig‐3: 7 ...
Page 8
4. Insert the back cover: Insert the back cover and rotate four screws clockwise to lock the back cover as shown in Jig‐4: 5. Charging 6. Shortcuts to be on and off power display, Press Power button to be ON or OFF. 7. Press the button and keep on the pressing 8 ...
Attention: Please power off the phone before plug in or pull out the SIM card. Please make sure the whole device battery cover, battery cover lock, the screw cove, earphone and USB cover are well sealed so that the device can be dust proof and water proof. Note:This product has 8 waterproof. After installing the SIM / T‐FLASH card, be sure to tighten the screws on the battery cover so; avoid waterproof function failure. ...
wallpaper and display the items you want. Using the Touchscreen Touchscreen Actions Touch: touch using your fingertip to select an item, confirm a selection, or start an application. Touch and hold: touch an item with your fingertip and continue to press down until your mobile phone responds. For example, to open the options menu for the active screen, touch the screen and hold down until the menu appears. Swipe: move your finger across the screen either vertically or horizontally. For example, swipe left or right to switch between pictures. Drag: touch and hold the desired item with your finger. Drag the item to any part of the screen. You can drag an icon to move or delete it. Rotating Your Mobile Phone Display The orientation of most screens will rotate with the phone as you turn it from upright to sideways and back again. Locking and Unlocking the Screen Locking the Screen When your mobile phone is on, press the Power button to lock the screen. When the screen is locked, you can still receive messages and calls. If you leave your mobile phone undisturbed for a while, the screen will lock automatically. Unlocking the Screen Press the Power key to wake up the screen. Then drag the lock icon to the unlock icon to unlock the screen. ...
Status Icons Bluetooth is on Connected to a Bluetooth device Connected to EDGE mobile network Ringer is silenced Connected to HSPA Vibrate mode Mobile network signal strength Battery is very low Searching for a network signal Battery is low No SIM card installed Or No signal Battery is partially drained Connected to a Wi‐Fi network Battery is full Roaming Battery is charging Airplane mode Receiving location data from GPS Notification Icons New email message ...
1. Touch and hold an application icon on the Home screen until the icon enlarges. 2. Without lifting your finger, drag the icon to the desired position on the screen, and then release it. Note: There must be enough space for the icon to fit on the current Home screen. Removing a Screen Item 1. Touch and hold an application icon on the Home screen until the icon enlarges. 2. without lifting your finger, drag the item to Remove. 3. when the item turns red, release your finger to remove it from the Home screen. Widgets A widget lets you preview or use an application. You can place widgets on your Home screen as icons or preview windows. Several widgets are installed on your phone by default. More widgets can be downloaded from Google Play Store. To add a widget to one of the screens: 1. From the Home screen, touch . Then touch the WIDGETS tab to display the applications. 2. to add an item, drag your desired widget to a specific Home screen. Folders Creating a Folder Drag the application icon or shortcut and drop it on top of similar applications. Renaming a Folder 1. Touch a folder to open it. 2. On the title bar of the folder, enter the new folder name. ...
Some locations may require you to turn off your phone’s wireless connections. Rather than powering off your phone, you can set it to Airplane mode. 1. Press and hold the the Power button. 2. Touch Airplane mode in the options menu. Or using the Settings application, access the WIRELESS & NETWORKS menu to enable the Airplane mode. Phone There are several ways to place a phone call. You can dial a number, select a number in your contacts list, on a Web page, or from a document that contains a phone number. When you are on a call, you can either answer incoming calls or send them to your voicemail box. You can also set up conference calls with several participants. Note: When you are in a call using one SIM card, you will not be able to receive other calls using the other SIM card for the duration of that call. Making a Call To make a call, you can use the Phone application, or select a number from People or Call Log. When you are on a call, you can press the central Home button to return to the Home screen and use other functions. To return to the calling screen, drag the notification bar down and touch Current Call. Note: Be careful not to block the microphone with your fingers. ...
3. Touch . If you have inserted two SIM cards, touch the desired network to dial the phone number. Making a Call from Call log 1. Touch Phone ( ) > Call Log tab to display the call log. If you are already working with Contacts or Dialer, touch the Call Log tab. 2. Touch of the contact you want to call. Answering and Rejecting a Call Answering or Rejecting an Incoming Call When you receive a phone call, the incoming call screen opens with the caller ID and any additional information about the caller that you have entered in People. To answer a call, touch and drag it to the right ( ). To reject the call, touch and drag it to the left ( ). ...
To open the application, do one of the following: Touch and then People ( ) to display the contact list. Touch on the Home screen, then touch People tab. All of your contacts are displayed alphabetically in a scrolling list. Copying Contacts You can copy contacts to and from the SIM card, the device, memory card, or USB storage. 1. In the contacts list, touch the Menu key, and then touch Import/export. 2. Select the source location of the contacts that you want to copy and touch Next. 3. Select the destination location to copy the contacts and touch Next. 4. Select the contacts to copy and touch . Adding a Contact 1. In the contacts list, touch to add a new contact. 2. Select the location you want to save the contact to. 3. Enter the contact’s name, and then add any detailed information such as phone number or address. 4.When you are finished , touch Done to save the contact information. ...
Communicating with a Contact 1. In the contacts list, touch the contact that you want to communicate. 2. In the contact’s details screen, you can do one of the following: Touch the phone number to make a call. Touch to send message. Touch to make a video call. Deleting a Contact 1. In the contacts list, touch the contact that you want to delete. 2. Touch the Menu key, and then touch Delete. 3. Touch OK to confirm that you want to delete the contact. Using the Onscreen Keyboard Displaying the Keyboard Panel To enter text, use the onscreen keyboard. Some applications open the keyboard automatically. In others, touch a text field to open the keyboard. To open the keyboard, touch the space where you want to write the text. Touch the Back key to hide the keyboard. Using the Landscape Keyboard If you find the keyboard inconvenient or difficult to use, turn your mobile phone sideways. The screen will display the keyboard in landscape orientation, providing you with a wider keyboard ...
Page 17
open it. 2. Enter a phone number in the To field, or touch to select a contact from People. As you enter the phone number, matching contacts appear. You can touch a suggested recipient or continue entering the phone number. 3. Touch the composition text box to start entering your message. If you touch the Back key while composing a message, it is saved as a draft in your message list. Touch the message to resume composing it. 4. Once you are done, touch . If you have inserted two SIM cards, touch the desired network to send your message. Note: Responses appear in the window. As you view and send additional messages, a message thread is created. Creating and Sending a Multimedia Message 1. On the messaging screen, touch . 2. Enter a phone number in the To field, or touch to select a contact from People. 3. Touch the composition text box to start entering your message. 4. Touch the Menu key to display the options panel, and then touch Add subject to add the message subject. ...
Page 18
Opening Email To open the application, do one of the following: Touch on the Home screen. Touch > Email ( ). Adding an Email Account When using the Email application for the first time, you must configure your email account. The Email setup wizard helps you set up your account for many popular email systems, so you can read and work with the same email that you do on a computer in a web browser, or with another email application. 1. Launch Email application. See “Opening Email.” 2. Enter your Email address and Password. 3. Touch Next. The device will automatically retrieve the email settings. To manually set up the email, touch Manual setup. Note: If you touch Manual setup, contact your email service provider for the parameters required for your account if you don’t know what they are. 4. Select an email connection protocol which best suits your needs. Follow the on‐screen instructions and enter all the server information, Domain, Username, Password, and other related information. Touch Next to continue. ...
2. In the To field, enter the recipient’s email address. 3. Enter the subject and compose your email. 4. To send an attachment with the message, touch the Menu key, and then touch Attach file. Select the type of file then select the file you want to attach. 5. when you are finished, touch If you touch the Back key while composing a message, it saves the current message as a draft. Replying to an Email Message 1. Touch the email message you want to view and reply to. 2. Touch or touch > Reply all to reply to the email message. Deleting an Email Account 1. On the Inbox screen, touch the Menu key, and then touch Settings. 2. Touch the email account you want to delete. 2. Touch Remove account. 3. Touch OK. Changing Email Account Settings You can change a number of settings for an account, including how often you check for emails, How you are notified of a new mail, and details about the servers the account uses to send and receive mails. 1. On the Inbox screen, touch the Menu key, and then touch Settings to customize the message settings. ...
1. Touch > Settings ( ). 2. In WIRELESS & NETWORKS, touch More > Mobile networks > Data connection. 3. Touch the desired network operator to enable the data connection. Wi‐Fi Wi‐Fi gives you wireless access to broadband Internet access. To use Wi‐Fi on your mobile phone, you need to have an access to wireless access points (hotspots). Obstacles that block the Wi‐Fi signal will reduce its strength. Turning On Wi‐Fi 1. Touch > Settings ( ). 2. In WIRELESS & NETWORKS, touch Wi‐Fi and set it to ON. Connecting to a Wireless Network 1. Turn on Wi‐Fi. 2. A list of detected Wi‐Fi networks will be displayed in the Wi‐Fi networks section. Touch a Wi‐ Fi network to connect to it. 3.If you select an open network, you will be automatically connected to the network. If you Select a network that is secured and connect to it for the first time, enter the password, and then touch Connect. Note: If you connect to a secured wireless network that you have already used, you will not be prompted ...
Browser Your mobile phone comes with a browser. You can use Browser to access and browse the Internet. Opening Browser To open the application, do one of the following: Touch on the Home screen. Touch > Browser ( ). Opening a Web Page 1. In a browser window, touch the URL field at the top of the screen. 2. Enter the web page address. 3. As you enter the address, matching web page addresses will appear on the screen. If you see the address you want, touch it and go directly to that web page, or when you complete entering the address of the web page you want, touch Go on the onscreen keyboard. Setting a Home Page 1. In a browser window, touch the Menu key. 2. Touch Settings > General > Set homepage. 3. Select one of the available options. To specify a desired web page, touch Other and enter the address of the desired home page, ...
Stop: Touch to stop loading the current web page. Home: Touch to return to the home page. Save to bookmarks: Touch to save favorite web pages. Close: Touch to exit the web page. Save for offline reading: Touch to save the current web page to be available even when the Date network is not available. Share page: Touch to share this web page via one of the sharing applications. Find on page: Touch to find the text on the web page. Request desktop site: Touch to open the current web page in desktop viewing mode. Bookmarks/History: Touch to select bookmarks, history, or saved favorite web page to visit. Settings: Touch to configure browser settings. Bluetooth Your mobile phone has Bluetooth, which allows you to create a wireless connection with other Bluetooth devices so you can share files with your friends, talk hands‐free with a Bluetooth headset, or even transfer photos on your phone to your PC. If you are using Bluetooth, remember to stay within 10 meters (33 feet) of other Bluetooth devices. Be aware that obstacles like walls or other electronic equipment may interfere with ...
DEVICES for devices to scan for Bluetooth devices). 3. Touch the device you want to pair with your mobile phone. 4. Enter the pairing password to complete the connection. Note: Once a partnership has been created, connecting to that Bluetooth device again will no longer require entering the password. Sending Files via Bluetooth With Bluetooth, you can share pictures, videos, or music files with your family and friends. To send files via Bluetooth, do as follows: 1. Touch > File Manager ( )to open the file manager. 2. Touch the file to be sent. 3. Touch > Bluetooth, and then select a paired device. Disconnecting or Unpairing a Bluetooth Device 1. Touch > Settings ( ). 2. In WIRELESS & NETWORKS, touch Bluetooth. 3. On the connected device option, touch and then Unpair to disconnect the device. Entertainment In addition to being a communication device and personal assistant, your mobile phone ...
Page 24
To share the photo, touch , then touch an application for sharing. To delete the photo, touch > OK. To view other photos and videos in Gallery, touch . 3. If you want to view more photos, touch the screen, and then swipe right or left. 4. Shooting a Video 1. Touch > Camera ( ). 2. Touch and select to switch to camcorder mode. Note: To switch between front and rear cameras, touch . 3. Frame the scene you want to start your video. 4. Touch to start recording a video. The camcorder starts shooting the video. .. Drag to zoom in/out on the subject. .. Touch and hold ...
Drag from the inside of the cropping tool to move it. Drag an edge of the cropping tool to resize the image. Drag a corner of the cropping tool to resize the image without changing the length to width ratio. 3. Touch OK to save the cropped picture. Touch CANCEL to discard the changes. Enjoying Music You can transfer music files from your PC to your microSD card so you can listen to music on your mobile phone. Copying Music to the microSD Card 1. Connect the phone to your computer with a USB cable and mount the microSD card. 2. On the PC, navigate to the USB drive and open it. 3. Create a folder in the root directory of the microSD card (for example, Music). 4. Copy the music from your computer to the folder you have created. 5. After copying music, unmount or eject the drive as required by your PC’s operating system to safely remove the mobile phone. 6. Disconnect the mobile phone from the PC. Opening the Media Library Touch > Play Music to display the media library. The Music application organizes your Music files by storage location. It contains the tabs: ARTISTS, ALBUMS, SONGS, PLAYLISTS. Playing Music ...
2. The FM Radio automatically scans for available FM channels, saves them as presets, and plays the first FM channel found. Tuning the FM Radio Do any of the following: To select the radio station to listen to, touch . To manually tune to a frequency, touch . To add the current radio station to the Favorite list, touch . To view the Favorite List, touch . To turn on the speaker, touch . To scan for all available channels, touch > Search. To temporarily stop the radio broadcast, touch . To resume, touch . To turn off the radio, touch > Exit. Recording the FM Radio To record the radio, touch > Record FM and do the following: To start recording, touch To stop recording, touch ...
Page 27
Creating a Google Account If you do not have a Google account, you can create one: 1. Touch > Settings ( ). 2. In ACCOUNTS, touch Add Account. 3. Touch Google to create a Google account. 4. Touch New to create a new account. 5. Enter your name and touch . 6. Enter the username and touch . The mobile phone will connect to the Google server to check whether the username is available. If the username you entered is already in use, you will be prompted to choose another one. 7. Enter and confirm your Google account password. 8. Set the recovery information (i.e. alternative email account and security question) and touch . 9. Touch Join Google+ if you want to join the Google+ or Not now if you want to skip this step. 10. Read the agreement and touch to complete the account setup. 11. Enter the authenticating code and touch . 12. Enter your credit card information to enable purchases from Google Play Store, and then ...
4. After composing your email, touch . Replying To or Forwarding an Email 1. On the Inbox screen, touch the email that you want to reply to or forward. 2. Touch Reply( ), Reply all ( > Reply all), or Forward ( > Forward). 3. Do one of the following: If you select Reply or Reply all, enter your message. If you select Forward, specify the message recipients and add any additional text you want to include with the forwarded message. 4. Touch . Searching for an Email ...
4. Touch the onscreen buttons to view the location on the map, get directions, and more. Getting Directions 1. While viewing a map, touch . 2. Enter the starting point in the first text box, and then enter your destination in the second text box. Note: You can also touch the corresponding and select an option. 3. Touch the icon for car, public transit, or walking directions. 4. Touch GET DIRECTIONS. 5. If you are driving or walking, touch DIRECTIONS LIST to view the directions. 6. When you finish viewing or following the directions, touch the Menu key, and then touch Clear Map to reset the map. Using Play Store Play Store provides direct access to applications and games, which you can download and install on your phone. Opening Market 1. Touch > Play Store ( ). 2. When you open Play Store for the first time, the Terms of Service window will appear. Touch ...
on the size of the application and your data connection speed. Uninstalling an Application 1. On the Play Store screen, touch the Menu key, and then touch Manage apps. 2. Touch the application you want to uninstall, and then touch Uninstall. 3. When prompted, touch OK to remove the application from your mobile phone. Note: Applications can also be managed by touching Settings ( ) > Apps. Synchronizing Information Some applications (for example, Gmail) on your mobile phone give you access to the same personal information that you can add, view, and edit on your computer. If you add, change, or delete your information in any of these applications on the web, the updated information also appears on your mobile phone. This is made possible through over‐the‐air data synchronization. The process occurs in the background and does not interfere with the use of your mobile phone. When your phone is synchronizing, a data synchronization icon will be shown in the notification bar. Managing Your Accounts You can synchronize contacts, email, and other information on your mobile phone with multiple Google accounts or other kinds of accounts, depending on the applications installed on your mobile phone. For example, you can start by adding your personal Google account, so your personal email, contacts, and calendar are always available. You could then add a work account, so your workrelated ...
1. On the ACCOUNTS settings screen, touch the account type. 2. Touch the account to delete. 3. Touch the Menu key, and then touch Remove account. 4. Touch Remove account to confirm that you want to remove the account Customizing Your Account Synchronization You can configure background data use and synchronization options for all the applications on your phone. You can also configure what kind of data you synchronize for each account. Some applications, such as Contacts and Gmail, can synchronize data from multiple applications. Others, such as Calendar, synchronize data only from the first Google account you signed into on your phone, or from an account associated specifically with that application. For some accounts, synchronizing is two‐directional; changes that you make to the information on your mobile phone are made to the copy of that information on the web. Some accounts support only one‐way synchronization; the information on your mobile phone is read‐only. Changing an Account’s Synchronization Settings 1. On the ACCOUNTS settings screen, touch the account whose synchronization settings you want to change. The data and synchronization screen opens, displaying a list of the kinds of information the account can synchronize. 2. Selected items are configured to synchronize to your mobile phone. 3. Select or clear the check box of information you want to synchronize to the mobile phone. Using Other Applications Using the Calendar Use Calendar to create and manage events, meetings, and appointments. Depending on ...
1. On any calendar view, touch an event to view its details or event summary. 2. Touch Add reminder to add a reminder. Or touch the “X” icon to delete it. 3. Touch the reminder time, and then touch the length of time before the event when you want to be reminded. When the time comes, you will receive a notification about the event. Customizing the Calendar Settings On any calendar view, touch the Menu key, and then touch Settings > General settings. Choose from: Hide declined events: Select to hide events for which you have declined invitations. Show week number: Select to show the week number. Week starts on: Specify the first day of the week. Use home time zone: Display calendars and event times in your home time zone when travelling. Home time zone: Specify the time zone of the current location. Clear search history: Select to remove all the searches that you have performed. Notifications: Select to send you an event notification. Choose ringtone: Touch to select the ringtone to sound when you receive an event reminder. Vibrate: Touch to select the vibrate mode when you receive an event notification. ...
1. On the File Manager screen, touch . 2. Enter the name of the new folder in the text box. 3. Touch OK. Moving or Copying File(s) 1. On the File Manager screen, long press the file or folder you want to move or copy. Note: To select another file(s), touch the respective check box. To select all files, touch . 2. Touch to copy or touch to move the file. 3. Select the destination folder. 4. Touch to paste the file. Delete File(s) 1. On the File Manager screen, long press the file or folder you want to delete. Note: To select another file(s), touch the respective check box. To select all files, touch . 2. Touch ...
Page 34
Pedometer: Firstly set the basic personal information,and then click the “start”to walk; It can calculate the steps,pace and distance Compass The first time you use the "compass"; please stay away from magnetic interference places to "calibrate" 34 ...
Torch Clicking the torch icon, it can turn on/off; Pressure Made in accordance with the principles of Torricelli's experiment to measure atmospheric ; pressure; Managing Your Mobile Phone To configure your mobile phone, touch > Settings ( ). Setting the Date and Time When you first start the phone, you are asked if you want the time and date to update automatically using the time provided by the network. Note: When the time provided by the network is automatically used, you cannot set the date, time, and ...
set the date. Touch Done when the configuration is complete. 5. Touch Select time zone, and then select the desired time zone from the list. Scroll the list to view more time zones. 5. Touch Set time. On the set time screen, touch the desired field, and then scroll up or down to set the time. Touch Done when the configuration is complete. 6. Select or clear the Use 24‐hour format check box to switch between 24‐hour format and 12‐hour format. 7. Touch Choose date format to select how you want the date to display on your mobile phone. Setting the Display Adjusting the Screen Brightness 1. On the Settings screen, touch Display > Brightness. 2. Drag the slider left to make the screen darker, or right to make it brighter. 3. Touch OK to save the adjustment. Note: Tap Automatic brightness to enable the device to automatically adjust the brightness of the screen depending on the surrounding light. Adjusting the Time Before the Screen Turns Off If your mobile phone is idle for several minutes, it will turn off the screen to save battery power. To set a longer or shorter idle time, do the following: 1. On the Settings screen, touch Display > Sleep. 2. Select the duration you want the screen to be illuminated. Auto‐rotate screen ...
Setting Phone Services Set up the Default Network Your mobile phone supports dual‐SIM technology which allows you to switch between two network operators simultaneously. 1. On the Settings screen, touch SIM management. 2. In DEFAULT SIM, touch Voice call, Video call, Messaging, or Data connection and then select the network that you want to use for data connection. Note: Check the availability of service and plan rates of data connections with your network service provider. Customize the Network Settings 1. On the Settings screen, touch SIM management. 2. In SIM INFORMATION, select the network that you want to customize. The following network settings are available: Edit SIM name: Select to change the network name. Enter phone number: Select to set the phone number. Set background color: Select to customize the network icon shown on the status bar. Display numbers: Select to hide the number or to display the first/last 4 digits. Turning on Data Roaming 1. On the Settings screen, touch SIM management > Roaming > Data roaming. 2. Select the network that you want to use for data connection. ...
2. Select one of the available options. None: The device is not protected. Slide: Slide the lock icon to unlock the phone. Pattern: Trace the correct unlock pattern on the screen to unlock the phone. PIN: Enter a PIN number to unlock the phone. Password: Enter a password to unlock the phone. 3. Follow instructions for the chosen method to complete the settings. Managing Applications Viewing an Installed Application 1. On the Settings screen, touch Apps. 2. In the applications list, do any of the following: Touch the Menu key, and then touch Sort by size. Then touch an application to view its details. Select DOWNLOADED, PHONE STORAGE, RUNNING, or ALL tab at the top of the screen. Then touch an application to view its details. Touch an application to view its details directly. Removing an Installed Application 1. On the Settings screen, touch Apps. 2. Touch an application, and then touch Uninstall to remove the application from your mobile phone. ...
or any files on your microSD card, such as music or photos. 1. On the Settings screen, touch Backup & reset > Factory data reset. 2. When prompted, touch Reset phone, and then touch Erase everything. The mobile phone resets the settings to the original factory settings, and then restarts. Specifications Mobile phone type 3G smart mobile phone, rugged phone OS Android4.1.2(Jelly Bean) SimCard 1: WCDMA/HSPA 850/2100 Band GSM/GPRS/EDGE 850/900/1800/1900 SimCard 2: GSM/GPRS/EDGE 850/900/1800/1900 MHz Chip MT6575(Cortex‐A9 1GHZ) Memory ROM:4G Flash Max:32G LCD 5.3 inch, 960x 540 pixels SIM cards Dual SIM dual standby Network WCDMA,GPRS,EDGE、WAP、TCP/IP Battery capicity 2900 mAh (Not removable) Talking time TBDmins (GSM PCL=7, or WCDMA power=0dBm) Standby time up to TBD hours (GSM Page9, or WCDMA DRX=256) Video call/hands free call ...
Appendix Warnings and Precautions This section contains important information pertaining to the operating instructions of your device. It also contains information about how to use the device safely. Read this information carefully before using your device. Waterproof Casing USB and Headphone Port covers must be securely in place, and the rear cover properly fitted and locked to ensure the device will meet this level of protection. Electronic Device Power off your device if using the device is prohibited. Do not use the device when using the device causes danger or interference with electronic devices. Medical Device Follow rules and regulations set forth by hospitals and health care facilities. Do not use your device when using the device is prohibited. Pacemaker manufacturers recommend that a minimum distance of 15 cm be maintained between a device and a pacemaker to prevent potential interference with the pacemaker. If you are using a pacemaker, use the device on the opposite side of the pacemaker and do not carry the device in your front pocket. Potentially Explosive Atmosphere Power off your device in any area with a potentially explosive atmosphere, and comply with all signs and instructions. Areas that may have potentially explosive atmospheres include the areas where you would normally be advised to turn off your vehicle engine. Triggering ...
aircraft. Using wireless devices in an aircraft may cause danger to the operation of the aircraft and disrupt the wireless telephone network. It may also be considered illegal. Operating Environment Do not use or charge the device in dusty, damp, and dirty places or places with magnetic fields Otherwise, it may result in a malfunction of the circuit. The device complies with the RF specifications when the device is used near your ear or at a distance of 1.5 cm from your body. Ensure that the device accessories such as a device case and a device holster are not composed of metal components. Keep your device 1.5 cm away from your body to meet the requirement earlier mentioned. On a stormy day with thunder, do not use your device when it is being charged, to prevent any danger caused by lightning. When you are on a call, do not touch the antenna. Touching the antenna affects the call quality and results in increase in power consumption. As a result, the talk time and the standby time are reduced. While using the device, observe the local laws and regulations, and respect others’ privacy and legal rights. Keep the ambient temperature between 0°C and 40°C while the device is being charged. Keep the ambient temperature between –10°C to 55°C for using the device powered by a battery. Prevention of Hearing Damage Using a headset at high volume can damage your hearing. To reduce the risk of damage to hearing, lower the headset volume to a safe and comfortable level. Safety of Children ...
water immediately and consult a doctor. If there is a case of battery deformation, color change, or abnormal heating while you charge or store the battery, remove the battery immediately and stop using it. Otherwise, it may lead to battery leakage, overheating, explosion, or fire. If the power cable is damaged (for example, the cord is exposed or broken), or the plug loosens, stop using the cable at once. Otherwise, it may lead to an electric shock, a short circuit of the charger, or a fire. Do not dispose of batteries in fire as they may explode. Batteries may also explode if damaged. Do not modify or remanufacture, attempt to insert foreign objects into the battery, immerse or Expose to water or other liquids, expose to fire, explosion or other hazard. Avoid dropping the device or battery. If the device or battery is dropped, especially on a hard Surface, and the user suspects damage, take it to a qualified service center for inspection. Promptly dispose of used batteries in accordance with local regulations. The device should only be connected to products that bear the USB‐IF logo or have completed the USB‐IF compliance program. CAUTION – RISK OF EXPLOSION IF BATERY IS REPLACED BY AN INCORRECT TYPE. DISPOSE OF USED BATTRIES ACCORDING TO THE INSTRUCTIONS. Cleaning and Maintenance The battery and charger are not water‐resistant. Keep them dry. Protect the device, battery, and charger from water or vapor. Do not touch the charger with wet hands. Otherwise, it may lead to a short circuit, a malfunction of the device, and an electric shock to the user. Do not place your device, battery, and charger in places where they can get damaged because of collision. Otherwise, it may lead to battery leakage, device malfunction, overheating, fire, or explosion. ...
Emergency Call You can use your device for emergency calls in the service area. The connection, however, cannot be guaranteed in all conditions. You should not rely solely on the device for essential communications. CE SAR Compliance This device meets the EU requirements (1999/519/EC) on the limitation of exposure of the general public to electromagnetic fields by way of health protection. The limits are part of extensive recommendations for the protection of the general public. These recommendations have been developed and checked by independent scientific organizations through regular and thorough evaluations of scientific studies. The unit of measurement for the European Council’s recommended limit for mobile devices is the “Specific Absorption Rate” (SAR), and the SAR limit is 2.0 W/kg averaged over 10 gram of tissue. It meets the requirements of the International Commission on Non‐Ionizing Radiation Protection (ICNIRP). For body worn operation, this device has been tested and meets the ICNIRP exposure guidelines and the European Standard EN 62311 and EN 62209‐2, for use with dedicated accessories. Use of other accessories which contain metals may not ensure compliance with ICNIRP exposure guidelines. SAR values may vary depending on national reporting and testing requirements and the network band。 ...
Page 44
FCC RF Exposure Information and Statement The SAR limit of USA (FCC) is 1.6 W/kg averaged over one gram of tissue. Device types RG700 (FCC ID: ZLE‐RG700RG970) has also been tested against this SAR limit. The highest SAR value reported under this standard during product certification for use at the ear is 0.289 W/kg and when properly worn on the body is 0.571 W/kg. This device was tested for typical body‐worn operations with the back of the handset kept 1.5cm from the body. To maintain compliance with FCC RF exposure requirements, use accessories that maintain a 1.5cm separation distance between the user's body and the back of the handset. The use of belt clips, holsters and similar accessories should not contain metallic components in its assembly. The use of accessories that do not satisfy these requirements may not comply with FCC RF exposure requirements, and should be avoided. This device complies with part 15 of the FCC rules. Operation is subject to the following two conditions: ...
Page 45
IC RF Exposure Information and Statement (For Canada) The SAR limit of Canada (IC) is 1.6 W/kg averaged over one gram of tissue. Device types RG700 (IC No.: 11113A‐RG700RG970) has also been tested against this SAR limit. The highest SAR value reported under this standard during product certification for use at the ear is 0.289 W/kg and when properly worn on the body is 0.571 W/kg. This device was tested for typical body‐worn operations with the back of the handset kept 1.5cm from the body. To maintain compliance with FCC RF exposure requirements, use accessories that maintain a 1.5cm separation distance between the user's body and ...
Need help?
Do you have a question about the APEX and is the answer not in the manual?
Questions and answers