Table of Contents
Advertisement
Advertisement
Table of Contents

Subscribe to Our Youtube Channel
Related Manuals for TP-Link TL-MR3420


Summary of Contents for TP-Link TL-MR3420
- Page 1 TL-MR3420 3G/3.75G Wireless N Router Rev: 1.0.0 1910010314...
-
Page 2: Fcc Statement
COPYRIGHT & TRADEMARKS Specifications are subject to change without notice. TP-LINK TECHNOLOGIES CO., LTD. Other brands and product names are trademarks or registered trademarks of their respective holders. No part of the specifications may be reproduced in any form or by any means or used to make any derivative such as translation, transformation, or adaptation without permission from TP-LINK TECHNOLOGIES CO., LTD. -
Page 3: Ce Mark Warning
FCC RF Radiation Exposure Statement This equipment complies with FCC RF radiation exposure limits set forth for an uncontrolled environment. This device and its antenna must not be co-located or operating in conjunction with any other antenna or transmitter. “To comply with FCC RF exposure compliance requirements, this grant is applicable to only Mobile Configurations. -
Page 4: Declaration Of Conformity
DECLARATION OF CONFORMITY For the following equipment: Product Description: 3G/3.75G Wireless N Router Model No.: TL-MR3420 Trademark: TP-LINK We declare under our own responsibility that the above products satisfy all the technical regulations applicable to the product within the scope of Council Directives:... -
Page 5: Table Of Contents
Package Contents ... 1 Chapter 1. Introduction... 2 Overview of the Router... 2 Conventions ... 2 Main Features ... 3 Panel Layout ... 3 1.4.1 The Front Panel ... 3 1.4.2 The Rear Panel ... 4 Chapter 2. Connecting the Router ... 6 System Requirements ... - Page 6 4.7.1 DHCP Settings ... 56 4.7.2 DHCP Clients List ... 58 4.7.3 Address Reservation ... 58 Forwarding ... 60 4.8.1 Virtual Servers ... 60 4.8.2 Port Triggering ... 62 4.8.3 DMZ... 64 4.8.4 UPnP ... 64 Security ... 65 4.9.1 Basic Security... 66 4.9.2 Advanced Security...
- Page 7 4.16.7 Password... 97 4.16.8 System Log... 98 4.16.9 Statistics ... 100 Appendix A: FAQ ... 102 Appendix B: Configuring the PCs... 107 Appendix C: Specifications ...111 Appendix D: Glossary...112 Appendix E: Compatible 3G/3.75G USB Modem ...114...
-
Page 8: Package Contents
Package Contents The following items should be found in your package: TL-MR3420 3G/3.75G Wireless N Router DC Power Adapter for TL-MR3420 3G/3.75G Wireless N Router Quick Installation Guide Resource CD for TL-MR3420 3G/3.75G Wireless N Router, including: • This Guide •... -
Page 9: Chapter 1. Introduction
3G/WAN Broadband Connection The TL-MR3420 3G/3.75G Wireless N Router provides 3G and WAN (xDSL, static IP, or dynamic IP) two kinds of broadband connections to get on the Internet, you can via the Internet no matter in home or outside on business. -
Page 10: Main Features
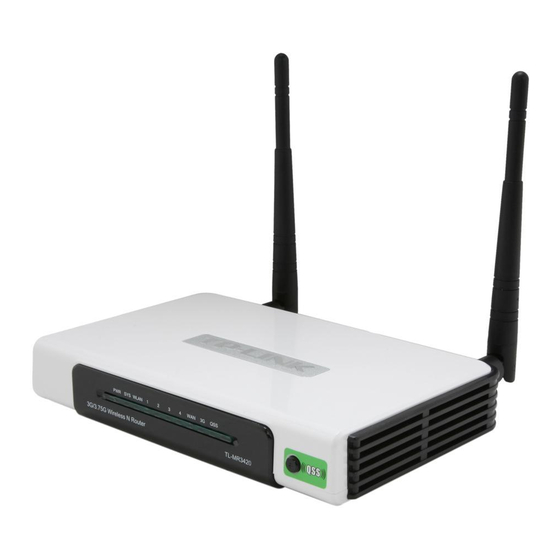
Connects Internet on demand and disconnects from the Internet when idle for PPPoE Provides 64/128/152-bit WEP encryption security and wireless LAN ACL (Access Control List) Supports Flow Statistics Supports firmware upgrade and Web management Panel Layout 1.4.1 The Front Panel TL-MR3420 Figure 1-1 Front Panel sketch 3G/3.75G Wireless N Router... -
Page 11: The Rear Panel
Wireless antenna: To receive and transmit the wireless data. POWER: The Power socket is where you will connect the power adapter. Please use the power adapter provided with this TL-MR3420 3G/3.75G Wireless N Router. WAN: This WAN port is where you will connect the DSL/cable Modem, or Ethernet 1,2,3,4 (LAN): These ports (1, 2, 3, 4) connect the Router to the local PC(s) USB: Connect to the USB Modem. - Page 12 Use the Factory Default Reset button: With the Router powered on, use a pin to press and hold the Reset button (about 5 seconds) until the SYS LED becomes quick-flash from slow-flash. And then release the button and wait the Router to reboot to its factory default settings. TL-MR3420 3G/3.75G Wireless N Router...
-
Page 13: Chapter 2. Connecting The Router
Connect the DSL/Cable Modem to the WAN port of the 3G Router, shown in Figure 2-1. Please visit our website http://www.tp-link.com to get the latest USB modems compatibility, and we recommend you to check whether the modem in your hand has already been tested TL-MR3420 (32 ~104 ) ℃... - Page 14 Connect the power adapter to the power socket on the Router, and the other end into an electrical outlet. The Router will start to work automatically. Power on your PC and Cable/DSL Modem. Figure 2-1 Hardware Installation of the 3G/3.75G Wireless N Router TL-MR3420 3G/3.75G Wireless N Router...
-
Page 15: Chapter 3. Quick Installation Guide
Open a command prompt, and type ping 192.168.1.1, and then press Enter. If the result displayed is similar to the Figure 3-1, it means the connection between your PC and the Router has been established well. TL-MR3420 3G/3.75G Wireless N Router Appendix B: "Configuring the... - Page 16 Please check the connection following these steps: Is the connection between your PC and the Router correct? Note: The 1/2/3/4 LEDs of LAN ports which you link to on the Router and LEDs on your PC's adapter should be lit. TL-MR3420 3G/3.75G Wireless N Router...
-
Page 17: Quick Installation Guide
Tools menu>Internet Options>Connections>LAN Settings, in the screen that appears, cancel the Using Proxy checkbox, and click OK to finish it. After successfully login, you can click the Quick Setup to quickly configure your Router. TL-MR3420 ® Navigator) utility, it is easy to configure and... - Page 18 In this mode, the router will try WAN access first. If the WAN access fails, and 3G access is valid, the router would switch to 3G access. Once the router succeeds to connect to the WAN TL-MR3420 3G/3.75G Wireless N Router...
- Page 19 You will then see Figure 3-8. Select Auto-Detect, the Router will automatically detect the connection type your ISP provides. Make sure the cable is securely plugged into the WAN port before detection. The appropriate configuration page will be displayed when an active TL-MR3420 3G/3.75G Wireless N Router Figure 3-7...
- Page 20 TL-MR3420 3G/3.75G Wireless N Router Internet service is successfully detected by the Router. Figure 3-8 If the connection type detected is PPPoE, the next screen will appear as shown in Figure 3-9. Enter the User Name and Password provided by your ISP. These fields are case sensitive. If you have difficulty with this process, please contact your ISP.
- Page 21 TL-MR3420 3G/3.75G Wireless N Router Figure 3-10 Quick Setup - Static IP Click Next to continue, the Wireless settings page will appear as shown in Figure 3-11. Figure 3-11 Quick Setup – Wireless Wireless Radio - Enable or disable the wireless radio choosing from the pull-down list.
- Page 22 Click the Next button. You will then see the Finish page. If you don’t make any changes on the Wireless page, you will see the Finish page as shown in Figure 3-12. Click the Finish button to finish the Quick Setup. TL-MR3420 3G/3.75G Wireless N Router -15-...
- Page 23 Note: The configuration for 3G Only, WAN Preferred and WAN Only mode is very similar to 3G Preferred mode. Here we just take 3G Preferred for example. TL-MR3420 Figure 3-12 Quick Setup – Finish Figure 3-13 Quick Setup – Finish -16- 3G/3.75G Wireless N Router...
-
Page 24: Chapter 4. Configuring The Router
On the right, there are the corresponding explanations and instructions. The detailed explanations for each Web page’s key function are listed below. Status The Status page provides the current status information about the Router. All information is read-only. TL-MR3420 3G/3.75G Wireless N Router -17-... - Page 25 TL-MR3420 3G/3.75G Wireless N Router Figure 4-1 Router Status -18-...
-
Page 26: Quick Setup
For the configuration of the new device, here takes the Wireless Adapter of our company for example. By PBC If the wireless adapter supports Wi-Fi Protected Setup and the Push Button Configuration (PBC) TL-MR3420 3G/3.75G Wireless N Router Figure 4-2 QSS -19-... - Page 27 TL-MR3420 3G/3.75G Wireless N Router method, you can add it to the network by PBC with the following two methods. Method One: Step 1: Press the QSS button on the front panel of the Router. Step 2: Press and hold the QSS button of the adapter directly for 2 or 3 seconds.
- Page 28 The QSS Configuration Screen of Wireless Adapter Method Three: Step 1: Keep the default QSS Status as Enabled and click the Add device button in Figure 4-2 , then the following screen will appear. TL-MR3420 3G/3.75G Wireless N Router -21-...
- Page 29 QSS as below, and click Next. The QSS Configuration Screen of Wireless Adapter Step 4: Wait for a while until the next screen appears. Click Finish to complete the QSS configuration. TL-MR3420 Figure 4-3 Add A New Device -22- 3G/3.75G Wireless N Router...
-
Page 30: By Pin
The PIN code of the adapter is always displayed on the QSS configuration screen Step 3: For the configuration of the wireless adapter, please choose Enter a PIN into my access point or a registrar in the configuration utility of the QSS as below, and click Next. TL-MR3420 3G/3.75G Wireless N Router -23-... - Page 31 QSS as below, and enter the PIN code of the Router into the field behind Access Point PIN. Then click Next. The QSS Configuration Screen of Wireless Adapter TL-MR3420 3G/3.75G Wireless N Router -24-...
-
Page 32: Network
Choose menu “Network→Internet Access”, you can configure the access mode on the screen below. The router is designed to work with either WAN port or 3G USB modem, and supports automatically take over back up with 3G access as Ethernet WAN failover. TL-MR3420 3G/3.75G Wireless N Router -25-... - Page 33 3) If you are using the 3G Preferred or WAN Preferred, the router would connect, disconnect or switch the current access automatically. The Connect/Disconnect button (on 3G, PPPoE, PPTP, L2TP) and some related parameters could not be set manually. TL-MR3420 Figure 4-5 Internet Access Mode -26-...
- Page 34 TL-MR3420 3G/3.75G Wireless N Router 4.5.2 3G Choose menu “Network→3G”, you can configure parameters for 3G function on the screen below. To use the 3G function, you should first insert your USB modem on the USB port of the Router.
- Page 35 TL-MR3420 3G/3.75G Wireless N Router Figure 4-6 3G Figure 4-7 Location - Please select the location where you're enjoying the 3G card. Mobile ISP - Please select the ISP (Internet Service Provider) you apply to for 3G service. The router will show the default Dial Number and APN of that ISP.
- Page 36 Click the Connect button to connect to your 3G network. Once the connection is successful, you will find the 3G screen is similar to Figure 4-8. Click menu Status and you will see the 3G status is similar to Figure 4-9. TL-MR3420 3G/3.75G Wireless N Router -29-...
- Page 37 TL-MR3420 3G/3.75G Wireless N Router Figure 4-8 -30-...
- Page 38 Internet connecting last unless a new link requested. Note: Sometimes the connection cannot be disconnected although you specify a time to Max Idle Time because some applications visit the Internet continually in the background. TL-MR3420 3G/3.75G Wireless N Router Figure 4-9 -31-...
- Page 39 2. Click the Add New... button in Figure 4-10, and then you will see Figure 4-11. 3. Click Browse… to select the path name where you save the downloaded file on the computer into the File blank. 4. Click the Upload button to upload the configuration. TL-MR3420 3G/3.75G Wireless N Router -32-...
-
Page 40: Wan
If your ISP provides the DHCP service, please choose Dynamic IP type, and the Router will automatically get IP parameters from your ISP. You can see the page as follows (Figure 4-12): TL-MR3420 3G/3.75G Wireless N Router if you want to use WAN. - Page 41 You should contact your ISP to get DNS server addresses. Host Name - This option specifies the Host Name of the Router. Get IP with Unicast DHCP - A few ISPs' DHCP servers do not support the broadcast TL-MR3420 Figure 4-12 WAN - Dynamic IP -34- 3G/3.75G Wireless N Router...
- Page 42 Primary/Secondary DNS - (Optional) Enter one or two DNS addresses in dotted-decimal notation provided by your ISP. If your ISP provides a PPPoE connection, select PPPoE option. And you should enter the following parameters (Figure 4-14): TL-MR3420 Figure 4-13 WAN - Static IP -35- 3G/3.75G Wireless N Router...
- Page 43 Internet again. If you want your Internet connection keeps active all the time, please enter “0” in the Max Idle Time field. Otherwise, enter the number of minutes you want to have elapsed before your Internet access disconnects. TL-MR3420 3G/3.75G Wireless N Router -36-...
- Page 44 MTU Size - The default MTU size is “1480” bytes, which is usually fine. It is not recommended that you change the default MTU Size unless required by your ISP. Service Name/AC Name - The service name and AC (Access Concentrator) name, which TL-MR3420 3G/3.75G Wireless N Router -37-...
- Page 45 Click the Save button to save your settings. If your ISP provides BigPond Cable (or Heart Beat Signal) connection, please select BigPond Cable. And you should enter the following parameters (Figure 4-16): TL-MR3420 3G/3.75G Wireless N Router Figure 4-16 -38-...
- Page 46 Time because some applications are visiting the Internet continually in the background. Click the Save button to save your settings. If your ISP provides L2TP connection, please select L2TP option. And you should enter the following parameters (Figure 4-17): TL-MR3420 3G/3.75G Wireless N Router -39-...
- Page 47 If you wish to activate Connect on Demand, click the radio button. If you want your Internet connection to remain active at all times, enter 0 in the Max Idle Time field. Otherwise, enter the number of minutes you want to have elapsed before your Internet connection terminates. TL-MR3420 3G/3.75G Wireless N Router -40-...
- Page 48 Caution: Sometimes the connection cannot be disconnected although you specify a time to Max Idle Time, since some applications is visiting the Internet continually in the background. If your ISP provides PPTP connection, please select PPTP option. And you should enter the following parameters (Figure 4-18): TL-MR3420 3G/3.75G Wireless N Router -41-...
- Page 49 Click the Connect button to connect immediately. Click the Disconnect button to disconnect immediately. Connect on Demand - You can configure the Router to disconnect from your Internet connection after a specified period of inactivity (Max Idle Time). If your Internet connection TL-MR3420 3G/3.75G Wireless N Router -42-...
-
Page 50: Mac Clone
The Router can not detect PPTP/L2TP/BigPond connections with your ISP. If your ISP uses one of these protocols, then you must configure your connection manually. 4.5.4 MAC Clone Choose menu “Network→MAC Clone”, you can configure the MAC address of the WAN on the screen below, Figure 4-19: TL-MR3420 3G/3.75G Wireless N Router -43-... -
Page 51: Lan
MAC Address - The physical address of the Router, as seen from the LAN. The value can't be changed. IP Address - Enter the IP address of your Router or reset it in dotted-decimal notation TL-MR3420 Figure 4-19 MAC Address Clone Figure 4-20 LAN -44- 3G/3.75G Wireless N Router... -
Page 52: Wireless
Wireless Security, Wireless MAC Filtering, Wireless Advanced and Wireless Statistics. Click any of them, and you will be able to configure the corresponding function. 4.6.1 Wireless Settings Choose menu “Wireless→Wireless Setting”, you can configure the basic settings for the wireless network on this page. TL-MR3420 3G/3.75G Wireless N Router -45-... - Page 53 TL-MR3420 3G/3.75G Wireless N Router Figure 4-22 Wireless Settings SSID - Enter a value of up to 32 characters. The same name of SSID (Service Set Identification) must be assigned to all wireless devices in your network. Considering your wireless network security, the default SSID is set to be TP-LINK_XXXXXX (XXXXXX indicates the last unique six numbers of each Router’s MAC address).
- Page 54 20M, which is unable to be changed. Max Tx Rate - You can limit the maximum tx rate of the Router through this field. Enable Wireless Router Radio - The wireless radio of this Router can be enabled or disabled to allow wireless stations access.
-
Page 55: Wireless Security
Choose menu “Wireless→Wireless Security”, you can configure the security settings of your wireless network. There are five wireless security modes supported by the Router: WEP (Wired Equivalent Privacy), WPA (Wi-Fi Protected Access), WPA2 (Wi-Fi Protected Access 2), WPA2-PSK (Pre-Shared Key), WPA-PSK (Pre-Shared Key). TL-MR3420 3G/3.75G Wireless N Router -48-... - Page 56 TL-MR3420 3G/3.75G Wireless N Router Figure 4-23 Disable Security - If you do not want to use wireless security, select this check box, but it’s strongly recommended to choose one of the following modes to enable security. WEP - It is based on the IEEE 802.11 standard. If you select this check box, you will find a notice in red as show in Figure 4-24.
- Page 57 Automatic, which can select WPA (Wi-Fi Protected Access) or WPA2 (WPA version 2) automatically based on the wireless station's capability and request. • Encryption - You can select either Automatic, or TKIP or AES. TL-MR3420 3G/3.75G Wireless N Router Figure 4-24...
- Page 58 • Encryption - When WPA-PSK or WPA is set as the Authentication Type, you can select either Automatic, or TKIP or AES as Encryption. Note: If you check the WPA-PSK/WPA2-PSK find a notice in red as shown in TL-MR3420 3G/3.75G Wireless N Router Figure 4-25 radio button and choose TKIP encryption, you will Figure 4-19.
-
Page 59: Wireless Mac Filtering
Description - A simple description of the wireless station. To Add a Wireless MAC Address filtering entry, click the Add New… button. The "Add or Modify Wireless MAC Address Filtering entry" page will appear, shown in Figure 4-28: TL-MR3420 3G/3.75G Wireless N Router -52-... - Page 60 B with MAC address 00-0A-EB-00-23-11 are able to access the Router, but all the other wireless stations cannot access the Router, you can configure the Wireless MAC Address Filtering list by following these steps: 1. Click the Enable button to enable this function. TL-MR3420 3G/3.75G Wireless N Router hexadecimal digit).
-
Page 61: Wireless Advanced
Transmit Power - Here you can specify the transmit power of Router. You can select High, Middle or Low which you would like. High is the default setting and is recommended. TL-MR3420 Figure 4-29 Wireless Advanced -54- 3G/3.75G Wireless N Router... -
Page 62: Wireless Statistics
4.6.5 Wireless Statistics Choose menu “Wireless→Wireless Statistics”, you can see the MAC Address, Current Status, Received Packets and Sent Packets for each connected wireless station. TL-MR3420 3G/3.75G Wireless N Router -55-... -
Page 63: Dhcp
(shown in Figure 4-32 ).The Router is set up by default as a DHCP (Dynamic Host Configuration Protocol) server, which provides the TCP/IP configuration for all the PC(s) that are connected to the Router on the LAN. TL-MR3420 3G/3.75G Wireless N Router -56-... - Page 64 TL-MR3420 3G/3.75G Wireless N Router Figure 4-32 DHCP Settings DHCP Server - Enable or Disable the DHCP server. If you disable the Server, you must have another DHCP server within your network or else you must configure the computer manually.
-
Page 65: Dhcp Clients List
PC on the LAN, that PC will always receive the same IP address each time when it accesses the DHCP server. Reserved IP addresses should be assigned to the servers that require permanent IP settings. TL-MR3420 Figure 4-33 DHCP Clients List -58-... - Page 66 Click the Modify in the entry you want to modify. If you want to delete the entry, click the Delete. Modify the information. Click the Save button. Click the Enable/ Disabled All button to make all entries enabled/disabled TL-MR3420 Figure 4-34 Address Reservation -59- 3G/3.75G Wireless N Router...
-
Page 67: Forwarding
(in XXX – YYY format, XXX is the start port number, YYY is the end port number). IP Address - The IP Address of the PC providing the service application. TL-MR3420 Figure 4-37 Virtual Servers -60- 3G/3.75G Wireless N Router... - Page 68 Click the Modify in the entry you want to modify. If you want to delete the entry, click the Delete. Modify the information. Click the Save button. Click the Enable/ Disabled All button to make all entries enabled/ disabled. Click the Delete All button to delete all entries. TL-MR3420 3G/3.75G Wireless N Router -61-...
-
Page 69: Port Triggering
A response using one of these ports will be forwarded to the PC that triggered this rule. You can input at most 5 groups of ports (or port section). TL-MR3420 Figure 4-39 Port Triggering -62-... - Page 70 Click the Modify in the entry you want to modify. If you want to delete the entry, click the Delete. Modify the information. Click the Save button. Click the Enable All button to make all entries enabled TL-MR3420 3G/3.75G Wireless N Router -63-...
-
Page 71: Dmz
Play) in the screen (shown in Figure 4-42).The UPnP feature allows the devices, such as Internet computers, to access the local host resources or devices as needed. UPnP devices can be automatically discovered by the UPnP service application on the LAN. TL-MR3420 3G/3.75G Wireless N Router Figure 4-41 DMZ... -
Page 72: Security
There are four submenus under the Security menu as shown in Figure 4-43: Basic Security, Advanced Security, Local Management and Remote Management. Click any of them, and you will be able to configure the corresponding function. TL-MR3420 Figure 4-42 UPnP Setting -65-... -
Page 73: Basic Security
Protocol (PPP) to be tunneled through an IP network. To allow PPTP tunnels to pass through the Router, keep the default, Enabled. L2TP Passthrough - Layer 2 Tunneling Protocol (L2TP) is the method used to enable TL-MR3420 Figure 4-44 Basic Security -66-... -
Page 74: Advanced Security
Click the Save button to save your settings. 4.9.2 Advanced Security Choose menu “Security → Advanced Security”, you can protect the Router from being attacked by TCP-SYN Flood, UDP Flood and ICMP-Flood in the screen as shown in Figure 4-45. TL-MR3420 3G/3.75G Wireless N Router -67-... - Page 75 TL-MR3420 3G/3.75G Wireless N Router Figure 4-45 Advanced Security Packets Statistics Interval (5~60) - The default value is 10. Select a value between 5 and 60 seconds from the drop-down list. The Packets Statistics Interval value indicates the time section of the packets statistics. The result of the statistics is used for analysis by SYN Flood, UDP Flood and ICMP-Flood.
-
Page 76: Local Management
Choose menu “Security → Local Management”, you can configure the management rule in the screen as shown in Figure 4-46. The management feature allows you to deny computers in LAN from accessing the Router. TL-MR3420 Figure 4-46 Local Management -69-... -
Page 77: Remote Management
0.0.0.0. To enable this function change 0.0.0.0 to a valid IP address. If set to 255.255.255.255, then all the hosts can access the Router from internet. Note: To access the Router, you should type your Router's WAN IP address into your browser's TL-MR3420 Figure 4-47 Remote Management -70- 3G/3.75G Wireless N Router... -
Page 78: Parental Control
Schedule - The time period allowed for the PC controlled to access the Internet. For detailed information, please go to “Access Control → Schedule”. Modify - Here you can edit or delete an existing entry. TL-MR3420 3G/3.75G Wireless N Router -71-... - Page 79 Click the Disable All button to disable all the rules in the list. Click the Delete All button to delete all the entries in the table. Click the Next button to go to the next page, or click the Previous button return to the previous page. TL-MR3420 3G/3.75G Wireless N Router -72-...
- Page 80 3. Click “Parental Control” menu on the left to go back to the Add or Modify Parental Control Entry page: Click Add New... button. Enter 00-11-22-33-44-AA in the MAC Address of Child PC field. Enter “Allow Google” in the Website Description field. Enter “www.google.com” in the Allowed Domain Name field. TL-MR3420 3G/3.75G Wireless N Router -73-...
-
Page 81: Access Control
Target and Schedule. Click any of them, and you will be able to configure the corresponding function. 4.11.1 Rule Choose menu “Access Control → Rule”, you can view and set Access Control rules in the screen as shown in Figure 4-52. TL-MR3420 3G/3.75G Wireless N Router -74-... - Page 82 3. Select a host from the Host drop-down list or choose “Click Here To Add New Host List”. 4. Select a target from the Target drop-sown list or choose “Click Here To Add New Target List”. TL-MR3420 3G/3.75G Wireless N Router -75-...
- Page 83 3. Click “Access Control → Schedule” in the left to enter the Schedule Settings page. Add a new entry with the Schedule Description is Schedule_1, Day is Sat and Sun, Start Time is 1800 and Stop Time is 2000. TL-MR3420 3G/3.75G Wireless N Router -76-...
-
Page 84: Host
Modify - To modify or delete an existing entry. To add a new entry, please follow the steps below. Click the Add New… button. In the Mode field, select IP Address or MAC Address. TL-MR3420 Figure 4-54 Host Settings -77- 3G/3.75G Wireless N Router... - Page 85 3. In Host Description field, create a unique description for the host (e.g. Host_1). 4. In MAC Address field, enter 00-11-22-33-44-AA. 5. Click Save to complete the settings. Then you will go back to the Host Settings page and see the following list. TL-MR3420 3G/3.75G Wireless N Router -78-...
-
Page 86: Target
2) In Domain Name field, enter the domain name, either the full name or the keywords (for example google) in the blank. Any domain name with keywords in it (www.google.com, www.google.cn) will be blocked or allowed. You can enter 4 domain names. TL-MR3420 Figure 4-57 Target Settings -79- 3G/3.75G Wireless N Router... - Page 87 1. Click Add New… button in Figure 4-57 to enter the Add or Modify an Access Target Entry page. 2. In Mode field, select Domain Name from the drop-down list. TL-MR3420 3G/3.75G Wireless N Router www.google.com only, you should first follow the...
-
Page 88: Schedule
4. In Time field, you can select all day-24 hours or you may enter the Start Time and Stop Time in the corresponding field. 5. Click Save to complete the settings. Click the Delete All button to delete all the entries in the table. TL-MR3420 Figure 4-60 Schedule Settings -81- 3G/3.75G Wireless N Router... -
Page 89: Static Routing
TL-MR3420 3G/3.75G Wireless N Router Click the Next button to go to the next page, or click the Previous button return to the previous page. Figure 4-61 Advanced Schedule Settings For example: If you desire to restrict the internet activities of host with MAC address 00-11-22-33-44-AA to access www.google.com... - Page 90 Select Enabled or Disabled for this entry on the Status pull-down list. Click the Save button to make the entry take effect. Other configurations for the entries: Click the Delete button to delete the entry. TL-MR3420 Figure 4-62 Static Routing -83- 3G/3.75G Wireless N Router...
-
Page 91: Bandwidth Control
Line Type - Select the right type for you network connection. If you don’t know how to choose, please ask your ISP for the information. Egress Bandwidth - The upload speed through the WAN port Ingress Bandwidth - The download speed through the WAN port. TL-MR3420 3G/3.75G Wireless N Router -84-... -
Page 92: Rules List
To add/modify a Bandwidth Control rule, follow the steps below. Step 1: Click Add New… shown in Figure 4-66, you will see a new screen shown in Figure 4-67. Step 2: Enter the information like the screen shown below. TL-MR3420 3G/3.75G Wireless N Router -85-... -
Page 93: Ip & Mac Binding Setting
When you want to add or modify an IP & MAC Binding entry, you can click the Add New button or Modify button, and then you will go to the next page. This page is used for adding or modifying an IP & MAC Binding entry (shown in Figure 4-70). TL-MR3420 Figure 4-69 Binding Setting -86-... - Page 94 Click the Find button in the page as shown in Figure 4-71. Figure 4-71 Find IP & MAC Binding Entry Click the Enable All button to make all entries enabled. Click the Delete All button to delete all entries. TL-MR3420 3G/3.75G Wireless N Router -87-...
-
Page 95: Arp List
IP & MAC Binding list. 4.15 Dynamic DNS Choose menu “Dynamic DNS”, and you can configure the Dynamic DNS function. The Router offers the DDNS (Dynamic Domain Name System) feature, which allows the hosting TL-MR3420 3G/3.75G Wireless N Router Figure 4-72 ARP List -88-... -
Page 96: Comexe.cn Ddns
Type the Domain Name received from your dynamic DNS service provider. Type the User Name for your DDNS account. Type the Password for your DDNS account. Click the Login button to log in to the DDNS service. TL-MR3420 3G/3.75G Wireless N Router -89-... -
Page 97: Dyndns.org Ddns
Connection Status -The status of the DDNS service connection is displayed here. Click Logout to logout of the DDNS service. 4.15.3 No-ip.com DDNS If the dynamic DNS Service Provider you select is www.no-ip.com, the page will appear as shown in Figure 4-75. TL-MR3420 3G/3.75G Wireless N Router -90-... -
Page 98: System Tools
Connection Status - The status of the DDNS service connection is displayed here. Click Logout to log out the DDNS service. 4.16 System Tools Figure 4-76 The System Tools menu Choose menu “System Tools”, and you can see the submenus under the main menu: Time TL-MR3420 3G/3.75G Wireless N Router -91-... -
Page 99: Time Setting
Click the Get GMT button to get system time from Internet if you have connected to the Internet. Note: This setting will be used for some time-based functions such as firewall. You must specify TL-MR3420 Figure 4-77 Time settings -92- 3G/3.75G Wireless N Router... -
Page 100: Diagnostic
You can use ping/traceroute to test both numeric IP address or domain name. If pinging/tracerouting the IP address is successful, but pinging/tracerouting the domain name is not, you might have a name resolution problem. In this case, ensure that the domain name TL-MR3420 Figure 4-78 Diagnostic Tools -93-... -
Page 101: Firmware Upgrade
Timeout” are used for Ping function. Option “Tracert Hops” are used for Tracert function. 4.16.3 Firmware Upgrade Choose menu “System Tools → Firmware Upgrade”, you can update the latest version of firmware for the Router on the following screen. TL-MR3420 Figure 4-79 Diagnostic Results -94- 3G/3.75G Wireless N Router... -
Page 102: Factory Defaults
4) The Router will reboot after the upgrading has been finished. 4.16.4 Factory Defaults Choose menu “System Tools → Factory Defaults”, and you can restore the configurations of the Router to factory defaults on the following screen TL-MR3420 Figure 4-80 Firmware Upgrade firmware upgrade... -
Page 103: Backup & Restore
The current configuration will be covered by the uploading configuration file. The upgrade process lasts for 20 seconds and the Router will restart automatically. Keep the Router on during the upgrading process to prevent any damage. TL-MR3420 3G/3.75G Wireless N Router -96-... -
Page 104: Reboot
4.16.7 Password Choose menu “System Tools → Password”, you can change the factory default user name and password of the Router in the next screen as shown in Figure 4-84. TL-MR3420 Figure 4-83 Reboot the Router -97- 3G/3.75G Wireless N Router... -
Page 105: System Log
Auto Mail Feature - Indicates whether auto mail feature is enabled or not. Mail Settings - Set the receiving and sending mailbox address, server address, validation information as well as the timetable for Auto Mail Feature, as shown in Figure 4-86. TL-MR3420 3G/3.75G Wireless N Router Figure 4-84 Password... - Page 106 Figure 4-86 Click Save to keep your settings. Click Back to return to the previous page. Log Type - By selecting the log type, only logs of this type will be shown. TL-MR3420 3G/3.75G Wireless N Router -99-...
-
Page 107: Statistics
Sorted Rules - Choose how displayed statistics are sorted. Select the Auto-refresh checkbox to refresh automatically. Click the Refresh button to refresh immediately. Click Reset All to reset the values of all the entries to zero. TL-MR3420 3G/3.75G Wireless N Router Figure 4-87 Statistics -100-... - Page 108 Reset the value of he entry to zero. Modify Delete the existing entry in the table. Delete There would be 5 entries on each page. Click Previous to return to the previous page and Next to the next page. TL-MR3420 3G/3.75G Wireless N Router -101-...
-
Page 109: Appendix A: Faq
If you are a Cable user, please configure the Router following the above steps. How do I configure the Router to access Internet by Ethernet users? Login to the Router, click the “Network” menu on the left of your browser, and click TL-MR3420 3G/3.75G Wireless N Router -102-... - Page 110 Add New…. Then on the “Add or Modify a Virtual Server Entry” page, enter “1720” for the “Service Port” blank, and your IP address for the “IP Address” blank, taking 192.168.1.169 for an example, remember to Enable and Save. TL-MR3420 Figure A-3 MAC Clone Figure A-4 Virtual Servers -103- 3G/3.75G Wireless N Router...
- Page 111 How to enable H323 ALG: Log in to the Router, click the “Security” menu on the left of your browser, and click “Basic Security” submenu. On the “Basic Security” page, check the Enable radio button next to H323 ALG. Remember to click the Save button. TL-MR3420 3G/3.75G Wireless N Router Figure A-6 DMZ...
- Page 112 If the above configuration takes effect, to configure to the Router by typing http://192.168.1.1:88 (the Router’s LAN IP address: Web Management Port) in the address field of the Web browser. TL-MR3420 Figure A-7 Basic Security Figure A-8 Remote Management -105-...
- Page 113 Figure A-10 Add or Modify a Virtual server Entry The wireless stations cannot connect to the Router. Make sure the "Wireless Router Radio" is enabled. Make sure that the wireless stations' SSID accord with the Router's SSID. Make sure the wireless stations have right KEY for encryption when the Router is encrypted.
-
Page 114: Appendix B: Configuring The Pcs
Connections tab in the appearing window. Right click the icon that showed below, select Properties on the prompt page. In the prompt page that showed below, double click on the Internet Protocol (TCP/IP). TL-MR3420 3G/3.75G Wireless N Router Figure B-1... - Page 115 Now you have two ways to configure the TCP/IP protocol below: Setting IP address automatically Select Obtain an IP address automatically, Choose Obtain DNS server automatically, as shown in the Figure below: TL-MR3420 3G/3.75G Wireless N Router Figure B-2 -108-...
- Page 116 Type the Router’s LAN IP address (the default IP is 192.168.1.1) into the Default gateway field. Select Use the following DNS server addresses radio button. In the Preferred DNS Server field you can type the DNS server IP address, which has been provided by your ISP TL-MR3420 3G/3.75G Wireless N Router Figure B-3 -109-...
- Page 117 TL-MR3420 3G/3.75G Wireless N Router Figure B-4 Now click OK to keep your settings. -110-...
-
Page 118: Appendix C: Specifications
Environmental and Physical Operating : 0℃~40℃ (32 ~104 Temperature. Storage: -40℃~70℃(-40℉~158℉) Operating: 10% ~ 90% RH, Non-condensing Humidity Storage: 5% ~ 90% RH, Non-condensing TL-MR3420 3G/3.75G Wireless N Router EIA/TIA-568 100Ω STP (maximum 100m) EIA/TIA-568 100Ω STP (maximum 100m) ℉ ℉) -111-... -
Page 119: Appendix D: Glossary
TL-MR3420 3G/3.75G Wireless N Router Appendix D: Glossary 802.11n - 802.11n builds upon previous 802.11 standards by adding MIMO (multiple-input multiple-output). MIMO uses multiple transmitter and receiver antennas to allow for increased data throughput via spatial multiplexing and increased range by exploiting the spatial diversity, perhaps through coding schemes like Alamouti coding. - Page 120 TL-MR3420 3G/3.75G Wireless N Router connection. SSID - A Service Set Identification is a thirty-two character (maximum) alphanumeric key identifying a wireless local area network. For the wireless devices in a network to communicate with each other, all devices must be configured with the same SSID. This is typically the configuration parameter for a wireless PC card.
-
Page 121: Appendix E: Compatible 3G/3.75G Usb Modem
EC169, E156, E156C, E156B, E156G, E169, E180, E220, E226, E270, E272, E1756, E1550, E1762, K3565, EC122, EC1260, EC1261 MF100, MF102, MF626, MF627, MF637U, MF645, AC581, AC2736, AC581, MU351 U760 NOVATEL NOKIA CS-10 ONDA MSA501HS X060S, X070S ALCATEL 4G SYSTEM XSStick W12 U1-TF SAMSUNG SGH-H128 TL-MR3420 3G/3.75G Wireless N Router -114-...
Need help?
Do you have a question about the TL-MR3420 and is the answer not in the manual?
Questions and answers