Table of Contents
Advertisement
Available languages
Available languages
Quick Links
IDOLA M 3.2
POMPE DI CALORE REVERSIBILI PER INSTALLAZIONE ESTERNA
CON COMPRESSORE DC INVERTER
REVERSIBLE HEAT PUMP UNITS FOR OUTDOOR INSTALLATION
WITH DC INVERTER COMPRESSOR
R32
65
.0
Scansiona il codice QR per leggere il manuale in altre lingue
Scan the QR code to read the manual in other language
IT
MANUALE DI INSTALLAZIONE E USO
EN
INSTALLATION AND OWNER'S MANUAL
Advertisement
Chapters
Table of Contents

Related Manuals for Lamborghini Caloreclima IDOLA M 3.2


Summary of Contents for Lamborghini Caloreclima IDOLA M 3.2
- Page 1 IDOLA M 3.2 POMPE DI CALORE REVERSIBILI PER INSTALLAZIONE ESTERNA CON COMPRESSORE DC INVERTER REVERSIBLE HEAT PUMP UNITS FOR OUTDOOR INSTALLATION WITH DC INVERTER COMPRESSOR Scansiona il codice QR per leggere il manuale in altre lingue Scan the QR code to read the manual in other language MANUALE DI INSTALLAZIONE E USO INSTALLATION AND OWNER’S MANUAL...
-
Page 2: Table Of Contents
INDICE PRECAUZIONI DI SICUREZZA INTRODUZIONE GENERALE ACCESSORI Accessori forniti in dotazione con l'unità PRIMA DELL’INSTALLAZIONE INFORMAZIONI IMPORTANTI PER IL REFRIGERANTE SITO DI INSTALLAZIONE Selezione di una località in climi freddi Selezione di una località in climi caldi PRECAUZIONI PER L'INSTALLAZIONE Dimensioni Requisiti per l'installazione Posizione del foro di scarico... - Page 3 Avvio iniziale a basse temperature ambiente esterne 10.3 Controlli pre-operazione 10.4 La pompa di circolazione 10.5 Impostazioni di campo 10.6 MODO TEST E CONTROLLI FINALI 11.1 Controlli finali 11.2 Esecuzione di test di funzionamento (manualmente) MANUTENZIONE E ASSISTENZA RISOLUZIONE DEI PROBLEMI 13.1 Linee guida generali 13.2...
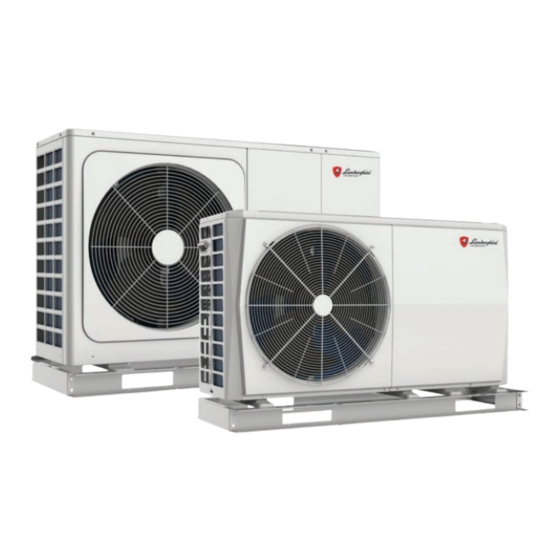
- Page 4 4/6 kW 8/10/12/14/16 kW Disposizione interna: 12~16kW(trifase) ad esempio 4/6 kW Impianto di controllo elettrico Morsettiera Sistema idraulico Sistema di refrigerazione 8/10/12/14/16 kW Si prega di rimuovere la piastra cava successivamente all'installazione. Eliminare il supporto di trasporto 12/14/16 kW NOTA L'immagine e la funzione descritte in questo manuale contengono i componenti del riscaldatore di backup.
-
Page 5: Precauzioni Di Sicurezza
1 PRECAUZIONI DI SICUREZZA Le precauzioni qui elencate sono suddivise nei seguenti tipi. Sono abbastanza importanti, quindi è necessario seguirle con attenzione. Significato dei simboli di PERICOLO, ATTENZIONE, ATTENZIONE e NOTA. INFORMAZIONI Leggere attentamente queste istruzioni prima dell'installazione. Tenere questo manuale a portata di mano per future consultazioni. - Page 6 PERICOLO Prima di toccare le componenti dei terminali elettrici, si prega di spegnere l'interruttore di alimentazione. Quando i pannelli di servizio vengono rimossi, è molto facile, per sbaglio, toccare le componenti sotto tensione. Non lasciare mai l'unità incustodita in fase di installazione o manutenzione quando il pannello di servizio viene rimosso. Non toccare i tubi dell'acqua durante e subito dopo il funzionamento, poiché...
- Page 7 Non installare l'unità nei seguenti luoghi: - Dove c'è nebbia di olio minerale, spray di olio o vapori. Le componenti in plastica si possono deteriorare e causare il distacco o la fuoriuscita di acqua. - Dove si producono gas corrosivi (come il gas acido solforoso). Dove la corrosione dei tubi di rame o delle parti saldate può causare perdite di refrigerante.
-
Page 8: Introduzione Generale
2 INTRODUZIONE GENERALE Queste unità sono utilizzate sia per applicazioni di riscaldamento e raffreddamento che per serbatoi di acqua calda sanitaria. Possono essere combinate con ventilconvettori, applicazioni di riscaldamento a pavimento, radiatori ad alta efficienza a bassa temperatura, serbatoi di acqua calda sanitaria e kit solari, che sono tutti alimentati sul campo. Insieme all'unità... -
Page 9: Accessori
Nella modalità di raffreddamento, il range di temperatura 3 ACCESSORI dell'acqua che scorre (TW_out) in diverse temperature esterne (T4) è elencato di seguito: 3.1 Accessori forniti in dotazione con l'unità Raccordi per l'installazione Quantità Nome Forma Manuale d’installazione e dell’utente (questo libro) Funzionamento manuale Manuale dei dati tecnici TW_uscita... -
Page 10: Informazioni Importanti Per Il Refrigerante
ATTENZIONE Per evitare lesioni, non toccare l'ingresso dell'aria o le alette di alluminio dell'unità. Non utilizzare le impugnature delle griglie delle ventole per evitare di danneggiarle. L'unità è pesantissima! Evitare che l'unità cada a causa di un'inclinazione non corretta durante la manipolazione. Il gancio e il baricentro dell'unità... -
Page 11: Sito Di Installazione
ATTENZIONE Frequenza dei controlli delle perdite di refrigerante - Per le unità che contengono gas fluorurati ad effetto serra in quantità di 5 tonnellate di CO equivalente o superiore, ma inferiore a 50 tonnellate di CO equivalente, almeno ogni 12 mesi, o in caso di installazione di un sistema di rilevamento delle perdite, almeno ogni 24 mesi. -
Page 12: Selezione Di Una Località In Climi Freddi
Se si installa l'unità su una struttura di un edificio, si prega di installare un vassoio impermeabile (fornitura campo) (circa 100mm, sul lato inferiore dell'unità) per evitare che l'acqua di scarico defluisca. (Cfr. immagine a destra). A (mm) Unità 4~6kW 8~16kW 6.1 Selezione di una località... -
Page 13: Precauzioni Per L'installazione
7 PRECAUZIONI DI INSTALLAZIONE 7.1 Dimensioni 8/10/12/14/16 kW (unit: mm) 4/6 kW (unità: mm) Modello 4/6kW 1295 8/10/12/14/16kW 1385 7.2 Requisiti di installazione Controllare la resistenza e il livello del terreno di installazione in modo che l'unità non possa causare vibrazioni o rumore durante il suo funzionamento. -
Page 14: Posizione Del Foro Di Scarico
7.3 Posizione del foro di scarico Foro di scarico Foro di scarico 4/6 kW Questo foro di scarico è coperto da un tappo di gomma. Se il foro di scarico piccolo non può soddisfare i requisiti di scarico, si può utilizzare contemporaneamente il foro di scarico grande. - Page 15 7.4.2 In caso di montaggio su più file (per l'utilizzo sul tetto, ecc.) In caso di installazione di più unità in collegamento laterale per fila. 1/2 H A (mm) B1 (mm) B2 (mm) C (mm) Unità 4~6kW 8~16kW...
- Page 16 8 ESEMPI TIPICI DI APPLICAZIONE Gli esempi di applicazione riportati di seguito sono solo a titolo illustrativo. 8.1 Applicazione 1 Interno Esterno FHL1 FHL2 FHLn 11.2 Modbus 11.3 Codice Unità di montaggio Codice Unità di montaggio Unità principale Serbatoio dell’acqua calda sanitaria (Alimentazione campo) TBH: Riscaldatore del bollitore dell'acqua calda Interfaccia utente 11.1...
- Page 17 Riscaldamento degli ambienti Il segnale ON/OFF e la modalità di funzionamento, nonché le impostazioni di temperatura, vengono impostati sull’interfaccia utente. P_o continua a funzionare fino a che l’unità è su ON per il riscaldamento degli ambienti, SV1 rimane su OFF. Riscaldamento dell'acqua sanitaria Il segnale ON/OFF e la temperatura dell’acqua del serbatoio target (T5S) vengono impostati sull’interfaccia utente.
- Page 18 8.2 Applicazione 2 Il Controllo TERMOSTATO AMB. per il riscaldamento o il raffreddamento degli ambienti deve essere impostato sull’interfaccia utente. Può essere impostato in tre modi: IMPOST. MODO/UNA ZONA/DUE ZONE. Il monoblocco può essere collegato a un termostato ambiente ad alta tensione e ad un termostato ambiente a bassa tensione. Può essere collegata anche una scheda di trasferimento del termostato.
- Page 19 8.2.2 Controllo impostazione modalità Interno Esterno FCU1 FCU2 FCUn FHL1 FHL2 FHLn Codifica Unità di montaggio Codifica Unità di montaggio Unità principale Valvola di scarico (Alimentazione campo) Interfaccia utente Collettore/distributore Valvola di bypass (Alimentazione campo) Serbatoio di equilibrio (Alimentazione campo) Valvola di spurgo automatico dell’aria Scheda di trasferimento termostato (Alimentazione campo) SV2: valvola a 3 vie (Alimentazione campo)
- Page 20 8.2.3 Controllo doppia zona Interno Esterno RAD.1 ZONA1 RAD.2 RAD.n ZONA2 23.1 23.2 Modbus FHL1 FHL2 FHLn Codifica Unità di montaggio Codifica Unità di montaggio Unità principale Collettore/distributore (Alimentazione campo) Interfaccia utente Scheda di trasferimento termostato (Opzionale) Serbatoio di equilibrio (Alimentazione campo) Stazione di miscelazione (Alimentazione campo) Valvola di spurgo automatico dell'aria SV3: Valvola miscelatrice (Alimentazione campo)
-
Page 21: Codice Unità Di Montaggio Codice
NOTA 1) La Zona 2 può funzionare solo in modalità riscaldamento. Quando la modalità di raffreddamento viene impostata sull’interfaccia utente e la zona 1 è su OFF, “CL” nella zona 2 si chiude, il sistema resta spento “OFF”. In fase di installazione, il cablaggio dei termostati per zona 1 e zona 2 deve essere corretto. -
Page 22: P_O: Pompa Di Circolazione Esterna (Alimentazione Campo)
Valvola di spegnimento Contattore (alimentazione di Valvola di riempimento (Alimentazione campo) campo) Tubo di ingresso dell'acqua di P_o: Pompa di circolazione Lo spazio funziona in modalità di rubinetto (Alimentazione campo) esterna (Alimentazione campo) raffreddamento o di riscaldamento Rubinetto dell'acqua calda Il locale funziona solo in modalità... - Page 23 NOTA 1. In un sistema è possibile collegare al massimo 6 unità in cascata. Una di esse è l'unità master, le altre sono unità slave; l'unità master e le unità slave si distinguono per il fatto di essere collegate al controller cablato durante l'accensione. L'unità con controller cablato è unità master, le unità...
- Page 24 9.2 Componenti principali 9.2.1 Modulo idraulico 4/6 kW con riscaldatore di backup (opzionale) 4/6 kW senza riscaldatore di backup 8~16 kW senza riscaldatore di backup 8~16 kW con riscaldatore di backup (opzionale) Codifica Unità di montaggio Spiegazione L'aria residua nel circuito dell'acqua sarà automaticamente Valvola di spurgo dell’aria rimossa dal circuito dell'acqua.
- Page 25 9.3 Scatola di controllo elettronica Nota: L'immagine è solo di riferimento, si prega di fare riferimento al prodotto reale. Scheda di controllo del modulo Inverter (PCB A) Scheda di controllo principale del sistema con Scheda di controllo principale del pompa di calore (PCB B) modulo idraulico 4/6kW Scheda di...
- Page 26 Scheda di controllo principale del modulo idraulico Scheda di controllo del modulo Inverter (PCB A) Scheda di controllo principale del sistema con pompa di calore (PCB B) 12/14/16kW (Monofase) Scheda di controllo principale del modulo idraulico Scheda di controllo del modulo Inverter (PCB A) Scheda di controllo principale del sistema con pompa di calore (PCB B)
- Page 27 CN24 CN21 CN28 CN16 CN32 CN13 CN15 CN29 CN18 CN25 CN42 CN40 DIS1 CN31 CN41 CN22 CN35 CN36 CN17 25 26 27 14 15 CN11 CN30 Ordine Unità di montaggio Ordine Unità di montaggio Porta Codice Porta Codice M1 M2 CN21 POTENZA Porta per alimentazione elettrica...
- Page 28 9.3.2 Monofase per unità 4-16kW 1) PCB A, 4-10kW, Modulo Inverter Note: per 4-6kw, due condensatori CN20 Codifica Unità di montaggio Unità di montaggio Codifica Porta di collegamento del compressore U Riservato(CN302) Porta di collegamento del compressore V Porta per la comunicazione con il PCB B (CN32) Porta di collegamento del compressore W Porta di ingresso N per ponte raddrizzatore (CN502) Porta di uscita per +12V/9V (CN20)
- Page 29 2) PCB B, Pannello di controllo principale del sistema a pompa di calore CN10 CN27 CN11 CN22 CN24 CN17 CN26 CN28 CN13 CN55 CN18 CN14 CN29 CN7 CN5 CN6 CN16 CN19 CN21 CN33 CN2 CN30 CN36 CN37 CN38 CN20 26 25 24 Codifica Unità...
- Page 30 9.3.3 Trifase per unità 12/14/16 kW 1) PCB A, modulo inverter CN16 CN22 CN15 CN23 CN17 CN18 CN20 CN19 Codifica Unità di montaggio Codifica Unità di montaggio Porta di uscita per +15V(CN20) Porta di ingresso P_in per modulo IPM(CN1) Porta di collegamento del compressore W(CN19) Porta per la comunicazione con PCB B (CN8) Scheda PED (CN22) Porta di collegamento del compressore V(CN18)
- Page 31 2) PCB B, Pannello di controllo principale del sistema a pompa di calore CN41 CN26 CN24 CN36 CN21 CN18 CN31 CN29 CN10 CN35 CN11 CN28 CN20 CN37 CN27 V i n CN22 CN30 CN38 CN53 CN109 Codifica Unità di montaggio Unità...
- Page 32 3) PCB C, scheda filtro CN204 CN205 CN206 CN30 CN213 CN214 CN202 CN211 CN203 CN200 CN201 CN212 PCB C Trifase 12/14/16kW Codifica Unità di montaggio Codifica Unità di montaggio Alimentazione L2(CN201) Alimentazione L3(CN200) Alimentazione N(CN203) Porta di alimentazione per la scheda di controllo Porta di alimentazione di 310VDC(CN212) principale (CN30) Riservato(CN211)
- Page 33 9.3.4 Componenti di controllo per il riscaldatore di backup (Opzionale) 4/6kW monofase con riscaldatore di backup (3kW monofase) 8-16kW monofase con riscaldatore di backup (3kW monofase) 8-16kW monofase con riscaldatore di backup (9kW trifase) 12-16kW trifase con riscaldatore di backup (3kW monofase) 12-16kW trifase con riscaldatore di backup (9kW trifase) Codifica Unità...
- Page 34 9.4 Tubazione dell’acqua Sono state prese in considerazione tutte le lunghezze e le distanze delle tubazioni. Requisiti Valvola La lunghezza massima consentita del cavo del termistore è di 20 m. Questa è la distanza massima consentita tra l'accumulatore dell'acqua calda sanitaria e l'unità (solo per installazioni con accumulatore dell'acqua calda sanitaria).
- Page 35 Prima di continuare l'installazione dell'unità, controllare quanto segue: Utilizzare sempre materiali compatibili con l'acqua utilizzata nel sistema e con i materiali utilizzati nell'unità. Assicurarsi che i componenti installati nelle tubazioni di campo possano resistere alla pressione e alla temperatura dell'acqua. I rubinetti di scarico devono essere previsti in tutti i punti bassi dell'impianto per consentire il completo scarico del circuito durante la manutenzione.
- Page 36 9.4.3 Collegamento del circuito dell’acqua I collegamenti dell'acqua devono essere effettuati correttamente 9.4.4 Protezione antigelo del circuito dell'acqua secondo le etichette apposte sull'unità esterna, per quanto Tutte le parti interne idroniche sono isolate per ridurre le riguarda l'ingresso e l'uscita dell'acqua. perdite di calore.
- Page 37 ATTENZIONE Quando l'unità non è in funzione per un lungo periodo di tempo, assicurarsi che l'unità sia sempre accesa. Se si desidera interrompere l'alimentazione, l'acqua nel tubo del sistema deve essere drenata in modo pulito, evitare che l'unità e il sistema di tubazioni siano danneggiati dal congelamento.
- Page 38 9.6 Isolamento delle tubazioni dell'acqua L'intero circuito dell'acqua, comprese tutte le tubazioni, le tubazioni dell'acqua devono essere isolate per evitare la formazione di condensa durante il funzionamento di raffreddamento e la riduzione della capacità di riscaldamento e di raffreddamento, nonché per evitare il congelamento delle tubazioni dell'acqua esterna durante l'inverno.
- Page 39 1OFF AHS1 AHS2 2OFF DFT2 DFT1 IBH1 3OFF CN11 CN30 25 T Esterno Interno Descrizione CA/CC Numero di conduttori richiesto Corrente massima di funzionamento Elemento Cavo di segnale del kit di energia solare 200mA Cavo interfaccia utente 200mA Cavo termostato camera 200mA(a) Cavo di controllo della pompa solare 200mA(a)
- Page 40 NOTA Si prega di utilizzare H07RN-F per il cavo di alimentazione, tutti i cavi sono collegati all’alta tensione ad eccezione del cavo del termistore e del cavo per l'interfaccia utente. La strumentazione deve essere provvista di messa a terra. Tutti i carichi esterni ad alta tensione, se sono di metallo o una porta con messa a terra, devono essere messi a terra. Tutte le correnti di carico esterne sono necessarie meno di 0,2A, se la singola corrente di carico è...
- Page 41 Linee guida per il cablaggio di campo La maggior parte del cablaggio di campo sull'unità deve essere effettuata sulla morsettiera all'interno della scatola dell'interruttore. Per accedere alla morsettiera, rimuovere il pannello di servizio della cassetta degli interruttori (porta 2). AVVERTENZA Prima di rimuovere il pannello di servizio della scatola degli interruttori, spegnere tutta l'alimentazione, compresa l'alimentazione dell'unità, il riscaldatore di backup e l'alimentazione dell'accumulatore dell'acqua calda sanitaria (se applicabile) prima di rimuovere il pannello di servizio della scatola degli interruttori.
- Page 42 Tabella 9-1 Corrente nominale Area sezione trasversale nominale (mm dell'apparecchio: Cavi flessibili Cavo per cablaggio fisso 0,5 e 0,75 e 2,5 0,75 e 1 e 2,5 > > e 1,5 e 2,5 10 e 1,5 e 2,5 1,5 e 4 >...
- Page 43 NOTA MCA: Amp. massimi circuito (A) TOCA: Totale amp. di sovracorrente (A) MFA: Amp. massimi a fusibile (A) MSC: Max. Amp. di inizio (A) RLA: In condizioni di test di raffreddamento o di riscaldamento nominale, gli Ampere in ingresso del compressore dove MAX. Hz può funzionare con gli Ampere di carico nominale. (A) KW: Potenza nominale del motore FLA: Amp a pieno carico.
- Page 44 Selezione unità Master Si prega di utilizzare il filo schermato, e lo strato di schermatura deve essere messo a terra. H1 H2 H1 H2 H1 H2 ..Unità Master Unità Slave 1 Unità Slave 2 Unità Slave x Solo l'ultima IDU richiede l'aggiunta della resistenza di costruzione a P e Q.
- Page 45 Quando si effettua il collegamento al morsetto di alimentazione, utilizzare il morsetto di cablaggio circolare con l'involucro isolante (cfr. Figura 9.1). Utilizzare un cavo di alimentazione conforme alle specifiche e collegare saldamente il cavo di alimentazione. Per evitare che il cavo venga strappato da una forza esterna, assicurarsi che sia fissato saldamente.
- Page 46 9.7.6 Collegamento per altre componenti Unità 4~-16kW 1OFF P_c P_o P_s P_d AHS1 AHS2 2OFF IBH1 N 3ON 3OFF DFT2 DFT1 CN11 CN30 Codice Collegamento a Codice Stampa Stampa Collegamento a Segnale di ingresso dell'energia solare Controller cablato Ingresso termostato camera (Alta tensione) SV1 (valvola a 3 vie)
- Page 47 25 26 1 2 3 4 5 29 30 31 32 6 7 8 9 10 CN11 CN30 25 26 27 28 1 2 3 4 5 29 30 31 32 6 7 8 9 10 CN11 CN30 Alimentazione 7531 8642 Contattore (TBH)
- Page 48 5) Per Pompa per tubi di ACS: 25 26 27 28 1 2 3 4 5 29 30 31 32 6 7 8 9 10 CN11 CN30 25 26 27 28 1 2 3 4 5 Alimentazione 29 30 31 32 6 7 8 9 10 7 5 3 1 CN11...
- Page 49 Metodo C (Controllo due zone) Il Modulo Idraulico è connesso con due termostati camera, mentre l'interfaccia utente PER SERVIZIO ASSISTENZA imposta il TERMOSTATO AMB. su DUE ZONE: C.1 Quando l’unità rileva una tensione di 230VAC fra H e L1, la zona1 si accende.
- Page 50 C.2 Quando l’unità rileva una tensione di 12VDC fra CL e COM, 8) Per un ulteriore controllo della fonte di calore: la zona2 si accende a seconda della curva di temperatura del clima. Quando l’unità rileva una tensione di 0V fra CL e COM, la zona2 si spegne.
- Page 51 Tensione 220-240VAC 11) Per rete intelligente (SMART GRID): Corrente massima di funzionamento (A) L'unità dispone della funzione rete intelligente, ci sono due Dimensione di cablaggio (mm 0,75 porte sul PCB per collegare il segnale SG e il segnale EVU come segue: Tipo di segnale della porta di controllo Tipo 1 CN24...
- Page 52 10 AVVIO E CONFIGURAZIONE L'unità deve essere configurata dall'installatore per adattarsi all'ambiente di installazione (clima esterno, opzioni installate, ecc.) e alla competenza dell'utente. ATTENZIONE È importante che tutte le informazioni di questo capitolo vengano lette in sequenza dall'installatore e che il sistema sia configurato come applicabile.
- Page 53 Curve di temperatura per la modalità di raffreddamento - 10 T4 15 15 T4 22 22 T4 30 30 T4 1- T1S 2- T1S 3- T1S 4- T1S 5- T1S 6- T1S 7- T1S 8- T1S - 10 T4 15 15 T4 22 22 T4 30 30 T4...
- Page 54 Valore Valore Valore Interrutt Interrutt Interrutt ON=1 OFF=1 ON=1 OFF=0 ON=1 OFF=0 predefinito predefinito predefinito ore DIP ore DIP ore DIP di fabbrica di fabbrica di fabbrica Unità master: 0/0=3kW IBH (Controllo a indirizzi chiari L’avvio della L’avvio della Mantenere una fase) di tutte le unità...
- Page 55 10.5 La pompa di circolazione Le relazioni tra la prevalenza e il flusso d'acqua nominale, il ritorno PMW e il flusso d'acqua nominale vengono mostrati nel grafico sottostante. Sollevamento pompa max. Velocità massima Velocità minima Q (m L'area di regolazione è compresa fra la curva di velocità massima Q (m e la curva di velocità...
- Page 56 ATTENZIONE Se le valvole si trovano nella posizione sbagliata, la pompa di circolazione si danneggia. PERICOLO Se è necessario controllare lo stato di funzionamento della pompa all'accensione dell'unità, si prega di non toccare i componenti interni della scatola di controllo elettronico per evitare scosse elettriche. Diagnosi dei guasti alla prima installazione Se sull'interfaccia utente non viene visualizzato nulla, è...
- Page 57 Informazioni su “PER SERVIZIO ASSISTENZA” 10.6.1 IMPOSTAZIONE MODO ACS La sezione "PER SERVIZIO ASSISTENZA" è progettata per ACS = acqua calda sanitaria consentire all'installatore di impostare i parametri. Andare su MENU> PER SERVIZIO ASSISTENZA > 1. IMPOSTAZIONE MODO ACS. Premere Verrà...
- Page 58 10.6.5 IMPOSTAZIONE TIPO TEMP. 2 IMPOSTAZIONE MODO FREDDO Informazioni su IMPOSTAZIONE TIPO TEMP. SÌ 2.1 MODO FREDDO 2.2 t_T4_FRESH_C 2.0ORE La IMPOSTAZIONE TIPO TEMP. viene utilizzata per 2.3 T4CMAX 43°C selezionare se la temperatura di mandata dell'acqua o la 20°C 2.4 T4CMIN temperatura ambiente viene utilizzata per controllare 2.5 dT1SC...
- Page 59 10.6.7 ALTRA FONTE RISCALDAMENTO In questo caso, il valore di impostazione della zona 1 è T1S, il valore di impostazione della zona 2 è T1S2. L'ALTRA FONTE RISCALDAMENTO viene utilizzata per impostare i parametri del riscaldatore di backup, delle fonti di Se DUE ZONE e TEMP.
- Page 60 Se si seleziona SÌ, verranno visualizzate le seguenti pagine: 9 CHIAMATA ASSISTENZA TELEFONO 33512345678 NUMERO DI TELEFONO CELLULARE 8613929145152 11 MODALITÀ TEST 11.1 CONTROLLO PUNTI 11.2 SFIATO ARIA 11.3 POMPA DI CIRCOLAZIONE IN FUNZIONE CONFERMARE MODIFICA 11.4 ATTIVAZIONE MODO FREDDO 11.5 ATTIVAZIONE MODO CALDO Il numero visualizzato sull'interfaccia utente è...
- Page 61 Quando ci si trova nella modalità di spurgo aria, SV1 si apre, Durante l'esecuzione del test MODO CALDO, la temperatura SV2 si chiude. 60s più tardi la pompa nell'unità (POMPAI) predefinita dell'acqua uscita è 35°C. L'IBH funzionerà per 10min durante i quali il flussostato non (riscaldamento di backup interno) si accende dopo che il funzionerà.
- Page 62 Vai a MENU > PER SERVIZIO ASSISTENZA > 12. Durante il preriscaldamento del pavimento, tutti i pulsanti FUNZIONE SPECIALE. tranne OK non sono validi. Se si desidera disattivare l'asciugatura del pavimento, premere OK. Prima del riscaldamento a pavimento, se sul pavimento rimane una grande quantità...
- Page 63 Quando il cursore è su AZIONAMENTO ASCIUGATURA Andare su MENU > PER SERVIZIO ASSISTENZA >13. PAVIMENTO, usare per scorrere su SÌ e premere OK. RIAVVIO AUTOM. Verrà visualizzata la seguente pagina. 13 RIAVVIO AUTOM. 12.2 ASCIUGATURA PAVIMENTO 13.1 MODO FREDDO/CALDO SÌ...
- Page 64 10.6.16 Configurazione dei parametri I parametri relativi a questo capitolo sono riportati nella tabella sottostante. Definizione Numero Codice Stato Default Minimo Massimo Unità intervallo d'ordine MODO ACS Abilitare o disabilitare la modalità ACS:0=NO,1=Sì DISINFEZIONE Attivare o disattivare la modalità di disinfezione:0=NO,1=Sì PRIORITÀ...
- Page 65 MODO CALDO Attivare o disattivare la modalità di riscaldamento Il tempo di aggiornamento delle curve climatiche per la modalità t_T4_FRESH_H di riscaldamento La temperatura ambiente massima di funzionamento per la modalità T4HMAX di riscaldamento °C La temperatura ambiente minima di funzionamento per la modalità di T4HMIN °C riscaldamento...
- Page 66 12.4 t_DRYUP Il giorno del riscaldamento durante l'asciugatura del pavimento I giorni di permanenza dell’alta temperatura durante 12.5 t_HIGHPEAK l'asciugatura del pavimento Il giorno del calo della temperatura durante l'asciugatura 12.6 t_DRYD del pavimento La temperatura target di picco del flusso d'acqua durante 12.7 T_DRYPEAK °C...
- Page 67 11 MODO TEST E CONTROLLI I seguenti controlli devono essere effettuati almeno una volta all'anno da una persona qualificata. FINALI Pressione dell'acqua Controllare la pressione dell'acqua: se è inferiore a 1 bar, L'installatore è tenuto a verificare il corretto funzionamento riempire l'impianto di acqua.
- Page 68 13 RISOLUZIONE DEI PROBLEMI Questa sezione fornisce informazioni utili per la diagnosi e la correzione di alcuni problemi che possono verificarsi nell'unità. Questa risoluzione dei problemi e le relative azioni correttive possono essere eseguite solo dal vostro tecnico locale. 13.1 Linee guida generali Prima di iniziare la procedura di risoluzione dei problemi, eseguire un'accurata ispezione visiva dell'unità...
- Page 69 Sintomo 3: la pompa fa rumore (cavitazione) POSSIBILI CAUSE AZIONE CORRETTIVA C'è dell’aria nel sistema. Spurgare l'aria. • Controllare la pressione dell’acqua. La pressione dell'acqua deve essere > 1 bar (l'acqua è fredda). La pressione dell'acqua • Controllare che il vaso di espansione non sia rotto. all'ingresso della pompa è...
- Page 70 Sintomo 8: la modalità ACS non può passare immediatamente alla modalità Riscaldamento POSSIBILI CAUSE AZIONE CORRETTIVA • Impostare "t_DHWHP_MAX" sul valore minimo, il valore suggerito è 60min. • Se la pompa di circolazione fuori dall'unità non è controllata dall'unità, Scambiatore di calore per il provare a collegarla all'unità.
- Page 71 PARAMETRI DI FUNZIONAMENTO #01 PARAMETRI DI FUNZIONAMENTO #01 PARAMETRI DI FUNZIONAMENTO #01 VELOC. VENTIL. 600 GIRI /MIN TW_O TEMP. ACQUA OUT SP 35°C T3 TEMP. SCARICO EST. 5°C FREQUEN. IDEALE IDU 46Hz TW_I TEMP. ACQUA IN SP 30°C T4 TEMP. ARIA ESTERNA 5°C TIPO LIMITE FREQ.
- Page 72 13.4 Codici di errore Quando viene attivato un dispositivo di sicurezza, sull'interfaccia utente viene visualizzato un codice di errore (che non include un guasto esterno). La tabella sottostante presenta un elenco di tutti gli errori e delle azioni correttive. Resettare la sicurezza spegnendo e riaccendendo l'unità. Nel caso in cui questa procedura di ripristino della sicurezza non abbia successo, contattare il proprio rivenditore locale.
- Page 73 ANOMALIA DI CODICE FUNZIONAMENTO O PROTEZIONE CAUSA DEL GUASTO E AZIONE CORRETTIVA ERRORE 1. Controllare la resistenza del sensore 2.Il connettore del sensore Tsolar è allentato - ricollegarlo. Guasto sensore temp. solare 3.Il connettore del sensore Tsolar è bagnato o c’è acqua all’interno; (Tsolar) togliere l’acqua e far asciugare il connettore.
- Page 74 CAUSA DEL GUASTO E ANOMALIA DI FUNZIONAMENTO CODICE ERRORE AZIONE CORRETTIVA O PROTEZIONE 1. I fili di segnale delle unità slave e dell'unità master non sono collegati in modo efficace. Dopo aver controllato che tutti i fili di segnale siano ben collegati, e dopo essersi assicurati che non vi sia forte elettricità...
- Page 75 ANOMALIA DI FUNZIONAMENTO CODICE ERRORE CAUSA DEL GUASTO E AZIONE CORRETTIVA O PROTEZIONE La perdita di fase o il cavo neutro 1. Controllare i cavi dell'alimentazione elettrica dovrebbero essere connessi in modo stabile, evitare perdite di fase. e il cavo sotto tensione sono 2.
- Page 76 1. Vento forte o tifone in basso verso la ventola, per far funzionare la ventola in direzione opposta. Modificare la direzione dell'unità o creare riparo per evitare che il tifone si trovi al di sotto della ventola. 2. Il motore della ventola è rotto, sostituire con un nuovo motore della Guasto della ventola CC ventola.
- Page 77 Modalità di riscaldamento, modalità ACS: 1. Il flusso d'acqua è basso; la temperatura dell'acqua è alta, se c’è aria nel sistema idrico. Rilasciare l'aria. 2. La pressione dell'acqua è inferiore a 0,1Mpa, caricare l'acqua per lasciare la pressione nel range 0,15~0,2Mpa. 3.
- Page 78 1. La tensione di alimentazione dell'unità è bassa, aumentare la tensione di alimentazione fino al range richiesto. 2. Lo spazio tra le unità è troppo stretto per lo scambio termico. Aumentare lo spazio tra le unità. 3. Lo scambiatore di calore è sporco o qualcosa è bloccato in superficie. Pulire lo scambiatore di calore o rimuovere l'ostruzione.
- Page 79 Protezione del modulo Protezione a bassa tensione CC generatrix protezione a bassa tensione Protezione a pompa di calore sistema ad alta pressione Protezione ad alta tensione CC generatrix protezione ad alta tensione Protezione ad alta pressione sistema a pompa di calore 1.
- Page 80 14 SPECIFICHE TECNICHE 14.1 Generale monofase monofase monofase Trifase 4/6 kW 8/10 kW 12/14/16 kW 12/14/16 kW Capacità nominale Cfr. i dati tecnici Dimensioni HxLxP 792×1295×429mm 945×1385×526mm 945×1385×526mm 945×1385×526mm Peso (senza riscaldatore di backup) Peso netto 98kg 121kg 144kg 160kg Peso lordo 121kg 148kg...
- Page 81 15 INFORMAZIONI DI MANUTENZIONE 1) Controlli nella zona Prima di iniziare i lavori su impianti contenenti refrigeranti infiammabili sarà necessario eseguire controlli di sicurezza al fine di garantire che il rischio di accensione sia ridotto al minimo. Per eseguire interventi di riparazione dell'impianto di refrigerazione, prima di effettuare lavori sull'impianto devono sarà...
- Page 82 10) Riparazione delle componenti sigillate a) Durante le riparazioni dei componenti sigillati, tutte le alimentazioni elettriche devono essere scollegate dall'apparecchiatura in lavorazione prima di rimuovere i coperchi sigillati, ecc. Se è assolutamente necessario disporre di un'alimentazione elettrica alle apparecchiature durante la manutenzione, allora sarà necessario localizzare una forma di rilevamento delle perdite funzionante in modo permanente nel punto più...
- Page 83 16) Procedure di caricamento Oltre alle procedure di caricamento convenzionali, sarà necessario rispettate le seguenti prescrizioni: Assicurarsi che non si verifichino contaminazioni di refrigeranti diversi quando si utilizza l'attrezzatura di ricarica. I tubi o le tubazioni devono essere quanto più corti possibile al fine di ridurre al minimo la quantità di refrigerante in essi contenuta. Le bombole devono essere tenute in posizione verticale.
- Page 84 ALLEGATO A: Ciclo del refrigerante Uscita Ingresso Raffreddamento Riscaldamento Elemento Descrizione Elemento Descrizione Compressore Sensore di temperatura ingresso refrigerante (tubo liquido) Valvola a 4 vie Sensore di temperatura uscita refrigerante (tubo del gas) Separatore gas-liquido Sensore della temperatura di uscita dell’acqua Scambiatore di calore lato aria Sensore della temperatura di ingresso acqua Valvola di espansione elettronica...
- Page 85 CHECK FORCE_COOL...
- Page 86 H-PRO CHECK FORCE_COOL...
- Page 88 CHECK FORCE_COOL...
- Page 89 H-PRO CHECK FORCE_COOL...
- Page 91 CHECK FORCE_COOL...
- Page 92 H-PRO CHECK FORCE_COOL...
- Page 94 ALLEGATO K: Per installare il nastro riscaldante elettrico sull’uscita di scarico (da parte del cliente) Collegare il nastro riscaldante elettrico del cavo sull’uscita di scarico nel giunto del cavo XT3. Al nastro riscaldante dell'uscita di scarico 4/6kW 8/10kW Al nastro riscaldante dell'uscita di scarico...
- Page 95 ALLEGATO K: Al nastro riscaldante 12/14/16kW (Monofase) dell'uscita di scarico 12/14/16kW (Trifase) Al nastro riscaldante dell'uscita di scarico NOTA: L’immagine è unicamente a fini di riferimento - rimandiamo al prodotto effettivo. L’alimentazione del nastro riscaldante non supererà i 40W/200mA, tensione di alimentazione 230VAC.
- Page 96 Dopo la verifica della documentazione, un Servizio Assistenza autorizzato Lamborghini Caloreclima contatterà il Cliente e/o l’Installatore per concordare l’intervento gratuito di verifica iniziale del prodotto e la convalida, tramite registrazione, della garanzia convenzionale. Trascorsi 10 giorni dalla messa in servizio la presente Garanzia Convenzionale non sarà...
- Page 97 CONTENTS SAFETY PRECAUTIONS GENERAL INTRODUCTION ACCESSORIES Accessories supplied with the unit BEFORE INSTALLATION IMPORTANT INFORMATION FOR THE REFRIGERANT INSTALLATION SITE Selecting a location in cold climates Selecting a location in hot climates INSTALLATION PRECAUTIONS Dimensions Installation requirements Drain hole position Servicing space requirements TYPICAL APPLICATIONS Application 1...
- Page 98 Initial start-up at low outdoor ambient temperature 10.3 Pre-operation checks 10.4 The circulation pump 10.5 Field settings 10.6 TEST RUN AND FINAL CHECKS 11.1 Final checks 11.2 Test run operation (manually) MAINTENANCE AND SERVICE TROUBLE SHOOTING 13.1 General guidelines 13.2 General symptoms Operation parameter 13.3...
- Page 99 4/6 kW 8/10/12/14/16 kW Internal layout:12~16kW(3-phase) for example 4/6 kW Electric Control System Terminal Block Hydraulic System Refrigerant System 8/10/12/14/16 kW Please remove the hollow plate after installation. Remove the transportation support 12/14/16 kW NOTE The picture and function described in this manual contain the backup heater components. Pictures in this manual are for reference only, please refer to the actual product.
-
Page 100: Safety Precautions
1 SAFETY PRECAUTIONS The precautions listed here are divided into the following types.They are quite important, so be sure to follow them carefully. Meanings of DANGER, WARNING, CAUTION and NOTE symbols. INFORMATION Read these instructions carefully before installation. Keep this manual in a handy for future peference. Improper installation of equipment or accessories may result in electric shock, short-circuit, leakage, fire or other damage to the equipment. - Page 101 DANGER Before touching electric terminal parts, turn off power switch. When service panels are removed, live parts can be easily touched by accident. Never leave the unit unattended during installation or servicing when the service panel is removed. Do not touch water pipes during and immediately after operation as the pipes may be hot and could burn your hands.
- Page 102 Do not install the unit in the following places: - Where there is mist of mineral oil, oil spray or vapors. Plastic parts may deteriorate, and cause them to come loose or water to leak. - Where corrosive gases (such as sulphurous acid gas) are produced. Where corrosion of copper pipes or soldered parts may cause refrigerant to leak.
-
Page 103: General Introduction
2 GENERAL INTRODUCTION These units are used for both heating and cooling applications and domestic hot water tanks.They can be combined with fan coil units, floor heating applications, low temperature high efficiency radiators, domestic hot water tanks and solar kits, which are all field supplied. -
Page 104: Accessories
In cooling mode, the water temperature flowing 3 ACCESSORIES (TW_out) range in different outdoor temperature(T4) is listed below: 3.1 Accessories supplied with the unit Installation Fittings Quantity Name Shape Installation and owner’s manual(this book) Operation manual Technical data manual Operation range by heat pump with possible limitation and protection. Y-shape filter In heating mode, the water flowing temperature (TW_out) range in different outdoor temperature (T4) is... -
Page 105: Important Information For The Refrigerant
CAUTION To avoid injury, do not touch the air inlet or aluminum fins of the unit. Do not use the grips in the fan grills to avoid damage. The unit is top heavy! Prevent the unit from falling due to improper inclination during handling. 1000mm The hook and barycenter of the unit should be on a line... -
Page 106: Installation Site
CAUTION Frequency of Refrigerant Leakage Checks - For unit that contains fluorinated greenhouse gases in quantities of 5 tonnes of CO equivalent or more,but of less than 50 tonnes of CO equivalent,at least every 12 months, or where a leakage detection system is installed, at least every 24 months. -
Page 107: Selecting A Location In Cold Climates
If you install the unit on a building frame, please install a waterproof tray (field supply) (about 100mm, on the underside of the unit) in order to avoid drain water dripping. (See the picture in the right). A(mm) Unit 4~6kW 8~16kW 6.1 Selecting a location in cold climates... -
Page 108: Installation Precautions
7 INSTALLATION PRECAUTIONS 7.1 Dimensions 8/10/12/14/16 kW (unit: mm) 4/6 kW (unit: mm) Model 4/6kW 1295 8/10/12/14/16kW 1385 7.2 Installation requirements Check the strength and level of the installation ground so that the unit may not cause any vibrations or noise during its operation. -
Page 109: Drain Hole Position
7.3 Drain hole position Drain hole Drain hole 4/6 kW This drain hole is covered by rubber plug. If the small drain hole can not meet the drainage requirements, the big drain hole can be used at the same time. 8/10/12/14/16 kW NOTE It's necessary to install an electrical heating belt if water can't drain out in cold weather even the big drain hole has... - Page 110 7.4.2 In case of multiple-row installation (for roof top use, etc.) In case of installing multiple units in lateral connection per row. 500mm 500mm 1/2 H A(mm) B1(mm) B2(mm) C(mm) Unit 4~6kW 8~16kW...
-
Page 111: Typical Applications
8 TYPICAL APPLICATIONS The application examples given below are for illustration only. 8.1 Application 1 Indoor Outdoor FHL1 FHL2 FHLn 11.2 Modbus 11.1 11.3 Code Assembly unit Code Assembly unit Main unit Domestic hot water tank (Field supply) User interface 11.1 TBH: Domestic hot water tank booster heater (Field supply) - Page 112 Space heating The ON/OFF signal and operation mode and temperature setting are set on the user interface. P_o keeps running as long as the unit is ON for space heating, SV1 keeps OFF. Domestic water heating The ON/OFF signal and target tank water temperature (T5S) are set on the user interface. P_o stops running as long as the unit is ON for domestic water heating, SV1 keeps ON.
-
Page 113: Application
8.2 Application 2 ROOM THERMOSTAT Control for Space heating or cooling need to be set on the user interface. It can be set in three ways: MODE SET/ONE ZONE/DOUBLE ZONE. The molobloc can be connected to a high voltage room thermostat and a low voltage room thermostat. - Page 114 8.2.2 Mode set control Indoor Outdoor FCU1 FCU2 FCUn FHL1 FHL2 FHLn Coding Assembly unit Coding Assembly unit Main unit Drainage valve (Field supply) User interface Collector/distributor Balance tank (Field supply ) Bypass valve (Field supply) Automatic air purge valve Thermostat transfer board (Field supply) Drainage valve SV2: 3 - way valve (Field supply...
- Page 115 8.2.3 Double zone control Indoor Outdoor RAD.1 ZONE1 RAD.2 RAD.n ZONE2 23.1 23.2 Modbus FHL1 FHL2 FHLn Coding Assembly unit Coding Assembly unit Main unit Collector/distributor (Field supply) User interface Thermostat transfer board (ptional) Balance tank (Field supply) Mixing station (Field supply) Automatic bleed valve SV3: Mixing valve (Field supply) 23.1...
-
Page 116: Parallel System
NOTE 2) Drainage valve must beinstalled at the lowest position of the piping system. 8.3 Parallel system r manometer heater... -
Page 118: Balance Tank Volume Requirement
9 OVERVIEW OF THE UNIT 9.1 Disassembling the unit Door 1 To access to the compressor and Door 1 To access to the compressor and electrical parts. electrical parts and hydraulic compartment Door 2 To access to the hydraulic compartment and electrical parts. 4/6kW 8/10/12/14/16kW WARNING... -
Page 119: Main Components
9.2 Main components 9.2.1 Hydraulic module 4/6 kW with backup heater(optional) 4/6 kW without backup heater 8~16 kW without backup heater 8~16 kW with backup heater(optional) Coding Assembly unit Explaination Remaining air in the water circuit will be automatically removes Air purge valve air from the water circuit. -
Page 120: Electronic Control Box
9.3 Electronic control box Note:The picture is for reference only, please refer to the actual product. Inverter module control board(PCB A) Main control board Main control board of hydraulic module of heat pump sysem(PCB B) 4/6kW Inverter module control board (PCB A) Main control board Main control board of hydraulic module... - Page 121 Main control board of hydraulic module Inverter module control board(PCB A) Main control board of heat pump sysem(PCB B) 12/14/16kW(1-phase) Main control board of hydraulic module Inverter module control board(PCB A) Main control board of heat pump sysem(PCB B) Filter board(PCB C)(at back of the PCB B,only for 3 phase unit) 12/14/16kW(3-phase) 9.3.1 Main control board of hydraulic module...
- Page 122 CN24 CN21 CN28 CN16 CN32 CN13 CN15 CN29 CN18 CN25 CN42 CN40 DIS1 CN31 CN41 CN22 CN35 CN36 CN17 25 26 27 14 15 CN11 CN30 Order Port Code Assembly unit Order Port Code Assembly unit M1 M2 POWER Port for power supply Port for remote switch CN21 CN36...
- Page 123 9.3.2 1-phase for 4-16kW units 1) PCB A 4-10kW Inverter module Remarks: for 4-6kw, two capacitors CN20 Coding Assembly unit Assembly unit Coding Compressor connection port U Reserved(CN302) Compressor connection port V Port for communication with PCB B(CN32) Compressor connection port W Input port N for rectifier bridge(CN502) Output port for +12V/9V(CN20) Input port L for rectifier bridge(CN501)
- Page 124 2) PCB B, Main control board of heat pump system CN10 CN27 CN11 CN22 CN24 CN17 CN26 CN28 CN13 CN55 CN18 CN14 CN29 CN7 CN5 CN6 CN16 CN19 CN21 CN33 CN2 CN30 CN36 CN37 CN38 CN20 26 25 24 Coding Assembly unit Coding Assembly unit...
- Page 125 9.3.4 3-phase for 12/14/16 kW units 1) PCB A Inverter module CN16 CN22 CN15 CN23 CN17 CN18 CN20 CN19 Coding Assembly unit Assembly unit Coding Output port for +15V(CN20) Input port P_in for IPM module (CN1) Compressor connection port W (CN19) Port for communication with PCB B (CN8) PED board(CN22) Compressor connection port V (CN18)
- Page 126 2) PCB B, Main control board of heat pump system CN41 CN26 CN24 CN36 CN21 CN18 CN31 CN29 CN10 CN35 CN11 CN28 CN20 CN37 CN27 V i n CN22 CN30 CN38 CN53 CN109 Coding Assembly unit Assembly unit Coding Port for ground wire(CN38) Port for temp.sensor Tp(CN8) Port for outdoor ambient temp.
- Page 127 3) PCB C, filter board CN204 CN205 CN206 CN30 CN213 CN214 CN202 CN211 CN203 CN200 CN201 CN212 PCB C 3-phase 12/14/16kW Coding Assembly unit Coding Assembly unit Power supply L2(CN201) Power supply L3(CN200) Power supply N(CN203) Power supply port of 310VDC(CN212) Power supply port for main control board(CN30) Reserved(CN211) Port for ground wire(PE2)
- Page 128 9.3.5 Controls parts for backup heater(Optional) 1-phase 4/6kW with backup heater(1-phase 3kW) 1-phase 8-16kW with backup heater(1-phase 3kW) 1-phase 8-16kW with backup heater(3-phase 9kW) 3-phase 12-16kW with backup heater(1-phase 3kW) 3-phase 12-16kW with backup heater(3-phase 9kW) Coding Assembly unit Coding Assembly unit Auto thermal protector Backup heater contactor KM2...
-
Page 129: Water Piping
9.4 Water piping All piping lengths and distances have been taken into consideration. Requirements Valve The maximum allowed thermistor cable length is 20m. This is the maximum allowable distance between the domestic hot water tank and the unit (only for installations with a domestic hot water tank).The thermistor cable supplied with Thermistor cable length minus 2m. - Page 130 Before continuing installation of the unit, check the following: Always use materials that are compatible with the water used in the system and with the materials used in the unit. Ensure that components installed in the field piping can withstand the water pressure and temperature. Drain taps must be provided at all low points of the system to permit complete drainage of the circuit during maintenance.
- Page 131 9.4.3 Water circuit connection Water connections must be made correctly in 9.4.4 Water circuit anti-freeze protection accordance with labels on the outdoor unit, with respect All internal hydronic parts are insulated to reduce heat to the water inlet and water outlet. loss.
-
Page 132: Filling Water
CAUTION When the unit is not running for a long time, make sure the unit is powered on all the time. If you want to cut off the power, the water in the system pipe needs to be drained clean, avoid the unit and pipeline system be damaged by freezing. -
Page 133: Water Piping Insulation
9.6 Water piping insulation The complete water circuit including all piping, water piping must be insulated to prevent condensation during cooling operation and reduction of the heating and cooling capacity as well as prevention of freezing of the outside water piping during winter. The insulation material should at least of B1 fire resistance rating and complies with all applicable legislation. - Page 134 1OFF AHS1 AHS2 2OFF DFT2 DFT1 IBH1 3OFF CN11 CN30 25 T Outdoor Indoor Description AC/DC Required number of conductors Maximum running current Item Solar energy kit signal cable 200mA User interface cable 200mA Room thermostat cable 200mA(a) Solar pump control cable 200mA(a) Outside circulation pump control cable 200mA(a)
- Page 135 NOTE Please use H07RN-F for the power wire, all the cable are connect to high voltage except for thermistor cable and cable for user interface. Equipment must be grounded. All high-voltage external load, if it is metal or a grounded port, must be grounded. All external load current is needed less than 0.2A, if the single load current is greater than 0.2A, the load must be controlled through AC contactor.
- Page 136 Field wiring guidelines Most field wiring on the unit is to be made on the terminal block inside the switch box. To gain access to the terminal block, remove the switch box service panel (door 2). WARNING Switch off all power including the unit power supply and backup heater and domestic hot water tank power supply (if applicable) before removing the switch box service panel.
- Page 137 Table 9-1 Rated current Nominal cross-sectional area (mm ) of appliance: A Flexible cords Cable for fixed wiring 0.5 and 0.75 and 2.5 0.75 and 1 and 2.5 > and 1.5 and 2.5 > > 10 and 1.5 and 2.5 1.5 and 4 16 and 2.5 and 4...
- Page 138 NOTE MCA : Max. Circuit Amps. (A) TOCA : Total Over-current Amps. (A) MFA : Max. Fuse Amps. (A) MSC : Max. Starting Amps. (A) RLA : In nominal cooling or heating test condition the input Amps of compressor where MAX. Hz can operate Rated Load Amps.
- Page 139 Master unit select Please use the shielded wire, and the shield layer must be grounded. H1 H2 H1 H2 H1 H2 ..Master unit Slave unit 1 Slave unit 2 Slave unit x Only the last IDU requires adding the build-out resistor at P and Q.
- Page 140 When connecting to the power supply terminal, use the circular wiring terminal with the insulation casing (see Figure 9.1). Use power cord that conforms to the specifications and connect the power cord firmly. To prevent the cord from being pulled out by external force, make sure it is fixed securely. If circular wiring terminal with the insulation casing cannot be used, please make sure that: Do not connect two power cords with different diameters to the same power supply terminal (may cause overheating of wires due to loose wiring) (See Figure 9.2).
- Page 141 9.7.6 Connection for other components Uint 4-16kW 1OFF P_c P_o P_s P_d AHS1 AHS2 2OFF IBH1 N 3ON 3OFF DFT2 DFT1 CN11 CN30 Code Code Print Connect to Print Connect to Solar energy input signal Wired controller Room thermostat input high voltage SV1(3-way valve) CN30...
- Page 142 25 26 1 2 3 4 5 29 30 31 32 6 7 8 9 10 CN11 CN30 25 26 27 28 1 2 3 4 5 29 30 31 32 6 7 8 9 10 CN11 CN30 Power supply 7 5 3 1 8 6 4 Contactor...
- Page 143 5) For Pumpc and DHW pipe pump : 25 26 27 28 1 2 3 4 5 29 30 31 32 6 7 8 9 10 CN11 CN30 25 26 27 28 1 2 3 4 5 Power supply 29 30 31 32 6 7 8 9 10 7 5 3 1 CN11...
- Page 144 Method C Double zone control Hydraulic Module is connected with two room thermostat, while user interface FOR SERVICEMAN set ROOM THERMOSTAT to DOUBLE ZONE: C.1 When unit detect voltage is 230VAC between H and L1 ,zone1 turns on.When unit detect voltage is 0VAC between H CN24 CN21 and L1, zone1 turns off.
- Page 145 C.2 When unit detect voltage is 12VDC between CL and COM, 8) For additional heat source control zone2 turn on according to climate temp curve. When unit detect voltage is 0V between CL and COM, zone2 turn off. C.3 When HT-COM and CL-COM are detected as 0VDC, unit turn off.
- Page 146 Voltage 220-240VAC 11) For smart grid: Maximum running current(A) The unit has smart grid function, there are two ports on PCB to Wiring size(mm 0.75 connect SG signal and EVU signal as following: Control port signal type Type 1 CN24 CN21 CN28 CN16...
-
Page 147: Start-Up And Configuration
10 START-UP AND CONFIGURATION The unit should be configured by the installer to match the installation environment (outdoor climate, installed options, etc.) and user expertise. CAUTION It is important that all information in this chapter is read sequentially by the installer and that the system is configured as applicable. -
Page 148: Dip Switch Settings Overview
Temperature curves for cooling mode - 10 T4 15 15 T4 22 22 T4 30 30 T4 1- T1S 2- T1S 3- T1S 4- T1S 5- T1S 6- T1S 7- T1S 8- T1S - 10 T4 15 15 T4 22 22 T4 30 30 T4 1- T1S... -
Page 149: Initial Start-Up At Low Outdoor Ambient Temperature
10.3 Initial start-up at low outdoor ambient temperature During initial start-up and when water temperature is low, it is important that the water is heated gradually. Failure to do so may result in concrete floors cracking due to rapid temperature change. Please contact the responsible cast concrete building contractor for further details. -
Page 150: The Circulation Pump
10.5 The circulation pump The relationships between the head and the water flow rated,the PMW Return and the water flow rated are shown in the graph below. 4- 10kW (Pump maintains maximum output) Flow rate m Water resistance(KPa) 2.87 29.1 2.71 34.2 2.49... -
Page 151: Field Settings
CAUTION If the valves are at the incorrect position, the circulation pump will be damaged. DANGER If it's necessary to check the running status of the pump when unit power on, please do not touch the internal electronic control box components to avoid electric shock. Failure diagnosis at first installation If nothing is displayed on the user interface, it is necessary to check for any of the following abnormalities before diagnosing possible error codes. - Page 152 About FOR SERVICEMAN 10.6.1 DHW MODE SETTING "FOR SERVICEMAN" is designed for the installer to set DHW = domestic hot water the parameters. Go to MENU> FOR SERVICEMAN> 1.DHW MODE SETTING. Press OK. The following pages will be Setting the composition of equipment. displayed: Setting the parameters.
- Page 153 10.6.5 TEMP. TYPE SETTING 2 COOL MODE SETTING About TEMP. TYPE SETTING 2.1 COOL MODE 2.2 t_T4_FRESH_C 2.0HRS The TEMP. TYPE SETTING is used for selecting whether 2.3 T4CMAX 43°C the water flow temperature or room temperature is used 2.4 T4CMIN 20°C to control the ON/OFF of the heat pump.
- Page 154 10.6.7 Other HEATING SOURCE In this case, the setting value of zone 1 is T1S,the setting value of zone 2 is T1S2. The OTHER HEATING SOURCE is used to set the parameters of the backup heater, additional heating If you set DOUBLE ZONE and ROOM TEMP. to YES, sources and solar energy kit.
- Page 155 9 SERVICE CALL If YES is selected, the following pages will be displayed: PHONE NO. 33512345678 MOBILE NO. 8613929145152 11 TEST RUN 11.1 POINT CHECK 11.2 AIR PURGE 11.3 CIRCULATION PUMP RUNNING CONFIRM ADJUST 11.4 COOL MODE RUNNING 11.5 HEAT MODE RUNNING The number displayed on the user interface is the phone ENTER number of your local dealer.
- Page 156 When in air purge mode, SV1 will open, SV2 will close. During HEAT MODE test running, the default target outlet 60s later the pump in the unit (PUMPI) will operate for water temperature is 35°C. The IBH (internal backup 10min during which the flow switch will not work. After the heater) will turn on after the compressor runs for 10 min.
- Page 157 Go to MENU> FOR SERVICEMAN> 12.SPECIAL During preheating for floor, all the buttons except OK are FUNCTION. invalid. If you want to turn off the preheating for floor, please press OK. Before floor heating, if a large amount of water remains on the floor, the floor may be warped or even rupture during The following page will be displayed: floor heating operation, in order to protect the floor, floor...
- Page 158 When the cursor is on OPERATE FLOOR DRYING,use Go to MENU> FOR SERVICEMAN>13.AUTO RESTART to scroll to YES and press OK. The following page will be displayed: 13 AUTO RESTART 12.2 FLOOR DRYING UP 13.1 COOL/HEAT MODE DO YOU WANT TO TURN OFF THE 13.2 DHW MODE FLOOR DRYING UP FUNCTION? ADJUST...
- Page 159 10.6.16 Setting parameters The parameters related to this chapter are shown in the table below. Setting Order number Code State Default Minumum Maximum Unit interval DHW MODE Enable or disable the DHW mode:0=NON,1=YES DISINFECT Enable or disable the disinfect mode:0=NON,1=YES DHW PRIORITY Enable or disable the DHW priority mode:0=NON,1=YES DHW PUMP...
- Page 160 HEAT MODE Enable or disable the heating mode The refresh time of climate related curves for heating t_T4_FRESH_H hours mode The maximum ambient operating temperature for heating T4HMAX mode The minimum ambient operating temperature for heating T4HMIN mode dT1SH The temperature difference for starting the unit (T1) dTSH The temperature difference for starting the unit (Ta) The setting temperature 1 of climate related curves for...
- Page 161 12.4 t_DRYUP The day for w arming up during floor drying up The continue days in high temperature during floor 12.5 t_HIGHPEAK drying up The day of dropping temperature during floor drying 12.6 t_DRYD The target peak temperature of w ater flow during 12.7 T_DRYPEAK °C...
-
Page 162: Test Run And Final Checks
11 TEST RUN AND FINAL The following checks must be performed at least once a year by qualified person. CHECKS Water pressure Check the water pressure, if it is below 1 bar,fill water The installer is obliged to verify correct operation of unit to the system. -
Page 163: Trouble Shooting
13 TROUBLE SHOOTING This section provides useful information for diagnosing and correcting certain troubles which may occur in the unit. This troubleshooting and related corrective actions may only be carried out by your local technician. 13.1 General guidelines Before starting the troubleshooting procedure, carry out a thorough visual inspection of the unit and look for obvious defects such as loose connections or defective wiring. - Page 164 Symptom 3: Pump is making noise (cavitation) POSSIBLE CAUSES CORRECTIVE ACTION There is air in the system. Purge air. The water pressure must be > 1 bar (water is cold). Water pressure at pump inlet is too low. vessel is correct (refer to "9.4.2 Water volume and sizing expansion vessels").
-
Page 165: Operation Parameter
Symptom 8: DHW mode can’t change to Heat mode immediately POSSIBLE CAUSES CORRECTIVE ACTION 60min. Heat exchanger for space connect it to the unit. heating not big enough flow. Space heating load is small Normal , no need for heating Disinfect function is enabled but without TBH Manual turn on the FAST WATER... - Page 166 OPERATION PARAMETER OPERATION PARAMETER OPERATION PARAMETER FAN SPEED 600R/MIN TW_O PLATE W-OUTLET TEMP. 35°C T3 OUTDOOR EXCHARGE TEMP. 5°C IDU TARGET FREQUENCY 46Hz TW_I PLATE W-INLET TEMP. 30°C T4 OUTDOOR AIR TEMP. 5°C FREQUENCY LIMITED TYPE T2 PLATE F-OUT TEMP. 35°C TF MODULE TEMP.
-
Page 167: Error Codes
13.4 Error codes When a safety device is activated, an error code(which does’t include external failure) will be displayed on the user interface. A list of all errors and corrective actions can be found in the table below. Reset the safety by turning the unit OFF and back ON. In case this procedure for resetting the safety is not successful, contact your local dealer. - Page 168 ERROR MALFUNCTION FAILURE CAUSE CODE OR PROTECTION AND CORRECTIVE ACTION "1.Check the resistance of the sensor. 2.The Tsolar sensor connector is loosen,reconnect it. Solar 3.The Tsolar sensor connector is wet or there is water temp.sensor(Tsolar) fault in,remove the water ,make the connector dry.Add waterproof adhesive.
- Page 170 ERROR MALFUNCTION FAILURE CAUSE CODE OR PROTECTION AND CORRECTIVE ACTION Phase loss or neutral wire and 1.Check the power supply cables should be conneted stable,aviod phase loss. live wire are connected 2.Check whether the sequence of neutral wire and live wire are reversely(only for three phase connected reversely.
- Page 171 1. Strong wind or typhoon below toward to the fan, to make the fan running in the opposite direction. Change the unit direction or make shelter to avoid typhoon below to the fan. The DC fan failure 2.fan motor is broken, change a new fan motor. 1.
- Page 172 Heating mode, DHW mode: 1. The water flow is low; water temp is high, whether there is air in the water system. Release the air. 2. Water pressure is lower than 0.1Mpa, charge the water to let the pressure in the range of 0.15~0.2Mpa. 3.
- Page 173 1. Power supply voltage of the unit is low, increase the power voltage to the required range. 2. The space between the units is too narrow for heat exchange. Increase the space between the units. 3. Heat exchanger is dirty or something is block on the surface. Clean the heat exchanger or remove the obstruction.
- Page 174 Module protection DC generatrix low voltage protection Heat pump syserm high pressure protection DC generatrix high voltage protection Heat pump syserm high pressure protection 1. Check the Heat pump system pressure. 2. Check the phase resistance of compressor. 3. Check the U V W power line connection sequence between the inventer board and the compressor.
-
Page 175: Technical Specifications
14 TECHNICAL SPECIFICATIONS 14.1 General 1-phase 1-phase 1-phase 3-phase 4/6 kW 8/10 kW 12/14/16 kW 12/14/16 kW Nominal capacity Refer to the Technical Data Dimensions HxWxD 792×1295×429mm 945×1385×526mm 945×1385×526mm 945×1385×526mm Weight (without backup heater) Net weight 98kg 121kg 144kg 160kg Gross weight 121kg 148kg... -
Page 176: Information Servicing
15 INFORMATION SERVICING 1) Checks to the area Prior to beginning work on systems containing flammable refrigerants, safety checks are necessary to ensure that the risk of ignition is minmised. For repair to the refrigerating system, the following precautions shall be complied with prior to conducting work on the system. - Page 177 10) Repairs to sealed components a) During repairs to sealed components, all electrical supplies shall be disconnected from the equipment being worked upon prior to any removal of sealed covers, etc. If it is absolutely necessary to have an electrical supply to equipment during servicing, then a permanently operating form of leak detection shall be located at the most critical point to warn of a potentially hazardous situation.
- Page 178 16) Charging procedures In addition to conventional charging procedures, the following requirements shall be followed: Ensure that contamination of different refrigerants does not occur when using charging equipment. Hoses or lines shall be as short as possible to minimize the amount of refrigerant contained in them. Cylinders shall be kept upright.
- Page 180 CHECK FORCE_COOL...
- Page 181 H-PRO CHECK FORCE_COOL...
- Page 183 CHECK FORCE_COOL...
- Page 184 H-PRO CHECK FORCE_COOL...
- Page 186 CHECK FORCE_COOL...
- Page 187 H-PRO CHECK FORCE_COOL...
- Page 189 ANNEX K: To install the E-heating tape at the drainage outlet (by client) Connect the wireCeating tape at the drainage outlet to the wire joint XT3. To the heating tape of drainage outlet 4/6kW 8/10kW To the heating tape of drainage outlet...
- Page 190 ANNEX K: To the heating 12/14/16kW(1-phase) tape of drainage outlet 12/14/16kW(3-phase) To the heating tape of drainage outlet NOTE: The picture is for reference only,please refer to the actual product. The power of the E-heating tape shall not exceed 40W/200mA, supply volatge 230VAC.
- Page 191 NOTE...
- Page 192 Lamborghini Caloreclima – www.lamborghinicalor.it è un marchio commerciale di FERROLI S.p.A. - Via Ritonda 78/a 37047 San Bonifacio (Verona) Italy - tel. +39.045.6139411 - fax. +39.045.6100933 www.ferroli.com Fabbricato in Cina - Made in China...
Need help?
Do you have a question about the IDOLA M 3.2 and is the answer not in the manual?
Questions and answers