Advertisement
Installation Instructions
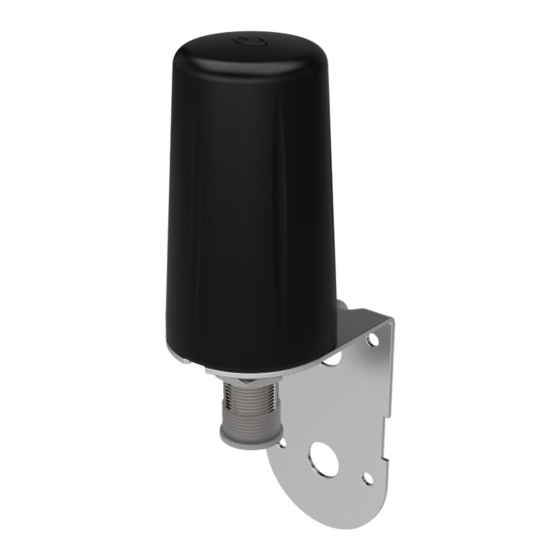
LPB-6-60-NJ Antenna
SW3-1023 - v1
1. Introduction
The LPB-6-60-NJ antenna covers 2G/3G/4G and 5G frequencies (617-960/1710-6000MHz). The antenna is supplied with a wall / mast mount bracket as
standard but can also be mounted on metal panels or enclosures of sufficient size. The antenna is supplied with a N bulkhead (f) type connector.
2. Mounting Requirements and Selecting Location
Bracket Mounting: Select a suitable mounting location for the antenna on the desired surface. The orientation of the antenna should be vertical with the
connector facing downwards. When selecting a mounting location care should be taken to ensure that at least 300mm (12") of separation is maintained
between the antenna and nearby metal objects and surfaces. When mounting the antenna to a metal housing, device enclosure or mast care should be
taken to ensure that the antenna housing is elevated above the metal surface to which it is mounted. Ensure that the selected location will enable the
coaxial cable to be easily connected and routed to the equipment. If mounting the antenna using screws it is important to check for adequate under panel
clearance.It is important for RF performance that the antenna is only bracket mounted using the supplied bracket. Mounting the antenna utilising a different
bracket may adversely affect performance.
Panel Mounting: The antenna must be fitted to a conductive ground plane of adequate size. It will fit panels of between 1-15mm thick (0.04-0.6") The
recommended minimum diameter of the surface is 200mm (8"). Select a mounting location taking care to ensure that there is at least 300mm (12") of
clearance from proximate metal objects. Ensure that there is adequate clearance under the mounting panel and measure to check for central positioning if
necessary.
3. Antenna Mounting
Bracket Mounting: Check that you have the required mounting hardware and equipment available. The antenna can be bracket mounted via the supplied
fixing holes (suitable for machine screws or self-tapping screws) or mast mounted using a suitable jubilee or worm drive hose clip. If drilling holes to mount
the antenna the bracket can be used as a drilling template. When ready mount the antenna securely to the bracket using the supplied nut and washer. It
is not necessary to remove the backing from the supplied adhesive pad but the pad can be utilised if a more permanent fitment to the bracket is desired. If
utilising the adhesive pad, ensure that the top surface of the bracket is clean and dry, remove the backing from the adhesive pad and stick the antenna to
the bracket applying firm pressure.
Panel Mounting: Mask the panel area around the hole position to protect the surface / paintwork. Drill a pilot hole, then increase the hole size to 16mm
(0.63"), ensuring that the drill / cutter bit does not hit any objects under the panel. Clean the area around the hole carefully removing all swarf. Remove any
paint and primer from underneath the panel surface to ensure adequate electrical contact using washer and nut.Remove the nut and washer and then the
adhesive pad backing from the underside of the antenna and feed the coaxial cable through the panel. Position the antenna over the mounting hole and
stick it to the panel applying firm pressure. Assemble the nut and washer from under the panel and tighten fully.
Recommended tightening torque for the mounting nut in both installation scenarios is 5Nm (3.6 ft lbs).
Note: Where the adhesive pad is required for sealing the installation it is recommended that the installation is not carried out if the temperature is less than
50°F (10°C) as the ideal temperature for the pad bonding is 70°F (21°C) to 100°F (37°C).
4. Routing and Terminating Coaxial Cable(s)
Connect the coaxial cable fitted with N Plug connector and tighten to 1Nm (0.75 ft Lbs). Route the coaxial cables to the radio equipment, taking care to avoid
running them adjacent to any existing wiring or fouling any moving components.
Advertisement
Table of Contents

Subscribe to Our Youtube Channel
Related Manuals for Panorama Antennas LPB-6-60-NJ


![Antenna Panorama Antennas LP[G]AM Series Installation Instructions](https://static-data2.manualslib.com/product-images/45e/3211865/60x60/panorama-antennas-lp-g-am-series-antenna.jpg)
![Antenna Panorama Antennas L[G]M[X] Series Installation Instructions](https://static-data2.manualslib.com/product-images/38c/3285221/60x60/panorama-antennas-l-g-m-x-series-antenna.jpg)
![Antenna Panorama Antennas L[X]A[X]M4[X]-7-42 Installation Instructions Manual](https://static-data2.manualslib.com/product-images/db0/3344578/60x60/panorama-antennas-l-x-a-x-m4-x-7-42-antenna.jpg)


Summary of Contents for Panorama Antennas LPB-6-60-NJ
- Page 1 1. Introduction The LPB-6-60-NJ antenna covers 2G/3G/4G and 5G frequencies (617-960/1710-6000MHz). The antenna is supplied with a wall / mast mount bracket as standard but can also be mounted on metal panels or enclosures of sufficient size. The antenna is supplied with a N bulkhead (f) type connector.
- Page 2 7. Commission and Test Check comms cable(s) ● Carry out VSWR check, the VSWR should measure as per the datasheet. ● Connect the Cellular/LTE cable to the radio equipment. 8. Notices DO NOT • operate the transmitter when someone is within 20CM (8”) of the antenna. •...
Need help?
Do you have a question about the LPB-6-60-NJ and is the answer not in the manual?
Questions and answers