Table of Contents
Advertisement
Quick Links
Advertisement
Table of Contents

Related Manuals for Sonel BT-120


Summary of Contents for Sonel BT-120
- Page 3 USER MANUAL BATTERY QUALITY ANALYZER BT-120 SONEL S.A. Wokulskiego 11 58-100 Świdnica Poland Version 1.00 29.08.2023...
- Page 4 The BT-120 is a modern, top quality measuring instrument which is easy and safe to use, provided that the principles presented in this manual are observed. In addition, becoming acquainted with the manual will help you avoid measuring errors and will prevent any possible problems with the operation of the meter.
-
Page 5: Table Of Contents
Recall charge / discharge test ..................31 6 Memory ......................32 6.1 Checking memory space ..................32 6.2 Memory management .................... 33 6.2.1 Displaying recordings ...................... 33 6.2.2 Erasing recordings ......................34 6.3 String management ....................36 6.3.1 String lists ........................36 BT-120 – USER MANUAL... - Page 6 12.1.7 Ripple voltage ......................... 49 12.2 Other technical data ....................49 13 Accessories ....................50 13.1 C-130BE current clamp ..................50 13.1.1 Basic data ........................50 13.1.2 Other technical data ......................50 14 Manufacturer ....................50 BT-120 – USER MANUAL...
-
Page 7: General Information
Use the appropriate terminals, range, function or range when taking a measurement. Replacement parts should be the manufacturer’s designated parts. Measurements cannot be taken while the battery is charging. Before battery replacement, be sure to disconnect any power cord, test lead, or accessories from the unit. BT-120 – USER MANUAL... -
Page 8: General Characteristics
1.3 General characteristics BT-120 measures internal resistance, voltage and temperature simultaneously, determining the de- gree of battery deterioration. String recording is designed for battery maintenance and management. The function can accumu- late saved measurement data systematically and analyse the degree of deterioration, and can be a reference to estimate battery charge time. -
Page 9: Quick Start
2 Quick start Turn the meter on. Connect the meter to the tested object. Select the measurement. Start Start the measurement. Analyse the results. Turn the meter off. BT-120 – USER MANUAL... -
Page 10: Interface And Configuration
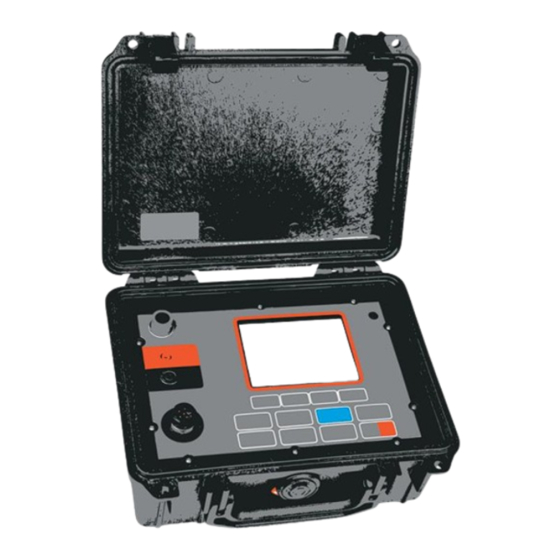
▪ Backlight on/off (press and hold) Power on/off Power adapter socket Power adapter socket for charging Currents terminal Input terminal for a current clamp Voltage terminal Input terminal for a V.A probe Impedance terminal Input terminal for a 4-lead test probe BT-120 – USER MANUAL... -
Page 11: Display
Ready for Bluetooth transmission. Connecting to a PC Connected to a PC. Bluetooth transmission active Indication of the battery charge level Battery Charging status AC adapter connected and charging Soft keys Function activated respectively by keys F1, F2, F3, F4 BT-120 – USER MANUAL... -
Page 12: Keyboard
View buttons for cursor movement and changing the keyboard 1Aa@ Change keyboard (uppercase/lowercase/numbers) Move backwards ◄ Move forwards ► ► Back Back to the previous menu ␣ Space Measurement unit Ω/mΩ ⌫ Backspace Accepts the inserted value BT-120 – USER MANUAL... -
Page 13: Configuration Of The Meter
Select <U/D>. Press ▲▼ to move the cursor to the desired parameter. F2 F3 Select <L/R>. Press ◄► to select the setting. F2 F3 When ENTER is displayed, select it in order to open an additional display. BT-120 – USER MANUAL... - Page 14 AC power line or if a PC is connected Data Format Erases all saved data Factory Setting Resets all settings Indicates information including hardware version, System Info firmware version, and serial number of the device BT-120 – USER MANUAL...
-
Page 15: Impedance Measurements
Parallel tip type: The protruding side is the source, and the other side is the sensor. The source pin is connected to the upper side, and the sensor pin is connected to the metal part below. BT-120 – USER MANUAL... - Page 16 Insert the probe tip into the hole of the adjustment bar and press the probe down vertically (both the SOURCE tip and SENSOR tip). The device will start the adjustment on all impedance ranges. Do not remove the test probe from the adjustment bar until a completion message is displayed. BT-120 – USER MANUAL...
- Page 17 5 seconds after the start of the adjustment. If the probe is faulty or improperly inserted into the adjustment bar, the value will be out of the expected range, and the adjustment will be cancelled. BT-120 – USER MANUAL...
-
Page 18: Single Battery Measurement
Currently set limit values. Displayed when limits are active. Limits Ω Upper Limit 2 / Ω Upper Limit 1 / V Lower Limit Number of recordings Number of recordings within the memory Average impedance calculated from accumulated impedance Average measurement data BT-120 – USER MANUAL... -
Page 19: Impedance Measurement
When measurement data is saved through Auto Rec, different buzzer sounds signal dif- ferent result assessments. PASS Short (100 ms) – 1 time WARNING Long (300 ms) – 2 times FAIL Short (100 ms) – 2 times and Long (400 ms) – 1 time. Total 3 times BT-120 – USER MANUAL... -
Page 20: Average Of Measurement Data
Displays the average of consecutive, accumulated measurement data – impedance and voltage. Once A HOLD+A REC data is saved, the data average is updated. Select Avg Clear to erase the previous average value. Average is not saved to the memory. BT-120 – USER MANUAL... -
Page 21: Limit
(+ / -) is irrelevant. 4.3.7.1 LIMIT on/off Go to impedance measurement. Select Limit… Activate limit function. [□ Limit] ►[▣ Limit] LIMIT value (Ω Upper 2 / Ω Upper 1 / V Lower) is displayed on the measurement screen, i.e.: BT-120 – USER MANUAL... -
Page 22: Limit Set Up - Direct Input
Select [Ω Up2…], [Ω Up1…], [V Low…] to edit. F1 F2 F3 When the keyboard is up, input the desired value. Select OK to set up the desired input value. Select [Back ↩] 2 times to return to the initial menu. BT-120 – USER MANUAL... -
Page 23: Limit Setting - Reference String
The set of limits can be copied from one string to another. Select Limit… Activate the limit function. [□ Limit] ►[▣ Limit] Select Refer… A list of existing strings will be displayed. Select ▲▼ to backlight the desired string. F1 F2 Select OK to apply. BT-120 – USER MANUAL... -
Page 24: String Measurement
Indicates the current cell within the string. progress indicator When the CURSOR position is empty, the accumulated average of impedance and voltage is displayed. Average / Recording When the CURSOR position is on DATA, the current measurement is displayed. BT-120 – USER MANUAL... -
Page 25: String Measurement Progress Indicator
If you continue measurements while A HOLD+A REC is active, you can save measurements in the cursor location. For example, if any wrong measurement data was saved by mistake, move the cursor to the cell to measure again – you will overwrite the data with new results. BT-120 – USER MANUAL... -
Page 26: String Recording
Connect the test probe to the battery terminal. For correct 4-terminal measurement, press both inside and outside probe pins to connect both of them to the battery terminal. A HOLD+A REC holds and saves data. Continue to measure the rest of the cells. BT-120 – USER MANUAL... -
Page 27: A Measurement
AC voltage & AC current. Saved recordings contain up to 1000 combinations of 2-measurement sets (3 different type sets as above). In string recording, each string can save up to 512, including 3 different type measurements. BT-120 – USER MANUAL... -
Page 28: Single Battery Measurement
Manual Hold Press briefly to hold the measurement results. If pressed once again, HOLD mode is re- leased, and the current measurement is displayed. HOLD During Hold, and the measurement 1 value next to it is displayed. BT-120 – USER MANUAL... -
Page 29: Auto Hold
A REC is displayed. When the measurement value remains static on the screen, it is automatically saved to the memory. In single battery mode, the device can save max. 1000 V.A records. Save location is displayed on the upper display area – i.e. [SAVE 000/1000]. BT-120 – USER MANUAL... -
Page 30: String Measurement
Displays when Auto Record mode is active HOLD Displays when the current measurement is on HOLD The current measurement data of measurement 1 is displayed in a smaller size. Selected string Indicates the string selected by the user. BT-120 – USER MANUAL... -
Page 31: Capacity (Charge / Discharge Test)
Switch to V.A measurement mode Select V DC & V ripple measurement. Select Capacity to display the charge / discharge test screen. You can start re- cording or recall an existing recording. VA Display Charge / Discharge test initial screen BT-120 – USER MANUAL... - Page 32 Then connect to the load to perform a full discharge. Charge capacity, discharge capacity and efficiency are calculated by charging and discharging in 1 cycle. If you press Stop during recording, the recording stops and is saved. BT-120 – USER MANUAL...
-
Page 33: Recall Charge / Discharge Test
Charge / Discharge Test Recall – Data On the graph screen, view the recording by zooming in and out and using the cursor. The data screen shows charge, charge time, discharge amount, and dis- charge time and calculates efficiency. BT-120 – USER MANUAL... -
Page 34: Memory
6.1 Checking memory space To check used Memory, press to display the percentage of remaining memory on the upper middle display. When the device is powered on, a message about memory space is displayed. BT-120 – USER MANUAL... -
Page 35: Memory Management
6.2 Memory management 6.2.1 Displaying recordings Enter Memory. The window below will be displayed. Select Meter and: press F1 (Ω) to display Ω records, press F2 (V,A) to display V.A records. BT-120 – USER MANUAL... -
Page 36: Erasing Recordings
Use F1 to activate the ▲▼Cursor. Move the cursor using F2▲, F3▼. In order to exit, press F4 [Back ↩]. 6.2.2 Erasing recordings Enter Memory. The window below will be displayed. Select Meter and: press F1 (Ω) to display Ω records, press F2 (V,A) to display V.A records. BT-120 – USER MANUAL... - Page 37 Use F1 to activate the ▲▼Cursor. Move the cursor using F2▲, F3▼ in order to move the recording to erase. In order to exit, press F4 [Back ↩]. Meter: Ω recording Meter: V.A recording Select Delete to erase the highlighted recording. Press and hold the button F3 to erase the indicated recording. BT-120 – USER MANUAL...
-
Page 38: String Management
F4 [Back ↩]. Select Add… to add a new string. Use F1 to activate the ▲▼Cursor. Move the cursor using F2▲, F3▼. In order to edit it, select Edit. In order to exit, press F4 [Back ↩]. BT-120 – USER MANUAL... -
Page 39: Editing Strings
Select OK to save. You will return to the string list. 6.3.2 Editing strings Enter Memory. Select String. Recording Initial display String List Use F1 to activate the ▲▼Cursor. Move the cursor using F2▲, F3▼. In order to exit, press F4 [Back ↩]. Select Edit… BT-120 – USER MANUAL... - Page 40 Select Edit. Edit string contents. Select OK to save. You will return to the string list. BT-120 – USER MANUAL...
-
Page 41: Erasing Strings
Use F1 to activate the ▲▼Cursor. Move the cursor using F2▲, F3▼. In order to exit, press F4 [Back ↩]. Select Delete. A confirmation message will appear. Select Yes. Erasing many recordings takes a long time. BT-120 – USER MANUAL... -
Page 42: String Recording Management
Select Select… The slots of string measurements will be displayed, containing measurement time, recording number and average impedance value. Use F1 to activate the ▲▼Cursor. Move the cursor using F2▲, F3▼. In order to exit, press F4 [Back ↩]. BT-120 – USER MANUAL... - Page 43 59th measurement and the new, additional measurement is set to the 60th measurement. Select Select… to display the selected slot. Use F1 to activate the ▲▼Cursor. Move the cursor using F2▲, F3▼. In order to exit, press F4 [Back ↩]. Select Delete to erase the recording. BT-120 – USER MANUAL...
-
Page 44: Recording
Use F1 to activate the ▲▼Cursor. Move the cursor using F2▲, F3▼. In order to exit, press F4 [Back ↩]. Select Select… Select the set of measurement data. Use F1 to activate the ▲▼Cursor. Move the cursor using F2▲, F3▼. In order to exit, press F4 [Back ↩]. BT-120 – USER MANUAL... - Page 45 Select Delete to erase the selected recording. BT-120 – USER MANUAL...
-
Page 46: Analyzer
The slot list displays. It is a list of packets within the selected string. Press ▲▼ to move the cursor to the slot to be analysed. F1 F2 ▼ Select Select… to select the cell packet. BT-120 – USER MANUAL... - Page 47 Measurement values change over time, as seen in the chart. The bold line represents imped- ance, and the thin line represents voltage. Press F1◄, F2 ►to move the cursor. The cursor point indicates measurement value and time. BT-120 – USER MANUAL...
- Page 48 Select Fitting to display the trend curve. The line will estimate when the cell im- pedance will deteriorate (increase) to the Upper level 2 limit. Trend curve information Trend curve BT-120 – USER MANUAL...
-
Page 49: Power Supply
Worn-out electronic equipment should be sent to a collection point in accordance with the regula- tions valid in a given region. Before the equipment is sent to a collection point, do not dismantle any elements. Observe local regulations concerning the disposal of packaging, waste batteries and rechargeable batter- ies. BT-120 – USER MANUAL... -
Page 50: Technical Data
* Additionally, take into account the accuracy of the current clamp. 12.1.5 AC current Display range Resolution Accuracy 0.001 A 40 A 0.01 A ±(0.75% m.v. + 10 digits)* 400 A 0.1 A * Additionally, take into account the accuracy of the current clamp. BT-120 – USER MANUAL... -
Page 51: Temperature
▪ V.A <V DC, V ripple>,<V DC, A DC>, <V AC, A VC> ........ max. 1000 records (512 recordings per string) n) transmission of results ............................. Bluetooth o) altitude a.s.l................................. 2000 m p) the device meets the requirements of ..................EN 61010-1 IEN 61326-1 ....................EN 55011/A1:2010 (Class A), EN 61000-3-2, EN 61000-3-3 BT-120 – USER MANUAL... -
Page 52: Accessories
The manufacturer of the equipment and provider of service during and past the warranty period: SONEL S.A. Wokulskiego 11 58-100 Świdnica Poland tel. +48 74 884 10 53 (Customer Service) e-mail: customerservice@sonel.com web page: www.sonel.com NOTE! Service repairs must be performed solely by the manufacturer. BT-120 – USER MANUAL... - Page 53 NOTES BT-120 – USER MANUAL...
- Page 54 NOTES BT-120 – USER MANUAL...
Need help?
Do you have a question about the BT-120 and is the answer not in the manual?
Questions and answers