Table of Contents
Advertisement
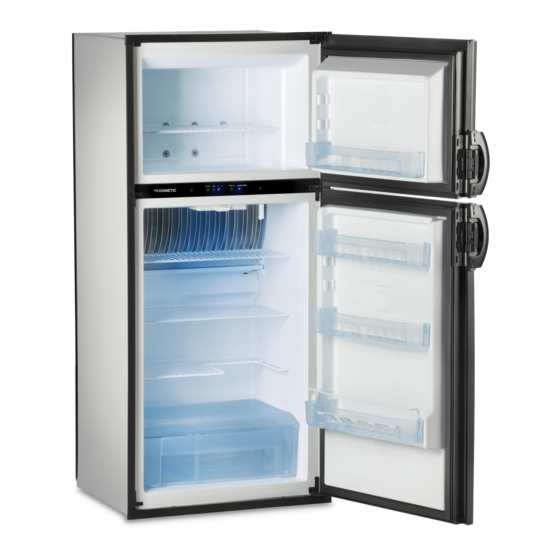
DMR702
DMC702
REVISION
Form No. 3315562.000 7/13
(Replaces 825132700 MO 1125)
(French 3315563.000)
©2013 Dometic Corporation
LaGrange, IN 46761
FOR YOUR SAFETY
If you smell gas:
1. Open windows.
2. Don't touch electrical switches.
3. Extinguish any open flame.
4. Immediately call your gas supplier.
FOR YOUR SAFETY
Do not store or use gasoline or other
flammable vapors and liquids in the
vicinity of this or any other appliance.
6
WARNING
!
Improper installation, adjustment,
alteration, service or maintenance can
cause injury or property damage. Refer to
this manual. For assistance or additional
information consult a qualified installer,
service agency or the gas supplier.
6
WARNING
!
If the refrigerator stops cooling - or - if
it emits an ammonia smell, immediately
turn the refrigerator off and contact a
Service Center.
USA
Service Office
Dometic Corporation
2320 Industrial Parkway
Elkhart, IN 46516
INSTALLATION
OPERATING
INSTRUCTIONS
CANADA
Dometic Corporation
46 Zatonski, Unit 3
Brantford, ON N3T 5L8
CANADA
&
For Service Center Or
Dealer Locations
Please Visit:
www.eDometic.com
Advertisement
Table of Contents

Related Manuals for Dometic DMR702


Summary of Contents for Dometic DMR702
- Page 1 For Service Center Or (Replaces 825132700 MO 1125) Service Office Dometic Corporation Dealer Locations (French 3315563.000) Dometic Corporation 46 Zatonski, Unit 3 Please Visit: ©2013 Dometic Corporation 2320 Industrial Parkway Brantford, ON N3T 5L8 www.eDometic.com LaGrange, IN 46761 Elkhart, IN 46516 CANADA...
-
Page 3: Table Of Contents
APPENDIX D - DOMETIC WARRANTY . . . . . . . . . . . . . . . . . . -
Page 4: Introduction
INTRODUCTION Thank you for entrusting us to supply your new quality-guaranteed refrigerator. The refrigerator is to be used as a recreational device designed for storage of foods, frozen foods and making ice. Please, when the refrigerator is not in use as a recreational device, turn the system off and open the doors. -
Page 5: Ventilation Requirements
Proper installation requires one lower fresh air intake and one upper exhaust vent. Certified installations require one roof vent 57-3/4 inches / 1465 mm DMR702 and one lower side vent or one upper side vent and one lower 55 inches / 1397 mm side vent. -
Page 6: Overall And Recess Dimensions
VENTILATION REQUIREMENTS CLEARANCES UPPER & LOWER SIDE VENT Minimum clearances (in inches) to combustible materials: Top (G) Side (K) Bottom (L) Rear (M Minimum The distance between the rear most part of the refrigerator and the wall Fan(s)* Ventilation behind it. Height * Fan(s) position may vary by model. -
Page 7: Installation Procedure
INSTALLATION PROCEDURE GENERAL INSTRUCTIONS b) Secure the refrigerator and the lower front strip with two screws. • Make sure the floor is solid and level. • Do not install the appliance directly on carpeting. Carpet- ing must be removed or protected by a metal or wood panel beneath the appliance, which extends at least full width and depth of the appliance. - Page 8 INSTALLATION PROCEDURE ELECTRICAL CONNECTION CONNECTIONS 120V AC CONNECTION GAS CONNECTION The refrigerator is equipped with a grounded three-prong plug Hook up to the gas supply line is accomplished at the manual for protection against shock hazards. It should be plugged gas valve, which is furnished with a 3/8”...
-
Page 9: Mounting Instructions
MOUNTING INSTRUCTIONS INSTALLING THE DOOR PANELS MOUNTING THE DOOR HANDLES The refrigerator is delivered without door panels. Before start- To mount the handles, follow these steps: ing the mounting work, read this instruction thoroughly and 1. Snap on the handle by inserting its tabs in the slot check that the panel dimensions are in compliance with those and slide into place. - Page 10 MOUNTING INSTRUCTIONS REPLACING THE DOOR PANELS 2. Open the door 90 degrees. 3. Insert the door panel’s edges into the grooves of the To replace a mounted door panel, follow these steps: door frame. Push the panel sideways until the edge of 1.
-
Page 11: Operating Instructions
O PE RATI NG I N ST RUC T ION S REFRIGERATOR OVERVIEW Wire shelve with plastic cover Control panel Finned plate Finned plate cover Door compartments Refrigerator lamp Drip protection Wire shelves with plastic cover Crisper Model shown: DMC 7-Series. The number of shelves and door compartments may vary according to model. - Page 12 REFRIGERATOR OVERVIEW CAUTION LED PANEL INDICATIONS STATUS INFORMATION Do not park your RV on a slope for a longer period of Display is on Refrigerator on time. Absorption refrigerators use a gravity-flow system. Display is off Refrigerator off Being on an angle of more than a couple of degrees for ex- tended periods of time stops the refrigeration and might The AUTO AUTO mode and...
-
Page 13: Instructions For Use
REFRIGERATOR OVERVIEW AUTO MODE IS TURNED OFF (GAS MODE) WARNING The system operates on LP gas only. The control system FIRE OR EXPLOSION HAZARD. When refueling activates the ignition system and makes one attempt to light the or parked near gasoline pumps, shut off all LP gas burner. -
Page 14: Storage Compartments
STORAGE COMPARTMENTS ICE CUBES WARNING Ice cubes can be made in the freezer compartment. Place the EXPLOSION HAZARD. Never store explosive trays in direct contact with the bottom of the freezer compart- substances in the refrigerator, such as cigarette ment. Ice will be made more rapidly if the thermostat is set at lighter fuel, gasoline, ether or the like. -
Page 15: Product Care
STORAGE COMPARTMENTS AIRING POSITION Use the Airing Position to keep the doors ajar if the refrigerator will not be in use for an extended period of time or put into storage. Put the door in airing position by: (1) Open the door. (2) Turn the integrated flap in the door handle to it’s end position. -
Page 16: Maintenance & Service
LP gas is a flammable gas which has the potential to create a If your refrigerator stops cooling, immediately turn hazard. Do not smoke or create sparks when working on or the refrigerator off and see a Dometic dealer. near the LP gas system. WARNING In order to keep the refrigerator work- EXPLOSION HAZARD. -
Page 17: Refrigerator Removal
MAINTENANCE & SERVICE CLEANING THE FLUE BAFFLE AND 12. Reinstall and tighten the burner jet. BURNER 13. Reinstall the burner. Ensure the end of the burner fits into the slot on the burner bracket. Verify that the Inspect the flue baffle. It should be reasonably clean and free of slots are centered under the flue tube). -
Page 18: Troubleshooting
SYMPTOM CHECK/REMEDIAL ACTION The refrigerator has stopped • Immediately turn the refrigerator off and contact a Dometic dealer or Service Center. cooling. NOTE! Do not leave it running for days and never try to solve the problem by repeatedly restarting the refrigerator. - Page 19 TROUBLESHOOTING WARNINGS For information about warnings, refer to the following table. The messages are displayed flashing (alternating between temperature and the message). WARNINGS INFORMATION • Gas ignition failed. The gas flame has not been ignited after 45 seconds. Turn refrigerator OFF and then back ON to return to normal operation.
- Page 20 - 20 -...
- Page 21 - 21 -...
-
Page 22: Appendix A - Rearview Equipment
APPENDIX A - REARVIEW EQUIPMENT Heater Thermofuse Flue baffle 385 13 31−01 F4 (5A) F3 (5A) SWITCHED AC HTR AC HTR Protection LAMP NEUT LINE TEST LINE NEUT cover Power module 1 2 V D C 12 volt Terminal block Screw for protection cover Burner jet Drain water hose... -
Page 23: Appendix B - Wiring Diagram
APPENDIX B - WIRING DIAGRAM 3 8 5 1 5 2 1 C I R C U I T B O A R D P O W E R B R O W N P 1 − 1 B L A C K P 1 −... -
Page 24: Appendix C - Consumer Support
Service and spare parts For service, please contact the Service Center Assistance, see the front page of this manual - or - visit the Dometic website to find the location of the nearest Dometic Service Center. -
Page 25: Appendix D - Dometic Warranty
6. In order to obtain the benefits of this warranty, the original purchaser must return the product which is found defective to the Seller named below or to a Dometic Authorized Service Center during the period that this warranty is in effect. The original pur- chaser is responsible for all charges incurred in delivery of the product to the Seller or Dometic Authorized Service Center, and in pick up after the warranty service has been completed. -
Page 26: Appendix E - Maintenance Schedule
APPENDIX E - MAINTENANCE SCHEDULE REFRIGERATOR OWNER MAINTENANCE YEARLY RECORD Customer Name: Model No.: Date of Purchase: Address: Serial No.: City: State: Zip Code: Phone: FIRST YEAR SECOND YEAR Date: Date: Dealership: Dealership: Address: Address: City: City: State: Zip: State: Zip: Phone: Phone:... - Page 27 PROTECTION FOR YOUR NEW INVESTMENT We truly appreciate that you have chosen to purchase a Dometic product for your recreational vehicle and we want to help you protect this wise investment. We at Dometic back our products with one of the most comprehensive warranties in the industry.
- Page 28 Owner’s Registration Card Registering your product is an essential step to ensure that you receive all the benefits you are entitled to as a DOMETIC customer. Complete the information below and mail to us or register on-line at www.edometic.com. Be sure to include your email address so that we can communicate with you quickly and efficiently.
Need help?
Do you have a question about the DMR702 and is the answer not in the manual?
Questions and answers