Epson TM-U220-i User Manual
Hide thumbs
Also See for TM-U220-i:
- User manual (48 pages) ,
- User manual (72 pages) ,
- Technical reference manual (150 pages)
Table of Contents
Advertisement
Quick Links
User's Manual
Important Safety Information. . . . . . . . . . . . . . . . . . .page 2
Part Names and Functions. . . . . . . . . . . . . . . . . . . . . .page 4
Setup. . . . . . . . . . . . . . . . . . . . . . . . . . . . . . . . . . . . . . . . . .page 6
Basic Operations . . . . . . . . . . . . . . . . . . . . . . . . . . . . . page 10
Installing/Replacing the Ribbon Cassette . . . . . page 12
Installing/Replacing the Roll Paper . . . . . . . . . . . page 15
Cleaning. . . . . . . . . . . . . . . . . . . . . . . . . . . . . . . . . . . . . page 17
Troubleshooting . . . . . . . . . . . . . . . . . . . . . . . . . . . . . page 18
Specifications . . . . . . . . . . . . . . . . . . . . . . . . . . . . . . . . page 20
Appendix . . . . . . . . . . . . . . . . . . . . . . . . . . . . . . . . . . . . page 21
M00089701EN
Advertisement
Table of Contents

Subscribe to Our Youtube Channel
Related Manuals for Epson TM-U220-i


Summary of Contents for Epson TM-U220-i
-
Page 1: Table Of Contents
User’s Manual Important Safety Information....page 2 Part Names and Functions..... .page 4 Setup. -
Page 2: Important Safety Information
Doing so may cause fire. ❏ If water or other liquid spills into this product, immediately unplug the AC cable, and then contact your dealer or an Epson service center for advice. Continued use may lead to fire or shock. ❏... - Page 3 English CAUTION: ❏ Do not use this product in locations subject to high humidity or dust levels. Excessive humidity and dust may cause paper jams and other problems, such as fire, or electric shock. ❏ Be sure to set this product on a firm, stable, horizontal surface. The product may break or cause injury if it falls.
-
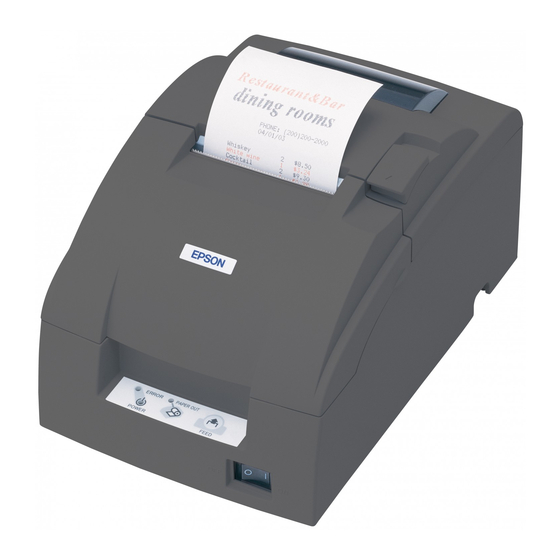
Page 4: Part Names And Functions
English Part Names and Functions Roll paper cover Ribbon cassette cover Cover open lever Control panel Power switch Roll paper cover Open this cover to install/replace the roll paper. Ribbon cassette cover Open this cover to install/replace the ribbon cassette. Power switch Use this switch to turn on or off the printer. - Page 5 English Interface All the ports and connectors are located on the back of the printer. Serial port / VGA port Ethernet port microSD card slot DC-in connector USB host ports USB device port Drawer kick connector : Mounted interfaces vary by the printer model.
-
Page 6: Setup
English Setup Installing the Printer Install the printer horizontally on a flat surface. Note: ❏ Take measures to prevent the printer from moving by vibration during paper cutting and when using a drawer. Affixing tape (DF-10) is provided as option. ❏... - Page 7 English Connecting the AC Adapter Follow the steps below to connect the AC adapter. 1. Firmly insert the DC connector of the AC adapter all the way into the DC-in connector on the printer. 2. Firmly insert the connector of the AC cable all the way into the AC inlet on the AC adapter. 3.
- Page 8 English Connecting External Devices If you connect external devices, connect each cable to the port/connector on the back of the printer. (U “Interface” on page 5 CAUTION: ❏ When connecting external devices to the USB ports, follow the precautions below. •...
- Page 9 English Attaching the Power Switch Cover Attaching the enclosed power switch cover prevents inadvertent changing of the power switch and tampering. You can turn the power switch on and off by inserting a sharp-pointed object in the holes in the power switch cover. To detach these covers, also use a sharp-pointed object.
-
Page 10: Basic Operations
English Basic Operations Turning Power On/Off Press the power switch to turn on or off the power. Note: It takes approximately 30 seconds after the printer is turned on until it is ready for printing. Opening the Covers Opening the roll paper cover Pull the cover open lever to open the roll paper cover. - Page 11 English Opening the ribbon cassette cover Put your fingers under the catches on both sides and lift the ribbon cassette cover in the direction of the arrow to open it.
-
Page 12: Installing/Replacing The Ribbon Cassette
English Installing/Replacing the Ribbon Cassette CAUTION: Do not touch the print head during printing or immediately after printing. The print head may be very hot after printing so wait a while for it to cool down before beginning the work. CAUTION: Be sure to use the specified ribbon cassette. - Page 13 English 4. Install the ribbon cassette so that the ribbon enters between the print head and platen and then push down on the ribbon cassette until it clicks. Check that the ribbon is not wrinkled or creased. 5. Turn the knob on the ribbon cassette two or three times in the direction of the arrow.
- Page 14 English 6. Close the ribbon cassette cover.
-
Page 15: Installing/Replacing The Roll Paper
English Installing/Replacing the Roll Paper Follow the steps below to install/replace the roll paper. CAUTION: Be sure to use the specified roll paper. “Specifications” on page 20 1. Open the roll paper cover. (U “Opening the roll paper cover” on page 10 2. - Page 16 English 4. Pull out some paper, and close the roll paper cover. 5. Cut the paper you pulled out.
-
Page 17: Cleaning
English Cleaning Cleaning the Printer Case Be sure to turn off the printer, and wipe the dirt off the printer case with a dry cloth or a damp cloth. CAUTION: Never clean the printer with alcohol, benzine, thinner, or other such solvents. Doing so may damage or break the parts made of plastic and rubber. -
Page 18: Troubleshooting
English Troubleshooting POWER LED does not light Check whether the AC adapter is correctly connected. (U “Connecting the AC Adapter” on page 7 ERROR LED is on ❏ Check whether the roll paper cover is correctly closed. ❏ If the PAPER OUT LED is on, check whether the roll paper is correctly installed and any roll paper remains. - Page 19 English Auto cutter blade does not return to the standby position The auto cutter blade may lock up without returning to the standby position as a result of a paper clip or other object entering inside the printer or a paper jam. Turn off the printer, wait 10 seconds, and then turn the printer back on.
-
Page 20: Specifications
*5: Be sure to use a safety-standards-applied power source that meets the following specifications. Rated output: 24 V, 1.5 to 10.0 A Maximum output: 240 VA or less *6: Reference data: In case of using the Epson power supply, PS-180 (Model: M159D) *7: Based on Epson operating conditions. -
Page 21: Appendix
For customers in other countries, go to the following web site: http://download.epson-biz.com/?service=pos Open Source Software License This product uses open source software in addition to Epson proprietary software. For information of the open source software used in this product, see the following URL. http://xxx.xxx.xxx.xxx/licenses/ For “xxx.xxx.xxx.xxx”... - Page 22 Neither is any liability assumed for damages resulting from the use of the information contained herein. Neither Seiko Epson Corporation nor its affiliates shall be liable to the purchaser of this product or third parties for damages, losses, costs, or expenses incurred by purchaser or third parties as a result of: accident, misuse, or abuse of this product or unauthorized modifications, repairs, or alterations to this product, or (excluding the U.S.) failure to strictly comply with Seiko Epson...
Need help?
Do you have a question about the TM-U220-i and is the answer not in the manual?
Questions and answers