Advertisement
Quick Links
MALONE
R
*ATTENTION CUSTOMERS*
Thank you for your recent purchase of a Malone trailer.
Please inspect all parts and hardware bags prior to assembly.
**Set the large red envelope (in the axle box) containing important
documents pertaining to registering your trailer in a safe spot.
If you encounter any missing components please contact us at:
Email:technical@maloneautoracks.com
OR
Phone:(207) 774 - 9100 X215
Business Hours: Monday-Friday
9am- 5pm
Thank you from all of us at Malone
MALONE
R
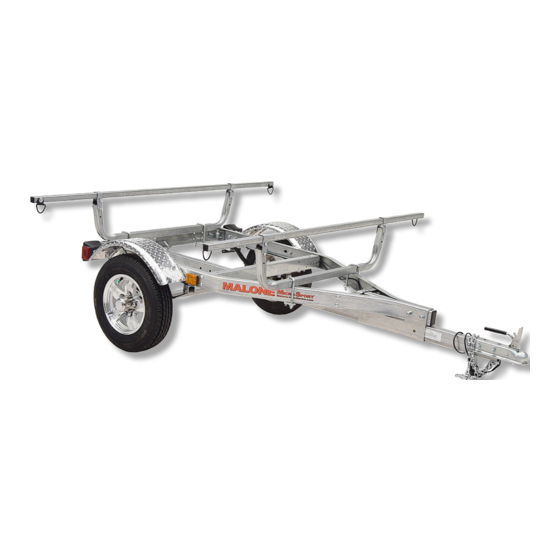
MPG460XT
Advertisement

Related Manuals for Malone MPG460XT


Summary of Contents for Malone MPG460XT
- Page 1 MALONE *ATTENTION CUSTOMERS* Thank you for your recent purchase of a Malone trailer. Please inspect all parts and hardware bags prior to assembly. **Set the large red envelope (in the axle box) containing important documents pertaining to registering your trailer in a safe spot.
- Page 2 Thank you for your purchase of a Malone Product. In order to be eligible for the Malone Warranty program, we ask that you contact us by email or online at one of the following: With-in 30 days of purchase. You can also mail this letter back to the address at the bottom.
- Page 3 Malone MicroSport Trailer Malone MicroSport Trailer Model MPG460XT Assembly Instructions Model MPG460XT Assembly Instructions Take a few moments and read through these instructions to familiarize yourself Take a few moments and read through these instructions to familiarize yourself with the with the step by step assembly process before you begin turning wrenches.
- Page 4 MPG460XT Group 1: Bag 11491 11429 Frame Components Bag 11462 Group 2: Axle / Spring Bag 11476 Components NOTE: actual aluminum wheel may vary from images Visit www.maloneautoracks.com/Replacement-Parts technical@maloneautoracks.com 800-295-0042 ext 206 for all of your spare part needs...
- Page 5 L.E.D. REFERENCE: MPG460XT Group 3: Lighting Components Bag 11468 Trailer Wiring Color Code •Brown = running lights Group 3: Lighting Components Bag 11468 •Yellow = left turn / left brake •Green = right turn / right brake •White = ground...
- Page 6 MPG460XT MPG460XT MPG460XT Group 6: Group 6: Group 6: Load Bar Load Bar Load Bar Components Components Components Bag 11489 Bag 11489 Bag 11489 FRAME ASSEMBLY (Group 1) FRAME ASSEMBLY (Group 1) FRAME ASSEMBLY (Group 1) 1. We assemble the frame upside down to make it easier to install the springs 1.
- Page 7 3. Lay the two frame cross members in between the frame rails. The in between the frame rails. The large two holes in the middle should face Malone decal should be in the rear, DOWN as shown. Channels face facing upside down. each other.
- Page 8 MPG460XT 5. Slide the clip nut onto the hole in the top of the short tongue. Note, these two parts are symetrical so it doesn’t matter which way they are turned. Slide the short tongue inside the tongue support and install a bolt and washer hand tight only.
- Page 9 MPG460XT 8. Bolt the tongue support to the frame rails using 3/8” x 1” carriage head bolts. Assemble with washers and nuts on the inside. Don’t fully tighten. 9. FRAME BOLT TIGHTENING: Starting at the rear of the frame fully tighten each bolt, working to the front, fully tighten all frame bolts ending with the 1/2”...
- Page 10 MPG460XT SPRING AND AXLE ASSEMBLY (Group 2) 1. Set the envelope containing the manufacturer’s certifi cate of origin (MCO) and VIN labels aside in a safe place. NOTE: actual aluminum wheel may vary from images 2. Spin the axle to fi nd the side with the spring centering holes.
- Page 11 MPG460XT 4. Run each nut down but, ONLY UNTIL THE NUTS ALMOST TOUCH THE PLATE !! You will need lots of wiggle in the springs to fi t them into the spring brackets in the next step. 5. Lift the axle/spring assembly to the trailer frame and slide the slipper spring ends into the slipper spring brackets as shown.
- Page 12 MPG460XT 6. Wiggle the spring eyes into the front hanger brackets and bolt using 1/2” x 3” bolts and self locking nuts. Nuts to the inside. Tighten the shackle bolts ONLY until they grip the sides of the brackets. Remember, this is a hinge. The bolt should remain still in the bracket allowing the spring eye to move freely.
- Page 13 MPG460XT MPG460XT MPG460XT 10. Tighten the lug nuts firmly to 75 - 85 foot pounds of torque. 10. Tighten the lug fi rmly 10. Tighten the lug fi rmly to 75 to 85 foot pounds of to 75 to 85 foot pounds of torque.
- Page 14 MPG460XT MPG460XT MPG460XT 13. Attach the two rubber stand-up 13. Attach the two rubber stand-up 13. Attach the two rubber stand-up 14. Attach the two rubber stand-up feet to the feet to the rear of the frame. Tighten feet to the rear of the frame. Tighten feet to the rear of the frame.
- Page 15 LIGHT ASSEMBLY (Group 3) MPG460G MPG460XT LIGHT ASSEMBLY (Group 3) L.E.D. REFERENCE: L.E.D. REFERENCE: REFERENCE: REFERENCE: Trailer Wiring Color Code Trailer Wiring Color Code Trailer Wiring Color Code Trailer Wiring Color Code •Brown = running lights •Brown = running lights •...
- Page 16 MPG460XT 4. 4. Secure with the lamp stud nut. 4. Routing the wiring harness. - Route the GREEN/BROWN wire along the RIGHT side of the frame. - Route the YELLOW/BROWN wire along the LEFT side of the frame. 5. Use the clips provided to secure the wire to the inside of the frame channel as shown.
- Page 17 10. Grasp either side of the cut with your fi nger- nails and pull to separate 3” of wire as shown. NOTE: THESE UNUSED PLUGS ARE FOR AUXILIARY ACCESSORIES LIKE THE MALONE MPG543 CHARGING UNIT AND/OR MPG539 FLOOD LIGHT (NOT INCLUDED) MPG543 11.
- Page 18 FENDER ASSEMBLY (Group 4) MPG460XT 1. Connect all 4 fender brackets to the fenders using 3/8” x 3/4” slot head screws and nuts. Assemble with the nuts to the inside of the fenders as shown. No washers here. Fully tighten all 8 screws and nuts.
- Page 19 MPG460XT Note that when bolting the mounting brackets to the frame you will install a washer on both sides, under the head of each bolt and under each nut. 2. Using 3/8” x 1” bolts, washers on both sides, and nuts, attach the fender brackets to the slotted holes in the frame as shown.
- Page 20 COUPLER ASSEMBLY MPG460XT (Group 5) 1. Assemble the tongue skid and safety chain assembly with a 3/8” x 1-1/2” bolt as shown. Use washers above and below the chain ends. MALONE technical@maloneautoracks.com technical@maloneautoracks.com 800-295-0042 ext 206 800-295-0042 ext. 215...
- Page 21 MPG460XT 2. Place the skid and chain assembly under the tongue and 2. Place the skid and chain insert the bolt up through the skid assembly under the tongue and bolt hole on the bottom of the insert the bolt up through the tongue as shown.
- Page 22 LOAD BAR ASSEMBLY (Group 6) MPG460XT Attach a load bar support tube onto the rear cross member. Center the support tube on the trailer and tighten. 2. Attach the second support tube 48 inches forward. Measure 48 inches on both sides of the trailer to be sure the load bar is on straight and centered, then tighten the U-bolts.
- Page 23 MPG460G MPG460XT 3. Use your hammer and carefully pound the end plugs into the ends of the support tubes. Slip the load bar brackets over the load bars (as shown) and loosely install the two small carriage bolts / nuts through each bracket trapping the load bars inside the brackets.
- Page 24 6. Center the load bars to the trailer, then tighten all 12 bracket bolts. MPG460XT 6. Center the load bars to the trailer, then tighten all 12 bracket bolts. 7. Go back now and recheck that all nuts and bolts on the ENTIRE trailer are securely tightened.
- Page 25 MPG460XT MPG460XT To use the retractable tongue. 1- Disconnect the extension harness from the frame harness and tuck the harness into the rear of the tongue. 2- Remove the hitch pin from the frame. 3- Slide the tongue into the frame until the end of the tongue aligns with the retainer bracket as shown to the right.
- Page 27 MALONE Trailer Checklist & Maintenance Manual MPG525G XtraLight MPG460G MicroSport MPG535G MegaSport MALONE MPG570G Sherpa...
- Page 29 Congratulations on your new Malone trailer! Take a couple minutes to read through this manual for commonly asked questions and some basic trailer maintenance that will ensure your trailer is preforming at its best. And as always please free to contact us with any questions you may have.
- Page 31 Some trailers now have an integrated ‘zerk’ on the backside of the hub. For the customer it means they can do periodic grease “freshenings” without disassembly of the hubs. Procedure for hub with integrated zerk fitting: Prepare a disposable container for the old grease to fall into. Remove the wheel and dust cap.
- Page 32 Adding your own Zerk fitting to avoid the previous steps above: You can add your own zerk fitting to the front of your hub by adding a Bearing Buddy ® Protector. Look for Model# 1980A and follow the manufactures instructions for use. Type of grease to use: Automotive bearing grease is OK in a pinch, marine wheel-bearing grease is better, and synthetic marine-wheel bearing grease is best.
- Page 33 Damaged Bearings? Replace them right away. Continued Procedure: Continued Install the grease seal. Don’t hammer directly on the seal. Use a block of wood. Take care to drive the seal in straight. Seal should be flush to the outside surface of the hub. Fill the hub, in behind the seal, with grease then slide the hub over the spindle being careful not to damage the seal against the spindle.
- Page 34 Towing Speeds/Tips: The hubs on your trailer are already fulled packed with a high-speed, high-temp grease, safely tow at any posted speed limit. Including highway speeds. allowing you to You need to allow for extra time and room when switching lanes, stopping, and passing other vehicles when towing a trailer.
- Page 35 Electrical/Lighting Properly functioning trailer lights are a must for safety, so check your lights every time you use your trailer. Some problems, such as a burned-out bulb or a bad ground wire, can be a snap to fix—others can be a real pain to diagnose and repair. Wiring Diagram For Trailer Lights Trailer Wiring Assembly Note: Wiring colors are the same from incandescent lights and LED light kits.
- Page 36 Electrical/Lighting Continued We can’t cover every scenario in this manual but here’s some trouble shooting we can do to help get your trailer back in top condition. Having a helper standing behind the vehicle to see if the lights are working will make the process go a lot quicker..and save you from running back and forth.
- Page 37 If the original retail purchaser is unable to contact the Malone dealer, or the dealer is not able to remedy the defect, the original retail purchaser should contact Malone by email at technical@maloneautoracks.com.
Need help?
Do you have a question about the MPG460XT and is the answer not in the manual?
Questions and answers