Malone MPG460G Assembly Instructions Manual
Microsport trailer
Hide thumbs
Also See for MPG460G:
- Assembly instructions manual (35 pages) ,
- Checklist & maintenance manual (9 pages) ,
- Assembly instructions manual (21 pages)
Table of Contents
Advertisement
Quick Links
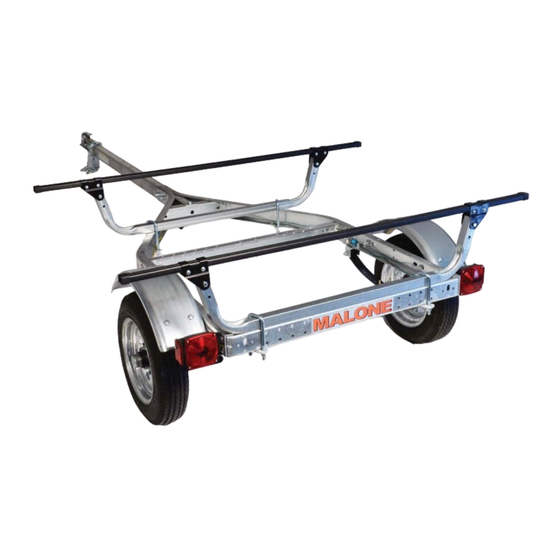
Malone MicroSport Trailer
Take a few moments and read through these instructions to familiarize yourself with the
step by step assembly process before you begin turning wrenches.
Unpack and sort the components into groups as shown in the following pages.
Then assemble each group in order. Lets get started !!
Required Tools:
•
(2) 3/4" wrenches
•
Large fl at blade screw driver
•
Razor knife
•
Wire stripping tool
•
Lug wrench
technical@maloneautoracks.com
800-295-0042 ext 206
Model MPG460G Assembly Instructions
• (2) 9/16" wrenches (a deep socket is recommended)
• (1) 7/16" wrench
• Pliers
• Electrical connector crimping tool
• Small hammer
Visit us at maloneautoracks.com
for more fi ne products and accessories.
TM
MPG460G
REV 3
1
Advertisement
Table of Contents

Related Manuals for Malone MPG460G


Summary of Contents for Malone MPG460G
- Page 1 MPG460G REV 3 Malone MicroSport Trailer Model MPG460G Assembly Instructions Take a few moments and read through these instructions to familiarize yourself with the step by step assembly process before you begin turning wrenches. Unpack and sort the components into groups as shown in the following pages.
- Page 2 MPG460G Bag 11462 Group 1: Frame Components Group 2: Axle / Spring Bag 11476 Components technical@maloneautoracks.com 800-295-0042 ext 206...
- Page 3 MPG460G Group 3: Lighting Components Bag 11468 Group 4: Bag 11464 Fender Components Group 5: Coupler Components Bag 11494 technical@maloneautoracks.com 800-295-0042 ext 206...
- Page 4 MPG460G Group 6: Load Bar Components Bag 11489 technical@maloneautoracks.com 800-295-0042 ext 206...
- Page 5 FRAME ASSEMBLY (Group 1) MPG460G 1. We assemble the frame on its back to make it easier to install the springs and axle. Once the springs and axle assembly is installed we will fl ip the trailer over to complete the assembly. So fi rst, layout the frame components upside down as shown.
- Page 6 MPG460G 4. Pass the wiring harness into the grommet and out the front end of the tongue as shown. Stretch out the white wire and leave an equal length of the green/brown/yellow wire outside the grommet as shown. This length of wires will be the con- nector to your tow vehicle.
- Page 7 MPG460G 7. Installing the rear tongue support bracket. First we lay the tongue back in its place making sure its upside down. Push the large wire protection grommet into the rear tongue support bracket hole, then pass the wires through the grommet. In- stall the 4-1/2”...
- Page 8 MPG460G 9. Clamp the frame rails around the tongue as shown using two 1/2” x 3-1/4” bolts. Use a washer on both sides. Hand tighten only. 10. Lay the two frame cross members in between the frame rails. The two holes in the middle should face DOWN as shown.
- Page 9 MPG460G TIME TO TIGHTEN FRAME BOLTS: Its important to follow this tightening sequence in order to insure the trailer will be straight after everything is tight. A) Tighten the 8 nuts holding the ends of the two cross members. B) Tighten the rear tongue support bracket. Check that you installed washers under the 4 nuts as shown.
- Page 10 MPG460G D) Tighten the big bolt thru the rear of the tongue and tongue support. Not too tight, don’t crush the tongue or support. Your frame assembly is now complete and should look like this. technical@maloneautoracks.com 800-295-0042 ext 206...
- Page 11 MPG460G SPRING AND AXLE ASSEMBLY (Group 2) 1. Set the envelope containing the manufac- turer’s certifi cate of origin (MCO) and VIN labels aside in a safe place. 2. Spin the axle to fi nd the side with the spring centering holes.
- Page 12 MPG460G 4. Run each nut down UNTIL IT TOUCHES THE PLATE ONLY! DON’T TIGHTEN !! You will need to wiggle the springs to fi t them into the spring brackets in the next step. 5. Lift the axle/spring assembly to the trailer frame and slide the slipper spring ends into the slipper spring brackets as shown.
- Page 13 MPG460G 8. Wiggle the spring eyes into the front hanger brack- ets and bolt using 1/2” x 3” bolts and self locking nuts. Tighten the shackle bolts ONLY until they grip the sides of the brackets. This is a hinge, the spring needs to move freely.
- Page 14 MPG460G LIGHT ASSEMBLY (Group 3) REFERENCE: Trailer Wiring Color Code •Brown = running lights •Yellow = left turn / left brake •Green = right turn / right brake •White = ground 1. Attach the tail lamp brackets to the frame as shown using 3/8” x 1”...
- Page 15 MPG460G 4. Check that the coil of wiring harness outside the tongue grommet is still full length. 5. Route the GREEN/BROWN wire along the RIGHT side of the frame. Route the YELLOW/BROWN wire along the LEFT as shown. 6. Use the clips provided to secure the wire to the inside of the frame channel as shown 7.
- Page 16 MPG460G 9. Press the brown wire into the quick connector as shown. Then insert the wire from the side marker light fully into the 2nd opening. Use pliers to squeeze the conductor blade down and thru the insulation. The blade cuts thru the insulation and connects the wires inside.
- Page 17 FENDER ASSEMBLY (Group 4) MPG460G 1. Connect all 4 fender brackets to the fenders using 3/8” x 3/4” slot head screws and nuts. Assemble with the nuts to the inside of the fenders as shown. No washers here. Fully tighten all 8 screws and nuts.
- Page 18 MPG460G Note that when bolting the mounting brackets to the frame you will install a washer on both sides, under the head of each bolt and under each nut. 4. Using 3/8” x 1” bolts, washers on both sides, and nuts, attach the fender brackets to the slotted holes in the frame as shown.
- Page 19 COUPLER ASSEMBLY MPG460G (Group 5) 1. Installing the ground wire con- nector. Strip 3/8” of insulation off the white ground wire and crimp on the ring connector as shown. 2. Assemble the tongue skid and safety chain assembly with a 3/8” x 1-1/2” bolt as shown. Use washers above and below the chain ends.
- Page 20 MPG460G 3. Place the skid and chain as- sembly under the tongue and insert the bolt up through the skid bolt hole on the bottom of the tongue as shown. 4. Slip the ring terminal over the bolt and install the nylon lock nut hand tight.
- Page 21 LOAD BAR ASSEMBLY (Group 6) MPG460G Attach a load bar support tube onto the rear cross member. Center the support tube on the trailer and tighten. 2. Attach the second support tube 48 inches forward. Measure 48 inches on both sides of the trailer to be sure the load bar is on straight and centered, then tighten the U-bolts.
- Page 22 MPG460G 3. Use your hammer and carefully pound the end plugs into the ends of the support tubes. Slip the load bar brackets over the load bars (as shown) and loosely install the two small carriage bolts / nuts through each bracket trapping the load bars inside the brackets.
- Page 23 MPG460G 5. Install and hand tighten the bolts holding each bracket to the support tube. 6. Center the load bars to the trailer, then tighten all 12 bracket bolts 7. Go back now and re-check that all nuts and bolts on the ENTIRE trailer are securely tightened.
- Page 24 MPG460G Apply the TIRE AND LOADING Decal and the VIN Decal as shown below, onto the left side of the frame. Be sure to clean the frame before applying the decals. Your MicroSport Trailer is now complete and ready to register and title ! Contact your local DMV offi...
Need help?
Do you have a question about the MPG460G and is the answer not in the manual?
Questions and answers