Table of Contents
Advertisement
Available languages
Available languages
Quick Links
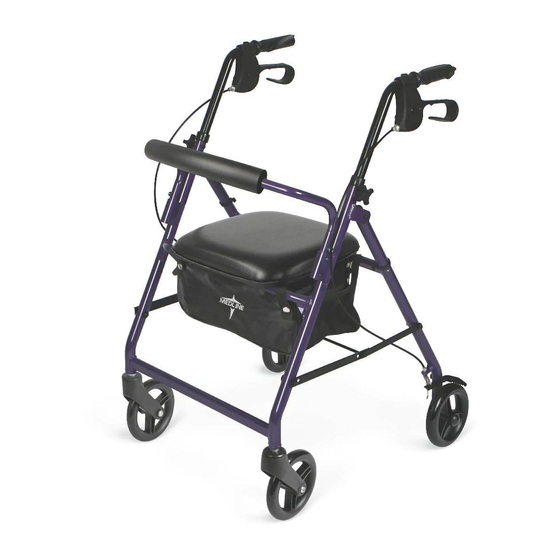
BASIC STEEL ROLLATOR
ROLLING WALKER
MÉTALLIQUE DE BASE
AVEC ROUES DE 6"
DE QUATRE ROUES
ACERO BÁSICO CON
DE CUATRO RUEDAS
INSTRUCTIVO Y GARANTÍA
Not Made With Natural Rubber Latex.
No está hecho con látex de caucho natural.
WITH 6" WHEELS
USER INSTRUCTIONS
& WARRANTY
DÉAMBULATEUR
MODE D'EMPLOI
ET GARANTIE
ROLATOR DE
RUEDAS DE 6"
Non fabriqué à partir de
latex de caoutchouc naturel.
MDS86850ES
MDS86850EBS
MDS86850EGS
Advertisement
Table of Contents

Related Manuals for Guardian MDS86850ES


Summary of Contents for Guardian MDS86850ES
- Page 1 ROLATOR DE ACERO BÁSICO CON RUEDAS DE 6" DE CUATRO RUEDAS INSTRUCTIVO Y GARANTÍA Not Made With Natural Rubber Latex. Non fabriqué à partir de latex de caoutchouc naturel. No está hecho con látex de caucho natural. MDS86850ES MDS86850EBS MDS86850EGS...
-
Page 2: Safety Instructions
DO NOT push the rollator while brakes are enabled. Brakes are to be used to keep the wheels from rolling. However, it may not prevent the rollator from moving if it is pushed. Note: Only use accessories and spare parts authorized by Medline Industries. MDS86850ES (PIC-00311) Revised: 10/13/2017... -
Page 3: Rollator Parts List
C. 4 Point Knobs D. Backrest Sling E. Backrest Attachment F. Seat G. Brake Lock H. Brake Cables I. Folding Support Bracket J. 6" (15.2 cm) Front Wheels K. 6" (15.2 cm) Back Wheels Figure 2: 4 Point Knob MDS86850ES (PIC-00311) Revised: 10/13/2017... - Page 4 Insert the screw from the inside of the rollator through the frame. Attach the washer so it fits snuggly against the frame. Secure the star knob to the screw. See Figure 2. (Important: Hand Tighten Only!) MDS86850ES (PIC-00311) Revised: 10/13/2017...
-
Page 5: Maintenance
If the brakes do not lock the wheels, the brakes need to be adjusted. If adjustment does not tighten the brakes, DO NOT use the rollator. MDS86850ES (PIC-00311) Revised: 10/13/2017... -
Page 6: Consignes De Sécurité
NE PAS pousser le déambulateur quand les freins sont bloqués. Les freins sont utilisés pour éviter le mouvement des roues. Cependant, elles ne peuvent pas empêcher le mouvement du déambulateur s’il est poussé. Note: Il ne fait utiliser que des accessoires et des pièces détachées autorisées par Medline Industries. MDS86850ES (PIC-00311) Revised: 10/13/2017... - Page 7 E. Fixation de dossier F. Siège G. Verrou de frein H. Câbles de frein I. Collier de support pliable J. Roues avant de 6" (15.2 cm) K. Roues arrière de 6" (15.2 cm) Figure 2: Onglets à quatre points MDS86850ES (PIC-00311) Revised: 10/13/2017...
-
Page 8: Instructions D'assemblage
Insérez la vis à partir de l’intérieur du déambulateur, par le c adre. Fixez la rondelle pour qu’elle soit étroitement ajustée contre le cadre. Fixez le papillon à la vis. Veuillez consulter la figure 2. (Important : Il ne faut visser qu’à la main !) MDS86850ES (PIC-00311) Revised: 10/13/2017... -
Page 9: Instructions D'opération
Si les freins ne bloquent pas les roues, ils doivent être réglés de nouveau. Si le réglage ne resserre pas les freins, NE TENTEZ PAS d’utiliser le déambulateur. MDS86850ES (PIC-00311) Revised: 10/13/2017... -
Page 10: Instrucciones De Seguridad
NO empuje el rolator mientras los frenos están puestos. Los frenos se usan para evitar que las ruedas rueden. Sin embargo, no pueden evitar que el rolator se mueva si es empujado. Nota: Utilice únicamente accesorios y repuestos autorizados por Medline Industries MDS86850ES (PIC-00311) Revised: 10/13/2017... - Page 11 D. Cabestrillo de Respaldo E. Acople de Respaldo F. Asiento G. Bloqueo de Frenos H. Cables de Frenos I. Soporte Plegable J. Ruedas Frontales 6" (15.2 cm) K. Ruedas Traseras 6" (15.2 cm) Figura 2: 4 Perillas de Punto MDS86850ES (PIC-00311) Revised: 10/13/2017...
-
Page 12: Instrucciones De Ensamblado
Inserte el tornillo desde el interior del rolator a través del armazón. Acople la arandela de modo que encaje firmemente contra el armazón. Asegure la perilla estrella al tornillo. Ver Figura 2: (Importante: ¡Ajuste a mano únicamente!) MDS86850ES (PIC-00311) Revised: 10/13/2017... -
Page 13: Instrucciones De Operación
Si los frenos no bloquean las ruedas, los frenos necesitan ser ajustados. Si el ajuste no aprieta los frenos, NO use el rolator. MDS86850ES (PIC-00311) Revised: 10/13/2017... - Page 14 MDS86850ES (PIC-00311) Revised: 10/13/2017...
- Page 15 MDS86850ES (PIC-00311) Revised: 10/13/2017...
-
Page 16: Limited Warranty
Some products may not be available for sale in Mexico or Canada. Please contact your Account Representative for additional information. We reserve the right to correct any errors that may occur within this manual. ©2017 Medline industries, Inc. Medline and Guardian are registered trademarks of Medline Industries, Inc.
Need help?
Do you have a question about the MDS86850ES and is the answer not in the manual?
Questions and answers
I need to make it higher to use as a walker too.
To adjust the height of the Guardian MDS86850ES for use as a walker:
1. Stand behind the rollator with shoulders relaxed, arms hanging at your sides, and eyes looking straight ahead.
2. Adjust the handlebars so that the handles are at wrist height.
3. Insert the handlebars into the closest hole to the desired height.
4. Insert the screw from the inside of the frame.
5. Attach the washer snugly against the frame.
6. Secure the star knob to the screw.
7. Hand tighten only.
This answer is automatically generated
Necesito darle más altura para apoyarme al caminar
To increase the height of the Guardian MDS86850ES for support while walking:
1. Stand behind the rollator with relaxed shoulders and arms at your sides.
2. Adjust the handlebars (barres de direction) so the handles are at the same height as your wrists.
3. Secure the handlebars at the closest hole to the desired height.
4. Insert the screw from the inside of the rollator through the frame.
5. Attach the washer snugly against the frame.
6. Secure the star knob to the screw.
7. Hand tighten only.
This answer is automatically generated
How do you adjust brakes for the first time on the MDS86850EB
The documents do not provide specific instructions for adjusting the brakes for the first time on the Guardian MDS86850EB. However, they mention that if the brakes do not lock the wheels properly, they need adjustment. If adjustment does not fix the issue, the rollator should not be used.
This answer is automatically generated
How to fold it
To fold the Guardian MDS86850ES rollator, lift up on the Folding Bracket until the frame collapses.
This answer is automatically generated
The plastic Brake Lock broke off, but the brake itself still works. Can I replace the actual part that broke, or do I have to replace the entire left brake?