Table of Contents
Advertisement
Advertisement
Table of Contents

Related Manuals for Fuji Spray Semi-PRO 2


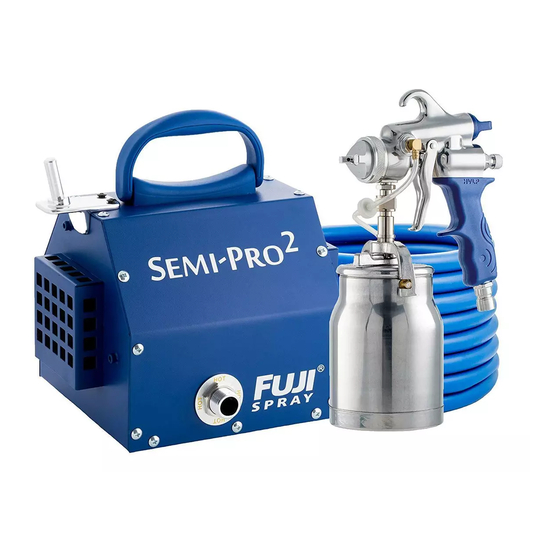
Summary of Contents for Fuji Spray Semi-PRO 2
- Page 1 User Manual of Product 1: Fuji Spray 2202 Semi-PRO 2 - HVLP Spray System...
-
Page 2: Table Of Contents
CONTENTS Contents ......1 Safety Precautions ....2 - 4 Getting Started. -
Page 3: Safety Precautions
Please read these instructions carefully before using the equipment GROUNDING This appliance must be grounded. If it should malfunction or break down, grounding provides a path of least resistance for electric current to reduce the risk of electric shock. This appliance is equipped with a cord having an equipment-grounding conductor and grounding plug. - Page 4 · Always store the unit inside in a dry location. Store on the fl oor if in a basement a basement setting. · The operator must wear shoes and the fl oor must not be wet. FIRE AND EXPLOSION HAZARD Turbine must not be used in an area contaminated by volatile or fl...
- Page 5 · Always wear appropriate gloves and eye protection · Always wear a respirator or mask. Read all instructions of the respirator or mask to ensure that it will provide the necessary protection against the inhalation of harmful vapors. Please also check with the local jurisdiction.
-
Page 6: Getting Started
GETTING STARTED Please register your Fuji Spray Product at www.fujispray.com/product-registration NOTE: Throughout this Manual we have used the generic word ‘Paint’ to describe all and any coatings. Please substitute the word ‘Paint’ for whatever finish or coating you are spraying. Your Fuji Spray M-Model Gun has been adjusted at the factory and is ready for spraying. -
Page 7: Spray Pattern
CHANGING SIZE & SHAPE OF THE PATTERN Loosen the Collar #1. Turn the Aircap #2 to the horizontal posi- tion. This setting produces a vertical spray pattern. Always make sure the Collar is snug tight. Setting the Aircap in a vertical position produces a horizontal spray pattern. -
Page 8: Spraying Technique
SPRAYING TECHNIQUE The spraygun should be held perpendicular to the surface at all times. HOLD THE GUN NO MORE THAN 8” (20cm) AWAY FROM THE SURFACE TO BE PAINTED. But closer is ok. CORRECT METHOD Start moving the spraygun in the direction you want to spray and press the trigger. -
Page 9: Aircap Selection
AIRCAP SET SELECTION 5 additional setups are available as accessories. Size No.3 is stan- dard with all Fuji M-Sprayguns. No. 2, 3 or No. 4 can be used for any type of fine-finishing application. The larger sizes such as No. 4 allow for more fluid output. -
Page 10: Viscosity Guide
VISCOSITY GUIDE A Viscosity Cup is included with your Fuji M-System. To test the viscosity of the paint material, fill the Viscosity Cup to the brim and time how long it takes for the liquid to empty out through the hole. -
Page 11: Latex Paint
A WORD ABOUT LATEX Although latex paint was never originally intended to be sprayed, a professional finish can be achieved by following a few simple rules. (Please do not confuse latex with the newer water-based coatings). For work such as cabinetry or trim, our equipment can be used successfully with latex paint. -
Page 12: General Cleaning
GENERAL CLEANING To clean the gun after each use, empty all paint from the Cup. Use a solvent-soaked rag to clean the residue in the Cup. Then, spray some clean solvent through the Gun into a clean rag (to avoid filling the room with unnecessary spray) or a bucket. -
Page 13: Finish Problems
FINISH PROBLEMS ORANGE PEEL - If the finish is rough and resembles orange peel then the material is too thick. (Or perhaps you have the Air Control Valve turned down - please check that it is fully open). The ‘paint’ will not atomize properly and the surface will be spotty. -
Page 14: Spraygun Problems
SPRAYGUN PROBLEMS NO PAINT (OR VERY LITTLE PAINT) The air passing through the Pressure Tube 40 to pressurize the Cup is blocked. This means that either the Tube itself, the Check Valve, or one of the two Nipples are blocked. A pipe cleaner can be used for cleaning the hole in the Nipple. - Page 15 THE TRIGGER IS SLUGGISH • The Needle Packing is too tight - see ADJUSTING THE NEEDLE PACKING. Page 15 • Bent Needle POOR SPRAY PATTERN • Damaged Needle or Nozzle • Nozzle is clogged • Air holes in Aircap clogged •...
-
Page 16: Needle Packing Nut
LEAKAGE FROM THE NOZZLE This occurs when the Needle Packing Nut is too tight compressing the Needle Packing #12 tightly around the Needle. Half fill the cup with water. Attach the Gun to the Hose and turn on the Turbine blower. Pull the Trigger and release. Check the Nozzle for water spurting out. -
Page 17: Cleaning Fluid Passages
CLEANING FLUID PASSAGES To clean, flush appropriate solvent (refer to material manufacturer's cleaning recommendations) through the Spraygun while the paint is still wet inside the gun. If this type of quick cleaning is performed frequently, the Spray Gun will function well for many years. 99% of problems with a Spray Gun stem from clogs in the fluid passages and (perhaps more important), the Pressure Tube air passages. -
Page 18: Turbine Care And Maintenance
TURBINE CARE AND MAINTENANCE FILTER(S) It is important to clean or replace your filters regularly. Operating the Turbine unit with clogged or dirty filters will cause the Turbine to overheat and result in premature failure. The Fuji HVLP Turbines have either 1 or 2 Filters. -
Page 19: Parts Diagrams
FUJI M-MODEL SPRAY GUN... - Page 22 #2095...
-
Page 23: Spray Gun Holder
GUN HOLDER GUN HOLDER INSTALLATION The 2 holes on the top of the Holder require the Black Machine Screws and Washers. These Screws fit into Threaded Inserts in the Metal Case. Do not overtighten - snug is fine. The single Silver-Colored Screw must be installed to the single hole on the side of the Gun Holder. -
Page 24: Service Information
For SERVICE & PARTS Cogent Bathtub Refinishing Coatings Phone: 862-238-7224 Online: www.cogentcoatings.com hvlp.net Phone: 800-650-0930 Online: www.hvlp.net Phelps Refinishing Phone: 800-377-5662 Online: www.phelpsrefinishing.net Paint Sprayers Plus Phone: 877-293-5826 Online: www.paintsprayersplus.com CANADA Fuji Spray Phone: 800-650-0930 Local: 416-650-1430 hvlp.ca Phone: 800-650-0930 Online: www.hvlp.ca UNITED KINGDOM Axminster Power Tool Centre. -
Page 25: Warranty Information
Fuji Limited 2 Year Warranty Fuji Industrial Spray Equipment Ltd. (“Fuji”) provides a 24 month limited warranty on the product to the original purchaser effective from the date of purchase against defects in materials and workmanship. The warranty does not cover damage or defects arising as a result of abuse, misuse, accident, negligence, malfunction, corrosion, normal wear and tear, inadequate or lack of spray gun or other aspects of maintenance of the product, damage arising from improper assembly,...
Need help?
Do you have a question about the Semi-PRO 2 and is the answer not in the manual?
Questions and answers