Table of Contents
Advertisement
Quick Links
Advertisement
Table of Contents

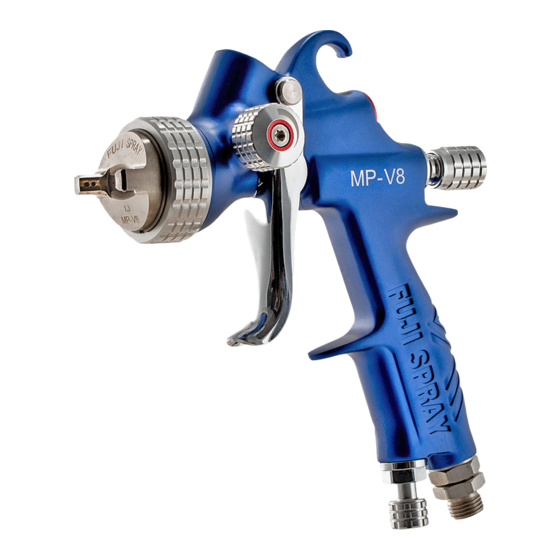
Summary of Contents for Fuji Spray V8 Series
-
Page 3: Table Of Contents
Contents Contents Specifications Safety Precautions 3 - 4 Assembly Operation 6 - 7 Technique Parts Diagram 8 - 9 Air Cap Sets Finish Problems Troubleshooting 12 - 13 Cleaning Reassembly 15 - 16 Disassembly for Service or Repairs Warranty Information... -
Page 4: Specifications
521g Nozzle Sizes Available (in mm) 1.2; 1.3; 1.4; 1.7; 2.0; 2.2 Spray Gun Materials Body Forged Aluminum Air Cap Nickel Plated Brass Nozzle Stainless Steel Needle Spring Stainless Steel Fluid Passages Stainless Steel Seal Gaskets PTFE (Teflon) V8 Series... -
Page 5: Safety Precautions
Please read these instructions before using the equipment FIRE AND EXPLOSION HAZARD Equipment must not be used in an area contaminated by volatile or flammable materials. This could ignite the contaminants causing a dangerous explosion. • Do not spray flammable or combustible materials near an open flame or sources of ignition such as cigarettes, motors, and electrical equipment. - Page 6 Warning: Sound levels produced by spray guns during use may be harmful to the ear depending on the set-up. It is recommended that ear protection is always worn at all times when spraying. THE EMPLOYER IS RESPONSIBLE TO PROVIDE THIS INFORMATION TO THE OPERATOR OF THE EQUIPMENT V8 Series...
-
Page 7: Assembly
ASSEMBLY Cup Assembly Installation: Insert Paint Strainer into the base of the Cup from the outside. Attach the cup assembly by screwing into the Fluid Coupler of the Spray Gun. Hand-tightened is enough. Connecting to Air Supply: 1. Attach pressure regulator with gauge (not included) into the Spray Gun’s air inlet 2. -
Page 8: Operation
If looking too coarse when wet, increase air supply pressure at the pressure regulator located at base of the Spray Gun’s handle. If looking too fine, decrease pressure. For pressure specifications of the Spray Gun, see page 2. V8 Series... -
Page 9: Technique
Pattern Control - To produce a smaller fan pattern, turn the Fan Pattern Control Knob (#16-6) clockwise. For widest pattern, turn Fan Pattern Control Knob counter-clockwise. NOTE: In most cases, a combination of all three adjustments will provide the desired results. TECHNIQUE The Spray Gun should be held perpendicular to the surface at all times. -
Page 10: Parts Diagram
FUJI SPRAY AUTO™ V8 SERIES SPRAY GUN ITEM PART NAME PART DESCRIPTION • • 6882 Spray Gun Air Cap with Collar Rebuild Kit Air Cap Retaining Ring consists of one each of these Collar parts Air Cap O-Ring Air Cap •... - Page 11 ITEM PART NAME Rear Barrel Plug Seal Rear Barrel Plug • Valve Seal • Spindle Valve Housing • • 6808 Spindle Valve Bushing • • 6809 Spindle Valve • • 6810 Spindle Valve Spring • • 6811 Fluid Screw Nut Needle •...
-
Page 12: Air Cap Sets
Air Cap Set Sizes Part Number MP Part Number HVLP (Sold Separately) 1.2mm 6800MP-V8-1.2 6890H-V8-1.2 1.3mm (Standard MP-V8) 6800MP-V8-1.3 6890H-V8-1.3 1.4mm (Standard H-V8) 6800MP-V8-1.4 6890H-V8-1.4 1.7mm 6800MP-V8-1.7 6890H-V8-1.7 2.0mm 6800MP-V8-2.0 6890H-V8-2.0 2.2mm 6800MP-V8-2.2 6890H-V8-2.2 V8 Series... -
Page 13: Finish Problems
FINISH PROBLEMS PROBLEM CAUSE Add more thinner (or Material is too thick appropriate solvent) Air inlet pressure is too Increase air pressure to the gun Drying too fast Add retarder ORANGE PEEL - Finish Keep distance 8” (20cm) Too close to surface is rough and resembles away from surface orange peel. -
Page 14: Troubleshooting
Needle and Fluid Nozzle and without pulling the Fluid Nozzle thoroughly clean Trigger... Loose Fluid Nozzle Tighten Fluid Nozzle Check and install Wrong Fluid Nozzle or correct Fluid Nozzle or Needle size installed Needle size to match V8 Series... - Page 15 TROUBLESHOOTING SPRAY GUN PROBLEMS CONTINUED PROBLEM CAUSE Cup or Lid may be Replace Cup Assembly cracked Tighten Cup Lid - hold CUP LEAKS Cup (not Gun) with one Cup Lid is too loose hand, and tighten Lid with the other Replace THE TRIGGER IS Bent Needle or not...
-
Page 16: Cleaning
If this type of quick cleaning is performed frequently, the Spray Gun will function well for many years. More than 50% of problems with a Spray Gun stem from clogs in the fluid passages and perhaps more important, the air passages. V8 Series... -
Page 17: Reassembly
THOROUGH CLEANING (Level 2) DISSASSEMBLY - See page 16 for images You may soak only the metal parts in neutral cleaning solution (pH value 6 to 8) and clean with the soft bristle cleaning brush. After performing Level 1 cleaning and removing the gravity cup from the Spray Gun: 1. - Page 18 230-240 lbf-in 200-208 kgf-cm V8 Series...
-
Page 19: Disassembly For Service Or Repairs
Disassembly for Service or Repairs Needle Packing Nut Assembly Follow instructions on page 15 up to #6, then follow the steps below: 1. Fig. K - Use an Allen Key size 6 to remove Fluid Screw Nut # 11, Then remove Spindle Valve Spring #10, Spindle Valve #9 and Spindle Valve Bushing #8 2. -
Page 20: Warranty Information
The warranty is void if repairs to the product are made or attempted by anyone other than Fuji or its authorized agent, or if any modifications to the product are made or attempted. V8 Series... - Page 21 NOTES...
- Page 22 NOTES V8 Series...
- Page 24 For Parts and Service, please contact Fuji Spray Auto™: Website: www.fujisprayauto.com Email: auto@fujispray.com Phone: 1-800-650-0930 Fuji Industrial Spray Equipment Ltd 40 Magnetic Drive, # 48 Toronto, Ontario, Canada, M3J 2C4 Copyright © 2020 Fuji Spray® Toronto, Canada...


Need help?
Do you have a question about the V8 Series and is the answer not in the manual?
Questions and answers