Table of Contents
Advertisement
Available languages
Available languages
Quick Links
BM 1609929Y06 10-10:BM 1609929Y06 10-10 1/18/11 9:31 AM Page 1
IMPORTANT:
Read Before Using
1800
1801
1803EVS
1806E
Call Toll Free for
Consumer Information
& Service Locations
1-877-BOSCH99 (1-877-267-2499) www.boschtools.com
For English Version
See page 2
IMPORTANT :
Lire avant usage
Operating/Safety Instructions
Consignes de fonctionnement/sécurité
Instrucciones de funcionamiento y seguridad
Pour obtenir des informations
et les adresses de nos centres
de service après-vente,
appelez ce numéro gratuit
Version française
Voir page 18
IMPORTANTE:
Leer antes de usar
Llame gratis para
obtener información
para el consumidor y
ubicaciones de servicio
Versión en español
Ver la página 34
Advertisement
Table of Contents

Related Manuals for Bosch 1800


Summary of Contents for Bosch 1800
- Page 1 IMPORTANT : IMPORTANTE: Read Before Using Lire avant usage Leer antes de usar Operating/Safety Instructions Consignes de fonctionnement/sécurité Instrucciones de funcionamiento y seguridad 1800 1801 1803EVS 1806E Call Toll Free for Pour obtenir des informations Llame gratis para Consumer Information et les adresses de nos centres obtener información...
-
Page 2: General Power Tool Safety Warnings
BM 1609929Y06 10-10:BM 1609929Y06 10-10 1/18/11 9:31 AM Page 2 General Power Tool Safety Warnings Read all safety warnings f) If operating a power tool in a damp WARNING and all instructions. Failure location is unavoidable, use a Ground Fault Circuit Interrupter (GFCI) protected to follow the warnings and instructions may supply. - Page 3 BM 1609929Y06 10-10:BM 1609929Y06 10-10 1/18/11 9:31 AM Page 3 b) Do not use the power tool if the switch tool’s operation. If damaged, have the does not turn it on and off. Any power tool power tool repaired before use. Many that cannot be controlled with the switch is accidents are caused by poorly maintained dangerous and must be repaired.
- Page 4 BM 1609929Y06 10-10:BM 1609929Y06 10-10 1/18/11 9:31 AM Page 4 h) Wear personal protective equipment. Kickback and Related Warnings Depending on application, use face Kickback is a sudden reaction to a pinched or shield, safety goggles or safety glasses. snagged rotating wheel, backing pad, brush or As appropriate, wear dust mask, hearing any other accessory.
- Page 5 BM 1609929Y06 10-10:BM 1609929Y06 10-10 1/18/11 9:31 AM Page 5 tool motionless until the wheel comes to power tool was not designed cannot be a complete stop. Never attempt to adequately guarded and are unsafe. remove the cut-off wheel from the cut b) The guard must be securely attached to while the wheel is in motion otherwise the power tool and positioned for...
-
Page 6: Additional Safety Warnings
GFCI and personal protection devices like Risk of injury to user. The power cord must only electrician’s rubber gloves and footwear will be serviced by a Bosch Factory Service Center further enhance your personal safety. or Authorized Bosch Service Station. - Page 7 BM 1609929Y06 10-10:BM 1609929Y06 10-10 1/18/11 9:31 AM Page 7 Symbols IMPORTANT: Some of the following symbols may be used on your tool. Please study them and learn their meaning. Proper interpretation of these symbols will allow you to operate the tool better and safer.
- Page 8 BM 1609929Y06 10-10:BM 1609929Y06 10-10 1/18/11 9:31 AM Page 8 Symbols (continued) IMPORTANT: Some of the following symbols may be used on your tool. Please study them and learn their meaning. Proper interpretation of these symbols will allow you to operate the tool better and safer.
-
Page 9: Functional Description And Specifications
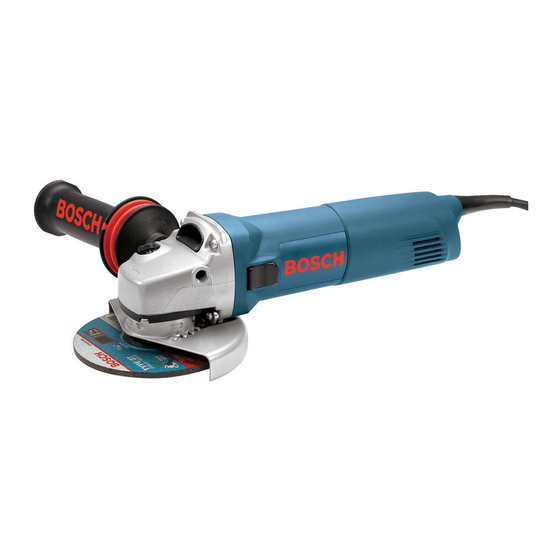
GRINDING WHEEL VIBRATION HAND GUARD WHEEL CONTROL (Optional Accessory) GUARD SIDE HANDLE Model number 1800 1801 & 1803EVS 1806E * Rated speed n 11,000/min n 11,000/min n 11,000/min * Max. abrasive wheel diameter 4 1/2" (115 mm) 5" (125 mm) 6"... -
Page 10: Wheel Guard Installation
BM 1609929Y06 10-10:BM 1609929Y06 10-10 1/18/11 9:31 AM Page 10 Functional Description and Specifications (Continued) Model number 1800 1801 & 1803EVS 1806E * Max. type 1 and 27 grinding wheels 4 1/2" Dia. 5" Dia. 6" Dia. * Max. type 1A and 27A cutting wheel 4 1/2" Dia. - Page 11 BM 1609929Y06 10-10:BM 1609929Y06 10-10 1/18/11 9:31 AM Page 11 DISC GRINDING WHEEL ASSEMBLy FIG. 3 (Models 1800, 1801 & 1803EVS only) Disconnect tool from power source. Be sure that wheel guard is in place for grinding. Place BACKING FLANGE and GRINDING WHEEL on the spindle.
-
Page 12: Wheel Assembly
BM 1609929Y06 10-10:BM 1609929Y06 10-10 1/18/11 9:31 AM Page 12 ABRASIVE TyPE 1A & 27A FIG. 5 WHEEL ASSEMBLy (Models 1800, 1801, 1803EVS & 1806E only) Using the optional type 1A wheel guard (supplied with 1806E only), it is possible to perform limited cutting on small stock such as metal tubes, piping or rebar. - Page 13 BM 1609929Y06 10-10:BM 1609929Y06 10-10 1/18/11 9:31 AM Page 13 WIRE BRUSH ASSEMBLy WIRE WHEEL ASSEMBLy Before assembling wire brush to this tool, Before assembling wire wheel to this tool, disconnect from the power source. Attach disconnect from the power source. Attach type hand guard (Fig.
-
Page 14: Restart Protection
BM 1609929Y06 10-10:BM 1609929Y06 10-10 1/18/11 9:31 AM Page 14 button. When pressure is released the switch stops during operation TURN OFF SWITCH button will snap to “OFF” position. IMMEDIATELY and allow the motor to cool for about 30 seconds by running at no-load. TO LOCK THE SWITCH “ON”, slide the If the overload protection stops the tool switch button forward and press “IN”... -
Page 15: Cutting Metal
In this case, interrupt the cutting process and Bosch sells suitable vacuum cleaners. allow the dry diamond wheel to cool by running the tool for a short time at maximum speed... - Page 16 BM 1609929Y06 10-10:BM 1609929Y06 10-10 1/18/11 9:31 AM Page 16 SANDING TIPS Remove gummy paint from metal with an For best results, tilt the “open coat” disc. Sand until sparks start to Disc Sander at a 10° to appear, then stop and change to a “closed 15°...
-
Page 17: Maintenance
We recommend that all tool service be performed by a Bosch Cleaning Factory Service Center or Authorized Bosch To avoid accidents always Service Station. - Page 18 BM 1609929Y06 10-10:BM 1609929Y06 10-10 1/18/11 9:31 AM Page 18 Avertissements généraux concernant la sécurité des outils électroportatifs Veuillez lire tous les f) S'il est absolument nécessaire d'utiliser l'outil AVERTISSEMENT avertissements et toutes les électroportatif dans un endroit humide, utilisez consignes de sécurité.
- Page 19 BM 1609929Y06 10-10:BM 1609929Y06 10-10 1/18/11 9:31 AM Page 19 meilleur travail et est plus sûr à la vitesse pour cassées ou d’autre circonstance qui risquent lequel il a été conçu. d’affecter le fonctionnement de l’outil électroportatif. Si l’outil est abîmé, faites-le b) Ne vous servez pas de l’outil électroportatif si son réparer avant de l’utiliser.
- Page 20 BM 1609929Y06 10-10:BM 1609929Y06 10-10 1/18/11 9:31 AM Page 20 h) Portez des équipements de protection personnelle. p) N'utilisez pas d'accessoires qui exigent des Suivant le travail effectué, portez un masque de liquides de refroidissement. L'utilisation d'eau ou protection, des lunettes à coques ou des lunettes d'autres liquides de refroidissement peut entraîner de sécurité.
- Page 21 BM 1609929Y06 10-10:BM 1609929Y06 10-10 1/18/11 9:31 AM Page 21 Avertissements spécifiques à la sécurité des c) Quand la meule se coince, ou quand vous opérations de rectification et de tronçonnage interrompez une coupe pour une raison à la meule : quelconque, mettez l'outil électroportatif à...
- Page 22 à poussière Risque de blessure pour l'utilisateur. Le cordon conçus spécialement pour filtrer les particules d'alimentation électrique ne doit être réparé que par un microscopiques. Centre de service usine de Bosch ou par une Station service agréée de Bosch. -22-...
- Page 23 BM 1609929Y06 10-10:BM 1609929Y06 10-10 1/18/11 9:31 AM Page 23 Symboles IMPORTANT : Certains des symboles suivants peuvent être utilisés sur votre outil. Veuillez les étudier et apprendre leur signification. Une interprétation appropriée de ces symboles vous permettra d'utiliser l'outil de façon plus efficace et plus sûre.
- Page 24 BM 1609929Y06 10-10:BM 1609929Y06 10-10 1/18/11 9:31 AM Page 24 Symboles (suite) IMPORTANT : Certains des symboles suivants peuvent être utilisés sur votre outil. Veuillez les étudier et apprendre leur signification. Une interprétation appropriée de ces symboles vous permettra d'utiliser l'outil de façon plus efficace et plus sûre.
-
Page 25: Description Fonctionnelle Et Spécifications
MEULE PROTECTEUR POIGNÉE LATÉRALE PROTÈGE-MAIN DE MEULE ANTIVIBRATIONS (accessoire en option) Numéro de modèle 1800 1801 et 1803EVS 1806E * Vitesse nominale n 11,000/min n 11,000/min n 11,000/min * Diamètre max. de la meule abrasive 4 1/2 po diam. 5 po diam. - Page 26 BM 1609929Y06 10-10:BM 1609929Y06 10-10 1/18/11 9:31 AM Page 26 Description fonctionnelle et spécifications (suite) Numéro de modèle 1800 1801 et 1803EVS 1806E * Meules de type 1 et 27 max. 4 1/2" po diam. 5" po diam. 6" po diam.
- Page 27 BM 1609929Y06 10-10:BM 1609929Y06 10-10 1/18/11 9:31 AM Page 27 ENSEMBLE DE MEULE A DISQUE FIG. 3 (modèles 1800, 1801 et 1803EVS seulement) Débranchez l'outil de la prise de courant. Assurez-vous que le protecteur de meule est en place pour la rectification.
- Page 28 BM 1609929Y06 10-10:BM 1609929Y06 10-10 1/18/11 9:31 AM Page 28 ENSEMBLE DE MEULE ABRASIVE DE TYPE 1A ET 27A FIG. 5 (modèles 1800, 1801, 1803EVS, et 1806E only) En utilisant le protecteur de meule de type 1A disponible en option (fourni avec le modèle 1806E uniquement), il est possible de réaliser des coupes...
-
Page 29: Consignes De Fonctionnement
BM 1609929Y06 10-10:BM 1609929Y06 10-10 1/18/11 9:31 AM Page 29 ENSEMBLE DE BROSSE MÉTALLIQUE ENSEMBLE DE BROSSE MÉTALLIQUE À TOURET Avant d'installer une brosse métallique sur cet outil, Avant d'installer une brosse métallique à touret sur cet débranchez ce dernier de la prise de courant. Fixez le outil, débranchez ce dernier de la prise de courant. - Page 30 BM 1609929Y06 10-10:BM 1609929Y06 10-10 1/18/11 9:31 AM Page 30 l’interrupteur vers l’avant en appuyant SEULEMENT sur durant le fonctionnement, METTEZ L'INTERRUPTEUR À la partie ARRIÈRE du bouton. Au relâchement, le L'ARRÊT IMMÉDIATEMENT et laissez le moteur bouton retournera à la position d’arrêt. refroidir pendant environ 30 secondes en fonctionnant à...
- Page 31 L'aspirateur utilisé pour cette application doit être agréé permettez à la meule diamantée de refroidir en laissant pour l'aspiration de la poussière de maçonnerie. Bosch fonctionner l'outil pendant un temps très court à vitesse vend des aspirateurs qui conviennent à cet usage.
- Page 32 BM 1609929Y06 10-10:BM 1609929Y06 10-10 1/18/11 9:31 AM Page 32 CONSEILS PRATIQUES disque à « grain ouvert ». Poncez jusqu’à apparition Pour obtenir de meilleurs d’étincelles, puis arrêtez pour substituer un disque à résultats, inclinez « grain serré » et décapez le reste de la peinture. ponceuse à...
-
Page 33: Entretien
BM 1609929Y06 10-10:BM 1609929Y06 10-10 1/18/11 9:31 AM Page 33 Entretien faire remplacer les paliers par un centre de service Service d’usine Bosch ou une station service agréée Bosch. Si Tout entretien préventif AVERTISSEMENT les paliers commencent à faire du bruit (à cause de effectué... - Page 34 BM 1609929Y06 10-10:BM 1609929Y06 10-10 1/18/11 9:31 AM Page 34 Advertencias generales de seguridad para herramientas mecánicas Lea todas las advertencias de para uso a la intemperie. La utilización de un ADVERTENCIA seguridad todas cordón adecuado para uso a la intemperie reduce el instrucciones.
- Page 35 BM 1609929Y06 10-10:BM 1609929Y06 10-10 1/18/11 9:31 AM Page 35 4) Uso y cuidado de las herramientas mecánicas que se atoran, si hay piezas rotas y si existe cualquier otra situación que podría afectar el a) No fuerce la herramienta mecánica. Use la funcionamiento de la herramienta mecánica.
- Page 36 BM 1609929Y06 10-10:BM 1609929Y06 10-10 1/18/11 9:31 AM Page 36 del accesorio que gira y haga funcionar la p) No utilice accesorios que requieran enfriadores herramienta mecánica a la máxima velocidad sin líquidos. La utilización de agua u otros enfriadores carga durante un minuto.
- Page 37 BM 1609929Y06 10-10:BM 1609929Y06 10-10 1/18/11 9:31 AM Page 37 Advertencias de seguridad específicas para las la herramienta mecánica y sujétela en posición operaciones de amolado y corte con ruedas abrasivas: inmóvil hasta que la rueda se detenga por completo. No intente nunca sacar del corte la a) Utilice únicamente los tipos de rueda que estén rueda recortadora mientras dicha rueda esté...
-
Page 38: Advertencias De Seguridad Adicionales
Centro de Servicio de Fábrica Bosch o una Estación de Servicio Bosch Autorizada. No use herramientas mecánicas con capacidad nominal solamente para CA con una fuente de Utilice el protector de la mano cuando lije y cepille. - Page 39 BM 1609929Y06 10-10:BM 1609929Y06 10-10 1/18/11 9:31 AM Page 39 Símbolos IMPORTANTE: Es posible que algunos de los símbolos siguientes se usen en su herramienta. Por favor, estúdielos y aprenda su significado. La interpretación adecuada de estos símbolos le permitirá utilizar la herramienta mejor y con más seguridad.
- Page 40 BM 1609929Y06 10-10:BM 1609929Y06 10-10 1/18/11 9:31 AM Page 40 Símbolos (continuación) IMPORTANTE: Es posible que algunos de los símbolos siguientes se usen en su herramienta. Por favor, estúdielos y aprenda su significado. La interpretación adecuada de estos símbolos le permitirá utilizar la herramienta mejor y con más seguridad.
-
Page 41: Descripción Funcional Y Especificaciones
MANGO LATERAL DE PROTECTOR DE LA MANO DE LA MUELA CONTROL DE LA (accesorio opcional) VIBRACIÓN Número de modelo 1800 1801 y 1803EVS 1806E * Velocidad nominal n 11,000/min n 11,000/min n 11,000/min * Máx. diámetro de la rueda abrasiva 4 1/2"... - Page 42 BM 1609929Y06 10-10:BM 1609929Y06 10-10 1/18/11 9:31 AM Page 42 Descripción funcional y especificaciones (cont.) Número de modelo 1800 1801 y 1803EVS 1806E * Máx. ruedas de amolar de tipo 1 y 27 4 1/2" de diám. 5" de diám.
- Page 43 BM 1609929Y06 10-10:BM 1609929Y06 10-10 1/18/11 9:31 AM Page 43 ENSAMBLAJE DE LA RUEDA DE AMOLAR DE DISCO FIG. 3 (modelos 1800, 1801EVS y 1803EVS solamente) Desconecte la herramienta de la fuente de energía. Asegúrese de que el protector de la muela esté colocado en su sitio para amolar.
- Page 44 ENSAMBLAJE DE LA RUEDA FIG. 5 ABRASIVA DE TIPO 1A Y 27A (modelos 1800, 1801, 1803EVS, y 1806E solamente) Utilizando el protector de la muela tipo 1A opcional (suministrado con el modelo 1806E solamente), es posible realizar corte limitado en material pequeño, tal HUSILLO como tubos, tuberías o barras de refuerzo de metal.
-
Page 45: Instrucciones De Funcionamiento
BM 1609929Y06 10-10:BM 1609929Y06 10-10 1/18/11 9:31 AM Page 45 ENSAMBLAJE DEL CEPILLO DE ALAMBRE ENSAMBLAJE DE LA RUEDA CON RAYOS DE ALAMBRE Antes de ensamblar el cepillo de alambre en esta Antes de ensamblar la rueda con rayos de alambre en herramienta, desconéctela de la fuente de energía. - Page 46 BM 1609929Y06 10-10:BM 1609929Y06 10-10 1/18/11 9:31 AM Page 46 interruptor está accionado por resorte y saltará de detiene durante el funcionamiento, APAGUE EL vuelta automáticamente. INTERRUPTOR INMEDIATAMENTE y deje que el motor se enfríe durante unos 30 segundos haciendo que Agarre la herramienta con las dos manos cuando funcione sin carga.
- Page 47 En este caso, interrumpa el proceso de corte y deje que debe estar aprobada para la extracción de polvo de la rueda de diamante de corte en seco se enfríe mampostería. Bosch vende muchas aspiradoras haciendo funcionar la herramienta durante un corto adecuadas.
- Page 48 BM 1609929Y06 10-10:BM 1609929Y06 10-10 1/18/11 9:31 AM Page 48 Quite la pintura gomosa del metal con un disco de “capa CONSEJOS PARA LIJAR abierta”. Lije hasta que empiecen a saltar chispas y Para mejores resultados, incline la lijadora de disco entonces pare y cambie a un disco de “capa cerrada”...
-
Page 49: Mantenimiento
BM 1609929Y06 10-10:BM 1609929Y06 10-10 1/18/11 9:31 AM Page 49 Mantenimiento Servicio rodamientos deben cambiarse en un Centro de servicio de fábrica Bosch o en una Estación de servicio Bosch El mantenimiento preventivo ADVERTENCIA autorizada. Los rodamientos que se vuelven ruidosos... -
Page 50: Notes: Remarques : Notas
BM 1609929Y06 10-10:BM 1609929Y06 10-10 1/18/11 9:31 AM Page 50 Notes: Remarques : Notas: -50-... - Page 51 BM 1609929Y06 10-10:BM 1609929Y06 10-10 1/18/11 9:31 AM Page 51 Notes: Remarques : Notas: -51-...
- Page 52 Robert Bosch Tool Corporation ("el Vendedor") garantiza, únicamente al comprador original, que todas las herramientas mecánicas portátiles y para tablero de banco BOSCH estarán libres de defectos de material o de fabricación durante un período de un año a partir de la fecha de compra.
Need help?
Do you have a question about the 1800 and is the answer not in the manual?
Questions and answers