
Related Manuals for Pilot Air ALTA-TEC Series


Summary of Contents for Pilot Air ALTA-TEC Series
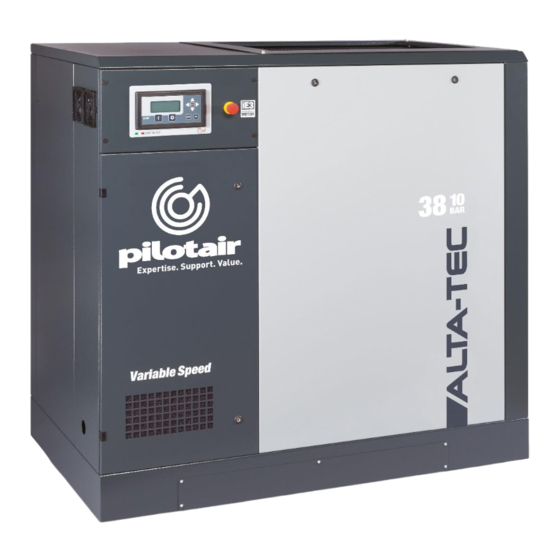
- Page 1 Pilot ALTA-TEC 30-37 Variable Speed Rotary Screw ALTA-TEC SERIES ALTA-TEC 31 – 38VS User’s Maintenance and Spare Parts Manual P a g e Alta-Tec 31-38VS Rev 01 02-01-2020...
- Page 2 Dear Customer, Thank you for choosing Pilot Air. In order to get the best performance out of this product, please read this manual carefully. To avoid incorrect operation of the equipment and possible physical risk to the operator, please read and strictly follow the instructions contained in this manual.
-
Page 3: Declaration Of Conformity
P a g e Alta-Tec 31-38VS Rev 01 02-01-2020... -
Page 4: Table Of Contents
INDEX Declaration of Conformity General Information Overall Dimensions Safety Regulations Installation Technical Features Start-up and Operations Maintenance Troubleshooting Wiring Diagram Warrant Terms and Conditions P a g e Alta-Tec 31-38VS Rev 01 02-01-2020... -
Page 5: General Information
General Information OUTFIT The following accessories are supplied with the compressor: • Use and maintenance manual • Anti-vibration elements • Electric box panel key • Oil/Condensate exhaust tube Check that the above accessories are available. Once the goods have been delivered and accepted, no complaints are accepted. -
Page 6: Overall Dimensions
Overall Dimensions P a g e Alta-Tec 31-38VS Rev 01 02-01-2020... - Page 7 Overall Dimensions P a g e Alta-Tec 31-38VS Rev 01 02-01-2020...
-
Page 8: Safety Regulations
Safety Regulations READ THIS PAGE CAREFULLY BEFORE PERFORMING ANY OPERATION ON THE COMPRESSOR General Warnings • The rotating compressors are destined for arduous and continuous industrial use. They are particularly adapt for application in industries where a large consumption of air is requested for long periods of time. •... - Page 9 Safety Regulations READ THIS PAGE CAREFULLY BEFORE PERFORMING ANY OPERATION ON THE COMPRESSOR SYMBOLS USED ON THE COMPRESSOR Several different labels are applied to the compressor. Their function is most of all to highlight any hidden dangers and to indicate correct behavior during use of the machine or in particular situations. It is of fundamental importance that they are respected.
- Page 10 Safety Regulations READ THIS PAGE CAREFULLY BEFORE PERFORMING ANY OPERATION ON THE COMPRESSOR DO NOT: • Do not touch inner parts and pipes as they are very hot during compressor operation and stay hot for a certain time after compressor stops. •...
-
Page 11: Installation
Installation DESCRIPTION OF THE COMPRESSOR 11 | P a g e Alta-Tec 31-38VS Rev 01 02-01-2020... - Page 12 Installation DESCRIPTION OF THE COMPRESSOR 1. Electrical Equipment 11. Electric Motor 2. Front Panel 12. Control Panel 3. Lid 13. Air Intake Outlet 4. Electric Fan 14. Suction Regulator 5. Oil Filter 15. Screw Compressor 6. Oil Separator Filter 16. Inverter 7.
-
Page 13: Technical Features
Technical Features 13 | P a g e Alta-Tec 31-38VS Rev 01 02-01-2020... -
Page 14: Start-Up And Operations
Start-Up and Operation CHECKS TO BE CARRIED OUT PRIOR TO START-UP N.B.: The customer is responsible for installing the machine and making the required electrical and air connections. Initial system start-up must be carried out by skilled personnel who will make the various checks required and follow the respective instructions. - Page 15 Start-Up and Operation OPERATING MODE • At the end of the start cycle, the compressor goes to the maximum operation speed and begins to compress air in the tank (5). • When approaching the desired operating pressure, the compressor begins to modulate the frequency of rotation of the motor (max.100%, min.
- Page 16 Start-Up and Operation 2 - CONTROL PANEL The compressor is fitted with a “control panel” for setting up and monitoring machine operation. The operating parameters were entered by the manufacturer during “testing”. The parameters were tested for several hours in the various operating conditions.
- Page 17 Start-Up and Operation Stoppage procedure: • Press the STOP button (O) to activate the stoppage procedure. The load solenoid valve is deactivated and the no load cycle starts for the time set in the parameter “Stoppage time” (“NO LOAD” and then “STATUS - OFF”...
- Page 18 Start-Up and Operation Compressor Functioning with an Inverter Start-up procedure: Press the START (I) button. If no alarms are on, the start-up cycle activates: • Stand-by for start-up: the control unit is waiting to verify the following conditions before starting the compressor: •...
- Page 19 Start-Up and Operation Main Screen The main screen summarises the current status of the machine. 19 | P a g e Alta-Tec 31-38VS Rev 01 02-01-2020...
- Page 20 Start-Up and Operation Menus and Parameters • The menus are structured as vertical drop-down menus; the title is on top and is followed by the list of parameters or sub-menus available. If the menu contains more items than the LCD display can show, two arrows (Up and Down) appear on the right to indicate more items are present.
- Page 21 Start-Up and Operation 21 | P a g e Alta-Tec 31-38VS Rev 01 02-01-2020...
- Page 22 Start-Up and Operation Password Certain menus are password protected. A password is requested if you try to access the reserved areas. Removal of menu protection persists until you go back to the main screen. Main Menu User : Menu containing the user parameters (see USER MENU paragraph). Support : Menu containing the Support parameters (see SUPPORT MENU paragraph).
- Page 23 Start-Up and Operation Support Menu Oil Hours : Indicates the hours remaining before the oil needs to be changed Oil Filter Hours : Indicates the hours remaining before the oil filter needs to be changed Air filter hours : Indicates the hours remaining before the air filter needs to be changed. Oil separator hours : Indicates the hours remaining before the oil separator filter needs to be changed.
- Page 24 Start-Up and Operation : Indicates pressure in bar with centesimal precision : Indicates the temperature in °C Screw probe : Indicates the temperature in °C Dryer probe : Indicates the inverter output automatically switches 4-20mA Keeping the I key pressed, you can execute a motor start-up test. Pressing the 0 key, you can upload the default parameters (there are 32 sets of parameters present).
- Page 25 Start-Up and Operation Dryer Menu Dryer ON : Dryer Enabling. Minimum time : Defines the minimum maintenance time of the deactivated dryer. It serves to protect the dryer compressor from over-frequent start-ups. Temperature OFF : Defines the value of the temperature at which the dryer compressor is deactivated. Temp.
- Page 26 Start-Up and Operation Total Hours : Indicates the working hours of the main motor. Loaded hours : Indicates the working hours the compressor is loaded. : Indicates the dryer probe temperature : Indicates the inverter output automatically switches 4-20mA Star/delta time : Defines the duration of the star phase during start-up of the main motor of the compressor.
- Page 27 Start-Up and Operation The possible alarms are as follows: Alarm! Minimum temp.: Having reached the oil minimum temperature, the alarm BLOCKS the compressor. To re- start the compressor, you need to wait for the temperature to rise above the programmed value. Alarm! Maximum temp.: Having reached the oil maximum temperature, the alarm BLOCKS the compressor.
-
Page 28: Maintenance
Maintenance • Correct maintenance is crucial to achieve maximum efficiency of your compressor, and to lengthen its operating life. • It is also important to comply with the maintenance intervals recommended, but it must be remembered that such intervals are suggested by the manufacturer in the event that the environmental conditions of use of the compressor are optimal (see “Installation”... - Page 29 Maintenance DRAIN CONDENSATE (Fig. 6) • The oil/air mixture cooling is set at a higher temperature with respect to the dew point of the air (under standard operating conditions of the compressor). However, the condensate in the oil cannot be fully removed. •...
- Page 30 Maintenance REPLACING THE OIL FILTER (FIG. 8) • With the compressor stopped, remove the front panel. • At each change replace also the oil filter E, unscrew the old filter and replace it. • Always apply some oil on the edge of the filter and on the seal before refitting manually the filter.
- Page 31 Maintenance REPLACING THE MINIMUM VALVE (FIG. 10) Replace the seals highlighted with the letter G. REPLACING THE FLEXIBLE HOSES • It is recommended that they are replaced when changing the oil. • Loosen the hose fittings, replace them and tighten with force the fittings. Continue with the final phases of the oil changing procedure.
-
Page 32: Troubleshooting
Troubleshooting 32 | P a g e Alta-Tec 31-38VS Rev 01 02-01-2020... -
Page 33: Wiring Diagram
Wiring Diagram 33 | P a g e Alta-Tec 31-38VS Rev 01 02-01-2020... -
Page 34: Warrant Terms And Conditions
1. For a period of 12 months from the date of purchase, the Product will be free from defects due to defective factory workmanship or materials; and 2. For a period of 12 months from the date of purchase that Pilot Air branded accessories supplied by Pilot Air will be free from defects due to defective factory workmanship or materials. - Page 35 The warranties specified herein are subject to the following conditions: Pilot Air will not be liable for a breach of any of its warranties unless the Claimant provides proof of purchase of the Product and makes a written claim to Pilot Air at the address set out below, either within 30 days after the defect would have become reasonably apparent, or if the defect was reasonably apparent prior to installation, then the claim must be made prior to installation;...
- Page 36 In the circumstances where Pilot Air accepts or it is determined by Pilot Air that the claimant has a valid claim under this warranty, and subject to paragraph (m) below, Pilot Air will bear all of the claimant's reasonable and proximate expenses incurred as a result of claiming under this warranty.
- Page 37 Important Note: If you acquire goods from Pilot Air as a consumer according to the Australian Consumer Law, our goods come with guarantees that cannot be excluded under the Australian Consumer Law. You are entitled to a replacement or refund for a major failure and for compensation for any other reasonably foreseeable loss or damage.
Need help?
Do you have a question about the ALTA-TEC Series and is the answer not in the manual?
Questions and answers