
Related Manuals for Pilot Air SILENT Series


Summary of Contents for Pilot Air SILENT Series
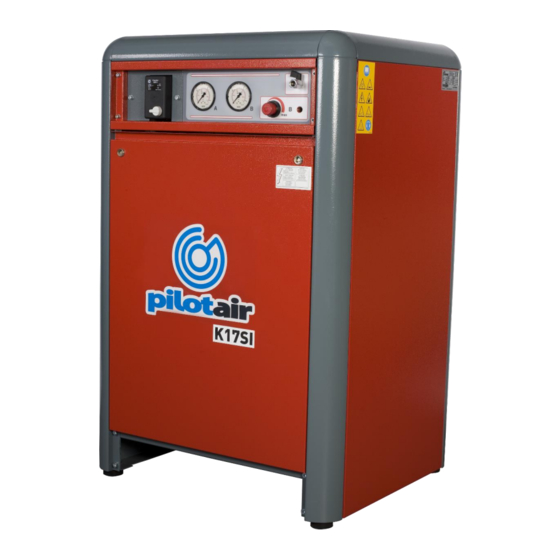
- Page 1 Pilot K17SI Silent 415V Reciprocating PILOT AIR SILENT SERIES Instruction and Maintenance Manual P a g e Silent Series Rev 01 03-2020...
- Page 2 Dear Customer, Thank you for choosing Pilot Air. In order to get the best performance out of this product, please read this manual carefully. To avoid incorrect operation of the equipment and possible physical risk to the operator, please read and strictly follow the instructions contained in this manual.
- Page 3 These instructions for use and maintenance constitute an integral part of the compressor and must be kept in the vicinity of the equipment or by the personnel responsible for using the equipment. P a g e Silent Series Rev 01 03-2020...
-
Page 4: Table Of Contents
Main Features Principles of Operations Putting into Service Operation Compressed Air Settings Maintenance Troubleshooting Guarantee EC Declaration of Conformity Summary of Maintenance and Inspection Operation Wiring Diagram Warrant Terms and Conditions P a g e Silent Series Rev 01 03-2020... -
Page 5: General Information
Bar code for the identification Pump Noise level Feeding voltage Year of production Tank capacity Net frequency Series Name Standards Identification Serial number Maximum working pressure Power of the engine Model P a g e Silent Series Rev 01 03-2020... - Page 6 1. General Information DESCRIPTION OF THE MACHINE The SILENT series comprises a range of reciprocating, single stage and dual stage compressors with oil-free or splash lubrication and vertical or “V” twin cylinders, for use in industrial applications. The various models can be direct motor coupled or V belt driven by single-phase electric motors with direct starting or three-phase motors with direct or delta-star starting.
-
Page 7: Captions For Illustrations
38) Safety lock on cover 39) Electrical panel 40) Control panel 41) Pressure switch 42) Electric fan thermostat 43) Thermal alarm thermostat 44 Air intake filter 45) Spiral intake hose mod. 500 750-850 P a g e Silent Series Rev 01 03-2020... -
Page 8: Handling And Controls
To connect the compressor to the compressed air system, only use hoses (51) [fig.6], that are at least 60 cm long and of a suitable size in relation to the outlet on the compressor (see table 4). P a g e Silent Series Rev 01 03-2020... -
Page 9: Installation
57) Ceramic filter C) Diagram showing set of compressors and 58) Air outlet from sump to user receiver sump 59) Dryer by-pass D) Diagram showing set of compressors, with cooler, sump and dryer P a g e Silent Series Rev 01 03-2020... - Page 10 The air supply circuit must have a slope of at least 1% in order to drain any condensate that may deposit in the lowest parts of the circuit. Use the automatic blowdown or purge valves on standard models to drain condensate [fig.8]. 10 | P a g e Silent Series Rev 01 03-2020...
-
Page 11: Safety Rules
Safety is guaranteed by means of fixed guards. These can only be removed after making sure that the machine has been disconnected from the electrical power supply. 11 | P a g e Silent Series Rev 01 03-2020... - Page 12 12 | P a g e Silent Series Rev 01 03-2020...
-
Page 13: Engineering
3) ELECTRICAL COMPONENTS Electrical panel In the SILENT series, the electrical panel is installed inside a space at the front of the cabinet. In the SILENT1 version, this panel is accessed by removing the cover. In the SILENT2 and SILENT4 versions it can also be accessed by unscrewing the two screws on the top of the control panel and turning this down. - Page 14 40.10 - Red stop pushbutton 40.11 - Green start pushbutton 40.12 - Control and auto-diagnostic circuit board 40.13 - Circuit board fastening screws 40.14 - Adhesive wiring diagram [fig.16] 14 | P a g e Silent Series Rev 01 03-2020...
-
Page 15: Main Features
Hour meter Displays the number of hours of operation and is included in SILENT2 and SILENT4 models. Pressure gauge Displays the pressure of the air delivered to the line. 15 | P a g e Silent Series Rev 01 03-2020... - Page 16 39.9.1 - Delta-star timer control, settings from 0 to 10 sec. 39.10 - Transformer for auxiliary circuit 230/400V IN - 0/24V OUT. 40.12 - Control and auto-diagnostic board 40.12.1 - Terminal strip on circuit board forconnector. 16 | P a g e Silent Series Rev 01 03-2020...
-
Page 17: Principles Of Operations
Make sure that the condensate drain valve under the sump [fig.12] is closed. 5. Models in the SILENT1 series: Check that the pushbutton on the pressure switch [fig.13] is set to “OFF - 0”. 17 | P a g e Silent Series Rev 01 03-2020... -
Page 18: Putting Into Service
Always use the pushbutton on the instrument panel to switch the compressor off. Do not pull the cable to disconnect the plug. Do not expose the compressor to severe temperatures. During normal operation, the use of extensions, of any diameter or length, is not recommended. 18 | P a g e Silent Series Rev 01 03-2020... -
Page 19: Operation
• To avoid the risk of burns, do not touch the connecting hoses, cylinder head, motor, check valve or any other parts of the compressor that may become hot while the compressor is running and for some minutes after it has stopped. 19 | P a g e Silent Series Rev 01 03-2020... -
Page 20: Compressed Air Settings
• Use the compressor in the rain or in severe weather conditions; • Remove the condensate blowdown plug; • Direct the jet of air towards people, animals or highly volatile materials (powders, thinners, etc...); • Carry out maintenance operations. 20 | P a g e Silent Series Rev 01 03-2020... -
Page 21: Maintenance
However, the pump unit and other important parts should preferably be overhauled by qualified technicians or maintenance operators. If necessary, contact your dealer. 21 | P a g e Silent Series Rev 01 03-2020... -
Page 22: Troubleshooting
KV 39.3 power contactor and the electric fan. 3) Check the voltage, consumption of individual phases and thermostat setting. 4) Check the level and quality of the oil. Overhaul the unit. 22 | P a g e Silent Series Rev 01 03-2020... - Page 23 Solutions 1) Clean or replace the filter. 2) Tension or replace belts. 3) Inspect fittings using soapy water. 4) Seek the help of a qualified technician tooverhaul the unit 23 | P a g e Silent Series Rev 01 03-2020...
- Page 24 4) Head blowdown hoses broken. Solutions 1) Check that bolts and nuts are tight. 2) Overhaul the pump unit. 3) Improve floor supports. 4)Restore original configuration to make the compressor operate more quietly. 24 | P a g e Silent Series Rev 01 03-2020...
-
Page 25: Guarantee
The guarantee does not cover damage due to negligence or improper use. 25 | P a g e Silent Series Rev 01 03-2020... -
Page 26: Ec Declaration Of Conformity
15.EC DECLARATION OF CONFORMITY 26 | P a g e Silent Series Rev 01 03-2020... -
Page 27: Summary Of Maintenance And Inspection Operation
16.Summary of Maintenance and Inspection Operation 27 | P a g e Silent Series Rev 01 03-2020... -
Page 28: Wiring Diagram
17.Wiring Diagram 28 | P a g e Silent Series Rev 01 03-2020... - Page 29 17.Wiring Diagram SILENT 29 | P a g e Silent Series Rev 01 03-2020...
- Page 30 17.Wiring Diagram SILENT 30 | P a g e Silent Series Rev 01 03-2020...
- Page 31 17.Wiring Diagram SILENT 31 | P a g e Silent Series Rev 01 03-2020...
- Page 32 17.Wiring Diagram SILENT 32 | P a g e Silent Series Rev 01 03-2020...
- Page 33 17.Wiring Diagram SILENT 33 | P a g e Silent Series Rev 01 03-2020...
- Page 34 17.Wiring Diagram SILENT 34 | P a g e Silent Series Rev 01 03-2020...
- Page 35 17.Wiring Diagram SILENT 35 | P a g e Silent Series Rev 01 03-2020...
- Page 36 17.Wiring Diagram SILENT 36 | P a g e Silent Series Rev 01 03-2020...
- Page 37 17.Wiring Diagram SILENT 37 | P a g e Silent Series Rev 01 03-2020...
- Page 38 17.Wiring Diagram SILENT 38 | P a g e Silent Series Rev 01 03-2020...
- Page 39 17.Wiring Diagram SILENT 39 | P a g e Silent Series Rev 01 03-2020...
- Page 40 17.Wiring Diagram SILENT 40 | P a g e Silent Series Rev 01 03-2020...
- Page 41 18.Wiring Diagram NOTES 41 | P a g e Silent Series Rev 01 03-2020...
-
Page 42: Warrant Terms And Conditions
1. For a period of 12 months from the date of purchase, the Product will be free from defects due to defective factory workmanship or materials; and 2. For a period of 12 months from the date of purchase that Pilot Air branded accessories supplied by Pilot Air will be free from defects due to defective factory workmanship or materials. - Page 43 The warranties specified herein are subject to the following conditions: Pilot Air will not be liable for a breach of any of its warranties unless the Claimant provides proof of purchase of the Product and makes a written claim to Pilot Air at the address set out below, either within 30 days after the defect would have become reasonably apparent, or if the defect was reasonably apparent prior to installation, then the claim must be made prior to installation;...
- Page 44 In the circumstances where Pilot Air accepts or it is determined by Pilot Air that the claimant has a valid claim under this warranty, and subject to paragraph (m) below, Pilot Air will bear all of the claimant's reasonable and proximate expenses incurred as a result of claiming under this warranty.
- Page 45 Important Note: If you acquire goods from Pilot Air as a consumer according to the Australian Consumer Law, our goods come with guarantees that cannot be excluded under the Australian Consumer Law. You are entitled to a replacement or refund for a major failure and for compensation for any other reasonably foreseeable loss or damage.
Need help?
Do you have a question about the SILENT Series and is the answer not in the manual?
Questions and answers