Table of Contents
Advertisement
Quick Links
Advertisement
Table of Contents

Related Manuals for BRIO Moderna CLBL730SC


Summary of Contents for BRIO Moderna CLBL730SC
- Page 1 Bottom Load Water Dispenser User’s Manual Model: CLBL730SC...
-
Page 2: Table Of Contents
Table of Contents Safety Information . . . . . . . . . . . . . . . . . . . . . . . . . . . . . . . . . . . . . . . . . . . . . . . . . . . . . . . . . . . . . . . . . . 3 Intended Use . -
Page 3: Safety Information
Safety Information WARNING: To reduce risk of injury and property damage, you must read this entire guide before assembling, installing and operating the dispenser . WARNING: This product dispenses water at very high temperatures . Failure to use properly can cause personal injury . -
Page 4: Intended Use
Intended Use This dispenser is intended to be used in household and similar applications such as: Staff kitchen areas, offices, and other working environments • • Farm houses Clients in hotels, motels and other residential type environments • • Bed and breakfast type environments •... -
Page 5: Touch Panel Description
Touch Panel Description No . Description Up arrow button LED Display Change bottle icon Self-cleaning ozone icon Down arrow button Lock button Hot water button Ambient water button Cold water button Operational Specifications Model No . CLBL730SC Rated Voltage / Frequency 115 V / 60 Hz Heating Power 420 W... -
Page 6: Installation
Installation 1 . Determine Installation Location Place the dispenser upright. Locate the dispenser on a hard and level surface in a cool shaded location near a grounded wall outlet. NOTICE: Do NOT plug in the power cord until the entire installation section is completed . -
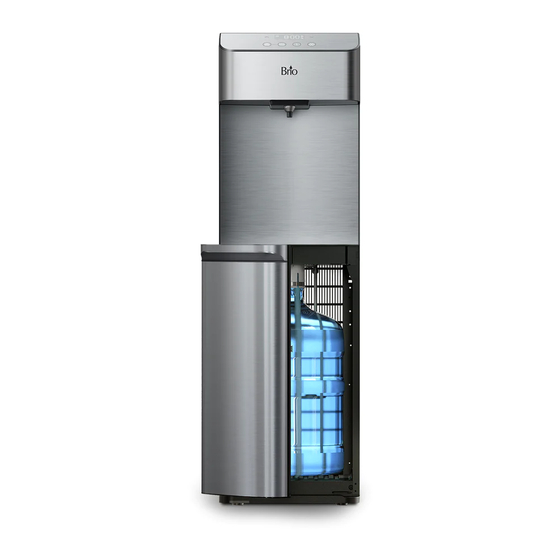
Page 7: Operation
Slide the water bottle into the dispenser cabinet and close the door. Wait 5 minutes for the water tanks to fill with water before attempting to use the dispenser. Remove air from the tanks by placing a cup under each water tap and drain at least 4 cups (1 liter) of water before initial use. -
Page 8: Set The Hot Water Temperature Level
approximately 2 hours for the cold water temperature range to adjust to the new level . During the adjustment process, the cold water light will illuminate in blue . Once the new level has been reached, the light will change to white . -
Page 9: Troubleshooting
Open the dispenser cabinet door and slide the empty bottle out of the cabinet . Remove the bottle adapter from the empty bottle and let the probe drip into the bottle . Once dripping has stopped, place the bottle adapter on the hanger and set the empty bottle aside . Follow the steps in Connect a Water Bottle to install your new water bottle . -
Page 10: Clean The Reservoirs
switch to save power and drain any remaining water . • Clean your cabinet, controls, bottle probe and spout each time you change your water bottle . Use a clean soft cloth and a food grade sanitizer or bleach . Empty and clean the drip tray, grid and float as needed . -
Page 11: Warranty
Warranty Brio (“Vendor”) warrants to the original purchaser of the Brio Water Cooler (the “Product”), and to no other person, that if the Product is assembled and operated in accordance with the printed instructions accompanying it, then for a period of one (1) year from the date of purchase, all parts in the Product shall be free from defects in material and workmanship . - Page 12 Contact Us Call: +1 844-257-4103 ©2023 Brio Water Technology, Inc.
Need help?
Do you have a question about the Moderna CLBL730SC and is the answer not in the manual?
Questions and answers