
Subscribe to Our Youtube Channel
Related Manuals for Cincoze MXM-A2000


Summary of Contents for Cincoze MXM-A2000
- Page 1 MXM-A2000 Module Quick Installation Guide Embedded MXM GPU Module NVIDIA Embedded RTX A2000 MXM Type A, 8G, 60W Kit with Heatsink and Thermal Pad Version: V1.00...
-
Page 2: Table Of Contents
Contents Preface..............................3 Revision ............................3 Copyright Notice .......................... 3 Acknowledgement ........................3 Disclaimer ............................. 3 Declaration of Conformity ......................3 FCC ............................3 CE ............................4 Product Warranty Statement ....................... 4 Warranty ..........................4 RMA ............................4 Limitation of Liability ......................5 Technical Support and Assistance .................... -
Page 3: Preface
2023/09/27 Copyright Notice © 2023 by Cincoze Co., Ltd. All rights are reserved. No parts of this manual may be copied, modified, or reproduced in any form or by any means for commercial use without the prior written permission of Cincoze Co., Ltd. All information and specification provided in this manual are for reference only and remain subject to change without prior notice. -
Page 4: Product Warranty Statement
(such as a fuse, battery, etc.), are not warranted. Before sending your product in, you will need to fill in Cincoze RMA Request Form and obtain a RMA number from us. Our staff is available at any time to provide you with the most friendly and immediate service. -
Page 5: Limitation Of Liability
Limitation of Liability Cincoze’ liability arising out of the manufacture, sale, or supplying of the product and its use, whether based on warranty, contract, negligence, product liability, or otherwise, shall not exceed the original selling price of the product. The remedies provided herein are the customer’s sole and exclusive remedies. -
Page 6: Conventions Used In This Manual
Conventions Used in this Manual This indication alerts operators to an operation that, if not strictly observed, may result in severe injury. (Cette indication avertit les opérateurs d'une opération qui, si elle n'est pas strictement observée, peut entraîner des blessures graves.) This indication alerts operators to an operation that, if not strictly observed, may result in safety hazards to personnel or damage to equipment. -
Page 7: Package Contents
Screw Pack Note: Notify your sales representative if any of the above items are missing or damaged. Ordering Information Model No. Product Description MXM-A2000-R10 NVIDIA RTX Embedded A2000 MXM Kit with Heatsink and Thermal Pad -A2000 | Quick Installation Guide... -
Page 8: Chapter 1 Product Introductions
Chapter 1 Product Introductions -A2000 | Quick Installation Guide... -
Page 9: Product Pictures
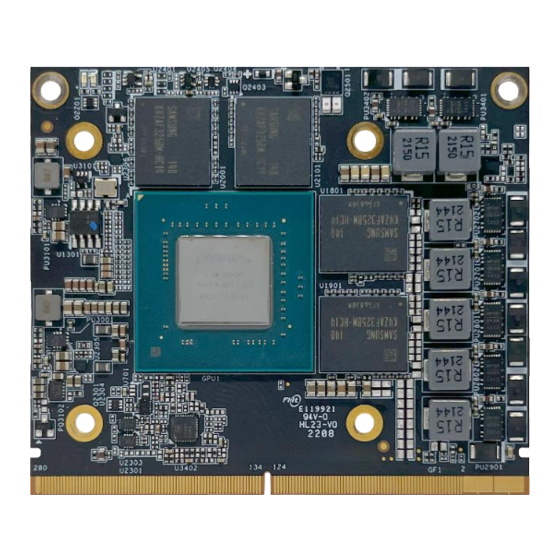
1.1 Product Pictures Front Rear -A2000 | Quick Installation Guide... -
Page 10: Key Features
1.2 Key Features ⚫ NVIDIA® RTX™ A2000 Embedded Graphics ⚫ Standard MXM 3.1 Type A Form Factor (82 x 70 mm) ⚫ 2560 NVIDIA® CUDA® Cores, 20 RT cores, and 80 Tensor cores ⚫ 8.25 TFLOPS Peak FP32 Performance ⚫ PCIe Gen 4 x8 interface ⚫... -
Page 11: Mechanical Dimension
1.4 Mechanical Dimension Unit: mm -A2000 | Quick Installation Guide... -
Page 12: Chapter 2 Module Setup
Chapter 2 Module Setup -A2000 | Quick Installation Guide... -
Page 13: Installing An Mxm Module
2.1 Installing an MXM Module This chapter is to demonstrate how to setup an MXM Module onto an MXM Module supported system. Before this chapter gets started, users need to follow the instructions of the system’s user manual to remove the system’s chassis cover and to install the MXM carrier board. Locate the slot on the MXM carrier board installed on the MXM Module supported system. - Page 14 Insert the MXM Module into the slot on the MXM carrier board at 45 degrees. 45° Fasten the two screws (M3X5L). Before putting on the thermal block (in the next step), please make sure the protective films on the Thermal Pads have been removed! (Avant de mettre le bloc thermique (à...
- Page 15 Place the thermal pad on the thermal block. Before assembling the system’s chassis cover, please make sure the protective film on the Thermal Pad has been removed! (Avant d'assembler le capot du châssis du système, assurez-vous que le film protecteur du coussin thermique a été...
- Page 16 © 2023 Cincoze Co., Ltd. All rights reserved. The Cincoze logo is a registered trademark of Cincoze Co., Ltd. All other logos appearing in this catalog are the intellectual property of the respective company, product, or organization associated with the logo.
Need help?
Do you have a question about the MXM-A2000 and is the answer not in the manual?
Questions and answers