
Related Manuals for Logitech iK1051


Summary of Contents for Logitech iK1051
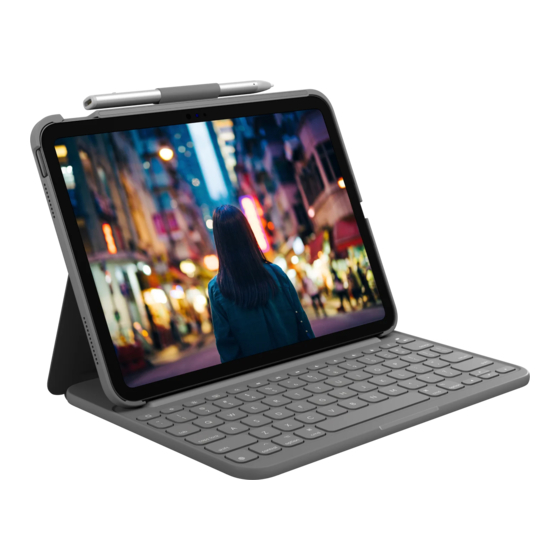
- Page 1 Type + Protective case with integrated keyboard iK1051 带集成键盘的保护套 Setup Guide | 设置指南...
- Page 2 Contents / 目录 English 简体中文...
-
Page 3: Know Your Product
Logitech Type + Know your product 1. iPad holder 2. Protective folio 3. Hot keys 4. Keyboard 5. Bluetooth and battery status light 6. Bluetooth connect button 7. Micro-USB charging port 8. Micro-USB charging cable 9. Product documentation Type + Protective case with integrated keyboard ®... - Page 4 Logitech Type + Setting up the keyboard folio Establishing connection with your iPad The keyboard folio links to your iPad via Getting started a Bluetooth® connection. The first time 1. Open the keyboard folio, make sure you use the keyboard folio, you must pair it the edge of your iPad is aligned with with your iPad.
- Page 5 Logitech Type + Using the keyboard folio 2. If your iPad requests a PIN, enter it using the folio keyboard (not on your iPad). Two viewing positions When successful connection is made, The keyboard folio provides two viewing the status light turns solid blue for positions—one for typing and another...
- Page 6 Logitech Type + Detaching your iPad Storing your iPad for travel To detach your iPad from the folio, 1. Insert your iPad in the iPad holder. bend back one of the iPad holder corners: 2. Close the keyboard folio: Your iPad is then released:...
-
Page 7: Status Light Indicators
Logitech Type + Status light indicators Your keyboard folio’s status light provides information about the battery power and Bluetooth connection: Light Description Blinking green The battery is charging. Green The battery is fully charged (100%). Battery power is low (less than 10%). Recharge the battery. -
Page 8: Function Keys
Logitech Type + Hot keys Home = iPad Home screen Screenshot Switch applications Previous track Siri Play/Pause Use your voice to send messages, make calls, schedule meetings, and more Next track Search Mute Launches search function Switch language Volume down Switches the keyboard language Virtual keyboard ... - Page 9 Logitech Type + Charging the keyboard battery Battery information If the status light is red the keyboard folio battery needs to be charged. • A fully charged battery provides about 1. Plug one end of the micro-USB cable three months of use when the keyboard into the charging port, and the other is used about two hours a day.
- Page 10 Logitech Type + Battery disposal at product Visit Product Support end of life There’s more information and support online for your product. Take a moment to visit Product Support to learn more about your new Bluetooth keyboard. Browse online articles for setup help, usage tips, and information about additional features.
-
Page 11: Troubleshooting
Logitech Type + Troubleshooting What do you think? Thank you for purchasing our product. The keyboard does not work Please take a minute to tell us • Press any key to wake the keyboard what you think of it. from sleep mode. - Page 12 ® 了解您的产品 1. iPad 支架 2. 保护套 3. 热键 4. 键盘 5. 蓝牙 ™ 和电池状态指示灯 6. 蓝牙 ™ 连接按钮 7. 微型 USB 充电端口 8. 微型 USB 充电连接线 9. 产品文档 Type + Protective case with integrated keyboard ® 1.5h www.logitech.com/support/type-i6 12 简体中文...
- Page 13 罗技 Type + ® 设置键盘保护套 建立与 iPad 之间的连接 键盘保护套与 iPad 之间通过 蓝牙 ™ 入门指南 进行连接。首次使用键盘保护套时, 1. 打开键盘保护套,确保 iPad 与 iPad 必须将其与 iPad 进行配对。 支架保持对齐,然后将其推入: 状态指示灯闪烁蓝灯,表示键盘处于可被 搜索状态,可与 iPad 进行配对。 2. 将键盘保护套移动到打字位置: 首次开启键盘后,键盘将保持可被搜索 状态 15 分钟。 键盘自动开启。 简体中文 13...
- Page 14 罗技 Type + ® 连接到其他 iPad 如果状态指示灯变为红灯,请为电池 充电。有关详细信息,请参见 “为键盘电 1. 将键盘保护套移动到打字位置。 池充电”。 . 2 确保 iPad 的蓝牙功能已开启。依次 将键盘保护套与 iPad 进行配对: 选择:设置 > 蓝牙 ™ > 开启。 1. 在 iPad 上: 3. 按下 蓝牙 ™ 连接按钮: • 确保 iPad 的蓝牙功能已开启。依次 选择:设置 > 蓝牙 ™ > 开启。 •...
- Page 15 罗技 Type + ® 使用键盘保护套 如要浏览,请将键盘保护套置于浏览 位置: 两种放置方式 键盘保护套提供两种放置方式:一种用于 输入,一种用于浏览。 若要输入文字,请将键盘保护套放到适合 输入的位置,将其与内置的磁体对齐以固 定到位: 将键盘保护套从输入位置取出后,键盘则 会自动关闭。 将键盘保护套放到输入位置后,键盘则会 自动开启。 简体中文 15...
- Page 16 罗技 Type + ® 卸下 iPad 旅行时收纳 iPad 如要将 iPad 从保护套卸下,将其中一个 1. 将 iPad 插入到 iPad 支架中。 iPad 支架的角向后弯曲 2. 合上键盘保护套: 之后便能够将 iPad 取出: 16 简体中文...
- Page 17 罗技 Type + ® 状态指示灯 键盘保护套的状态指示灯能为您指示电池电量以及蓝牙连接的相关信息: 指示灯 说明 闪烁绿灯 电池正在充电。 绿灯 电池已充满 (100%)。 红灯 电量不足 (<10%)。为电池充电。 闪烁蓝灯 快速: 键盘处于可被搜索状态,已准备好可以进行配对。 缓慢: 键盘正在尝试重新连接 iPad。 稳定蓝灯 蓝牙配对或重新连接成功。 简体中文 17...
- Page 18 罗技 Type + ® 热键 上一曲目 Home = iPad 主屏幕 切换应用程序 播放/暂停 Siri 下一曲目 通过语音发送消息、拨打电话、 安排会议等 静音 搜索 启动 iPad 搜索功能 调低音量 切换语言 切换键盘语言 调高音量 虚拟键盘 锁屏 显示或隐藏虚拟键盘 锁定或解锁 iPad 屏幕 屏幕截图 功能键 Fn + V = 粘贴 Fn + X = 剪切 Fn + 左光标...
- Page 19 罗技 Type + ® 为键盘电池充电 如果状态指示灯变成红灯,则说明键盘保 电池信息 护套的电池需要充电。 • 如果键盘每天使用约两个小时,则满电量 1. 将微型 USB 连接线的一端插入充电 电池可使用约三个月时间。 端口,将另一端插入电脑上的 USB • 在开启键盘之后,如果状态指示灯短暂亮 端口。 起红灯,请为电池充电。 或者,您也可以使用输出功率不超过 5V • 不使用时,请关闭键盘以节省电池电量。 - 500mA 的 USB 充电器进行充电。 • 在处于输入位置时,如果有一段时间未 电池充电过程中,状态指示灯将闪烁 使用,则键盘会自动进入休眠模式。按任 绿灯。 意键即可将其唤醒。 2. 为电池充电,直到状态指示灯变为稳定 • 每充电一分钟可使用 2 小时;完全充满 的绿灯为止。...
- Page 20 和支持服务。请抽时间访问 “产品支持”, 了解关于新 蓝牙 ™ 键盘的更多信息。 浏览在线文章,查看安装帮助、使用技 巧以及关于更多功能的信息。如果 蓝牙 ™ 键盘有可选软件,请了解其优点以及如何 帮助对键盘进行自定义。 通过 “社区论坛” 与其他用户交流,获得 建议,提出问题,分享解决方法。 1. 用螺丝刀撬开键盘的顶盖。 “产品支持” 提供了广泛的内容选择: 2. 从电路板上分离电池,取出电池。 • 教程 3. 请根据当地法律对产品和电池进行 • 疑难解答 弃置。 • 支持社区 • 在线文档 • 保修信息 • 备用部件 (若有供应) 访问: www.logitech.com/support/type-i6 20 简体中文...
- Page 21 Type + ® 疑难解答 您对本产品有何感想? 感谢您购买罗技产品。 键盘不工作 请拨冗告诉我们您的意见。 • 按任意键即可将键盘从休眠模式中唤醒。 www.logitech.com/ithink • 将键盘关闭,然后再将其重新开启。 • 为内置电池充电。有关详细信息,请参见 “为键盘电池充电”。 • 在键盘与 iPad 之间重新建立 蓝牙 ™ 连接。 • 确保 iPad 设置中的蓝牙已开启。 (“设置” > “ 蓝牙 ™” > “开启”)。 • 在 iPad 的 “设备” 菜单上选择 “Type+ Keyboard Case”。...
- Page 22 Apple and iPad are trademarks of Apple Inc., registered in the U.S. and other countries. The Bluetooth® word mark is a registered trademark owned by Bluetooth SIG, Inc. and any use of such marks by Logitech is under license. All other trademarks are the property of their respective owners. Logitech assumes no responsibility for any errors that may appear in this manual.
Need help?
Do you have a question about the iK1051 and is the answer not in the manual?
Questions and answers