
Subscribe to Our Youtube Channel
Related Manuals for Dell Vostro 15-3568


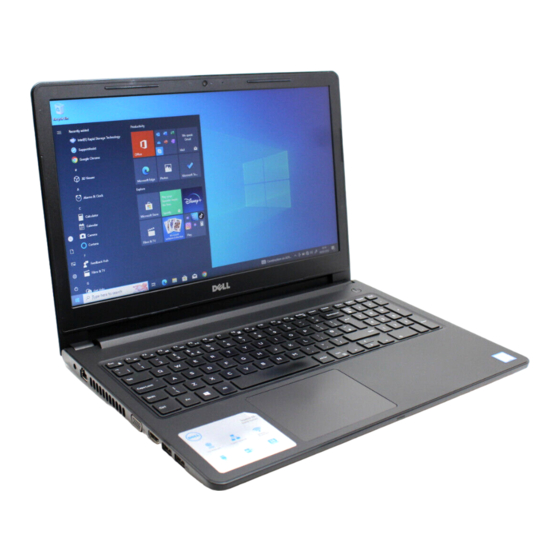
Summary of Contents for Dell Vostro 15-3568
- Page 1 Dell Vostro 15–3568 Owner's Manual Regulatory Model: P63F Regulatory Type: P63F002 August 2020 Rev. A04...
- Page 2 A WARNING indicates a potential for property damage, personal injury, or death. © 2018-2020 Dell Inc. or its subsidiaries. All rights reserved. Dell, EMC, and other trademarks are trademarks of Dell Inc. or its subsidiaries. Other trademarks may be trademarks of their respective owners.
-
Page 3: Table Of Contents
Contents Chapter 1: Working on your computer....................7 Safety instructions................................7 Before working inside your computer..........................7 Turning off your computer..............................8 Turning off your — Windows............................. 8 Turning off your computer — Windows 7.......................8 After working inside your computer..........................8 Chapter 2: Disassembly and reassembly..................10 Recommended tools................................10 Screw size list.................................. - Page 4 Power button board................................27 Removing the power button board......................... 27 Installing the power button board..........................27 Heat sink .....................................28 Removing the heat sink ............................28 Installing the heat sink .............................. 28 System fan..................................29 Removing the system fan............................29 Installing the system fan............................30 Speaker....................................
- Page 5 Chipsets....................................52 Downloading the chipset driver..........................53 Identifying the chipset in Device Manager on Windows 10................53 Identifying chipset in Device Manager on Windows 8..................53 Identifying chipset in Device Manager on Windows 7..................53 Intel chipset drivers..............................54 Intel HD Graphics ................................54 Intel HD Graphics drivers............................
- Page 6 Running the ePSA Diagnostics............................76 Chapter 6: Technical specifications..................... 77 Chapter 7: Contacting Dell......................81 Contents...
-
Page 7: Chapter 1: Working On Your Computer
Damage due to servicing that is not authorized by Dell is not covered by your warranty. Read and follow the safety instructions that came with the product. -
Page 8: Turning Off Your Computer
CAUTION: To disconnect a network cable, first unplug the cable from your computer and then unplug the cable from the network device. 5. Disconnect all network cables from the computer. 6. Disconnect your computer and all attached devices from their electrical outlets. 7. - Page 9 CAUTION: To avoid damage to the computer, use only the battery designed for this particular Dell computer. Do not use batteries designed for other Dell computers. 1. Connect any external devices, such as a port replicator or media base, and replace any cards, such as an ExpressCard.
-
Page 10: Chapter 2: Disassembly And Reassembly
Disassembly and reassembly Topics: • Recommended tools • Screw size list • Chassis view • Battery • Optical drive • Keyboard lattice and Keyboard • Base cover • Hard drive • WLAN card • Memory modules • Coin-cell battery • Power button board •... -
Page 11: Chassis View
Table 1. Vostro 15–3562 screw size list (continued) M2L2(Bi M2L2(Bi M2.5L2. Component M2L3 M2.5L8 M2L5 5 (Big M3L3 M2L3 M2L2 head07) head05) head) Hard drive bracket WLAN card System fan System board I/O board Power connector Display assembly Display panel Hinge Power button board Touchpad... -
Page 12: Left View
1. Camera 2. Camera-status light 3. Microphone 4. LCD panel 5. Power and battery-status light/ Hard-drive activity light Left view 1. Power connector 2. Network connector (No LED indicator) 3. VGA connector 4. HDMI 1.4 connector 5. USB 3.1 Gen 1 connector 6. -
Page 13: Palm Rest View
Palm rest view 1. Power button 2. Keyboard 3. Palm rest 4. Touchpad Right view 1. SD card reader 2. Universal audio port Disassembly and reassembly... -
Page 14: Battery
3. USB 2.0 connector 4. Optical drive 5. Security cable slot Battery Removing the battery 1. Follow the procedure in Before working inside your computer. 2. To remove the battery: a. Slide the release latch to release the battery [1]. b. -
Page 15: Optical Drive
Optical drive Removing the optical drive 1. Follow the procedure in Before working inside your computer. 2. Remove the battery. 3. To remove the optical drive: a. Remove the two M2L3 screws that secure the optical drive to the computer [1]. b. -
Page 16: Installing The Optical Drive Bracket
Installing the optical drive bracket 1. Install the optical drive bracket. 2. Tighten the single M2L2(Big head05) screw to secure the optical drive bracket. 3. Install the: optical drive battery 4. Follow the procedure in After working inside your computer. Installing the optical drive 1. - Page 17 4. To remove the keyboard cable: a. Disconnect the keyboard cable from the system board. b. Remove the keyboard from the computer. Disassembly and reassembly...
-
Page 18: Installing The Keyboard
Installing the keyboard 1. Connect the keyboard cable to the connector on the system board. 2. Slide the keyboard to align it with the tabs. 3. Press along the top edges to lock the keyboard in place. 4. Install the battery. 5. - Page 19 4. Flip the computer and remove the screws (3 screws - M2L2; 2 screws- M2L2; 8 screws - M2.5L8) that secure the base cover to the computer. Disassembly and reassembly...
- Page 20 5. To remove the base cover: a. Use a scribe to pry the edges of the base cover [1]. b. Lift the base cover and remove it from the computer [2]. Disassembly and reassembly...
-
Page 21: Installing The Base Cover
Installing the base cover 1. Align the base cover with the screw holders on the computer. 2. Press the edges of the cover until it clicks into place. 3. Tighten the ( 8 screws - M2.5L8; 3 screws - M2L2; 2 screws- M2L2) screws to secure the base cover to the computer. 4. -
Page 22: Removing The Hard Drive From The Hard Drive Bracket
base cover 3. To remove the hard drive assembly: a. Disconnect the hard drive cable from the connector on the system board [1]. b. Remove the four M2L3 screws that secure the hard drive assembly to the computer [2]. c. Lift the hard drive assembly away from the computer [3]. Removing the hard drive from the hard drive bracket 1. -
Page 23: Installing The Hard Drive Into The Hard Drive Bracket
Installing the hard drive into the hard drive bracket 1. Align the screw holders and insert the hard drive into the hard drive bracket. 2. Tighten the four M3L3 screws to secure the hard drive to the hard drive bracket. 3. -
Page 24: Installing The Wlan Card
3. To remove the WLAN card: a. Remove the single M2L3 screw that secures the tab to the WLAN card [1]. b. Lift the tab that secures the WLAN card [2]. c. Disconnect the WLAN cables from the connectors on the WLAN card [3]. d. -
Page 25: Installing The Memory Module
2. Remove the: battery optical drive keyboard base cover 3. To remove memory module: a. Pull the clips securing the memory module until the memory module pops up [1]. b. Remove the memory module from the system board [2]. Installing the memory module 1. -
Page 26: Coin-Cell Battery
Coin-cell battery Removing the coin cell battery 1. Follow the procedure in Before working inside your computer. 2. Remove the: battery optical drive keyboard base cover 3. Use a plastic scribe to lift the battery out of the slot [1,2]. Installing the coin cell battery 1. -
Page 27: Power Button Board
Power button board Removing the power button board 1. Follow the procedure in Before working inside your computer. 2. Remove the: battery optical drive keyboard base cover 3. To remove the power button board: a. Disconnect the system board cable from the computer [1]. b. -
Page 28: Heat Sink
6. Tighten the two (M2.5L8) screws to secure the display hinge to the power button board. 7. Install the: base cover keyboard optical drive battery 8. Follow the procedures in After working inside your computer. Heat sink Removing the heat sink 1. -
Page 29: System Fan
2. Tighten the four captive screws to secure it to the system board. NOTE: Secure the screws in the order of the callout numbers [1, 2, 3, 4]. 3. Install the: base cover keyboard optical drive battery 4. Follow the procedures in After working inside your computer. -
Page 30: Installing The System Fan
Installing the system fan 1. Align the system fan on the chassis. 2. Secure the system fan to the computer by tightening the two M2L5 screws. 3. Connect the system fan connector cable to the system board connector. 4. Install the: base cover keyboard optical drive... -
Page 31: Installing The Speakers
Installing the speakers 1. Place the speakers into the slots on the computer. 2. Connect the speaker cable to the system board. 3. Install the: base cover keyboard optical drive battery 4. Follow the procedure in After working inside your computer System board Removing the system board 1. - Page 32 memory module heat sink system fan 3. Remove the screw and lift the display hinge from the computer [1, 2]. 4. Lift the locking tab to disconnect the following cables a. hard drive connector [1] b. power connector [2] c. remove the adhesive tape [3] d.
- Page 33 5. Remove the two M2L3 screws that secure the system board to the computer [1] and lift the system board [2]. Disassembly and reassembly...
- Page 34 6. Flip the system board. 7. To remove the system board: a. Peel the adhesive tape [1]. b. Unlock the tab and disconnect the power cable [2]. c. Remove the system board from the computer. Disassembly and reassembly...
-
Page 35: Installing The System Board
Installing the system board 1. Connect the power cable cable. 2. Affix the adhesive tape. 3. Flip the system board. 4. Align the system board with the screw holders on the computer. 5. Tighten the two M2L3 screws to secure the system board to the computer. 6. -
Page 36: Input-Output Board
Input-Output board Removing the Input-Output board 1. Follow the procedure in Before working inside your computer. 2. Remove the: battery optical drive keyboard base cover hard drive assembly 3. To remove the Input/Output board (I/O board): a. Disconnect the I/O board cable [1]. b. -
Page 37: Power Connector Port
optical drive battery 4. Follow the procedure in After working inside your computer. Power connector port Removing the power connector 1. Follow the procedure in Before working inside your computer. 2. Remove the: battery optical drive keyboard base cover hard drive assembly WLAN card memory module heat sink... -
Page 38: Installing The Power Connector
Installing the power connector 1. Insert the power connector into the slot on the computer. 2. Secure the power connector to the computer by using the single [ M2x2 (Big head 07)] screw. 3. Route the power connector cable. 4. Install the: system board system fan WLAN Card... - Page 39 4. Flip the computer. 5. To remove the display assembly: NOTE: Place the chassis on the edge of a table with the display facing down. a. Remove the three M2.5L8 screws that secure the display hinge to the computer [1]. Disassembly and reassembly...
-
Page 40: Installing The Display Assembly
CAUTION: Practice caution when handling the LCD HUD by supporting it with one hand, while working on the hinges. b. Lift and remove the display assembly [2]. Installing the display assembly 1. Align the display assembly with the chassis. 2. Connect the eDP cable to the connector on the system board and lock the locking tab. 3. -
Page 41: Display Bezel
Display bezel Removing the display bezel 1. Follow the procedure in Before working inside your computer. 2. Remove the: battery optical drive keyboard base cover WLAN card display assembly 3. To disconnect the display bezel: a. Use a plastic scribe to release the tabs on the edges to release the display bezel from the display assembly. b. -
Page 42: Camera
Camera Removing the camera 1. Follow the procedure in Before working inside your computer. 2. Remove the: battery optical drive keyboard base cover WLAN card display assembly display bezel 3. To remove the camera: a. Disconnect the camera cable from the camera [1]. b. -
Page 43: Display Panel
battery 4. Follow the procedure in After working inside your computer. Display panel Removing the display panel 1. Follow the procedure in Before working inside your computer. 2. Remove the: battery optical drive keyboard base cover WLAN card display assembly display bezel 3. -
Page 44: Installing The Display Panel
Installing the display panel 1. Connect the eDP cable to the display panel. 2. Affix the tape to secure the display cable. 3. Place the display panel on the display assembly. 4. Tighten the M2.5L8 screws to secure the display panel to the display assembly. 5. -
Page 45: Installing The Display Hinges
display assembly display bezel display panel 3. To remove the hinges: a. Remove the six M2.5L2.5 screws that secure the display hinges to the display assembly [1]. b. Remove the display hinges [2]. Installing the display hinges 1. Tighten the six M2.5L2.5 screws to secure the display hinges to the display assembly. 2. - Page 46 optical drive keyboard base cover hard drive assembly WLAN card memory module speaker heat sink system fan system board 3. To remove the screw support bracket: a. Remove the M2L3 screw that secures the screw support bracket to the computer [1]. b.
- Page 47 5. To remove the touchpad board: a. Remove the four M2L2 screws that secure the touchpad board to the computer [1]. b. Lift and remove the touchpad board [2]. Disassembly and reassembly...
-
Page 48: Installing The Touchpad
Installing the touchpad 1. Place the touchpad board into the slot. 2. Replace the four M2L2 screws to secure the touchpad board to the computer. 3. Replace the two M2L3 screws to secure the touchpad support bracket to the touchpad board. 4. -
Page 49: Installing The Palmrest
Installing the palmrest 1. Place the palmrest. 2. Install the: display assembly system board power connector port I/O board speaker system fan heat sink power button board memory module WLAN Card hard drive assembly base cover keyboard optical drive battery 3. -
Page 50: Chapter 3: Technology And Components
Technology and components Topics: • Processors • Chipsets • Intel HD Graphics • Display options • Hard drive options • USB features • HDMI 1.4 • USB Powershare • Camera features • Memory features • Audio drivers Processors This laptop is shipped with Intel 6th generation processor: ●... -
Page 51: Identifying Processors In Windows 7
The basic information of the processor is displayed. Identifying processors in Windows 7 1. Click Start > Control Panel > Device Manager. 2. Select Processor. The basic information of the processor is displayed. Verifying the processor usage in Task Manager 1. -
Page 52: Verifying The Processor Usage In Resource Monitor
The Windows Task Manager window is displayed. 3. Click the Performance tab in the Windows Task Manager window. The processor performance details are displayed. Verifying the processor usage in Resource Monitor 1. Press and hold the taskbar. 2. Select Start Task Manager. The Windows Task Manager window is displayed. -
Page 53: Downloading The Chipset Driver
Downloading the chipset driver 1. Turn on the laptop. 2. Go to Dell.com/support. 3. Click Product Support, enter the Service Tag of your laptop, and then click Submit. NOTE: If you do not have the Service Tag, use the autodetect feature or manually browse for your laptop model. -
Page 54: Intel Chipset Drivers
Intel chipset drivers Verify if the Intel chipset drivers are already installed in the laptop. Table 2. Intel chipset drivers Before installation After installation Intel HD Graphics This laptop is shipped with the Intel HD Graphics graphics chipset. Technology and components... -
Page 55: Intel Hd Graphics Drivers
Intel HD Graphics drivers Verify if the Intel HD Graphics drivers are already installed in the laptop. Table 3. Intel HD Graphics drivers Before installation After installation Display options This laptop has a 15– inch HD with 1366 x 768 pixels resolution (maximum). Identifying the display adapter 1. -
Page 56: Downloading Drivers
● Left arrow key (Rotate 270 degrees) Downloading drivers 1. Turn on the laptop. 2. Go to Dell.com/support. 3. Click Product Support, enter the Service Tag of your laptop, and then click Submit. NOTE: If you do not have the Service Tag, use the auto detect feature or manually browse for your laptop model. -
Page 57: Adjusting Brightness In Windows 8
Adjusting brightness in Windows 8 To enable or disable automatic screen brightness adjustment: 1. Swipe-in from the right edge of the display to access the Charms menu. 2. Tap or click Settings → Change PC Settings → PC and devices→ Power and sleep. 3. -
Page 58: Identifying The Hard Drive In Windows 10
1. Turn on or restart your laptop. 2. When the Dell logo appears, perform one of the following actions to enter the BIOS setup program: ● With keyboard — Tap F2 until the Entering BIOS setup message appears. To enter the Boot selection menu, tap F12. -
Page 59: Usb Features
Hard drive is listed under the System Information under the General group. USB features Universal Serial Bus, or USB, was introduced in 1996. It dramatically simplified the connection between host computers and peripheral devices like mice, keyboards, external drivers, and printers. Table 4. - Page 60 ● USB 2.0 previously had four wires (power, ground, and a pair for differential data); USB 3.0/USB 3.1 Gen 1 adds four more for two pairs of differential signals (receive and transmit) for a combined total of eight connections in the connectors and cabling.
-
Page 61: Hdmi 1.4
HDMI 1.4 This topic explains the HDMI 1.4 and its features along with the advantages. HDMI (High-Definition Multimedia Interface) is an industry-supported, uncompressed, all-digital audio/video interface. HDMI provides an interface between any compatible digital audio/video source, such as a DVD player, or A/V receiver and a compatible digital audio and/or video monitor, such as a digital TV (DTV). -
Page 62: Camera Features
charge until the battery reaches 25% of full capacity (e.g. 75% of the portable's battery charge is used up). Camera features This laptop comes with front-facing camera with the image resolution of 1280 x 720 (maximum). Identifying the camera in Device Manager on Windows 10 1. -
Page 63: Starting The Camera
Starting the camera To start the camera, open an application that uses the camera. For instance, if you tap the Dell webcam central software or the Skype software that is shipped with the laptop, the camera turns on. Similarly, if you are chatting on the internet and the application requests to access the webcam, the webcam turns on. -
Page 64: Memory Features
● With keyboard — Press F2. ● Without keyboard — Press and hold the Volume Up button when the Dell logo is displayed on the screen. When the F12 boot selection menu is displayed, select Diagnostics from the boot menu, and press Enter. -
Page 65: Audio Drivers
Audio drivers Verify if the Realtek audio drivers are already installed in the laptop. Table 5. Realtek HD audio drivers Before installation After installation Technology and components... -
Page 66: Chapter 4: System Setup
Boot sequence enables you to bypass the System Setup–defined boot device order and boot directly to a specific device (for example: optical drive or hard drive). During the Power-on Self-Test (POST), when the Dell logo appears, you can: ● Access System Setup by pressing F2 key ●... -
Page 67: Keyboards Hot Key Definitions
Keys Navigation Moves to the previous page until you view the main screen. Pressing Esc in the main screen displays a message that prompts you to save any unsaved changes and restarts the system. Keyboards Hot Key Definitions Table 6. Keyboards Hot Key Definitions Keys Description Fn + ESC... - Page 68 Table 7. General tab Option Description System Information This section lists the primary hardware features of your computer. ● System Information: Displays BIOS Version, Service Tag, Asset Tag, Ownership Tag, Ownership Date, Manufacture Date, and the Express Service Code. ● Memory Information: Displays Memory Installed, Memory Available, Memory Speed, Memory Channels Mode, Memory Technology, DIMM A Size, DIMM B Size, ●...
- Page 69 Table 8. System Configuration (continued) Option Description If USB port is disabled, the OS cannot see any device attached to this port. ● Enable Boot Support ● Enable External USB Port ● Enable USB3.0 Controller NOTE: USB keyboard and mouse always work in the BIOS setup irrespective of these settings.
- Page 70 Table 10. Security (continued) Option Description Password Configuration Allows you to determine the minimum and maximum length of Administrator and System passwords. Password Bypass Allows you to enable or disable the permission to bypass the System and the Internal HDD password, when they are set. The options are: ●...
- Page 71 Table 11. Secure Boot (continued) Option Description Expert Key Management Allows you to manipulate the security key databases only if the system is in Custom Mode. The Enable Custom Mode option is disabled by default. The options are: ● PK ●...
- Page 72 Table 13. Performance (continued) Option Description Intel TurboBoost Allows you to enable or disable the Intel TurboBoost mode of the processor. ● Enable Intel TurboBoost Default Setting: The option is enabled. Hyper-Thread Control Allows you to enable or disable the HyperThreading in the processor. ●...
- Page 73 Table 15. POST Behavior Option Description Adapter Warnings Allows you to enable or disable the system setup (BIOS) warning messages when you use certain power adapters. Default Setting: Enable Adapter Warnings Fn Lock Option Allows the hot key combination <Fn> +<Esc> toggle the primary behavior of F1–F12, between the standard and secondary functions.
-
Page 74: Updating The Bios In Windows
If BitLocker is enabled, it must be suspended prior to updating the system BIOS, and then re enabled after the BIOS update is completed. 1. Restart the computer. 2. Go to Dell.com/support. ● Enter the Service Tag or Express Service Code and click Submit. ● Click Detect Product and follow the instructions on screen. -
Page 75: System And Setup Password
System and setup password Table 21. System and setup password Password type Description System password Password that you must enter to log on to your system. Setup password Password that you must enter to access and make changes to the BIOS settings of your computer. You can create a system password and a setup password to secure your computer. -
Page 76: Chapter 5: Enhanced Pre-Boot System Assessment - Epsa Diagnostics
Invoke diagnostics boot by either of the methods that are suggested below: 1. Power on the computer. 2. As the computer boots, press the F12 key when the Dell logo is displayed. 3. In the boot menu screen, use Up/Down arrow key to select the Diagnostics option and then press Enter. - Page 77 Technical specifications NOTE: Offerings may vary by region. For more information regarding the configuration of your system in: ● Windows 10, click or tap Start > Settings > System > About. Table 22. System specifications Feature Specification Chipset Intel Kaby Lake DRAM bus width 64 bits Flash EPROM...
- Page 78 Table 26. Audio specifications (continued) Feature Specification Interface Intel HDA bus Speakers 2 x 2 W Volume controls Program menu and keyboard media-control keys Table 27. Video specifications Feature Specification Video type Video Controller: Intel HD Graphics (shared memory) Discrete AMD Radeon R5 M315 (up to 2 GB DDR3) Data bus: 64 bits...
- Page 79 Table 31. Display specifications (continued) Feature Specification Height 360.00 mm (14.17 inches) Diagonal 396.24 mm (15.60 inches) Width 224.3 mm (8.83 inches) Maximum resolution 1366 x 768 pixels Active area (X/Y) 344.20 mm x 193.50 mm (13.55 inches x 7.62 inches) Maximum brightness 200 nits Operating angle...
- Page 80 Table 35. AC Adapter specifications Feature Specification Type 65 W (discrete) Input voltage 100 V AC–240 V AC Input frequency 50 Hz–60 Hz Input current (maximum) 65 W 1.70 A Output current 65 W 3.34 A (continuous) Rated output voltage 19.5 V DC Temperature range: Operating...
- Page 81 Dell provides several online and telephone-based support and service options. Availability varies by country and product, and some services may not be available in your area. To contact Dell for sales, technical support, or customer service issues: 1. Go to Dell.com/support.
Need help?
Do you have a question about the Vostro 15-3568 and is the answer not in the manual?
Questions and answers