Table of Contents
Advertisement
Quick Links
Advertisement
Table of Contents

Related Manuals for Orchid Telecom KS 832


Summary of Contents for Orchid Telecom KS 832
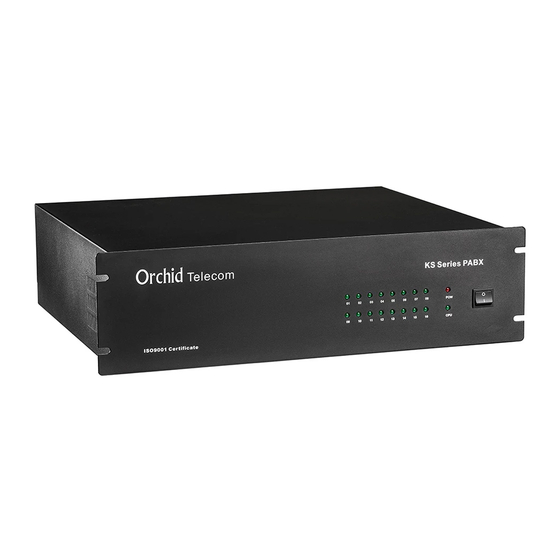
- Page 1 Model KS 832 Programming & User Guide...
-
Page 2: Table Of Contents
Introduction ............................5 Installation hints ..........................5 Wall mounting ......................... 5 Expanding your System………………………………………………………………………………5 System programming........................6 System password ........................6 Changing the password ....................... 6 Exchange line set up ........................6 One Exchange Line connected ....................6 Two Exchange Lines connected ..................... 7 Six Exchange Lines connected .................... - Page 3 Least Cost Routing (LCR) for all calls .................... 11 Accessing IP Calls ........................11 Call Barring / Call Restrictions ....................... 12 Internal calls only Group 0 ......................12 Assign Groups 1 - 6 or 0 to extensions ................. 12 Call Barring on a line-by-line basis ....................13 Set a time limit for outgoing calls ....................
- Page 4 Conference Calls……………………………………………………………………………………19 System Speed Dials………………………………………………………………………………...19 Confirm extension number ....................19 Operator call…………………………………………………………………………………………19 Ring-back on Busy ....................... 19 Transfer calls when busy ...................... 19 Transfer all calls to another extension .................. 19 Transfer all calls to your secretary ..................20 Do Not Disturb mode ......................20 Select a specific line on a call-by-call basis ................
-
Page 5: Introduction
Introduction Thank you for choosing the Orchid Telecom KS 832 telephone system. Please take time to read through this Programming and User Guide to get the most from your new purchase. Installation hints Ensure the On/Off switch located on the left hand side of the KS832 is switched to On. (-) ... -
Page 6: System Programming
System programming All programming is done on Extension 201 only. Note: After programming a line successfully you will hear the message 'Your instructions are successful' after you enter the # If you make a mistake you will hear 'You have entered an incorrect instruction, try again later' If you are programming a number of features you do not need to enter # and hang up after each feature string. -
Page 7: Two Exchange Lines Connected
Exchange Lines connected EXT 201 Password * 31 1 2 # Hang up Dial Six Exchange Lines connected Ext 201 Dial Password * 31 1 2 3 4 5 6 # Hang up Telephones with caller display and Date/Time features If you are intending to use telephones with the above features on the KS832 you must program the Date/Time settings on the PBX. -
Page 8: Change Extension Numbers
Change extension numbers As currently configured, the extensions are 3 digits 201 to 232, but these numbers can be changed to 3 or 4 digits and any numbers you want from 100 to 8999 Change the number of digits and lead digit for extensions Example 1: Change all extensions from 201 232 to 3001-3032 Ext 201 Dial... -
Page 9: Add Extensions 207 And 208 To Ring On Line 1
If you want more than these 4 to ring you can add further extensions, please use the following examples to help you get your KS set up as per your requirements. Add extensions 207 and 208 to ring on line Ext 201Dial Password * 12 01 207 # * 12 01 208 # Hang up... -
Page 10: Assigning Outgoing Calls
Assigning outgoing calls Extension to use specific exchange lines A useful feature if you want to keep lines 1 and 2 free for incoming calls or other priority Extensions for outgoing calls. This does not restrict other extensions from using the same outside line. -
Page 11: Least Cost Routing (Lcr) For All Calls
Ext 201 Dial Password * 82 * 82 Hang up Revert extensions 207 and 208 only to dial '9' mode: Ext 201 Dial Password * 82 * 82 Hang up Note: Direct Dial extensions must dial * in front of the extension number when making internal calls. -
Page 12: Call Barring / Call Restrictions
To Cancel, Dial: * 971 # Example 2: Assign Digit 8 to access IP or FCT services on line 3 Ext 201 Dial Password * 971 To cancel Dial * 971 # To make IP or FCT calls dial 7 as in example 1, or 8 as in example 2. Note: If your extensions have been changed for Direct Dial mode you need to dial * in front of the 7 or 8 above Call Barring / Call Restrictions... -
Page 13: Call Barring On A Line-By-Line Basis
Cancel Group 1 being assigned to all extensions, Ext 201 Dial Password * 53 Hang up Example 2: Assign Group 2 to Ext 204 and Group 0 to Ext 208 Ext 201 Dial Password * 51 204 2 * 51 208 Hang up Cancel extension 204 being assigned to group 2 Ext 201 Dial... -
Page 14: Hotline
Ext 201 Dial Password * 92 208 Hang up Note: One minute before the end of the time limit a beep will be heard every 15 seconds. Hotline This is a useful feature for Reception or emergency phones. When the handset is lifted the phone automatically dials a given extension. -
Page 15: Playback The Auto Attendant Outgoing Message (Ogm)
Ext 201 Dial Password * 221 # Record message Hang up Playback the Auto Attendant outgoing Message (OGM) Ext 201 Dial Password * 231 # Listen to message Hang up OGM if the extension is busy You can record a message to inform the caller to dial 0 for the operator because the extension is busy. -
Page 16: Assign All Lines For Auto Attendant
Assign all lines for Auto Attendant Ext 201 Dial Password * 20 # Hang up Assign a single line for Auto Attendant Example: Assign Line 3 only to Auto Attendant Ext 201 Dial Password * 20 03 Hang up Remove the Auto Attendant feature from all lines Ext 201 Dial Password *201 # Hang up... -
Page 17: Assign Single Digits For An Extension Or Extensions
Cancel single digit operation Ext 201 Dial Password * 29 0 Hang up Assign single digits for an extension or extensions Example 1: Assign extensions 201,202,and 203 to Digit 1. These extensions will ring in turn, if 202 takes a call 203 will ring next. Ext 201 Dial Password * 150 1 201 # *150 1 202 # * 150 1 203 # Hang up... -
Page 18: Expanding Your System
Expanding your System Installing Expansion Cards Line Cards – Installing an 8 Line Expansion Card (8LEC) will add the capacity to the KS832 to handle an additional 8 lines. To install, Turn the system power OFF and remove the blanking plate from the 4 column on the left, carefully insert the new expansion card and secure it with the screws provided. -
Page 19: Call Pick Up
simply hang up and if the extension does not answer the incoming call will ring back to your phone. Call pick up To pick up a call ringing on another extension dial Conference calls To set up a conference call between an external call on your extension, yourself and another extension dial Recall followed by the extension number. -
Page 20: Transfer All Calls To Your Secretary
Transfer all calls to your secretary Transfer all calls to your secretary Dial: # * 6 Ext No In this mode only the secretary can call your extension. To cancel calls being transferred to your secretary Dial: # * 6 00 Do Not Disturb mode If you do not want to receive internal or external calls Dial: # * 71... -
Page 21: Caller Display Extension To Extension
Caller Display extension to extension This feature is provided by the KS832 and is not subject to Network connection. Providing you have compatible Caller Display telephones, when an internal extension calls you their extension number will be displayed. For example, if extension 208 calls you 00208 will be displayed on the LCD. -
Page 22: Troubleshooting & Faq's
Troubleshooting and FAQ’s The factory default settings are as follows: All extensions are dial 9 for a line. Extension 201 to 204 only ring on incoming calls Call restrictions removed on all extensions Auto Attendant (DISA) OFF. Reset the system to factory default settings Ext 201 Dial Password * 6000 #... -
Page 23: Unable To Transfer Calls
Unable to transfer calls You must use Recall or ‘R’ button when transferring calls – please ensure the Recall type is set to TBR (Time Break Recall). A TBR – ELR switch is normally located on the base of the phone. -
Page 24: Technical Specifications
Technical specifications Capacity 8 Lines and 32 Extensions (Expandable to 16/64) External sockets Line and Extensions terminated on RJ11 sockets External Music socket 3.5 mm Mono Communication channels Transmission loss Extension to Extension < 1.5 dB Extension to Exchange < 2 dB Ringing Current AC65V/50Hz Balance about earth...
Need help?
Do you have a question about the KS 832 and is the answer not in the manual?
Questions and answers