
Related Manuals for Siemens CB634GBS3


Summary of Contents for Siemens CB634GBS3
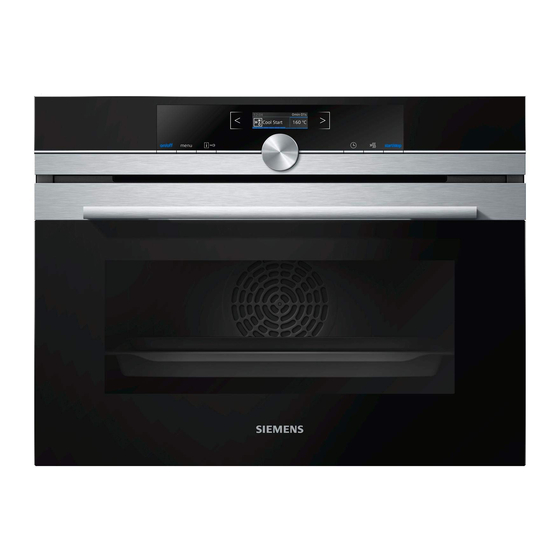
- Page 1 Oven CB634GB.3 User manual and installation instructions Register your product on My Siemens and discover exclusive ser- vices and offers. siemens-home.bsh-group.com/welcome The future moving in. Siemens Home Appliances...
-
Page 2: Table Of Contents
en Safety 1.2 Intended use Table of contents This appliance is designed only to be built into kitchen units. Read the special installation instructions. USER MANUAL Only a licensed professional may connect ap- Safety .............. 2 pliances without plugs. Damage caused by in- correct connection is not covered under the Preventing material damage ....... -
Page 3: Safety
Safety en Opening the appliance door creates a Components inside the appliance door may draught. Greaseproof paper may come into have sharp edges. contact with the heating element and catch ▶ Wear protective gloves. fire. WARNING ‒ Risk of electric shock! ▶ Never place greaseproof paper loosely Incorrect repairs are dangerous. -
Page 4: Preventing Material Damage
en Preventing material damage Children may breathe in or swallow small WARNING ‒ Risk of electric shock! parts, causing them to suffocate. When changing the bulb, the bulb socket con- ▶ Keep small parts away from children. tacts are live. ▶ Do not let children play with small parts. ▶... - Page 5 Environmental protection and saving energy en 3.2 Saving energy If you follow these instructions, your appliance will use less power. Only preheat the appliance if the recipe or the recom- mended settings tell you to do so. ¡ Not preheating the appliance can reduce the en- ergy used by up to 20%.
-
Page 6: Familiarising Yourself With Your Appliance
en Familiarising yourself with your appliance 4 Familiarising yourself with your appliance 4.1 Control panel Buttons The buttons on the left- and right-hand side of You can use the control panel to configure all functions the control panel have a pressure point. Press of your appliance and to obtain information about the a button to execute its function. -
Page 7: Operating Modes
Operating modes en The progress line shows you how much the appliance You can remove the rails, e.g. for cleaning. has already heated up. The line is filled from left to → "Rails", Page 20 right. Countdown You can view the countdown time or the cooking time for the previous operation in the top right in the status bar. - Page 8 en Operating modes Operating Operating mode mode Types of Select finely tuned types of heating for Meals Use programmed, recommended set- heating the optimal preparation of your food. tings for various meals. → "Types of heating", Page 8 Basic set- Adjust the basic settings. Basic settings tings → Page 14 5.1 Types of heating...
-
Page 9: Accessories
Accessories en Symbol Type of heating Temperature What it's used for and how it works range Possible additional options Plate warming 30–70 °C Plate warming. CoolStart function 30–275 °C For quickly preparing frozen products at position 1. The temper- ature depends on the manufacturer's instructions. Use the highest temperature specified on the packaging. -
Page 10: Basic Operation
The appliance will switch itself off automatically if it is ‒ not used for a certain period of time. a The Siemens logo appears in the display. A type of heating and a temperature are then displayed. Press to switch the appliance off. -
Page 11: Rapid Heating
Rapid heating en The light above the button goes out. 8.6 Setting the type of heating and the ‒ a The appliance switches off. Any functions currently temperature in progress are cancelled. When you switch on the appliance, the types of heating a The time or residual heat indicator appears in the operating mode is set automatically. - Page 12 en Time-setting options 10 Time-setting options Your appliance has different time-setting options, with 10.3 Setting the cooking time which you can control its operation. You can set a cooking time for operation of up to 23 hours 59 minutes. 10.1 Overview of the time-setting Requirement: The type of heating and a temperature options or setting have been set.
-
Page 13: Childproof Lock
Childproof lock en To set a later end time, turn the rotary selector. Changing the end time Press to start the operation. The set end time can only be changed when the oven a The symbol and the time at which the operation is in standby mode. -
Page 14: Sabbath Mode
en Basic settings 13 Basic settings You can configure the appliance to meet your needs. Basic setting Selection Brand logo Display 13.1 Overview of the basic settings Do not display Fan run-on Recommended Here you can find an overview of the basic settings Minimum and factory settings. -
Page 15: Cleaning And Servicing
Cleaning and servicing en Suitable cleaning agents Only use cleaning agents that are suitable for the differ- Follow the instructions on cleaning the appliance. ent surfaces on your appliance. → "Cleaning the appliance", Page 16 Appliance front Surface Suitable cleaning agents Information Stainless steel ¡... - Page 16 en Cleaning assistance faces no longer clean themselves adequately during 14.2 Cleaning the appliance operation, heat up the cooking compartment specific- In order to avoid damaging the appliance, you must ally to the right temperature. clean your appliance only as specified, and with suit- ATTENTION! able cleaning products.
- Page 17 Appliance door en Open the appliance door and remove the remaining 15.2 Wiping down the cooking water with an absorbent sponge cloth. compartment Clean the smooth surfaces in the cooking compart- ment with a dish cloth or a soft brush. Remove stub- ATTENTION! born food remnants using a stainless steel scouring The prolonged presence of moisture in the cooking...
- Page 18 en Appliance door Close the locking levers on the left- and right-hand Lift out the inner pane and set it down carefully hinges . on a flat surface. Lift out the intermediate pane and set it down carefully on a flat surface. a The locking levers are closed.
- Page 19 Appliance door en Open the appliance door and attach the door seal. 16.4 Fitting the door panes WARNING ‒ Risk of injury! The hinges on the appliance door move when the door is opened and closed, which could trap your fingers. Keep your hands away from the hinges. ▶...
-
Page 20: Troubleshooting
en Rails Note: Do not use the cooking compartment again until the door panes have been correctly fitted. 17 Rails To thoroughly clean the rails and the cooking compart- 17.2 Attaching the rails ment, or to replace the rails, you can remove the rails. Notes ¡... -
Page 21: Customer Service
Next time, set lower or higher values. ▶ Tip: A lot of information about the food preparation and corresponding setting values can be found on our website www.siemens-home.bsh-group.com . 18.2 Replacing the oven light bulb WARNING ‒ Risk of burns! The appliance and its parts that can be touched be- If the light in the cooking compartment fails, change come hot during use. - Page 22 en Disposal Pull out the halogen bulb without turning it . WARNING ‒ Risk of electric shock! When changing the bulb, the bulb socket contacts are live. Before replacing the bulb, ensure that the appliance ▶ is switched off in order to prevent a potential electric shock.
-
Page 23: How It Works
How it works en 21 How it works Here, you can find the ideal settings for various types ¡ Place the poultry onto the cookware breast-side or of food as well as the best accessories and cookware. skin-side down. We have perfectly tailored these recommendations to ¡... - Page 24 en How it works ¡ To catch any liquids that drip down, place the uni- ¡ Remove any ice. versal pan into the cooking compartment at least ¡ Some frozen products may be unevenly pre-baked. one level below the wire rack. Uneven browning may remain even after baking.
- Page 25 How it works en Food Accessory/cookware Shelf pos- Heating Temperature in Cooking time in ition function °C mins → Page 7 Bake, savoury, cooked ingredi- Ovenproof dish 200 - 220 35 - 55 ents Potato gratin, raw ingredients, Ovenproof dish 170 - 180 50 - 65 4 cm deep Chicken, 1 kg, unstuffed...
- Page 26 en How it works Immediately place the meat into the pre-warmed After slow cooking, remove the meat from the cook- cookware in the cooking compartment. ing compartment. To ensure that the climate in the cooking compart- ment remains constant, keep the cooking compart- ment door closed during slow cooking.
-
Page 27: 22.1 General Installation Instructions
Installation instructions en Recommended settings for baking Food Accessory/cookware Shelf pos- Heating Temperature in Cooking time in ition function °C mins → Page 7 Viennese whirls Baking tray 150 - 160 25 - 40 Viennese whirls Baking tray 140 - 150 25 - 40 Viennese whirls, on 2 levels Universal pan 140 - 150... - Page 28 en Installation instructions 22.2 Appliance dimensions You will find the dimensions of the appliance here ¡ Wear protective gloves so that you do not cut yourself. Parts that are accessible dur- ing installation may have sharp edges. ¡ Dimensions of the figures in mm. 22.3 Installation below a worktop WARNING ‒ Risk of fire! Observe the installation dimensions and the installation...
- Page 29 Installation instructions en Hob type a raised in mm a flush in mm b in mm Full-surface induction hob Gas hob Electric hob ¡ The appliance must be disconnected from the 22.5 Installation in a tall unit power supply whenever installation work is being Observe the installation dimensions and the installation carried out.
- Page 30 en Installation instructions 22.8 Installing the appliance Slide the appliance all the way in and centre it. Screw the appliance into place. Note: The gap between the worktop and the appliance must not be closed by additional battens. Thermal insulation strips must not be fitted to the side panels of the surround unit.
- Page 32 Valid within Great Britain: Imported to Great Britain by BSH Home Appliances Ltd. Grand Union House Old Wolverton Road Wolverton, Milton Keynes MK12 5PT United Kingdom Manufactured by BSH Hausgeräte GmbH under the trademark licence of Siemens AG *9001680334* 9001680334 (010830)
Need help?
Do you have a question about the CB634GBS3 and is the answer not in the manual?
Questions and answers