Table of Contents
Advertisement
Advertisement
Table of Contents

Summary of Contents for Studiologic SL-760
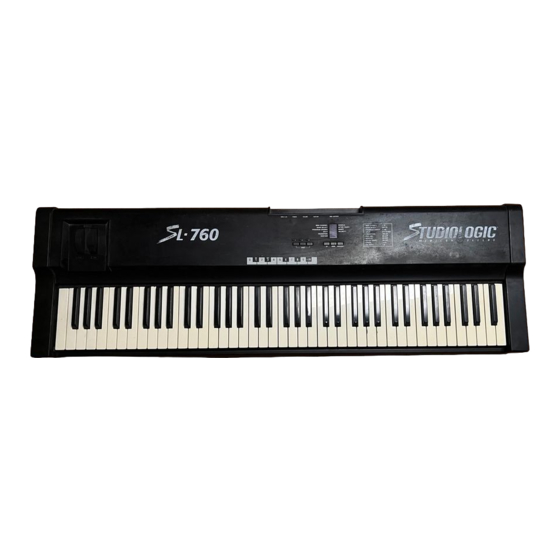
- Page 2 When a patch is selected on your Master Controller all of this informa- tion is sent to your modules instantly. The Studio Logic SL-760 Master Controller by FATAR has three (3) completely independent zones, meaning each zone can transmit all of its own infor- mation on any given MIDI channel.
- Page 3 The SL-760 has (3) three independent ZONES with each of them capable of being assigned to any range of keys across the SL-760's keyboard. As discussed in the introduction to this manual, the ZONES are the heart of creating musically useful Layers and Splits. Each of the (3) ZONES consists of: 1.
-
Page 4: Sustain Pedal
SUSTAIN PEDAL: The Studio Logic SL-760 has a connection jack on the rear panel for a SUSTAIN PEDAL input. The VP-26 by Fatar is recommended. VOLUME PEDAL: The Studio Logic SL-760 has a connection jack on the rear panel for a stan- dard VOLUME PEDAL input. -
Page 5: Midi Out Connections
MIDI OUT CONNECTIONS MIDI OUT Connections: The MIDI OUT jacks are where you connect your Studio Logic SL-760 Master Controller to your various MIDI sound sources. Using a standard 5 pin DIN MIDI cable, connect the Studio Logic MIDI OUT to your MIDI input jack on your synthesizer, sound modu- le or other MIDI equipped keyboard. -
Page 6: Up, Down, Enter/Edit
EDIT/ENTER button. In exiting the EDIT mode you store the new information automatically in the SL-760 Master Controller's memory and enable the keyboard ZONE to play and transmit information on the new selected MIDI channel. In order to play and transmit on a desired ZONE, select the corresponding ZONE switch while in play mode so that its LED is lit. - Page 7 same key twice) or the entire length of the KEYBOARD by hitting the lowest and then the highest key. The range can be any contiguous combination of notes in between the highest and lowest note on the keyboard and completely independent and different for each zone. You can ovelap any amount of notes from ZONE to ZONE.
- Page 8 You may also like this setting while using the SL-760 to program Hi Hats or Drums into a sequencer, it makes it easier to "pump" a part or vary the accents. It is also useful when the input MIDI device is too sensitive and you want to lower the relative velocities being transmitted.
-
Page 9: Default Settings
10 KEYPAD, (H) AND (-), As you have most likely figured out by this point the Studio Logic Master Controller SL-760 (ON) AND (OFF): uses the keyboard itself in EDIT mode as the 10 KEY KEYPAD and data entry source. The keys in the central octave, starting at the middle C, are assigned to specific functions for data entry in EDIT mode and are clearly labeled as indicated in the diagram below. -
Page 10: General Programming Information
THE ZONES The ZONES are the heart of the SL-760 Master Controller. Creative use of the ZONE'S parame- ters and the ZONES themselves gives the player new found flexibility and control over their sounds and modules. - Page 11 Studio application: Again, use multi-record on your sequencer but this time with a split patch set up on your SL-760 record two or more parts at once. Bass and comp or chords and melody. The point is, get creative and innovative using all your new possibilities.
- Page 12 BLANK PATCH PARAMETER CHART: Model SL-760 Studio Logic Master Controller BLANK PATCH PARAMETER CHART: Model SL-760 Studio Logic Master Controller...
- Page 13 GLOBAL VELOCITY The following charts are graphic displays of the ZONE specific (SHAPE) velocity curves. They CURVES are here to help you conceptualize and understand how these CURVES affect the dynamic response of your ZONES.
- Page 14 GENERAL MIDI PATCH LIST The following charts show the standard General MIDI patch locations. If you are using a General MIDI Module or Keyboard this will come in handy. When you are programming your ZONE'S PATCH CHANGES you can refer to this chart for entering numbers of desired Patches. 1.
-
Page 15: Troubleshooting Guide
• Power the keyboard down. With the SUSTAIN PEDAL plugged in to the SUSTAIN PEDAL INPUT power the keyboard up. This will cause the SL-SL-760 to sense the proper polarity setting for the type of pedal you are using and adjust properly.


Need help?
Do you have a question about the SL-760 and is the answer not in the manual?
Questions and answers