Star Micronics TSP200 Installation Manual
Star micronics tsp200: install guide
Hide thumbs
Also See for TSP200:
- User manual (138 pages) ,
- Programmer's manual (80 pages) ,
- Technical manual (72 pages)

Related Manuals for Star Micronics TSP200


Summary of Contents for Star Micronics TSP200
- Page 1 THERMAL PRINTER TSP200 INSTALLATION MANUAL GUIDE D’INSTALLATION AUFSTELLANLEITUNG MANUALE DI INSTALLAZIONE...
-
Page 3: Table Of Contents
TABLE OF CONTENTS 1. UNPACKING AND INSPECTION ... 1 1-1. Unpacking ... 1 1-2. Locating the printer ... 1 2. PARTS IDENTIFICATION AND NOMENCLATURE ... 2 3. PRINTER CONNECTION ... 3 3-1. Interface Cable ... 3 3-2. Ferrite Core 4. NEAR-END SENSOR ... 7 APPENDIX ... -
Page 4: Unpacking And Inspection
If any of these items are missing, contact your supplier. Printer 1-2. Locating the printer Before you start setting up your printer, make sure that you have a suitable place in which to locate it. By “a suitable place”, we mean: Close to an easily accessible socket-outlet. -
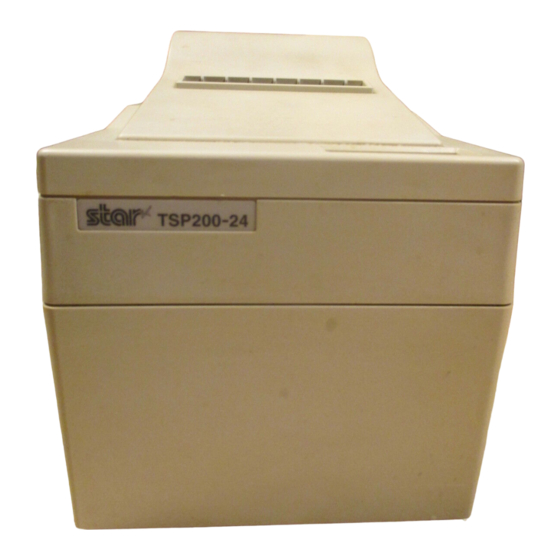
Page 5: Parts Identification And Nomenclature
Shape of AC power plug will vary according to destinations. Interface connector Connects the printer with host computer. Fig. 2-1 External view of the printer Control panel Features two control switches and two indicators to indicate printer status. Peripheral unit drive circuit connector Connects to peripheral units such as cash drawers, etc. -
Page 6: Printer Connection
3. PRINTER CONNECTION Please prepare the following before making connections to the printer. Always have the power switch in the off position when making any connections. • Interface cable • Ferrite core (EU only) 3-1. Interface Cable 1 Open the cover 2 Push the head up lever (green) to the rear. - Page 7 4 Plug the printer-side connector of the interface cable into the printer interface connector and use screws to secure the serial interface con- nector or a hook bracket to secure the parallel interface connector. Screws Screwdriver – 4 –...
-
Page 8: Ferrite Core *Europe Only
NOTE: Take special care when following the procedures listed below. A ferrite core noise filter for the peripheral unit cable comes packed with the printer. The ferrite core is normally packed so it is opened, as shown in Fig. 3-2. - Page 9 Clamp the ferrite core onto the peripheral unit cable, looping the cable as shown in Fig. 3-2. • When installing the ferrite core be careful not to damage the cable. • The ferrite core should be anchored firmly in place with the fastener that comes with it, as shown in Fig.
-
Page 10: Near-End Sensor
4. NEAR-END SENSOR This printer is equipped with a sensor that detects when a roll of paper is near the end. Read the following if you are going to use this sensor. Cautions 1) The factory setting is step 1. - Page 11 TABLE DES MATIÈRES 1. DÉBALLAGE ET INSPECTION ... 9 1-1. Déballage ... 9 1-2. Emplacement de l’imprimante ... 9 2. IDENTIFICATION DES PIÈCES ET NOMENCLATURE ... 10 3. CONNEXION DE L’IMPRIMANTE ... 11 3-1. Câble d’interface ... 11 3-2. Tore de ferrite *Uniquement pour l’Europe ... 13 4.
-
Page 12: Déballage Et Inspection
Contrôler à l’aide de la figure 1-1 ci-dessous que chaque élément décrit se trouve dans la boîte. Si tout élément semble manquer, contacter le fournisseur. Imprimante Printer 1-2. Emplacement de l’imprimante Avant d’entamer l’installation de l’imprimante, s’assurer que le futur emplace- ment est approprié. En d’autres termes, il convient que cet emplacement soit: à... -
Page 13: Identification Des Pièces Et Nomenclature
2. IDENTIFICATION DES PIÈCES ET NOMENCLATURE Capot Protège l'imprimante contre la poussière et réduit le bruit. Ne pas ouvrir le capot pendant l'impression. Cordon d'alimentation secteur Ce cordon sert à raccorder l'imprimante à une prise secteur de la tension spécifiée. La forme de la fiche secteur pourrait varier en fonction du lieu de vente de l'imprimante. -
Page 14: Connexion De L'imprimante
3. CONNEXION DE L’IMPRIMANTE Préparer les éléments suivants avant d’effectuer les connexions à l’imprimante. Avant d’effectuer toute connexion, toujours veiller à ce que l’imprimante soit hors tension. • Câble d’interface • Tore de ferrite (uniquement pour l’Europe) 3-1. Câble d’interface 1 Ouvrir le capot. - Page 15 4 Raccorder le connecteur du câble d’interface dans le connecteur pour interface de l’imprimante et fixer le connecteur de l’interface en série à l’aide de vis ou le connecteur de l’interface parallèle à l’aide des agra- fes prévues. Screws Screwdriver Tournevis –...
-
Page 16: Tore De Ferrite *Uniquement Pour L'europe
3-2. Tore de ferrite N.B.: Effectuer les démarches ci-dessous avec un soin particulier. L’imprimante est fournie avec un filtre antibruit à tore de ferrite des- tiné au câble de l’appareil périphéri- que. Le tore de ferrite est normalement ouvert à la livraison, comme le mon- tre la figure 3-2. - Page 17 Serrer le tore de ferrite autours du câble d’appareil périphérique en effectuant une boucle de la manière illustrée (3-2). • Veiller à ne pas endommager le câble lors de l’installation du tore de ferrite. • Le tore de ferrite doit être correctement fixé à l’aide de l’attache fournie (se reporter aux figures 3-3 et 3-4).
-
Page 18: Capteur De Fin De Rouleau
4. CAPTEUR DE FIN DE ROULEAU Cette imprimante est équipée d’un capteur détectant l’approche de la fin de rouleau. Pour savoir comment utiliser cette fonction, lire les instructions ci- dessous. Attention 1) Le capteur de fin de rouleau est positionné sur le cran 1 à la sortie d’usine. 2) Afin d’assurer une détection correcte de la quantité... - Page 19 INHALTSVERZEICHNIS 1. AUSPACKEN UND PRÜFUNG ... 17 1-1. Auspacken ... 17 1-2. Wahl eines Aufstellungsorts ... 17 2. FUNKTION UND BEZEICHNUNG DER TEILE ... 18 3. DRUCKERVERBINDUNG ... 19 3-1. Schnittstellenkabel ... 19 3-2. Ferritkern *nur Europa ... 4. PAPIERVORRAT-SENSOR ... 23 ANHANG ...
-
Page 20: Auspacken Und Prüfung
Überprüfen Sie an Hand von Abbildung 1 die Teile in der Verpackung, und stellen Sie sicher, daß alle nötigen Positionen geliefert wurden; es sollten fünf sein. Falls eines der Teile fehlen sollte, wenden Sie sich bitte an Ihren Händler. Printer Drucker 1-2. Wahl eines Aufstellungsorts Bevor Sie mit der Aufstellung des Druckers beginnen, stellen Sie sicher, daß... -
Page 21: Funktion Und Bezeichnung Der Teile
2. FUNKTION UND BEZEICHNUNG DER TEILE Oberteil Schützt den Drucker vor Staub und reduziert das Betriebsgeräusch. Nicht während des Druckens öffnen. Netzkabel An eine Netzsteckdose mit geeigneter Spannung anschließen. Die Form des Netzsteckers ist je nach Bestimmungsland unterschiedlich. Schnittstellenbuchse Zur Verbindung des Druckers mit dem Host-Rechner. -
Page 22: Druckerverbindung
3. DRUCKERVERBINDUNG Vor dem Herstellen von Verbindungen folgende Vorbereitungen treffen. Immer Netzschalter in Aus-Stellung stellen, während Verbindungen hergestellt werden. • Schnittstellenkabel • Ferritkern (nur EU) 3-1. Schnittstellenkabel 1 Das Oberteil öffnen. 2 Den Kopfhebel (grün) nach hinten drücken. Achtung Wenn der Drucker transportiert oder längere Zeit weggestellt werden soll, immer den Kopfhebel nach vorne zie- hen, so daß... - Page 23 4 Den druckerseitigen Stecker des Schnittstellenkabels Schnittstellenbuchse des Druckers stecken und mit den Befestigungs- schrauben oder einem Haltebügel befestigen. Screws Schrauben Screwdriver Schraubenzieher – 20 –...
-
Page 24: Ferritkern *Nur Europa
3-2. Ferritkern *nur Europa HINWEIS: Die folgenden Arbeiten besonders sorgfältig ausführen. Ein Ferritkern-Rauschfilter für das Peripheriegerät wird mit dem Druk- ker mitgeliefert. Der Ferritkern ist normalerweise in geöffnetem Zustand verpackt, wie in Abbildung 3-2 gezeigt. Wenn Sie den Ferritkern in nicht geöffnetem Zustand vorfinden: Mit einem schar- fen Gegenstand die Plastiksperre des Ferritkerns aufhebeln, wie in Abbil-... - Page 25 Den Ferritkern auf das Peripherieeinheit-Kabel klemmen und das Kabel in einer Schleife verlegen, wie in Abbildung 3-2 gezeigt. • Beim Anbringen des Ferritkerns darauf achten, nicht das Kabel zu beschädi- gen. • Der Ferritkern muß fest mit dem mitgelieferten Kabelband befestigt werden, wie in Abbildung 3-3 und 3-4 gezeigt.
-
Page 26: Papiervorrat-Sensor
4. PAPIERVORRAT-SENSOR Der Drucker ist mit einem Sensor ausgestattet, der erkennt, wenn das Ende einer Papierrolle fast erreicht ist. Zum Einsatz dieses Sensors wie folgt verfahren. Vorsichtsmaßregeln 1) Die werksseitige Einstellung ist Stufe 1. 2) Immer eine Papierrolle mit einem Kern verwenden, der einen Innendurch- messer von 12 mm und einen Außendurchmesser von 18 mm hat, um richtige Erkennung der Restpapiermenge zu gewährleisten. - Page 27 1. APERTURA E CONTROLLO DELLA CONFEZIONE ... 25 1-1. Apertura della confezione ... 25 1-2. Scelta del luogo di installazione della stampante ... 25 2. IDENTIFICAZIONE E NOMENCLATURA DELLE PARTI ... 26 3. COLLEGAMENTO DELLA STAMPANTE ... 27 3-1. Cavo di interfaccia ... 27 3-2.
-
Page 28: Apertura E Controllo Della Confezione
1-1 per assicurarsi di disporre di tutti gli elementi. Nel caso mancasse qualcuno di questi componenti, contattare il fornitore presso cui si è effettuato l’acquisto. Printer Stampante 1-2. Scelta del luogo di installazione della stampante Prima di installare la stampante, assicurarsi di disporre di un luogo adatto in cui collocarla. -
Page 29: Identificazione E Nomenclatura Delle Parti
2. IDENTIFICAZIONE E NOMENCLATURA DELLE PARTI Coperchio Protegge la stampante dalla polvere e attutisce il rumore. Non aprire il coperchio durante la stampa. Cavo di alimentazione elettrica Si inserisce in una presa elettrica della tensione specificata. La forma della spina di alimentazione varia a seconda del paese di destinazione. -
Page 30: Collegamento Della Stampante
3. COLLEGAMENTO DELLA STAMPANTE Tenere pronti i seguenti componenti prima di effettuare i collegamenti della stampante. Spegnere sempre l’interruttore di alimentazione prima di effettuare qualunque collegamento. • Cavo di interfaccia • Anello di ferrite (solo U.E.) 3-1. Cavo di interfaccia 1 Aprire il coperchio. - Page 31 4 Inserire l’estremità stampante del Viti Screws Screwdriver Cacciavite – 28 – cavo di interfaccia nel connettore di interfaccia della stampante e utiliz- zare le viti per fissare il connettore di interfaccia seriale oppure gli ap- positi fermagli per fissare il connettore di interfaccia parallela.
-
Page 32: Anello Di Ferrite *Solo Per L'europa
3-2. Anello di ferrite NOTA: Prestare particolare attenzione durante l’esecuzione delle seguenti procedure. Insieme alla stampante viene fornito in dotazione un filtro antidisturbi che consiste in un anello di ferrite da applicare al cavo dell’unità periferi- L’anello di ferrite è normalmente confezionato in modo da restare aper- to, come mostrato in Fig. - Page 33 Bloccare l’anello di ferrite sul cavo dell’unità periferica, facendo un cappio al cavo come mostrato in Fig. 3-2. • Quando si applica l’anello di ferrite, fare attenzione a non danneggiare il cavo. • L’anello di ferrite va ancorato saldamente mediante la fascetta di fissaggio fornita in dotazione, come mostrato nelle Fig.
-
Page 34: Sensore Di Rilevamento Fine Carta
4. SENSORE DI RILEVAMENTO FINE CARTA Questa stampante è dotata di un sensore in grado di rilevare quando un rotolo di carta sta per terminare. Leggere le seguenti istruzioni se si intende utilizzare questa funzione. Attenzione 1) L’impostazione di fabbrica è la posizione 1. 2) Per garantire un corretto rilevamento della quantità... -
Page 35: Dip Switch Setting
DIP Switch Setting Be sure to turn the power to both the printer and host computer off before changing the setting of the DIP switches. Power off DIP switch DIP switch 1 DIP switch #1 The factory settings of DIP switch 1 are all on. - Page 36 DIP Switch #2 Factory settings: 2-1 and 2-2 are on; 2-3 and 2-4 are off. Switch Contents Print Density Serial I/F No. 6 Pin Reset Signal Serial I/F No. 9 Pin Reset Signal Print Density Light Standard Somewhat Heavy Heavy Enabled Enabled –...
-
Page 37: Connectors And Signal Names (Serial Interface)
Function Frame ground Receiving data Transmission data ESC/POS mode 1) DTR/DSR communication mode Indicates if printer is busy or not. Space: Printer ready Mark: Printer busy The conditions for busy will vary according to the memory switch settings. Printer Status 1. - Page 38 DIP switches. A pulse width of 1 ms or more space state activates reset. In the Star mode, the printer will enter the mark state during the following errors: no paper, head up, cutter error. In ESC/POS mode, this is normally space.
-
Page 39: Interface Connections
Interface Connections Refer to the host computer’s interface specifications for details of how to connect the interface. The following illustrations show typical connection configura- tions. [RS-232C] Printer side F-GND S-GND INIT FAULT IBM PC side F-GND S-GND – 36 –... -
Page 40: Connectors And Signal Names (Parallel Interface)
Signal Name DATA 1 DATA 8 STROBE BUSY Connectors and Signal Names (Parallel Interface) (18) (36) (Printer Side) Sample Circuit 4.7k 74LS-equivalent 4.7k 74LS-equivalent 1000pF 1.8k 74LS-equivalent Conforms to Amphenol connector 57-30360 (19) – 37 –... - Page 41 LOW level causes printer to reset its control circuitry and return to its initial state. Goes LOW to indicate that printer is unable to print. Ground terminal for external connection Not used –...
-
Page 42: Peripheral Unit Drive Circuit
1. Use the modular plug as shown in Figure below. 2. Separate ground wire is required for Europe only. 3. If the printer is used in Europe, the Ferrite core should be attached to the cable, as shown in Figure below. - Page 43 Drive circuit The recommended drive circuit is shown. +24V M-GND M-GND NOTES: 1. Peripheral units #1 and #2 cannot be driven simultaneously. When driving a device continuously, do not use drive duty above 20%. 2. Compulsion switch status is available as status data. 3.
- Page 44 MEMO – 41 –...
- Page 45 MEMO – 43 – P 1996.10...
- Page 46 HEAD OFFICE STAR MICRONICS CO., LTD. 20-10 Nakayoshida, Shizuoka, 422 Japan Tel: 054-263-1115, Fax: 054-263-8714 OVERSEAS SUBSIDIARY COMPANIES STAR MICRONICS AMERICA, INC. 70-D Ethel Road West, Piscataway, NJ 08854 U.S.A Tel: 908-572-9512, Fax: 908-572-5095 STAR MICRONICS DEUTSCHLAND GMBH Westerbachstraße 59, D-60489 Frankfurt, Germany Tel: 069-789990, Fax: 069-781006 STAR MICRONICS U.K.
Need help?
Do you have a question about the TSP200 and is the answer not in the manual?
Questions and answers