Table of Contents
Advertisement
USER MANUAL
Enjoy peace of mind.
Register your appliance today.
Stay updated on better living services, safety notices and
shop for accessories.
1. Open the camera app on your smartphone and
point at the QR code to scan
Product Registration QR code is located on the
front of your appliance or inside the door rim*.
2. Tap the notification or link to open the registration form
3. Complete your details and enjoy peace of mind
*Exact location of QR code may vary depending on oven model
ELECTRIC BUILT-IN OVENS
WVEP6918DD
Advertisement
Table of Contents
Troubleshooting

Related Manuals for Westinghouse WVEP6918DD


Summary of Contents for Westinghouse WVEP6918DD
- Page 1 2. Tap the notification or link to open the registration form 3. Complete your details and enjoy peace of mind *Exact location of QR code may vary depending on oven model ELECTRIC BUILT-IN OVENS WVEP6918DD...
-
Page 2: Table Of Contents
Failure to strictly adhere to the requirements in this manual may result in personal injury, property damage and affect your ability to make a claim under the Westinghouse manufacturer’s warranty provided with your product. Products must be used, installed and operated in accordance with this manual. -
Page 3: Important Safety Instructions
IMPORTANT SAFETY INSTRUCTIONS Please read the user manual carefully and store in a handy Steam can be released. There is a risk of skin burns. place for later reference. There is a risk that steam causes moisture damage to cabinets. •... - Page 4 IMPORTANT SAFETY INSTRUCTIONS Cooktop only Cooktop only • If the ceramic glass on cooktop is accidently cracked, • Do not allow pots to boil dry as damage to both pan switch off the appliance to avoid the possibility of and cooktop may result. electric shock.
-
Page 5: Installing Your Appliances
Supply cord size required: • This appliance must be mounted on a flat surface for the full width and depth of the product. WVEP6918DD-2.5mm2 • To avoid overheating, the appliance must not be installed in a recess or cupboard behind a Note: Electrical connection is 230-240 volts AC 50Hz. - Page 6 INSTALLING YOUR APPLIANCE (CONTINUED) Cabinet construction for your appliance Pyrolytic underbench oven For the best integration within a kitchen, install the Your underbench oven looks best when the control panel appliance in a standard 600mm wide cupboard that gives is directly under the benchtop. An upper infill panel may a flush fit with the surrounding cupboard fronts as shown have to be added if the cooktop placed over the oven is in Fig.
-
Page 7: Product Description
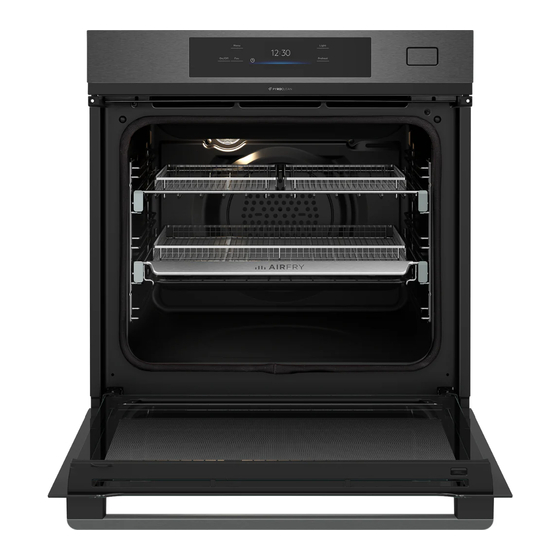
PRODUCT DESCRIPTION WVEP6918DD 12:30 170 C 85˚C START 15min On/off button (Press and hold) ‘Touch screen display Favourite button Preheat button Menu button Light button 12:30 170 C START 15min The display with the maximum number of functions set. A. Time of day B. -
Page 8: Before First Use
BEFORE FIRST USE Preparing your appliance for the first time • Please remove all internal boxes and bags from the oven before operation. • Please wipe out the oven interior prior to operation with warm soapy water and polish dry with a soft clean cloth. -
Page 9: Installing Your Oven Accessories
INSTALLING YOUR OVEN ACCESSORIES Slides (Telescopic runners) Left hand side rack Obtain left hand side rack and left hand slide – see image to identify. The shaded wires indicate the wire the slide can be mounted on. Fit slide rear clips to the rear of wire at an angle as shown below. - Page 10 INSTALLING YOUR OVEN ACCESSORIES To fit a shelf or tray to telescopic slides: Push the shelf or tray along the top of the slide until it hits the back post. Back post Back post Drop the front of the shelf or tray onto the slide ensuring it sits behind the front post of the slide.
-
Page 11: Using Your Oven
USING YOUR OVEN NOTE: For multifunction ovens the desired cooking function must be selected before the oven will operate. TIPS & INFORMATION IMPORTANT Once the desired function has been selected, use the temperature selector to set the required temperature. Cooling/Venting fan Pre-heating your appliance This appliance is fitted with a cooling fan. - Page 12 USING YOUR OVEN (CONTINUED) 170°C On / Off Press and hold to turn the oven on and off Favourites Lists the favourite settings Menu Lists the oven functions Touch display Shows the current settings of the oven Preheat To deactivate the Preheat function Light To turn the lamp on and off Press...
- Page 13 Display indicators Basic indicators – to navigate on the display To confirm the selection / setting To go one level back in the menu To undo the last action How to turn the oven on and off To turn the options on and off 12:34 Sound alarm function indicators –...
- Page 14 USING YOUR OVEN (CONTINUED) Take a shortcut! Run in the empty oven before the first use. Remove all accessories and removable shelf supports from the oven. Set the temperature to 180°C for the function: Fan force d . Let the oven operate for 30 minutes. How to set Assisted Cooking The oven can emit an odour and smoke during burn off.
- Page 15 Take a shortcut! Press + to add the setting to the list of: Favourites. Press – press to reset the setting. – press to cancel the setting. How to choose end option Function lock Press This function prevents an accidental change of the heating Press function.
- Page 16 USING YOUR OVEN (CONTINUED) Symbol Function description Heat comes from the element surrounding the fan. This fan circulates the hot air around the oven Fan Forced cavity so that you can put your food in different places in the oven and still cook them at the same time.
- Page 17 Symbol Function description Rapid Heat The ‘Rapid Heat’ function is ideal for cooking frozen precooked foods such as savoury pastries, pizzas, mini meals (TV dinners), meat pies and fruit pies. Heat comes from the element surrounding the fan as well as a smaller element above the food. Simply place the food in the oven straight from the freezer and heat.
- Page 18 USING YOUR OVEN (CONTINUED) Symbol Function description The ‘Keep Warm’ function is a low temperature oven function designed to keep your food at a perfect eating temperature without cooking it further. Heat comes from the smaller elements above the food and is circulated by the fan.
- Page 19 Main menu Press Menu Menu item Application Assisted cooking Lists automatic programmes. Cleaning Lists cleaning programmes. Favourites Lists the favourite settings. Options To set the oven configuration. Settings Setup To set the oven configuration Service Shows the software version and configuration Submenu for Pyrolytic Cleaning –...
- Page 20 USING YOUR OVEN (CONTINUED) Submenu for Setup Submenu Application Language Sets the oven language. Display brightness Sets the display brightness. Key tones Turns the tone of the touch fields on and off. It is not possible to mute the tone for Buzzer volume Sets the volume of key tones and signals.
- Page 21 Oven shelves RECOMMENDED MINUTES MEAT RESULT TEMPERATURE PER KG Rare 35 - 40 TIPS & INFORMATION IMPORTANT Beef Medium 45 - 50 • Select the correct shelf location for food being cooked. Well done 55 - 60 • Make sure dishes will fit into the oven before you Medium switch it on.
-
Page 22: Pyrolytic Cleaning
PYROLYTIC CLEANING Pyrolytic cleaning of the oven cavity • Unlike humans, some birds and reptiles can be extremely sensitive to the potential fumes emitted The oven has the Pyrolytic self-cleaning function, it during the pyrolytic cleaning process. It is strongly cleans by burning off the spatters and accumulated dirt advised to remove any pets (especially birds) from and grease from the oven liner, at high temperature. -
Page 23: Steam Assisted Cooking
STEAM ASSISTED COOKING Steam product description Cooking function steam assist Steam comes from the outlet pipe and heat comes from the element surrounding the fan. This fan circulates the hot air and steam around the oven cavity so that you STEAM ASSIST can put your food in different places in the oven. - Page 24 STEAM ASSISTED COOKING (CONTINUED) The steam appears after approximately 2 minutes. Steam COOKING operation When the appliance reaches the set temperature, the signal sounds. When the water drawer is running out of The water drawer cover is in the control panel. water, the signal sounds and the water drawer needs to be refilled to continue the steam cooking as described WARNING...
- Page 25 for the recipe, consult the dedicated table in the • When the oven is cold, dry the cavity with a soft paragraphs below.steam service functions cloth. • Leave the oven door open and wait until the cavity Menu > Cleaning > Steam maintenance is dry.
- Page 26 STEAM ASSISTED COOKING (CONTINUED) Tank Emptying Water hardness Use this function after cooking with a steam heating How to set water hardness: function to remove the residual water from the water When the oven is first turned ON, the water hardness drawer.
-
Page 27: Cooking Guide
COOKING GUIDE Cooking Shelf Temp time (min Size/ Recipe Function Preheat Accessory position excluding portion preheat) Chicken AirFry AirFry 15-25 600g Tray nuggets AirFry Croquettes AirFry 15-25 450g Tray AirFry Crumbed fish AirFry 15-25 6pcs Tray Chicken AirFry AirFry 15-20 6pcs Tray schnitzel... -
Page 28: Dealing With Cooking Problems
DEALING WITH COOKING PROBLEMS PROBLEM CAUSES REMEDY Uneven cooking • Incorrect shelf position • Select shelf suitable for cooking function. See cooking function tables in cooking guide • Oven tray too large • Experiment with other trays or dishes • Trays not centralised •... -
Page 29: Getting To Know The Oven
GETTING TO KNOW THE OVEN Get to know the oven with this ‘Simple Test Cake’ Although we strive for a perfect performing oven, it’s possible that there will be some variation in colour when baking. Therefore, we suggest this simple, easy and delicious to make Simple Test Cake, it can help you understand your new oven. -
Page 30: Care And Cleaning
CARE AND CLEANING WARNING WARNING WARNING WARNING Ensure the oven is electrically isolated before cleaning. The door glass on this appliance is made from a tough, This can be done by switching off the appliance via durable material that withstands heating and cooling the powerpoint or isolating switch (if available), or the without breaking. - Page 31 WARNING WARNING Make sure the appliance is turned off before you remove or replace parts, to avoid the possibility of electric shock. Removing the side racks Grasp the middle wire at the front. Releasing the grill element Pull firmly inwards while pushing back. WARNING WARNING Make sure the appliance is turned off before you remove...
- Page 32 CARE AND CLEANING (CONTINUED) Cleaning the quad glazed oven door (on selected models) WARNING CAUTION Do not lift the door by the handle. Rough handling will cause glass to break. Removing the oven door TIPS & INFORMATION IMPORTANT Your oven is equipped with a door that can be disassembled in order to clean all the panes of glass.
- Page 33 Cleaning the door glass panels WARNING CAUTION Do not use harsh abrasives on the glass panes as the reflective surface plays a role in the function of the oven. Do not place glass in dishwasher. Hand wash only with a soft cloth and warm soapy water.
- Page 34 CARE AND CLEANING (CONTINUED) WARNING CAUTION Do not lift the door by the handle. Rough handling will cause glass to break. Removing the door glass panels WARNING CAUTION Rough handling, especially around the edges can cause the glass to break. •...
- Page 35 Cleaning the door glass panels position it to the inside edge of the glass. • Push the trim down with its top edge over glass panel until the clip snaps in on each side of the trim. WARNING CAUTION Do not to use harsh abrasives on the glass panes as the reflective surface plays a role in the function of the oven.
- Page 36 CARE AND CLEANING (CONTINUED) This function assists in the removal of food residue CAUTION from inside the oven. This method is effective in The oven door and control panel are decorated removing light soiling only. It is not effective in removing stubborn baked-on stains.
- Page 37 Cleaning the cavity well The cleaning procedure removes limestone residue from the cavity well after cooking with steam. WARNING Perform the cleaning procedure after every Steam cooking cycle. Mix 150ml of tap water with 100ml of white vinegar and put the mix in the cavity well. Let the water+vinegar-mix dissolve the limestone residue at the ambient temperature for 45 minutes.
-
Page 38: Tips And Troubleshooting
TIPS AND TROUBLESHOOTING Before the first use, have you to set: IMPORTANT • Language Cooling/ventilation fan • Display brightness This appliance is fitted with a cooling fan. • Key tones This prevents your kitchen cabinet from overheating and reduces the condensation •... - Page 39 The effects of dishes on cooking results Dishes and tins vary in their thickness, heat conductivity, colour etc. which affects the way they transfer heat to the food inside them. • Aluminium, earthenware, oven glassware and bright shiny utensils reduce cooking and base browning. •...
-
Page 40: Shortcuts
SHORTCUTS Here you can see all the useful shortcuts. You can also find them in the dedicated chapters in the user manual. How to set: heating functions How to set: cooking with a steam heating function How to set: assisted cooking How to set: cooking time How to delay: start and end of cooking How to cancel: set timer... -
Page 41: Troubleshooting
TROUBLESHOOTING NOTE: We may charge for service even in the warranty period if your problem is due to the causes listed below. problem possible cause Oven or grill not working • Time of day is not set. • Power is not turned on. •... - Page 42 Shelf or telescopic runner slides out when door is • Oven cavity is not level, you can perform a check using a opened level to verify this (refer to installation section). If not level refer to installer. Door locked (switching off Pyro function quickly) •...
-
Page 43: Warranty
(c) ‘ASC’ means Electrolux’s authorised serviced centres; the Appliance; (d) ‘Westinghouse’ is the brand controlled by Electrolux Home Products In addition, Electrolux is not liable under this warranty if: Pty Ltd of 163 O’Riordan Street, Mascot NSW 2020, ABN 51 004... - Page 44 0800 225 088 westinghouse.co.nz email: customercare@electrolux.co.nz web: westinghouse.co.nz and WESTINGHOUSE are trademarks of Westinghouse Electric Corporation. Used under license by Electrolux Home Products Pty Ltd. All Rights Reserved. © 2023 Electrolux Home Products Pty Ltd. ABN 51 004 762 341 WMAN_WVEP6918DD_A26336701_A_Mar2023...
Need help?
Do you have a question about the WVEP6918DD and is the answer not in the manual?
Questions and answers