Table of Contents
Advertisement
Quick Links
Advertisement
Table of Contents

Related Manuals for Electrolux KVLAE00WT


Summary of Contents for Electrolux KVLAE00WT
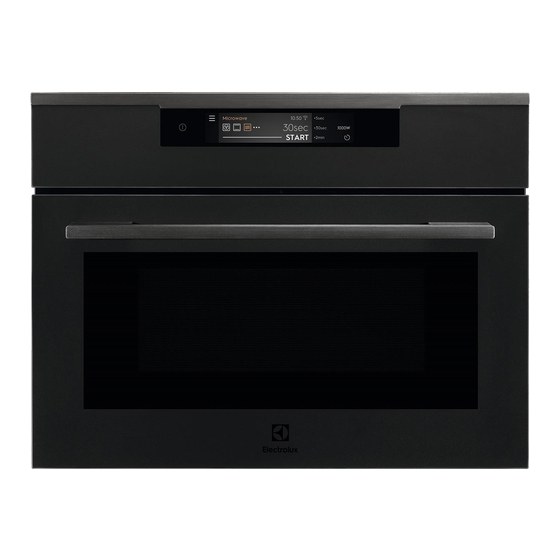
- Page 1 KVLAE00WT Microwave combi-oven User Manual...
-
Page 2: Table Of Contents
WE’RE THINKING OF YOU Thank you for purchasing an Electrolux appliance. You’ve chosen a product that brings with it decades of professional experience and innovation. Ingenious and stylish, it has been designed with you in mind. So whenever you use it, you can be safe in the knowledge that you’ll get great results every time. - Page 3 14.5 Submenu for: Service....36 materials ..........26 15. IT'S EASY!..........37 10.4 Recommended power settings for 16. ENVIRONMENTAL CONCERNS.....38 different kinds of food......28 10.5 Cooking tables for test institutes..28 My Electrolux Kitchen app Subject to change without notice. 3/40...
-
Page 4: Safety Information
Children should be supervised to ensure that they do not • play with the appliance and mobile devices with My Electrolux Kitchen . Keep all packaging away from children and dispose of it • appropriately. WARNING: The appliance and its accessible parts become •... - Page 5 SAFETY INFORMATION This appliance may be used in, offices, hotel guest rooms, • bed & breakfast guest rooms, farm guest houses and other similar accommodation where such use does not exceed (average) domestic usage levels. Only a qualified person must install this appliance and •...
- Page 6 SAFETY INFORMATION WARNING: Do not heat liquids and other foods in sealed • containers. They are liable to explode. Use only utensils that are suitable for use in microwave • ovens. When heating food in plastic or paper containers, observe •...
-
Page 7: Safety Instructions
SAFETY INSTRUCTIONS 2. SAFETY INSTRUCTIONS 2.1 Installation WARNING! Only a qualified person must install this appliance. • Remove all the packaging. • Do not install or use a damaged appliance. • Follow the installation instructions supplied with the appliance. • Always take care when moving the appliance as it is heavy. Always use safety gloves and enclosed footwear. -
Page 8: Electrical Connection
SAFETY INSTRUCTIONS 2.2 Electrical connection WARNING! Risk of fire and electric shock. • All electrical connections should be made by a qualified electrician. • The appliance must be earthed. • Make sure that the parameters on the rating plate are compatible with the electrical ratings of the mains power supply. -
Page 9: Care And Cleaning
SAFETY INSTRUCTIONS WARNING! Risk of damage to the appliance. • To prevent damage or discoloration to the enamel: – do not put aluminium foil directly on the bottom of cavity of the appliance. – do not put water directly into the hot appliance. –... -
Page 10: Internal Lighting
PRODUCT DESCRIPTION Allow hot glassware to cool on a cooling rack, a potholder or a dry cloth. Make sure that the glassware is cool enough before washing, refrigerating or freezing. Avoid handling hot glassware (including ware with silicone gripping surfaces) without dry potholders. -
Page 11: Accessories
CONTROL PANEL 3.2 Accessories Wire shelf For cookware, cake tins, roasts. Baking tray For cakes and biscuits. Microwave bottom glass plate To prepare food in microwave mode. 4. CONTROL PANEL 4.1 Control panel overview ON / OFF Press and hold to turn the appliance on and off. Display Shows the current settings of the appliance. -
Page 12: Display
CONTROL PANEL Press Move Press and hold Touch the surface with finger‐ Slide fingertip over the sur‐ Touch the surface for 3 sec‐ tip. face. onds. 4.2 Display The display with the maximum number of func‐ B C D tions set. A. -
Page 13: Before First Use
BEFORE FIRST USE The timer The timer starts The timer starts starts after when the appli‐ To set the function: Delayed To cancel when cooking closing the ance reaches start. the setting. starts. appliance the set temper‐ door. ature. Wi-Fi indicators - the appliance can be connected to Wi-Fi. Wi-Fi connection is turned on. -
Page 14: Software Licences
DAILY USE • Mobile device connected to the same wireless network. Step 1 Download the mobile app My Electrolux Kitchen and follow the instructions for the next steps. Step 2 Turn on the appliance. Step 3 Press: . Select: Settings / Connections. -
Page 15: How To Set: Microwave Functions
DAILY USE Step 3 Press: . The display shows the temperature settings. 170°C 70°C 170°C 210°C -5°C +5°C Step 4 Move the finger on the slider to set the temperature. Step 5 Press: Step 6 Press: - press to turn off the heating function. Step 7 Turn off the oven. -
Page 16: How To Use: Microwave Quick Start
DAILY USE MICROWAVE POWER MAXIMUM TIME 100 - 600 59:55 > 600 If you open the door, the function stops. To start it again, press 6.3 How to use: Microwave quick start Step 1 Press and hold: The microwave runs for 30 s. Step 2 To extend the cooking time: Press one of the time shortcuts on the... - Page 17 DAILY USE STANDARD Heating function Application To grill thin pieces of food and to toast bread. Grill To roast large meat joints or poultry with bones on one shelf position. To make gratins and to brown. Turbo Grilling To bake on up to two shelf positions at the same time and to dry food. Set the temperature 20 - 40 °C lower than for Conventional Cooking.
- Page 18 DAILY USE Heating function Application To dry sliced fruit, vegetables and mushrooms. Dehydrating To preheat plates for serving. Plate Warming To speed up the rising of the yeast dough. It prevents dough surface from drying and keeps the dough elastic. Dough Proving For dishes such as lasagna or potato gratin.
-
Page 19: Clock Functions
CLOCK FUNCTIONS Heating function Application Heating up drinks and soups, power range: 800 - 1000 W Liquid MICROWAVE COMBINATION Heating function Application Baking on one shelf position. The function with MW boost, power range: 100 - 600 W. True Fan Cooking + MW Baking and roasting food on one shelf position. -
Page 20: How To Set: Clock Functions
CLOCK FUNCTIONS Clock function Application Delayed start To postpone the start and / or end of cooking. Time extension To extend cooking time. Reminder To set a countdown. Maximum is 23 h 59 min. This function has no ef‐ fect on the operation of the appliance. Start criteria Comment The timer starts when you turn it on. - Page 21 CLOCK FUNCTIONS How to choose cooking start / end option Step 1 Choose a heating function and set the temperature. Step 2 Press: Step 3 Press: Step 4 Press: Start criteria / End action. Step 5 Choose the preferred: Start criteria / End action. Step 6 Press: or .
-
Page 22: Using The Accessories
USING THE ACCESSORIES How to set extra time What if it's better to change extra time? It's possible to reset extra time. Step 1 Press: Step 2 Choose the value on the slider or press one of the preferred time icons to set the time. Step 3 Press: How to change timer settings... -
Page 23: Additional Functions
ADDITIONAL FUNCTIONS Wire shelf: Push the shelf between the guide bars of the shelf support and make sure that the feet point down. Baking tray: Push the tray between the guide bars of the shelf support. Microwave bottom glass plate: Use the microwave bottom glass plate only with microwave function. -
Page 24: Automatic Switch-Off
ADDITIONAL FUNCTIONS Step 4 Select: Save current settings. Step 5 Press + to add the setting to the list of: Favourites. Press - press to reset the setting. - press to cancel the setting. 9.2 Automatic switch-off For safety reasons the appliance turns off after some time, if a heating function works and you do not change any settings. -
Page 25: How To Use: Mechanical Door Lock
ADDITIONAL FUNCTIONS CAUTION! Do not move the door lock vertically. Do not push the door lock when you close the oven door. 9.5 How to use: Mechanical door lock Step 1 To lock the door pull the door lock forward until it locks. Step 2 To unlock the door push the door lock back into the panel. -
Page 26: Hints And Tips
HINTS AND TIPS 10. HINTS AND TIPS 10.1 Cooking recommendations The temperature and cooking times in the tables are guidelines only. They depend on the recipes and the quality and quantity of the ingredients used. Your appliance may bake or roast differently to the appliance you had before. The hints below show recommended settings for temperature, cooking time and shelf position for specific types of the food. - Page 27 HINTS AND TIPS Cookware / Material Ovenproof glass and porcelain with no metal components, e.g. heat-proof glass Non-ovenproof glass and porce‐ lain without any silver, gold, plat‐ inum or other metal decorations Glass and glass ceramic made of ovenproof / frost-proof materi‐ Ovenproof ceramic and earthen‐...
-
Page 28: Recommended Power Settings For Different Kinds Of Food
HINTS AND TIPS Cookware / Material Cookware for microwave use, e.g. crisp pan 10.4 Recommended power settings for different kinds of food The data in the table is for guidance only. 700 - 1000 W Searing at the start of the cooking process Heating liquids 500 - 600 W Defrosting and... - Page 29 HINTS AND TIPS Microwave function Use wire shelf unless otherwise specified. Sponge cake 0.475 Bottom 8 - 9 Turn container around by 1/4, half‐ way through the cooking time. Meatloaf 25 - 27 Turn container around by 1/4, half‐ way through the cooking time.
-
Page 30: Care And Cleaning
CARE AND CLEANING 11. CARE AND CLEANING WARNING! Refer to Safety chapters. 11.1 Notes on cleaning Clean the front of the appliance only with a microfibre cloth with warm water and a mild detergent. Use a cleaning solution to clean metal surfaces. Cleaning Clean stains with a mild detergent. -
Page 31: How To Replace: Lamp
TROUBLESHOOTING Install the shelf supports in the opposite sequence. 11.3 How to replace: Lamp WARNING! Risk of electric shock. The lamp can be hot. Always hold the halogen lamp with a cloth to prevent grease residue from burning on the lamp. Before you replace the lamp: Step 1 Step 2... - Page 32 TROUBLESHOOTING The appliance does not turn on or does not heat up Possible cause Remedy The clock is not set. Set the clock, for details refer to Clock func‐ tions chapter, How to set: Clock functions. The door is not closed correctly. Fully close the door.
-
Page 33: How To Manage: Error Codes
TROUBLESHOOTING Problems with Wi-Fi signal Possible cause Remedy The wireless network signal is weak. Move router as close to the appliance as possi‐ ble. The wireless signal is disrupted by another mi‐ Turn off the microwave oven. crowave oven placed near the appliance. Avoid using another microwave oven and the Remote Control of the appliance at the same time. -
Page 34: Service Data
ENERGY EFFICIENCY Code and description Remedy F602, F603 - Wi-Fi is not available. Turn the appliance off and on. 12.3 Service data If you cannot find a solution to the problem yourself, contact your dealer or an Authorised Service Centre. The necessary data for the service centre is on the rating plate. -
Page 35: Menu Structure
MENU STRUCTURE 14. MENU STRUCTURE 14.1 Menu Menu item Application Favourites Lists the favourite settings. Assisted Cooking Lists automatic programmes. Options To set the appliance configuration. Settings Connections To set the network configuration. Setup To set the appliance configuration. Service Shows the software version and con‐... -
Page 36: Submenu For: Setup
MENU STRUCTURE Submenu Description Remote operation To enable and disable remote control. Option visible only after you turn on: Wi-Fi. Network To check network status and the signal power of: Wi-Fi. Auto remote operation To start remote operation automatically after pressing START. -
Page 37: S Easy
IT'S EASY! Submenu Description Licence Information about licenses. Software version Information about software version. Reset all settings Restores factory settings. Reset all popups Restores all pop-ups to the original settings. 15. IT'S EASY! Before the first use you have to set: Language Display brightness Buzzer volume... -
Page 38: Environmental Concerns
IT'S EASY! Start cooking Step 1 Step 2 Step 3 Step 4 Step 5 Step 6 - move the - press to go - press to finger on the - select the to the tem‐ - press to - press to turn on the slider to set function. - Page 40 www.electrolux.com/shop...
Need help?
Do you have a question about the KVLAE00WT and is the answer not in the manual?
Questions and answers