Table of Contents
Advertisement
Available languages
Available languages
Quick Links
perator's Manual
£RnFrSMRN°
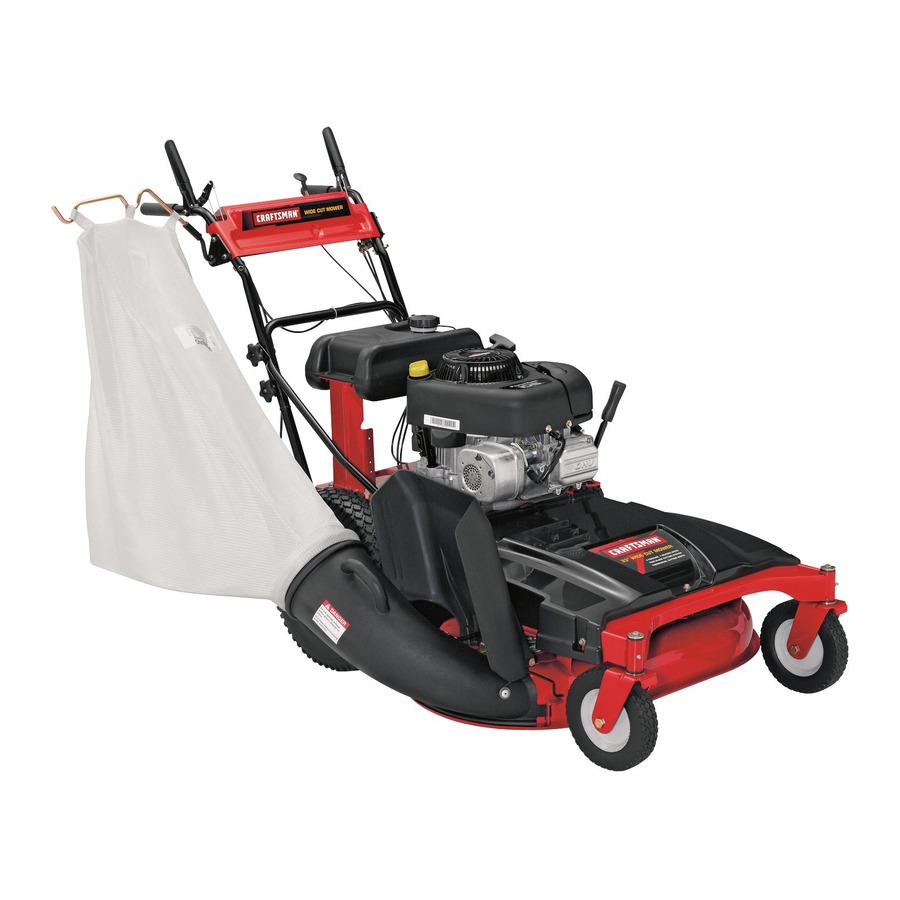
33-inch Wide Cut Mower
Model No. 247.887330
For answers
to your questions
about
this product,
call 1-800-659-5917.
CAUTION:
BEFORE USING THiS
PRODUCT,
READ THiS MANUAL
AND FOLLOW ALL SAFETY RULES
AND OPERATING
iNSTRUCTiONS.
,, SAFETY
,, ASSEMBLY
,, OPERATION
,, MAINTENANCE
,, PARTS LIST
,, ESPAIf,IOL R 44
Sears, Roebuck and Co., Hoffman
Estates,
IL 60179, U.S.A.
Visit our website:
www.sears.com/craftsman
FormNo.769-04610A
(December 1 6,2009)
Advertisement
Table of Contents

Related Manuals for Craftsman 247.887330


Summary of Contents for Craftsman 247.887330
- Page 1 Manual £RnFrSMRN° 33-inch Wide Cut Mower Model No. 247.887330 For answers to your questions call 1-800-659-5917. CAUTION: BEFORE USING THiS PRODUCT, READ THiS MANUAL AND FOLLOW ALL SAFETY RULES AND OPERATING iNSTRUCTiONS. Sears, Roebuck and Co., Hoffman Visit our website:...
- Page 2 This warrantygivesyou specificlegal rights,and you mayalso haveotherrightswhich vary from stateto state. Gross HP: 10.5 EngineOil: SAE 30 Fuel: UnleadedGasoline SparkPlug: Champion®RC12YC Engine: Briggs& StrattonPowerBuilt © SearsBrands,LLC CRAFTSMAN FULL WARRANTY Sears, Roebuck and Co., Hoffman Estates, IL 60179 Model Number Serial Number Dateof Purchase Recordthe modelnumber,serialnumber, and dateof purchaseabove.
- Page 3 which,ifnot followed,couldendangerthe personal __IL his symbolpointsout important s afetyinstructions safetyand/or propertyof yourselfand others.Read and followall instructions in this manualbefore attemptingto operatethis machine.Failureto complywith these instructions may resultin personalinjury. W henyou seethis symbol, HEEDITS WARNING! Your Responsibility: Restrictthe useof this powermachineto personswhoread,understand,and followthe warningsand instruc- tions inthis manualand on the machine.
- Page 4 • If the equipmentshould startto vibrateabnormally,stop the engine and check immediately for the cause.Vibrationis generallya warningof trouble. • Shutthe engineoff andwait untilthe bladecomesto a completestop beforeremovingthe grass catcheror uncloggingthe chute. The cuttingblade continuesto rotatefor a fewseconds afterthe engine is shut off. Neverplace any part of the bodyinthe bladearea untilyou aresure the bladehas stoppedrotating.
- Page 5 Use this pageas a guide to determineslopeswhereyoumay not operatesafely.Do not operate the lawnmoweron such slopes. This symbolpoints outimportant safety instructions which,ifnot followed,could endangerthe personalsafetyand/or propertyof yourselfand others.Readand follow all instructions inthis manualbeforeattemptingto operatethis machine.Failureto complywith these instructions may result inpersonalinjury. W henyou seethis symbol,HEEDITS WARNING!
- Page 6 WARNING This symbol points out important safety instructions which, if not followed, could endanger the personal safety and/or property of yourself and others. Read and follow all instructions in this manual before attempting to operate this machine. Failureto comply with these instructions may result in personal injury.
- Page 7 Thispage leftintentionally blank.
- Page 8 IMPORTANT:This unitis shippedwith oil in the engine.After assembly,see page 12for fueland oil details. IMPORTANT:Referenceto rightor left side of the moweris observed fromthe operatingposition. The mowingdeck is capableof throwingobjects. Failureto operate the mowerwithoutthe dischargechute in the properoperatingposi- tion couldresult in seriouspersonalinjuryand/or propertydamage. Disconnectthe spark plugwire and groundit againstthe engineto preventunintendedstarting.
- Page 9 2. Pull chute b ack t owards the engine. While h olding the chute w ith one hand, remove the chute h older using y our other hand. 3. Carefully lower the chute a gainst the deck a nd discard the holder. INSTALLING THE GEAR SHIFT LEVER Removethe5/16-18screwand the lock nutthat hold the shift...
- Page 10 Be sureno one otherthan theoperatoris standingnearthe lawn mowerwhilestartingengineor operatingmower.Neverrun engine indoorsor in enclosed,poorlyventilatedareas. Engineexhaust containscarbonmonoxide,an odorlessand deadlygas. Keep hands, feet, hairand looseclothingawayfrom any movingpartson engine and lawn mower. GAS CAP Removethe gascap to add fuel to the fueltank. LEVER Useclean,fresh, regularunleadedgasolinewith a minimumof 85 octane.
- Page 11 BLADE CONTROL Theblade controlis usedto engagethe mowerdeck.Toengagethis control,press and hold the leveragainstthe handlebar grip.Tostop the blades,releasethe blade control.Alwaysdisengagethe blade controlbeforestartingthe engine.This helpsto ensurethat the bladeswill not startturningwhenthe enginestarts. DRIVE CONTROL Thedrivecontrol is usedto engage and disengagedriveto thewheels.To engagethis control,squeeze the drive controlagainstthe handlebargrip.To stop thedrive, releasethe drivecontrol.
-
Page 12: Hours
Theoperationof any lawnmowercan resultin foreignobjectsbeing thrownintothe eyes,whichcan damageyoureyes severely. A lways wearsafetyglasseswhileoperatingthe mower,or while performing anyadjustmentsor repairson it. Useextremecarewhenhandlinggasoline.Gasolineis extremely flammableand the vaporsare explosive.Neverfuel machineindoors or whilethe engineis hotor running.Extinguishcigarettes,cigars, pipes,and othersourcesof ignition. GAS AND OIL FILL-UP Gas Fill Useof Alcoholblendedfuels (calledgasoholor usingethanolor methanol)canattract moisturewhich leadsto separation and forma- tionof acids during storage.Acidic gascan damagethe fuel system of an enginewhilein storage. - Page 13 Lookbehindthe mowerbeforeand during reverseoperation.Stop the mowerbladesbeforeoperatingin reverse. USING THE MOWER IMPORTANT:Alwaysreleasethe drivecontrolbeforechanging speeds.Referto "Knowyour Mower"sectionfor mowercontroldetails. Be sure lawnis clearof stones,sticks,wire, or otherobjectswhich coulddamagelawnmoweror engine.Suchobjectscouldbe accidently thrownby themowerin anydirectionand cause seriouspersonalinjury to the operatorand others.Forbest results,do not cut wet grass and nevercut off morethan one-thirdof the total lengthof the grass.
- Page 14 Alwaysstopengine,disconnectsparkplug,and groundagainst engine beforeperforminganytype of maintenance on the mower. GENERAL RECOMMENDATIONS Alwaysobservesafetyruleswhenperformingany type of maintenance on the mower. Thewarrantyon this lawnmowerdoesnot coveritemsthat have been subjectedto operatorabuseor negligence. T o receivefull valuefromwarranty,operatormustmaintainthe lawnmoweras instructedin this manual. • Changingof engine-governed speedwill voidenginewarranty. •...
- Page 15 Changing the Engine Theoil inthe engine shouldbe changedevery25 hoursof operation. Togain accessto the oil drain valveon the engine,the right handlebracetube shouldbe pivotedforward. Removetheupper star knoband carriagescrewon the right sideof the handle,Figure11. Pivotthe bracetubetowardsthe front of the mowerto allow roomto connectthe oil drain hoseto theoil drain valve, Figure11.
-
Page 16: Belts
Beforeperforminganytype of maintenance on the machine,wait for all parts to stop movingand disconnectthe sparkplug wire. Failure I to followthis instructioncould resultin personalinjuryor property [damage. REMOVING THE BELT COVER The beltcovermustbe removedto performseveralmaintenance and serviceprocedures.Followtheinstructionsbelowto removethe belt cover. Stopengine,wait for all partsto stop moving,and disconnect spark plugwire. -
Page 17: Controls
Before performing any type ofmaintenance allparts t ostop moving and disconnect the spark plug wire. Failure tofollow t his instruction could r esult inpersonal injury o rproperty damage. LUBRICATION Pivot Points & Linkage Lubricateall the pivotpointson thedrive systemand lift linkageat least oncea season,or every 25 hoursof operation,with light oil. - Page 18 Neverexceedthe maximuminflationpressureshownon the sidewall of tire. REAR TIRE PRESSURE The recommended operatingreartire pressureisapproximately 20 psi forthe reartires.Checkthe tire pressureperiodicallyand maintain equal pressurein bothrear tiresat all times. IMPORTANT:Referto the tire sidewallfor exacttire manufacturer's recommended or maximumpsi. Do notoverinflate.Uneventire pres- surecouldcausethe cuttingdeck to mow unevenly. REPLACING THE TRAILING If a screwis presentat each sideof the trailingshield,removethe...
- Page 19 Blade Sharpening iMPORTANT:If any metal separation is present,replacethe blades with newones. Toproperlysharpenthe cuttingblades,removeequal amountsof metalfrom bothends of the bladesalong thecuttingedges, parallelto the trailingedge,at a 250to 300angle, Figure21. Figure21 It is importantthat eachcuttingbladeedge be groundequallyto maintainproper bladebalance.A poorlybalancedblade willcause excessivevibrationand maycause damageto the mowerand result in personalinjury.Thebladecan be testedbybalancingit on a round shaftscrewdriver.
- Page 20 Replacing the Deck Engagement Stopengine,wait for all partsto stop moving,and disconnect spark plugwire, Releaseall mowercontrols, Removebeltcoveras instructedearlierin this section, Loosenthe bolt and nut holdingbeltkeeperrod to frame, Figure23. Figure23 Loosenidler pulley(A) by looseningthe nutand bolt, Figure24. Loosenidler pulley(B) by looseningnut, Figure24. Removebelt(C) from aroundpulleys,Figure24.
- Page 21 InstallingtheTiming Belt Beforeinstallinga replacement t iming belt, the markson each spindleassemblymustbe positionedin such a wayas to ensure the bladesare perpendicular t o eachother,Figure27. /?/// Front Figure27 Turnthe spacerspindleassembly(E) so thatthe arrow punchedon the spindleis facingthe front of the mower, Figure25. Turnthe drivespindleassembly(F) so that the arrow punchedon the spindleis facingto the outsideof the cutting deck,Figure25.
-
Page 22: Table Of Contents
Beforeperforming anytypeof maintenance/service, disengage all controls and stoptheengine.Waituntilall moving partshavecometo a complete stop.Disconnect sparkplugwireandgrounditagainstthe enginetoprevent u nintended starting. A lways wearsafety glassesduring operation or whileperforming anyadjustments o r repairs. EachUse Mowerblades Looseor missinghardware Belts Engineoil level Controls Mulchplug (if fitted) 1st2 hours Engineoil 25 hours... -
Page 23: Engineoil
Cleanengineof surfacedebris. Thefollowingattachments and accessoriesare availablefor the lawnmower.Contacta SearsService Center1-800-4-MY-HOME® for more information. PREPARING THE LAWN MOWER • Whenstoringthe mowerin an unventilated or metalstorageshed, careshouldbe taken to rustproofthe non-paintedsurfaces.Using a lightoil or silicone,coat the equipment,especiallyany springs, bearings,and cables. - Page 24 Beforeperforming anytype d maintenance/service, disengage all controlsandstoptheengine. W aituntilall movingpartshavecometo a complete stop.Disconnect sparkplugwireand ground it against t he engineto prevent u nintended starting. A lwayswearsafetyglassesduring operation or whileperforming anyadjustments or repairs. Thissectionaddresses minor serviceissues.To locate the nearestSearsServiceCenteror to scheduleservice,simplycontactSears at 1-800-4-1VlY-HOIVl E®.
- Page 25 777S30145 777S30117 777122759 777122760 777122782 777D09788 777122758 1. Insert Mulch Plug's front 2. Pivot Mulch Plug inboard 3. Slide rearward until slot . Lower Discharge Chute 777D10929 777122793 777D10928 777122809 into slot on outside of deck. into discharge opening. bottoms against edge of discharge opening.
- Page 26 33-inch Wide Cut Mower B Model No. 247.887330...
- Page 27 687-02255B-4044 FrameAssembly 687-02263-4044 CasterWheelBracketAssembly 687-02419-0637 DeckLift Assembly:RR 687-02265-0637 DeckLift Assembly:Front 710-0627 Screw,HH Cap: 5/16-24 x .750" 725-0157 CableTie, 3/16 x .05x 7.4 710-04312 Screw,HH Cap: 5/16-18 x .50" No. 247.887330 " 712-04065 1914-0145 720-0311 931-05684 731-05791 732-04418A 736-0242 736-0343 936-0351...
- Page 28 33=inchWide Cut Mower B Model No. 247.887330 A _65...
- Page 29 IdlerPulley:4.25" Dia. 756-04258 FlatSheave7.75" 756-04260 EnginePulley3.20" x 4.35" Dia. 756-04280 IdlerPulley3.50" Dia. 787-01469B-4044 Shift Rod,Lower 787-01470A-0637 Shift Rod,Upper 787-01473-0637 BeltKeeper 787-01523A WheelDriveidlerBracket 918-04438B Drive SpindleAssembly No. 247.887330 918-04439B i631-04252 i987-02420 687-02476-4044 DeckAssembly33-inch 710-04187 710-0514 i710-0560 710-04484 710-3184A 931-04244 712-0417A 912-0641 912-3017...
- Page 30 33=inch Wide Cut Mower m Model MODELand SERIAL NUMBERS HERE No. 247.887330 20,,_/22 34 /...
- Page 31 ThrustWasher(.762"ID X .031") T0-780108 ShiftWasher(Cupped) TC-780001 Washer.750"ID .56" TC-780195 Washer.750"ID .062 TC-788083 Oil Seal 5/8" TC-792001 O Ring(.823"OD) TC-780194 Bushing(.563") TC-780193 FlangedBushing(.625"ID) TC-780197 FlangedBushing(.751"ID) No. 247.887330 TC-790075 TC-790007 TC-799021A TC-786026 736-3078 TC-790104 TC-792177 912-0237 TC-790025 TC-786086 T0-775146 T0-775147 TC-778338 TC-778342 TC-778313 TC-778350...
- Page 32 Briggs & Stratton 10.5 Gross HP Engine 684 _ f&%\._ 584_/_-_ 1264 _ 1263 _-../ 307 _j 24_? 1044 1_ 15÷ IViodel 215802 4O4_ 741 _ 5240 2271 614 i_ 358 ENGINEGASKETSET 1022 524° 842 <d>...
- Page 33 Briggs & Stratton 10.5 Gross HP Engine Model 215802 238._ 635J_Y 1022 1034 1029 654_ 1022 9146_' 1095VALVEGASKETSET 868_, 1036EMISSIONS LABEL 1022...
- Page 34 Briggs & Stratton 10.5 Gross HP Engine 1411 634_ 217m_}a 13> 987 _ 1276 ` Model 215802 633 _-*') 4311 1266AdJ ... 1091 I _' 305d 9 187A ::::::% 121CARBURETOR OVERHAUL KiT 6341 217_ 1 633 ,_ 1266A_I ) 95 _y 1397 @ ®...
- Page 35 Briggs & Stratton 10.5 Gross HP Engine S_ _ 202 _z 232_ IViodel 215802 216 _._ 356 _/_ _5"._ 520_ 359_ 334_ 1561/.!/ ,>_ >_., _'i _W_j 1044_ ,,,, 1! S I!y>*- , '_t_ _',_si,_i _.-_ 521 _-% 65 _ 689 _ ':¢_ 455,/ 78_i_ ...
- Page 36 Briggs & Stratton 10.5 Gross HP Engine BS-697377 CylinderAssembly BS-399265 Kit-Bushing/Seal ( MagnetoSide) BS-391086s • Seal-Oil(MagnetoSide) BS-697106 Sump-Engine BS-796183 Head-Cylinder BS-273280s o+ Gasket-Cylinder H ead BS-697109 • Gasket-Breather BS-697157 Screw(BreatherAssembly) BS-794683 Tube-Breather BS-697110 ° Gasket-Crankcase BS-690360 Screw(CylinderHead) BS-690946 Plug-OilDrain BS-796146 Crankshaft BS-795387 •...
-
Page 37: Air Cleaner
Briggs & Stratton 10.5 Gross HP Engine BS-691843 Cap-Valve BS-394358s Filter-Fuel BS-691024 Clamp-Casing BS-794904 Screw(CasingClamp) BS-796000 Muffler BS-796414 BlowerHousing BS-697102 Screw(BlowerHousing)(Long) 305A BS-793376 Screw(BlowerHousing)(Short) BS-697359 Shield-Cylinder BS-691003 Screw(CylinderShield) BS-795315 Armature-Magneto BS-691061 Screw(MagnetoArmature) BS-491055s Plug-Spark BS-398808 Wire-Stop BS-796181 GasketSet-Engine BS-691077 Washer(GroundTerminal) BS-691612 Nut (GroundTerminal) BS-691691... - Page 38 Briggs & Stratton 10.5 Gross HP Engine BS-697104 Screw(BreatherReed) 1266 BS-691917 •O Seal-ORing(intake Elbow)(Red) 1266A BS-697123 •O Seal-ORing(intake Elbow)(Large) 1267 BS-697419 Latch-BlowerHousing 1397 BS-796449 Washer(BlowerHousing) 1329 BS_15802-0015-G1 Replacement E ngine includedin EngineGasketSet, KeyNumber358 includedin ValveGasketSet, KeyNumber1095 includedinCarburetorOverhaulKit, KeyNumber121 Model 215802...
- Page 39 Congratulations on makinga smartpurchase.YournewCraftsman@ productis designedand manufactured for yearsof dependableopera- tion. But likeall products,it may requirerepairfrom time to time.That's whenhavinga RepairProtectionAgreementcansave youmoneyand aggravation. Here'swhat the RepairProtectionAgreement*includes: * Expert service byour 10,000professional r epairspecialists o Unlimitedserviceand no chargefor partsand laboron all coveredrepairs o Product replacement up to $1500if yourcoveredproductcan't be fixed...
- Page 40 FEDERAL and/or CALIFORNIA MTDConsumerGroupInc,the United StatesEnvironmental P rotectionAgency (EPA),and, forthose productscertifiedfor sale in the stateof California,the CaliforniaAir ResourcesBoard(CARB)are pleasedto explainthe emission(evaporativeand/or exhaust)controlsystem(ECS) warrantyon youroutdoor 2006 andlater smalloff-roadspark-ignitedengine andequipment(outdoorequipmentengine)In California,new outdoorequipmentengines mustbe designed,built and equippedto meetthe State'sstringentanti-smog standards(in otherstates, 1997andlater modelyear equipmentmustbe designed,built, and equippedto meet the U.S.
- Page 41 The repairor replacementof any warrantedpart otherwiseeligiblefor warrantycoveragemay be excludedfrom such warrantycoverageif MTDConsumerGroup Inc demonstratesthatthe outdoor equipmentengine has beenabused,neglected,or improperlymaintained,and thatsuch abuse, neglect,or impropermainte- nancewasthe direct causeof the needfor repairor replacementof the part. That notwithstanding, a ny adjustmentof a component t hat hasa factory installed, and properlyoperating,adjustmentlimitingdevice is still eligible for warrantycoverage.
- Page 42 250 hours of actual engine running time. to be emission compliant for 500 hours of actual engine running time. lawn mower is used 20 to 25 hours per year. Therefore, rating would equate to 10 to 12 years. the relative level of emissions...
- Page 44 Almacenamiento Aditamentos Solucion de problemas ... NL_mero de servicio ... GARANTiA COMPLETA CRAFTSMAN Sears, Roebuck and Co., Hoffman Estates, IL 60179 NSmerode rnodelo NSmerode serie Fechade compra Registreel nQmero de modelo,nQmero de seriey fechade compra fuera de temporada ... 65 y Accesorios ...
- Page 45 instruccionesimportantesde seguridadquese deben respetarpara evitar poneren peligro su seguridad La presenciade este simbolo indicaque se trata de personaly/o materialy lade otras personas.Leay siga todas las instruccionesde este manualantesde poner en funcionamientoesta m&quina. S i no respetaestas instruccionespodria provocarlesionespersonales.Cuando vea este simbolo, ipresteatenci6na la advertencia! Su responsabilidad: R estrinjael usode esta rn_.quina rnotorizada a las personasque lean,cornprendan y respetenlas advertencias e...
- Page 46 que e lmotor se ha apagado. Nunca coloque el _ rea d e lacuchilla hasta que e ste s eguro girar. • Nunca opere lacortadora sino tiene colocados posterior apropiado, lacubierta dedescarga, lamanija de control de lacuchilla yotros dispositivos protecci6n. Nunca opere lacortadora silos dispositivos est_n da_ados.
- Page 47 Use esta p_.gina comoguia paradeterminarlas inclinaciones de las pendientes en las que podria no teneruna operaci6nsegura.Noopere la podadoraen dichaspendientes. La presenciade este simboloindicaque se trata de instruccionesimportantesde seguridadque se debenrespetarparaevitar poneren peligrosu seguridadpersonaly/o materialy la de otras personas.Leay sigatodas las instrucciones de este manual antesde poneren funcionamiento esta m_.quina.
- Page 48 ADVERTENCIA Este sfmboloindica instrucciones de seguridadimportantes que de no seguirse,se podria poneren peligro la seguridadpersonaly/o la propiedadsuyay de terceros.Leay sigatodas las instrucciones en este manualantes de iniciarla operaci6nde esta m_.quina. E n caso de no seguirestasinstruccionespodria provocarlesiones personales.Cuandoveaeste simbolo SIGALA ADVERTENCIA Su responsabilidad: S 61o permitaque usenesta m_.quina el_ctrica las personasque lean,comprendany respetenlas advertencias y las instruccionesqueaparecenen este manualyen la m_.quina.
- Page 49 Estapgtgina s emarch6 intencionadamente enblanco.
- Page 50 IMPORTANTE:Esta unidadse enviasin aceiteen el motor.Despu_s del rnontaje,consultela p&gina49 para los detallesdel combustibley el aceite. IMPORTANTE:Las referenciasa losladosderechoo izquierdode la cortadorade c_spedse hacenobservandola rn_.quina desdela posici6nde operaci6n. La plataformade la cortadorade cesped puedearrojarobjetos. En caso de operar la cortadorade cesped sincolocar el canal de descargaen la posici6nadecuadapara elfuncionamiento,podrianproducirsegraves lesionespersonalesy/o daSosmateriales.
- Page 51 Gire la manijasuperiora la operaci6noperativa,Figura3. Tenga cuidadode no doblar ni torcer loscables al girar la manija. Figura3 Instalelostornillosdel carro y las perillasextraidosanteriormente. Ajustelas perillasen estrellasuperiores e inferiores y los tornillos del carropara asegurarla manijasuperiora la inferior,Figura3. INSTALACION DE LA PALANCA DE VELOCIDADES Extraigael tornillode 5/6-18"y la tuercade seguridadque sujetan la palancade cambioa la placade la palancade cambio,...
- Page 52 Palancade altura de la plataforma Familiaricesecon todoslos controlesy su correctofuncionamiento. S epa c6mo detenerla m4quinay c6mo desconectarlos controles. AIoperar unacortadorade cespedes posibleque objetosextra_ossean arrojadosa los ojos, Iocual puededa_arlosgravemente.Utilicesiempre I galas de seguridaddurante la operaci6nde la cortadorade cesped o mientraslaajustao larepara. PALANCA DE CONTROL DEL REGULADOR...
- Page 53 CONTROL DE LAS CUCHILLAS Se usa el controlde las cuchillaspara engancharla plataforrna de la cortadora. Paraenganchareste control,presioney retengala palancacontra la ernpu_adura de la barrade control.Paradetener las cuchillas,suelteel controlde las cuchillas.Desenganche siernpreel controlde lascuchillasantes de arrancar el motor.Asi se asegurade que las cuchillasno cornenzar_.n a girar cuando arrancael motor.
- Page 54 AIoperar unacortadorade cespedes posibleque objetosextra_os seanarrojadosa los ojos, Iocual puededa_arlosgravernente.Utilice siempregalas de seguridaddurantela operaci6nde la cortadorade cespedo mientrasla ajusta o la repara. Tengasumocuidadoal manipularla gasolina.La gasolinaes sumamente infiamabley susvaporespuedencausarexplosiones. Nuncacarguecombustibleen la m_.quina en un espaciocerrado o cuandoel motorest,. calienteo en marcha.Apaguecigarrillos, cigarros,pipasy otras fuentesde combusti6n.
- Page 55 Mire detr_sde la cortadoraantesy duranteel funcionamientomarchaarras. Detengalas cuchillasde lacortadoraantesde operar marchaarras. USO DE LA CORTADORA DE CESPED IMPORTANTE:Sueltesiernpreel controlde la transrnisi6nantesde carnbiarlasvelocidad.Consultela secci6n"Conozcasu cortadorade cesped"para vet los controlesde la cortadora. AsegOrese de que el c_spedesta librede piedras,palos,cables u otrosobjetosque pudiesendaSarla cortadorao el motor.Dichos objetospuedenserarrojadosaccidentalrnente pot la cortadoraen cualquierdirecci6ny provocarlesionespersonales gravesal operador y a otras personas.Paraobtenerrnejoresresultados, n o corte c_sped...
- Page 56 Detengasiempreel motor,desconectelabujia y haga masacontrael motor antesde realizarcualquiertareade mantenimiento en la cortadora. RECOMENDACIONES GENERALES • Respetesiernprelas reglasde seguridadcuandorealice cualquiertareade rnantenirniento en la cortadora. • La garanfiade esta cortadorano cubreelernentos que ban estadosujetosal rnal usoo la negligenciadel operador.Para recibirel reernbolso total de la garanfia,el operadordeber&dar rnantenirniento a la podadoracornose indicaen este manual.
- Page 57 Cambio de aceite del motor El aceitedel motorse debe cambiarcada25 horasde funcionamiento. Paraaccedera la v_Jvula de drenajedel aceitedel motor,se debe girar hada adelanteel firantetubularde la manijaderecha, Extraigala perillaen estrellasuperiory el tornillodel carro del lado derechode la manija,Figura11, Gire el firantetubularhada el frentede la cortadorapara tenerlugar paraconectarla manguerade drenajede aceite a lav_Jvula de drenajede aceite,Figura11.
- Page 58 Antesde Ilevara caboalgQntipo de rnantenirniento en la rn_.quina, esperea que todas las partesse detengany desconecteel cablede la bujfa. Si no se observanestasinstruccionesse puedenproducir [ esonespersonaes o da_osmatera es. EXTRACCION DE LA CUBIERTA DE LA CORREA La cubiertade la correasedebe extraerpara realizarvarios procedirnientos de rnantenirniento y servicio.Siga las siguientes instruccionesparaextraerla cubiertade la correa.
- Page 59 16.Retire laplataforrna decorte. 17.Para instalar laplataforrna decorte, siga lospasos anteriores orden i nverso. Antes d eIlevar acabo a lg[3n tipo dernantenirniento espere aque todas l aspartes sedetengan labujia. Sinoseobservan estas i nstrucciones lesiones personales oda_os rnateriales. Nolirnpie lacortadora decesped con una lavadora apresi6n. Puede producir da_os alos cornponentes el_ctricos, rodarnientos...
- Page 60 Nuncaexcedala presi6nrn_.xirna de infladoque se indicaen los lateralesde los neurn_.ticos. PRESION DE LOS NEUiVlATICOS La presi6noperativarecornendada para los neurn_.ticos t raseroses de aproxirnadarnente 2 0 p.s.i.Verifiquela presi6nde losneurn_.ticos regularrnente y rnantengasiernprela rnisrnapresi6nen arnbos neurn_.ticos t raseros. IMPORTANTE:Consultelos lateralesde las ruedaspara conocercon exactitudla presi6nrn_.xirna en psi recornendada por el fabricante.No infle losneurn_.ticos e n exceso.La presi6nde neurn_.ticos d esigual podria hacerque la plataforrna corte el c_speden forrnadespareja.
- Page 61 Afilado de cuchillas IMPORTANTE:Si existeuna separacbn de metal,reernphcelas cuchillaspor otras nuevas. Paraafilarlas cuchillasde corte de forrnaadecuada,extraiga cantidadesiguales de metal de arnbosextrernosde las cuchillas a Iolargo de los bordescortantes,de forrnaparaMaal bordede caida,a un _.ngulo de 250a 30°, Figura21. • Es irnportante que cada hordede la cuchillade corte seapulido por igualpara rnantenerel equilibrioadecuadode la cuchilla.Una cuchilladesequilibrada causar_, vibraci6nexcesiva,y puedeoca- sionardaSosrnateriales a la cortadoraque resultenen lesiones...
- Page 62 Reemplazo de la correa de enganche Detengael motor,esperea que todas las partesdejen de moversey desconecte el cane de la bujia. Sueltetodos los controlesde la cortadorade c_sped. Retirela cubiertade la correacomose ha indicadoantesen esta seccbn, Aflojeel pernoy la tuercaque sujetanla varilladel guardacorrea al bastidor Figura23, Figura 23 Afloje la polea Ioca (A) afiojando la tuerca y el perno, Figura 24.
- Page 63 Gire el soportede sincronizaci6n de la polea Ioca(B) para pasar la correaalrededorde la poleaIoca, Figura25. Gire el rnontajedel brazosecundario(C) y extraigala correa(D) de los rnontajesde husillo,Figura25. Instalaci6nde la correade sincronizaci6n Antesde instalaruna correade sincronizaci6n de repuesto,se debe asegurarde ubicarlas rnarcasde cadarnontajede husillo de tal rnaneraque lascuchillasquedenperpendiculares entresi, Figura27.
- Page 64 Antesde realizarcualquier t ipo de mantenimiento o servicio,desenganche todos loscontroles y detengaelmotor.Esperea quese detengancompletamente todaslaspiezasm6viles.Desconecte el cablede labujiay p6ngalohaciendo masacontraelmotorparaevitarquese enciendaaccidentalmente. Utilice siempreanteojosde seguridad durantelaoperaci6n o mientrasrealizaajusteso reparaciones. Cadauso Cuchillasdelacortadora Piezassueltasofaltantes Correas Nivelde aceitedel motor Controles Clavijade abono (siest,. instalada) l ras2 horas Aceitedel motor 25 horas...
- Page 65 Nuncaalmacenela cortadorade cespedcon combustibleen el tanqueen un espaciocerradoo en _reascon pocaventilaci6n,donde losgasesdel combustiblepuedanalcanzarel fuego,chispaso unaluz piloto comola que tienen algunoshornos,calentadoresde agua, secadoresde ropa o algQn otro dispositivoa gas. PREPARACI6N DEL MOTOR Para rnotores alrnacenados durantern&sde 30 dfas: Paraevitar que se forrnegornaen el sisternade combustibleo en las piezasdel carburador, h aga funcionarel motorhasta que se detengapor falta de combustibleo agregueaditivo paragasolina al combustible del tanque.Si utilizaun aditivopara gasolina,...
- Page 66 Antesde realizarcualquiertipode mantenimiento oservicio,desenganche todos loscontrolesy detengael motor. E sperea quesedetengancompletamente todaslaspiezasm6viles.Desconecte elcablede labujiay p6ngalohaciendo masacontrael motorparaevitarqueseenciendaaccidentalmente. Utilice siempreanteojos de seguridad durantela operaci6n o mientras realizaajusteso reparaciones. Esta secci6nanaliza problemasmenores de servicio.Paraubicar el Centrode ServicioSears m_s cercanoo para programarun servicio,simplemente comunkuesecon Searsal tel_fono 1-800-4-MY-HOME®. El motorno arranca No se ha activadoel cebador El controldel regulador/cebador n o est,.
- Page 67 Felicitaciones por haberrealizadouna adquisici6ninteligente.El productoCraftsman@ que ha adquiridoest_ dise_adoy fabricado para brindarrnuchosa_osde funcionarniento confiable.Perocorno todoslos productosa vecespuederequerirde reparaciones.Esen esernornentocuandoel disponerde un Acuerdode protecci6npara reparaciones le puedeahorrardineroy problernas. A continuaci6nsedetallanlos puntosincluidosen el Acuerdo: • Servicio experto prestadopor nuestros10,000especialistas en reparaciones profesionales •...
- Page 69 DECLARACION FEDERAL y/o DE CALIFORNIA SUS DERECHOS Y OBLIGACIONES MTDConsumerGroupInc, laAgencia de Protecci6nMedioambiental d e los EstadosUnidos(EPA),y para aquellosproductoscertificadosparasu ventaen el es- tadode California,el Departamento de los Recursosdel Aire de California(CARB)secomplacenen explicarla garanfiaque cubre al sistemade control (ECS)de emisiones(evaporativasy/o de escape)de su equipoy motor(motor de equipos de exteriores)de encendidopot chispa paratodo terreno,peque_o,de exteriores del a_o2006 y a_osposterioresEn California,losnuevosmotoresde equipos de exterioresdebenestar dise_ados,construidosy equipadospara cumplircon las estrictasnormasantipoluci6ndel Estado(en otrosestados,losequipos del a_o 1997y modelosposterioresdebenser estar dise_ados,construidosy equipados para cumplircon las regulacionesde motoresde encendidopor chispa para todoterrenopeque_osde laAgencia de Protecci6nMedioambiental d e los Estados...
- Page 70 8. Durante latotalidad del periodo de garantia de piezas bajo g arantia suficiente para satisfacer 9. Cualquier pieza de reemplazo se podr_ usar para e lcumplimiento elpropietario. Dicho uso no reducir_ las obligaciones 10. No sepodr_n usar piezas adicionales nimodificadas El u so d ecualquier pieza adicional omodificada...
- Page 71 Busque el periodo de duraci6n Los motores cuyo cumpiimiento con los estAndares de emisi6n Tier 2 de la Comisi6n de Recursos Ambientales de California (CARB) est6 certificado deben exhibir la informaci6n relacionada con el perJodo de duraci6n de las emisiones y la clasificaci6n Roebuck and Co., de los Estados Unidos ponen esta informaci6n a disposici6n El Periodo de Duraci6n de las Emisiones describe el nQmero de horas de tiempo real de funcionamiento el motor cumple con las reglas de emisi6n, descontando...
- Page 72 For troubleshooting, product manuals and home solutions ÷anag÷ For repair - in your home - of all major brand appliances, lawn and garden equipment, no matter who made it, no matter who sold it! For the replacement owner's manuals that you need to do-it-yourself. For Sears professional and items like garage door openers and water heaters.
Need help?
Do you have a question about the 247.887330 and is the answer not in the manual?
Questions and answers