
Related Manuals for PROTRON PLTV-3250


Summary of Contents for PROTRON PLTV-3250
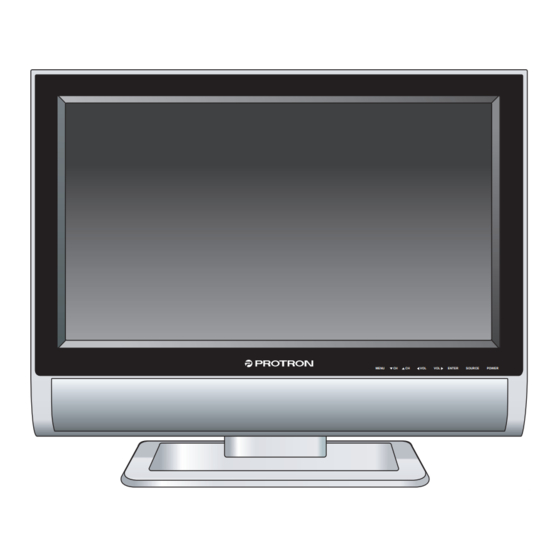
- Page 1 OMPLTV3250-1.book Page i Monday, July 17, 2006 8:15 PM PLTV-3250 32" Liquid Crystal Display User’s Manual MENU ENTER SOURCE POWER...
- Page 2 OMPLTV3250-1.book Page ii Monday, July 17, 2006 8:15 PM Protron PLTV-3250 Liquid Crystal Display User’s Manual. © 2006 Protron Digital Corporation. All rights reserved. Under copyright law, this manual may not be reproduced in any form, in whole or in part, without the prior written consent of Protron Digital Corporation.
-
Page 3: Important Safety Instructions
OMPLTV3250-1.book Page i Monday, July 17, 2006 8:15 PM Important Safety Instructions 1. Read these instructions. 2. Keep these instructions. 3. Heed all warnings. 4. Follow all instructions. 5. Do not use this apparatus near water. 6. Clean only with a dry cloth. 7. -
Page 4: Product Cautions
OMPLTV3250-1.book Page ii Monday, July 17, 2006 8:15 PM Product Cautions TO PREVENT POSSIBLE DANGER, ELECTRIC SHOCK, AND OTHER INJURIES WHEN HANDLING YOUR DISPLAY, PLEASE BE AWARE OF OF ALL WARNINGS AND SAFETY PRECAUTIONS LISTED BELOW. Never spill any liquid of any kind on the display. Never insert anything into the display, where objects can come into contact with high voltage nodes or damage internal components. -
Page 5: Fcc Compliance Statement
Connect the equipment to an outlet on a circuit different from that to which the receiver is connected. • Consult the dealer or an experienced radio/TV technician for help. Caution: To comply with the limits for an FCC Class B computing device, the user should use the shielded signal cable and power cord supplied with the unit. - Page 6 OMPLTV3250-1.book Page iv Monday, July 17, 2006 8:15 PM...
-
Page 7: Table Of Contents
Connecting an Analog TV Signal ........ - Page 8 OMPLTV3250-1.book Page vi Monday, July 17, 2006 8:15 PM...
-
Page 9: Introduction
• 32" viewable display area • 1366 × 768 resolution • Built-in HDTV tuner with coaxial input • Analog TV tuner with coaxial input • HDMI audio/video input • 2 progressive scan component video inputs • 2 composite video inputs •... -
Page 10: Unpacking Your New Display
OMPLTV3250-1.book Page 2 Monday, July 17, 2006 8:15 PM Unpacking Your New Display Before using your new display, you should unpack the contents of the box and check to make sure everything is present and undamaged. To unpack the display: 1. -
Page 11: Setting Up The Display
2. Turn on the power switch on the bottom of the display. Connecting a Digital TV Signal To connect an digital TV signal source to the display, connect a coaxial cable between the ATSC input and the TV signal source. -
Page 12: Connecting An Analog Tv Signal
OMPLTV3250-1.book Page 4 Monday, July 17, 2006 8:15 PM Setting Up the Display Connecting an Analog TV Signal An analog TV signal may come from a cable box, satellite receiver, antenna, or similar device. To connect an analog TV signal source to the... -
Page 13: Connecting S-Video Devices
OMPLTV3250-1.book Page 5 Monday, July 17, 2006 8:15 PM Connecting S-Video Devices Many video devices that have composite video outputs also have S-Video outputs. S-Video uses a single four-wire cable to transmit video information. Two of the wires are used to transmit video. Because it splits the video signal into two components, S-Video generally provides higher quality than composite video, but lower quality than component video and HDMI (see below). -
Page 14: Connecting Component Video Devices
OMPLTV3250-1.book Page 6 Monday, July 17, 2006 8:15 PM Setting Up the Display Connecting Component Video Devices High-quality video devices, such as HDTV receivers and high-end DVD players, have component video outputs. Component video uses three RCA connections to transmit video information. Because the information is split into three signals, component video offers higher quality than composite video and S-Video. -
Page 15: Connecting A Pc
OMPLTV3250-1.book Page 7 Monday, July 17, 2006 8:15 PM Connecting a PC Your display can be used as a computer monitor for any computer with a VGA video output. In addition, the computer’s audio output can be connected to the display and played through the display’s speakers. - Page 16 OMPLTV3250-1.book Page 8 Monday, July 17, 2006 8:15 PM Setting Up the Display 2. Connect a VGA cable between the VGA output on the computer and the D-SUB input on the display. 3. (OPTIONAL) Using a 1/8" stereo audio cable, connect the computer’s audio line output (LINE OUT) to the audio input on the bottom of the display (PC AUDIO IN).
-
Page 17: Operating The Display
The signal source may come from any of the input blocks on the sides or bottom of the display. The SOURCE button cycles through these. To change the audio/video source, press the SOURCE button until the correct source is selected. The SOURCE button cycles through the following sources: • TV • DTV • Component1 • Component2 •... -
Page 18: Accessing The On-Screen Display
OMPLTV3250-1.book Page 10 Monday, July 17, 2006 8:15 PM Operating the Display To change the channel, press the CH and CH buttons. To change to a particular channel directly, enter the desired channel number on the remote keypad, then press the • button. Accessing the On-Screen Display The On-Screen Display allows you to configure the operation of the display. -
Page 19: Using Your Display For The First Time
OMPLTV3250-1.book Page 11 Monday, July 17, 2006 8:15 PM Using Your Display for the First Time When you turn on your LCD for the first time, you will need to set up the display for proper operation by scanning the television spectrum for available channels. Setting up Digital Television Channels Once the HDTV signal is connected to the display, you should scan all channels to find strong signals. -
Page 20: Setting Up Analog Television Channels
Select Air if you are using an antenna. Select one of the Cable options if you are connecting directly to a cable TV wall outlet. Contact your cable service provider to find out which system is in use in your area. Cable or Cable-IRC will work with most systems. -
Page 21: Using The Remote Control
Displays current source and television channel information Switches between the TV signal sources: TV and DTV Selects the signal source: TV, DTV, Component1, Component2, AV1, AV2, HDMI, S-Video, or VGA When viewing digital TV, displays a list of available channels... -
Page 22: Button(S) Function
Cycles through the sound enhancement options: Normal, Music, Speech, Jazz Club, Concert, or Movie When viewing digital TV, brings up a list of the channels you have viewed most When viewing analog TV, brings up the closed captioning menu, where you... -
Page 23: Replacing The Remote Batteries
OMPLTV3250-1.book Page 15 Monday, July 17, 2006 8:15 PM Button(s) Function Selects the aspect ratio used by the display: 4:3 or Full (16:9) Adjusts the audio volume Note: To use a universal remote with your display, program the remote to control any NEC television. -
Page 24: Configuring The Display
OMPLTV3250-1.book Page 16 Monday, July 17, 2006 8:15 PM Configuring the Display The On-Screen Display (OSD) allows you to configure the operation of the LCD. You can change video and audio settings, activate and configure closed captioning, select television channels, control access to mature programming, and configure other general display behavior. -
Page 25: Image
OMPLTV3250-1.book Page 17 Monday, July 17, 2006 8:15 PM Note: The currently selected source determines which menus are available in the OSD. The following table lists the menus available for each source: Source Image • Component1 • Component2 • • •... -
Page 26: Audio
Auto Volume Turns automatic volume adjustment, used to compensate for program sound level variation, on and off. (TV only) Selects the MTS (Multichannel Television Sound) channel played back while watching television: Auto, Mono, Stereo, or SAP (Secondary Audio Programming). Sound Field Selects a sound enhancement scheme: Normal, Music, Speech, Jazz Club, Concert, or Movie. -
Page 27: Program Editor
OMPLTV3250-1.book Page 19 Monday, July 17, 2006 8:15 PM The TV menu allows you to select the television signal type and select which television channels are available for viewing, manually or automatically. It contains the following menu items: Auto Scan When selected, automatically scans all television channels for valid signals and makes unavailable any channels with insufficient signal strength. -
Page 28: Setup
OMPLTV3250-1.book Page 20 Monday, July 17, 2006 8:15 PM Configuring the Display Setup The Setup menu contains general display settings, including OSD options, timers, display format, closed captioning, and parental controls. It contains the following menu items: Clock Display Turns the time display on and off. When on, the time shows in the top right corner of the display. - Page 29 No one under 17 admitted Adults only (no one under 17 admitted) • TV Rating—A sub-menu that sets the TV PG rating level the V-Chip will block without a password. Blocking a particular rating will automatically block all ratings above that level. Similarly, unblocking a rating will automatically unblock all ratings below that level.
-
Page 30: Adjustment (Dtv)
TV-MA Mature audience only • Parental Lock—Turns V-Chip protection on and off. Adjustment (DTV) The Adjustment menu sets general video and audio options for digital TV. The following settings are available: Brightness Sets the brightness of the display image. Contrast Sets the variation between light and dark colors. -
Page 31: Closed Caption (Dtv)
The factory-default password is '1234'. The following menu items are available: Parental Guide A sub-menu that sets the TV PG rating level (listed on the left) the V-Chip will block without a password. Specific types of mature content (listed across the top) can be blocked for some of the ratings. -
Page 32: Setup (Dtv)
Selects the language used for the OSD: English, French, or Spanish. Time Zone Selects the current time zone. All Reset Resets all digital TV settings to factory defaults. Select Yes to reset all settings, No to cancel. System Info Displays information about the display’s configuration. -
Page 33: Troubleshooting
Adjust the contrast and/or brightness until picture appears. Make sure the signal cable(s) are firmly connected. Check the TV signal. If using an antenna, adjust the position for better signal. If using cable or satellite TV, contact your service provider. -
Page 34: Support Information
OMPLTV3250-1.book Page 26 Monday, July 17, 2006 8:15 PM Troubleshooting Symptom Possible Cause After-image Inherent LCD remains on characteristics screen after display is turned off Distorted Display format set image incorrectly “Invalid VGA input signal is Mode” not in a supported message on mode screen... -
Page 35: Specifications
1200:1 500 cd/m +/–89° (H/V) 8ms (gray to gray) 1 × ATSC TV (75 ohm coaxial F) 1 × NTSC-M TV (75 ohm coaxial F) 1 × HDMI 2 × progressive scan component video (RCA) 2 × composite video (RCA) 1 ×... -
Page 36: Supported Computer Video Modes
OMPLTV3250-1.book Page 28 Monday, July 17, 2006 8:15 PM Specifications Supported Computer Video Modes Display Resolution Vertical Frequency 640 × 480 SVGA 800 × 600 1024 × 768 SXGA 1280 × 1024 WXGA 1280 × 768 1366 × 768 Horizontal (Refresh Rate) Frequency 31.5... -
Page 37: Limited Warranty
• Any cost incurred in shipping the product for repair • Signal reception problems caused by external antenna, cable systems or interference • Incompatibility due to a change in TV/CATV broadcast systems after the product was sold • Batteries • Images burnt on to the screen •... - Page 38 • Damaged because it is improperly connected to any other equipment. • If the original proof of purchase cannot be supplied. • If the identifiable markings on the TV such as the serial number are defaced, unrecognizable, or missing. • The product is used outside the country in which it was originally sold.
- Page 39 OMPLTV3250-1.book Page 31 Monday, July 17, 2006 8:15 PM...
- Page 40 OMPLTV3250-1.book Page 32 Monday, July 17, 2006 8:15 PM Protron Digital Corporation http://www.protronusa.com/ PLTV-3250 OMPLTV3250-1...
Need help?
Do you have a question about the PLTV-3250 and is the answer not in the manual?
Questions and answers