Advertisement
Quick Links
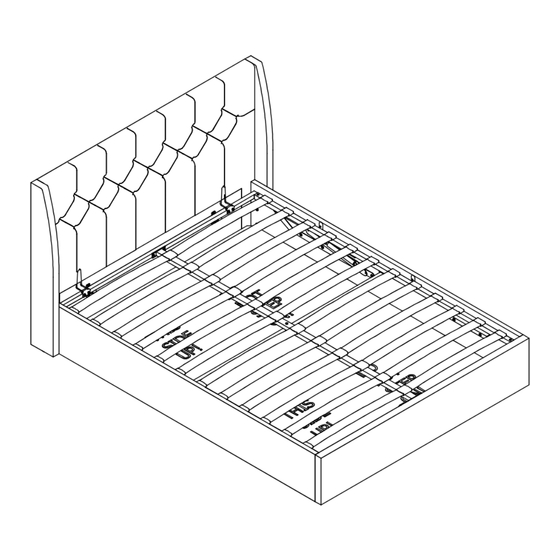
Weight Limit:
Bed:600Lb/272Kg
Storage:200Lb/90Kg
KT - 2023/2/17
2023 Dorel Home Products All Rights Reserved
4638439N (Light Gray Linen)
4641639N (Blue Linen)
Thank you for purchasing from DHP!
Questions, concerns, missing parts?
CONTACT OUR CUSTOMER SERVICE DEPARTMENT
BEFORE RETURNING PRODUCT TO THE RETAILER.
If parts are missing or damaged, we will gladly ship your
replacement parts free of charge.
Visit www.dhpfurniture.com/eng/replacement-parts
or call Toll-Free 1-800-267-1739
You can also chat with us at www.dhpfurniture.com
Date of Purchase
THIS INSTRUCTION BOOKLET CONTAINS IMPORTANT SAFETY
INFORMATION. PLEASE READ AND KEEP FOR FUTURE REFERENCE.
Upholstered Bed
Queen
Lot Number
(TAKEN FROM CARTON)
B344638439N00-KT
1
Advertisement

Subscribe to Our Youtube Channel
Related Manuals for Dorel Home Products 4638439N


Summary of Contents for Dorel Home Products 4638439N
- Page 1 You can also chat with us at www.dhpfurniture.com Date of Purchase Lot Number (TAKEN FROM CARTON) THIS INSTRUCTION BOOKLET CONTAINS IMPORTANT SAFETY INFORMATION. PLEASE READ AND KEEP FOR FUTURE REFERENCE. B344638439N00-KT KT - 2023/2/17 2023 Dorel Home Products All Rights Reserved...
-
Page 2: Limited 1-Year Warranty
Limited 1 year Warranty Read Before Beginning Assembly DHP warrants this product to be free from defects in material and workmanship Work in a spacious area and near where the unit will be used, preferably on a and agrees to remedy any such defect. This warranty covers one year from the carpet, or use a piece of the cardboard packaging to protect your floor and product. - Page 3 PARTS...
- Page 4 Base Support Mattress Retainer Wooden Slats 2 PCS 3 PCS 2 PCS 1 PC 24 PCS PART NUMBERS 4638439N 4641639N PART Each part has a unique part number. (Light Gray Linen) (Blue Linen) LABELS Please reference the appropriate part T1027220...
- Page 5 Support Rail Hinge Base Lift Strap Support Rail 1 PC 1 PC 1 PC 2 PCS 1 PC PART NUMBERS PART NUMBERS 4638439N 4641639N 4638439N 4641639N PART PART (Light Gray Linen) (Blue Linen) (Light Gray Linen) (Blue Linen) LABELS LABELS...
- Page 6 1 PC 1 PC 1 PC 2 PCS 1 PC Bottom Centre Rail 1 PC PART NUMBERS 4638439N 4641639N Each part has a unique part number. PART Please reference the appropriate part (Light Gray Linen) (Blue Linen) LABELS number when contacting customer...
-
Page 7: Hardware List
The screw(s), bolt(s) to be used at each step are shown in actual size in the lower right corner of the Hardware Pack page. 4638439N (Light Gray Linen) Bolt(Zinc) Allen Key HP#:T4638439N-00 4641639N (Blue Linen) - Page 8 Step 1 1.1 Attach Z to A1 and A2 with 1.2 Attach Z to B with Then fully tighten all the bolts in this step.
- Page 9 Step 2 Screw into B as illustrated, making sure to leave half of the threads exposed. Do not completely tighten the BOLTS leave half of the thread exposed.
- Page 10 Step 3 Attach A1 and A2 to A with X 10 X 10...
- Page 11 Step 4 Stick N to the back of A with Velcro as illustrated.
- Page 12 Step 5 Attach C to A1 with Attach D to A2 with...
- Page 13 Step 6 Hang C & D on B as illustrated, Don't completely tighten the bolts until STEP 9 is complete.
- Page 14 Step 7 7.1 Attach U x 2 to A with 7.2 Attach U to B with Then fully tighten all the bolts in this step.
- Page 15 Step 8 Attach J to A and B with...
- Page 17 Step 10 Attach L to C and R to D with...
- Page 18 Step 11 Slide F1 onto F, ensuring to not to block holes along the middle.
- Page 20 Step 13 Attach I to G x 2 with Turn over the subassembly.
- Page 21 Step 14 Attach U x 2 to E with Attach H to I with...
- Page 22 Step 15 Place subassembly from previous step on top of hinges L and R, then attach with...
- Page 23 Step 16 16.1 16.1 Insert one side of both O3 into X as indicated 16.2 Press X into G on each side. 16.3 Insert the other free end of both slats O3 into Y where both O3 meet, then press 16.2 Y into H.
- Page 24 Step 17 With the help of extra hands, lift the frame in an appropriate angle as illustrated. Attach E1 to L and R with Correct: The orientation of part E1 is correct as indicated. Incorrect: The orientation of part E1 is upside down.
- Page 25 Step 18 Place W x 2 at the bottom frame as illustrated. To better use the storage, please correctly orientate PART W with the warning " DO NOT STEP ON" towards top side.
- Page 27 Step 20 Close the frame by pulling the fabric handle or the metal frame downward. NOTE: Each gas lift has been tested and is functional. The gas lifts will provide some resistance and additional force will be required to close them while using the fabric handle or by placing both hands toward the middle of the frame.
-
Page 28: Helpful Hints
CAUTION: This unit is intended for use only with the products and/or maximum Helpful Hints weights indicated. Use with other products and/or products heavier than the maximum weights indicated may result in instability or cause possible injury. Move your new furniture carefully, with two people lifting and carrying the unit to its new location. - Page 29 Preguntas, inquietudes, partes que faltan? CONTACTE 4638439N (Gris claro) NUESTRO DEPARTAMENTO DE SERVICIO AL CLIENTE ANTES DE DEVOLVER EL PRODUCTO A LA TIENDA. 4641639N (Lino azul) Si le faltan piezas o las que se incluyen est n da adas, con mucho Cama Tapizada gusto le enviaremos sus piezas de reemplazo sin cargo extra.
- Page 30 Tambi n confirme que ha recibido todos los componentes necesarios para el ensamblaje al compararlos con la tabla de piezas indicadas en la secci n en ingl s. N MERO DE PIEZAS ETIQUET ETIQUET 4638439N 4641639N 4638439N 4641639N AS DE AS DE...
- Page 31 Paso 15 Instrucciones Con ayuda adicional, levantar el subconjunto de la etapa anterior y colocar en la parte superior de L y R con V apuntando hacia la cabecera A. Paso 1 Una el subconjunto de la etapa anterior a R y L con 1.1 Una Z con A1&A2 con Paso 16 1.2 Una Z con B con...
-
Page 32: Informations Sur La Garantie
Des questions, des pr occupations ou des pi ces 4638439N (Gris clair) manquantes? CONTACTEZ NOTRE SERVICE LA CLIENT LE AVANT DE RETOURNER LE PRODUIT AU D TAILLANT. 4641639N (Lin bleu) Si des pi ces sont manquantes ou endommag es, nous Lit Rembourr e exp dierons volontiers vos pi ces de rechange gratuitement. - Page 33 (illustrations disponibles dans la section en anglais). LISTE DES PI CES 4638439N 4641639N 4638439N 4641639N TIQUETTE TIQUETTE...
-
Page 34: Conseils Utiles
tape 15 Instructions Avec l'aide de mains suppl mentaires, soulever le sous-ensemble de l' tape pr c dente et se reposer sur le dessus de L et R avec une partie V vers la t te de lit A. tape 1 Attacher le sous-ensemble de l' tape pr c dente R et L avec des 1.1 Attacher Z A1 et A2 avec...
Need help?
Do you have a question about the 4638439N and is the answer not in the manual?
Questions and answers