KODAK SLIDE N SCAN Digital Film Scanner Manual
- User manual (59 pages) ,
- User manual (126 pages)
Advertisement
- 1 INTRODUCTION
- 2 SPECIFICATIONS
- 3 BOX CONTENTS
- 4 SAFETY PRECAUTIONS
- 5 GET TO KNOW YOUR SCANNER
-
6
HOW TO USE YOUR SCANNER
- 6.1 GETTING STARTED
- 6.2 YOUR HOME PAGE AND MAIN MENU
- 6.3 USING YOUR SCANNER
- 6.4 Loading Your Film
- 6.5 CHOOSING FILM SETTINGS
- 6.6 PREVIEW MODE
- 6.7 ADJUSTING IMAGE BRIGHTNESS AND COLOR
- 6.8 CHOOSING IMAGE RESOLUTION
- 6.9 GALLERY MODE
- 6.10 DELETING AN IMAGE
- 6.11 VIEWING IMAGES ON A TV SCREEN
- 6.12 UPLOADING IMAGES TO YOUR COMPUTER
- 6.13 FORMATTING YOUR SD CARD
- 6.14 SETTING THE DATE AND TIME
- 6.15 TIPS FOR BEST IMAGE QUALITY
- 6.16 ICONS AND THEIR FUNCTIONS
- 7 Documents / Resources
INTRODUCTION
Thank you for purchasing the KODAK SLIDE N SCAN Digital Film Scanner. This User Guide is intended to provide you with guidelines to ensure that operation of this product is safe and does not pose risk to the user. Any use that does not conform to the guidelines described in this User Guide may void the limited warranty.
Please read all directions before using the product and retain this guide for reference. This product is intended for household use only. It is not intended for commercial use.
This product is covered by a limited one-year warranty. Coverage is subject to limits and exclusions. See warranty for details.
SPECIFICATIONS
Image Sensor
14.0 megapixels (4320 x 3252)
1/2.33' CMOS sensor
Display
5" All Angle Color LCD
Lens Specification
F/No. 3.5, 5 elements lens
Color Balance
Automatic
Exposure Control
Automatic/Manual
Supported Film Sizes Auto Cropping
135 Negative & Slide (3:2)
110 Negative & Slide (4:3)
126 Negative & Slide (1:1)
Supported Film Types Auto Converting
Slide (135, 110, & 126)
Color Negative Film (135, 110, & 126)
Black & White Negative Film (135, 110, & 126)
Scannable Picture Formats
B&W, Slides, Negatives
Focusing
Fixed Focus EV Adjustment
Yes, + - 2.0 EV
RGB Color Adjustment
Yes
PC Interface
USB 2.0
Image Format
135 Negative 3:2 Ratio
110 Negative 4:3 Ratio
126 Negative 1:1 Ratio
Power Supply
From Computer USB Port, Power Bank
Light Source White
LED Panel
USB Connector
Type-C
TV Connector
HDMI
Dimensions
5.27' D x 5.35' W x 3.74' H (95 x 136 x 134 mm)
BOX CONTENTS

SAFETY PRECAUTIONS
![]()
Do not expose this product to liquids or high humidity.- Do not handle this product with wet hands. Risk of electric shock.
![]()
DO NOT ATTEMPT TO DISASSEMBLE OR ALTER THIS UNIT. THIS DEVICE CONTAINS NO USER-SERVICEABLE PARTS.- Do not block any ventilation openings.
- Do not operate this device near heat sources such as radiators or stoves.
- When connecting the KODAK SLIDE N SCAN Digital Scanner directly to your computer, be careful to not over load the USB connections. If you have too many devices connected to your computer, such as a wireless mouse, media player, mobile phone or other USB powered devices, there may not be enough power for the product to function properly.
- Do not move or disconnect the device from the computer while the device is reading/writing data. This may cause damage to the data and/or the device.
- The proper adapter tray must be inserted into the slide holder, and then inserted into the product before attempting to insert film. Failure to do so may result in losing media inside the unit and will void the warranty. Resultant media loss is NOT covered under warranty.
- Always turn off and unplug the device when it is not in use. Unplug the USB cable from your computer and unplug the AC adapter from the socket.
![]()
Small parts. This product contains small parts and is not suitable for children under 3 years old.- Remove all packaging before using this device. Please keep all packaging materials out of reach of children and pets.
- Properly dispose of all packing materials immediately after unpacking product, as the bags used for packaging could present a suffocation or choking hazard.


This device is not intended for nor capable of developing film. Film must have previously been developed in order to produce negatives that can be digitized. Any images of film and/or film types are only to illustrate the various categories of film that can be digitized and scanned using this device.
DO NOT ATTEMPT TO DEVELOP FILM USING THIS DEVICE.
The device is not intended for any other purpose, nor for use beyond the scope described. No claims of any kind will be accepted for damage arising as a result of incorrect use. The risk is borne solely by the user.
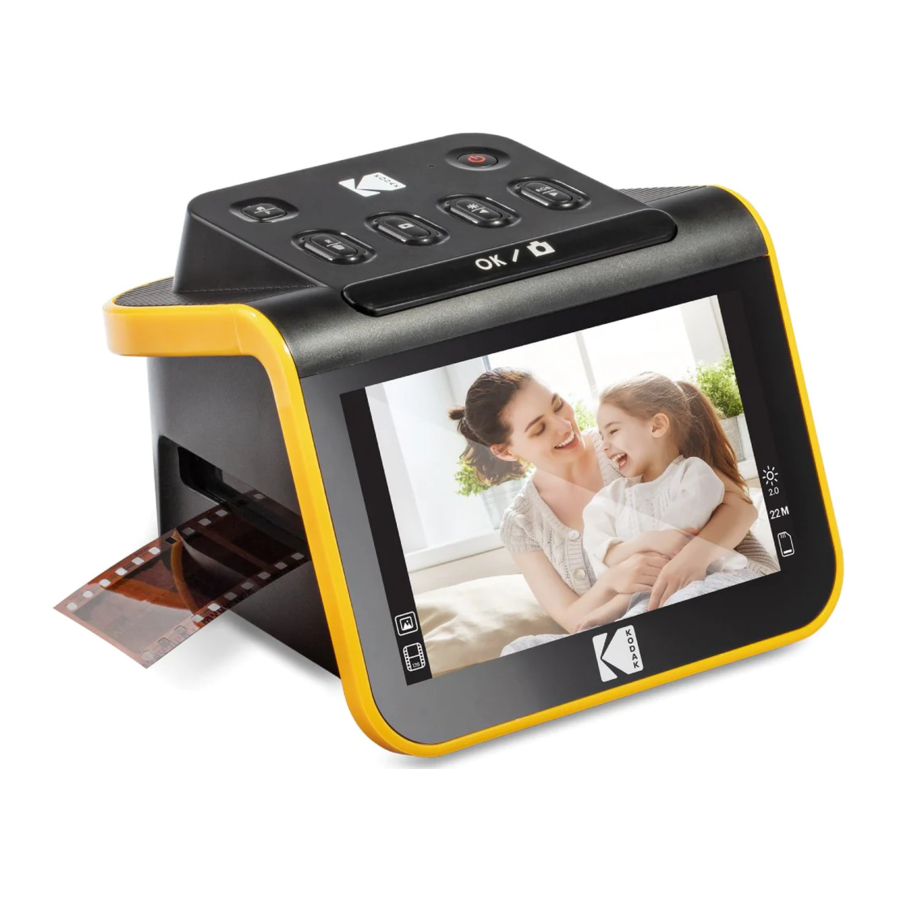
GET TO KNOW YOUR SCANNER

HOW TO USE YOUR SCANNER
GETTING STARTED

- Insert the SD card into the SD Card Slot at the back of the scanner. Make sure the label on the card is face-up. The card will lock into place automatically. If this does not happen, make sure it is inserted correctly.
- Please note: The scanner only accepts SD and SDHC cards (maximum 32 GB). SDXC cards are not compatible. If the SD card you use is not compatible with the scanner, you will need to format it, using your computer. Formatting will delete all pictures stored on the SD card. If you do not want to delete pictures, please either download them to your computer or use a fresh card.
- Power the scanner by connecting the Type-C USB cable to the port on your scanner, and then connecting the other end to either the Power Adapter or the USB port of your computer.
- Press the Power Button to turn on your scanner. The Home Page will pop up on the LCD screen.
YOUR HOME PAGE AND MAIN MENU
Please note: at any time, you can return to your Home Page by pressing the Home/ Preview  button.
The Home Page is your start page for all operations with your scanner.

- When unit is powered on, the Home Page will load automatically.
- To return to the Home Page at any time, press the Home/Preview
![]() button.
button. - If you are in Preview Mode, you can access Gallery Mode by pressing the Playback
![]() button.
button.
To enter Preview mode, go to the Home Page, and press the Home/Preview button.
![]() Film Settings: Press the OK/Scan (
Film Settings: Press the OK/Scan ( ) button to select this icon to set the size and type of film you are scanning.
![]() USB Upload: Use the Arrow buttons to scroll to this icon, then press the OK/Scan button to select this option to upload files from your SD card to your computer. While in USB Upload Mode, you will be unable to scan photos or activate any of the scanner's other features. To exit USB Upload Mode and disconnect from your computer, press the Home/Preview button.
USB Upload: Use the Arrow buttons to scroll to this icon, then press the OK/Scan button to select this option to upload files from your SD card to your computer. While in USB Upload Mode, you will be unable to scan photos or activate any of the scanner's other features. To exit USB Upload Mode and disconnect from your computer, press the Home/Preview button.
![]() Photo Gallery: Use the Arrow buttons to scroll to this icon, then press the OK/ Scan (
Photo Gallery: Use the Arrow buttons to scroll to this icon, then press the OK/ Scan ( ) button to select this option to review scanned images from your SD card on your scanner's LCD Screen.
![]() Date and Time Settings: Use the Arrow buttons to scroll to this icon, then press the OK/Scan button to select this option. It allows you to manually label the image with your desired date: this could be the date the photo was taken or scanned. The Date and Time will not be printed on the scanned image, but it will be stored in the image's electronic file. This setting is not a running calendar or clock.
Date and Time Settings: Use the Arrow buttons to scroll to this icon, then press the OK/Scan button to select this option. It allows you to manually label the image with your desired date: this could be the date the photo was taken or scanned. The Date and Time will not be printed on the scanned image, but it will be stored in the image's electronic file. This setting is not a running calendar or clock.
USING YOUR SCANNER
Loading Your Film
Note: your scanner supports transparent slides, color negatives, and black and white negatives for film sizes 135, 110, and 126.
For all scans:
- The 50 x 50 mm Hinged Slide Holder is used for all formats. Use it alone for slide sizes 135, 110, and 126, or with one of the three special adapters for 135, 126, or 110 film. The film size printed on the adapter should be visible. Make sure the 4 pins of your adapter are aligned and fully inserted into the 4 holes of the Slide Holder. It should lie flat.
- Close the Slide Holder until it clicks shut. If it doesn't close properly, do not force. Reposition the adapter and try again.


To scan transparent slides:
- Insert the 50 x 50 mm Hinged Slide Holder into the Film/Slide Holder Slot, using the triangular arrow marks on the holder and the scanner for reference until it stops.
- Insert slides one at a time into the opening in the slide holder. The slides will push each other through. You can center the slide by manually adjusting it to the left or right.

- With the slide centered in place, make color and brightness adjustments as necessary.
- When the image is in place on the LCD screen, you can press the OK/Scan button to scan.
- The image will then automatically be saved on the SD card.

To scan 135, 110, and 126 negatives:
- Open the 50 x 50 mm Hinged Slide Holder, and insert the appropriate Film Adapter for the size of your negatives.
- Make sure the 4 pins of your adapter are aligned and fully inserted into the 4 holes of the Slide Holder. It should lie flat.
- Close the Slide Holder until it clicks shut. If it doesn't close properly, do not force. Reposition the adapter and try again.
- Insert the 135 Film Adapter into the Film/Slide Holder Slot, using the triangular arrow marks on the holder and the scanner for reference.
- Insert film one at a time into the opening in the film adapter. The negatives will push each other through. You can center the image by manually adjusting it to the left or right.

- When the image is in place on the LCD screen, you can press the OK/Scan button to scan.
- The image will then automatically be saved on the SD card.

Note: Make sure the side of the negative upon which the words are printed is oriented at the top.
CHOOSING FILM SETTINGS
- Select the Film Settings
![]() icon from the Main Menu and press OK/Scan to confirm.
icon from the Main Menu and press OK/Scan to confirm.

- Use the Arrow buttons to choose your desired type of film from the submenu (Slides, Color Negatives, or Black and White Negatives). Press OK/Scan to select.
- Once you have selected the film type, a submenu for film size will appear on the screen. Use the Arrow buttons to choose your desired size, and press OK/Scan to select.

- Now you will need to load the film into the proper converter tray for your desired type of film.
- A preview screen will pop up, and the scanner is ready for you to insert film.
- You will then be able to view the film on the LCD screen, convert your photos into digital images, and store them on the SD card.


PREVIEW MODE
No matter which menu you are in, you can return to Preview mode by double tapping the Home/Preview ![]() button.
button.
ADJUSTING IMAGE BRIGHTNESS AND COLOR
- Brightness and color are preset automatically, so additional adjustment is normally not needed.
- Brightness and color adjustments can only be made in Preview Mode.
To adjust brightness:
- Press the Brightness/Backward
![]() button.
button. - The brightness scale will be displayed on the LCD screen.
- Use the arrow buttons to adjust.
- Press OK/Scan to select your desired brightness.

 button.
To adjust color:
- Press the RGB/Forward
![]() button.
button. - Use the Arrow buttons to navigate the submenu for adjusting Reds, Greens, or Blues. Press OK/Scan to confirm your selection.
- The color scale will be displayed on the LCD screen.

- Use the arrow buttons to adjust.
- Press OK/Scan to select your desired color levels.
- The Return option will reset the image back to the original color balance.

 button.

CHOOSING IMAGE RESOLUTION
- There are two options that you can choose from for the resolution of images that you wish to save to your SD card: 14 megapixels or 22 megapixels.
![]()
- While your scanner is in Preview Mode, you can choose the resolution by pressing the Resolution/Delete
![]() button. Your choice will be displayed in the lower right side of the LCD screen.
button. Your choice will be displayed in the lower right side of the LCD screen.
![]()


GALLERY MODE
This mode can be a good way to use your scanner as an electronic desktop photo frame.
- With the scanner in Preview Mode, press the Playback
![]() button.
button. - Use the Arrow buttons to scroll through your stored images.
- Select your desired image and press the OK/Scan button.
- Once an image is selected, you will see this icon
![]() in the upper left corner of the screen.
in the upper left corner of the screen. - Press the Playback
![]() button again to begin the Gallery slideshow.
button again to begin the Gallery slideshow. - The icon in the upper left corner of the screen will change to
![]() and the slideshow will begin automatically in a few seconds.
and the slideshow will begin automatically in a few seconds. - To stop Slide Show Mode, press the OK/Scan button. You will return to the Home Screen.
Playback Mode can also be accessed directly from the Home Page by selecting the Photo Gallery option.
- From the Home Page, select use the Arrow buttons to select the Photo Gallery Icon
![]() and press OK/Scan to confirm.
and press OK/Scan to confirm. - Use the Arrow buttons to scroll through your stored images.
- Select your desired image and press the OK/Scan button.
- Once an image is selected, you will see this icon
![]() in the upper left corner of the screen.
in the upper left corner of the screen. - Press the Playback
![]() button again to begin the Gallery slideshow.
button again to begin the Gallery slideshow. - The icon in the upper left corner of the screen will change to
![]() and the slideshow will begin automatically in a few seconds.
and the slideshow will begin automatically in a few seconds. - To stop Slide Show Mode, press the OK/Scan button. You will return to the Home Screen.
You can also display the Slide Show on your television.
Please follow the steps in "VIEWING IMAGES ON A TV SCREEN", and then follow the steps to engage the Slide Show feature.
Note: you will only be able to play back images that have been created with your scanner. Images from other devices, such as mobile phones, will not be accessible due to different file names and formats.
DELETING AN IMAGE
Note: Please back up images from your SD card to another device before beginning this process. Once an item is deleted, it cannot be retrieved unless you have stored it on another device.
- In Playback Mode, use the arrow keys to select the picture you want to delete.
- Press the Resolution/Delete
![]() button only one time to delete the single selected image.
button only one time to delete the single selected image. - To cancel deletion, select No when prompted.
 button only one time to delete the single selected image.
Press the Resolution/Delete button two times to delete all captured images. This will permanently delete all images on your SD card.

VIEWING IMAGES ON A TV SCREEN
- Use the HDMI cable to connect your scanner to your TV's HDMI port.
- Make sure your TV is set to the HDMI input setting. You may need to refer to your TV's manual for this.
- Please note that all menus and images will only show on your TV screen from this point forward. The scanner's screen will not display them.
- To preview an image, press your scanner's Home/Preview
![]() button.
button. - With the scanner in Preview Mode, press the Playback
![]() button.
button. - Use the Arrow buttons to scroll through your stored images.
- Select your desired image and press the OK/Scan button.
- Once an image is selected, you will see this icon
![]() in the upper left corner of the screen.
in the upper left corner of the screen. - Press the Playback
![]() button again to begin the Gallery slideshow.
button again to begin the Gallery slideshow. - The icon in the upper left corner of the screen will change to
![]() and the slideshow will begin automatically in a few seconds.
and the slideshow will begin automatically in a few seconds. - To stop Slide Show Mode, press the OK/Scan button. You will return to the Home Screen.
- You may also be able to review your images at up to a 4K/2K image quality by connecting your scanner to your TV via the USB setting, depending on the maximum resolution of your TV.
 button.
 button.
Note: when 22 megapixel scanning is selected, the preview resolution on the TV screen will reduce to 480P due to the transfer rate. The resolution of the scanned images save in the SD card will remain at 22 megapixels with no reduction.
UPLOADING IMAGES TO YOUR COMPUTER
- Use the Type-C USB Cable to connect the scanner to your computer's USB port.
- Make sure your scanner and computer are both powered on.
- From the scanner's Home Page, select the USB Upload
![]() Icon
Icon - Press OK/Scan to complete the connection.
- Find the Removable Disk on your computer (usually E: or F:).
- Follow the prompts on your computer to upload the image files.
Note: if you are unable to connect, check to see that the SD Card is loaded properly in its slot and try connecting the USB cable to a different USB port on your computer. If this is the first time you are connecting, it may take your computer a few moments to find the correct drive.
FORMATTING YOUR SD CARD

Formatting your SD Card will delete all files on that card. Please save files you wish to keep to your computer before formatting.
If the SD Card you use is not compatible, you will need to format it using your computer.
- Use the Type-C USB Cable to connect the scanner to your computer's USB port.
- Make sure your scanner and computer are both powered on.
- From the scanner's Home Page, select the USB Upload
![]() Icon
Icon - Press OK/Scan to complete the connection.
- Find the Removable Disk on your computer (usually E: or F:) and right click on it.
- Select "Format."
SETTING THE DATE AND TIME
Setting the Date and Time allows you to manually label the image with the date the photo was taken or scanned. This setting is not a running calendar or clock.
You can set the Date and Time of an image before scanning it. The Date and Time will not be printed on the scanned image, but it will be stored in the image's electronic file.
To set the Date and Time:
- Go to the scanner's Home Page, and use the Arrow buttons select the Date and Time
![]() Icon. Press OK/Scan to confirm.
Icon. Press OK/Scan to confirm. - You will see a Date and Time adjustment table.

- Press the Playback button to select your desired item

- Use the arrow keys to adjust the number you are setting.
- Press OK/Scan to confirm your selection and return to the Home Page.
TIPS FOR BEST IMAGE QUALITY
- Before loading film into the scanner, use the cleaning wand and gently insert it into the film slot to clean off the lens and backlight panel.
- Ensure that your negatives, slides, and cover trays are clean before use.
- Dust or dirt can affect the quality of your scanned images.
ICONS AND THEIR FUNCTIONS
 Scanning film
 Connect SD Card to Computer
 Reviewing scanned photos from the SD card
 Setting date and time
 For transparent film and 50 x 50mm slides
 For color negative film
 For black and white film
 For 135 film, 24X36mm picture size film
 For 110 film, 13X17mm picture size film
 For 126 film, 28X28mm picture size film
 Selected film type shown in preview: Transparent film
 Selected film type shown in preview: Color negative film
 Selected film type shown in preview: B&W negative film
 Selected film size shown in preview: 135 film
 Selected film size shown in preview: 110 film
 Selected film size shown in preview: 126 film
 Brightness setting: -2EV to +2EV
 Resolution setting: 14M or 22M
 Capacity of card: Full=3GB+, 3/4=2GB, 2/4=1GB, 1/4=0.5GB
 SD card malfunction: Not loaded, not locked, or not compatible
 Reviewing picture from card: single picture
 Reviewing pictures from card: Slide show
 Brightness(EV) adjustment scale
 RGB color adjustment scale
 RGB color adjustment return to default settings
 RGB color selection and reset
 Select deletion of single image
 Select deletion of all scanned images
 Indicates SD card and computer successfully connected
 Indicates computer connection failure
 Wait for scanned image to be stored into the SD card

Documents / ResourcesDownload manual
Here you can download full pdf version of manual, it may contain additional safety instructions, warranty information, FCC rules, etc.
Advertisement


Need help?
Do you have a question about the SLIDE N SCAN and is the answer not in the manual?
Questions and answers