Advertisement
Quick Links
Please give us a chance to make it right and do better !
Contact our friendly customer service department for help first.
Replacements for missing or damaged parts will be shipped ASAP !
US office: Fontana
UK office: Ipswich
Contact Us !
Do NOT return this item.
AU office: Truganina
US:cs.us@costway.com
UK:cs.uk@costway.com
AU:cs.au@costway.com
BAMBOO BUILD & RUN
THIS INSTRUCTION BOOKLET CONTAINS IMPORTANT SAFETY INFORMATION. PLEASE READ AND KEEP FOR FUTURE REFERENCE.
USER'S MANUAL
TM10010
Advertisement

Related Manuals for Costway BAMBOO BUILD & RUN


Summary of Contents for Costway BAMBOO BUILD & RUN
- Page 1 US office: Fontana UK office: Ipswich AU office: Truganina USER’S MANUAL Contact Us ! BAMBOO BUILD & RUN TM10010 Do NOT return this item. US:cs.us@costway.com UK:cs.uk@costway.com AU:cs.au@costway.com THIS INSTRUCTION BOOKLET CONTAINS IMPORTANT SAFETY INFORMATION. PLEASE READ AND KEEP FOR FUTURE REFERENCE.
-
Page 2: Before You Start
The New Bamboo Build Run aims to expand little ones possibilities by helping them develop foundation STEM (Science, Technology, Engineering and Mathematics) skills as they build different Before You Start configurations. Multiple ways of designs encourage early engineering skills and three-dimensional thinking and build creative capacity. - Page 3 ● PARTS ● FUNCTION...
-
Page 5: Installation Step
● INSTALLATION STEP Insert B1, D1, F2 into the corresponding positions as shown in the figure. Insert A2, C1, F1, F3 into the corresponding positions as shown in the figure. - Page 6 Insert B1, B2, E1, E3 into the corresponding positions as Insert B1, B2, E1 into the corresponding positions as shown shown in the figure. in the figure. Insert A2, C1, F1, F3 into the corresponding positions as Insert A2, F1, F3 into the corresponding positions as shown shown in the figure.
- Page 7 Insert B1, E1, E3 into the corresponding positions as shown Insert B1, B2, E2, E3 into the corresponding positions as in the figure. shown in the figure. Insert A1 and F1 into the corresponding positions as shown Insert B1, C1,F1 into the corresponding positions as shown in in the figure.
- Page 8 Insert F1 and G1 into the corresponding positions as shown Insert A1, B1, E1, F1 into the corresponding positions as in the figure. shown in the figure.
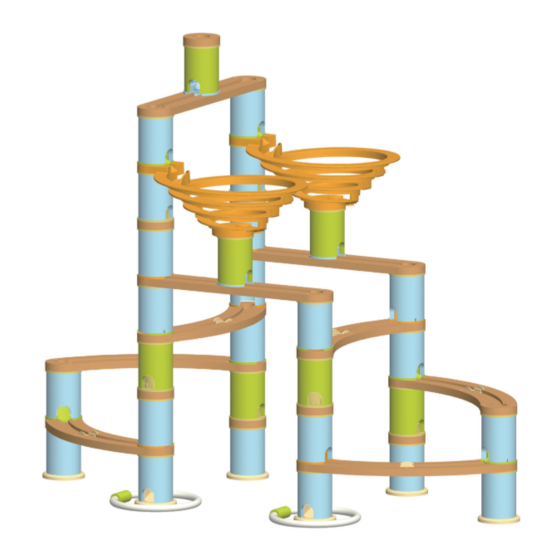
- Page 9 Insert B2, C1, E2, F1 into the corresponding positions as shown in the figure, and the assembly is completed. Endless possibilities for different confiqurations according to the kids imagination.
Need help?
Do you have a question about the BAMBOO BUILD & RUN and is the answer not in the manual?
Questions and answers