Table of Contents
Advertisement
Quick Links
Advertisement
Table of Contents

Related Manuals for Signature Kitchen Suite UPFXC2466 Series


Summary of Contents for Signature Kitchen Suite UPFXC2466 Series
- Page 1 OWNER’S MANUAL FRENCH DOOR REFRIGERATOR Please read this owner's manual thoroughly before operating and keep it handy for reference at all times. UPFXC2466* www.signaturekitchensuite.com MFL68507671_Rev.06 Copyright © 2015 - 2017 Signature Kitchen Suite. All Rights Reserved.
-
Page 2: Table Of Contents
Adjusting the Refrigerator Shelves Assembling the Left Refrigerator Door Removing the Freezer Drawers Assembling the Freezer Drawers SMART FUNTIONS Connecting the Water Line SIGNATURE KITCHEN SUITE Application Before You Begin Smart Grid Function Water Pressure Smart Diagnosis™ Function What You Will Need... -
Page 3: Product Features
PRODUCT FEATURES PRODUCT FEATURES * Depending on the model, some of the following functions may not be available. FILTERED WATER AND ICE DISPENSER The water dispenser dispenses fresh, chilled water. The ice dispenser dispenses cubed and crushed ice. DOOR ALARM The Door Alarm function is designed to prevent the refrigerator from malfunctioning if a refrigerator door or freezer drawer remains open. -
Page 4: Important Safety Instructions
IMPORTANT SAFETY INSTRUCTIONS IMPORTANT SAFETY INSTRUCTIONS READ ALL INSTRUCTIONS BEFORE USING THE APPLIANCE. This guide contains many important safety messages. Always read and obey all safety messages. This is the safety alert symbol. It alerts you to safety messages that inform you of hazards that can kill or hurt you or others, or cause damage to the product. - Page 5 IMPORTANT SAFETY INSTRUCTIONS READ ALL INSTRUCTIONS BEFORE USING THE APPLIANCE. To reduce the risk of fire, electric shock, or personal injury when using your product, basic safety precautions should be followed, including the following: This product is not to be used for special In refrigerators with automatic icemakers, avoid purposes such as the storage of medicine or contact with the moving parts of the ejector...
- Page 6 IMPORTANT SAFETY INSTRUCTIONS READ ALL INSTRUCTIONS BEFORE USING THE APPLIANCE. To reduce the risk of fire, electric shock, or personal injury when using your product, basic safety precautions should be followed, including the following: CAUTION Maintenance Installation Do not use strong detergents like wax or The refrigerator must be properly installed thinners for cleaning.
-
Page 7: Product Overview
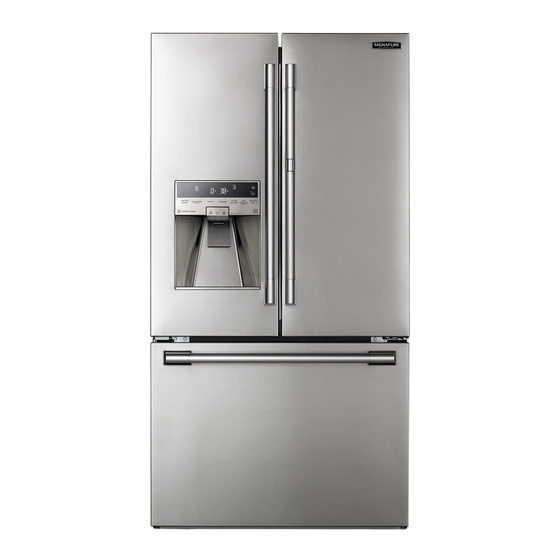
PRODUCT OVERVIEW PRODUCT OVERVIEW Use this page to become more familiar with the parts and features of your refrigerator. *The appearance and specifications of the actual product may differ depending on the model. Refrigerator Exterior Filtered Water and Handle Opens and closes Ice Dispenser the door. -
Page 8: Refrigerator Interior
PRODUCT OVERVIEW Refrigerator Interior LED interior lamps Adjustable Refrigerator Shelf The interior lamps light up the The shelves in the refrigerator are adjustable to meet individual storage inside of the refrigerator. needs. Water filter Purifies water. Door-in-Door Case A convenient storage area for NOTE frequently-used items that require Replace the water filter every 6 months, or... -
Page 9: Installation
INSTALLATION INSTALLATION Installation Overview Read the following installation instructions first after purchasing this product or transporting it to another location. 1 Unpacking your 2 Choosing the proper 3 Disassembling/Assembling refrigerator location NOTE Connect to potable water supply only. 4 Connecting the water 5 Leveling and Door supply and water line Alignment... -
Page 10: Unpacking The Refrigerator
INSTALLATION Remove tape and any temporary labels from Unpacking the Refrigerator your refrigerator before using. Do not remove any warning labels, the model WARNING and serial number label, or the Tech Sheet that is located under the front of the refrigerator. Use two or more people to move and install the refrigerator. -
Page 11: Measuring Clearances
INSTALLATION Measuring Clearances Removing/Assembling the Refrigerator Door Handles Check the dimensions of the product and the installation path to ensure there is sufficient room to move the refrigerator through doors NOTE or narrow openings. When it is necessary to move the If an opening is too narrow to fit the refrigerator through a narrow opening, refrigerator through, remove the refrigerator... -
Page 12: Removing/Assembling The Freezer Drawer Handle
INSTALLATION Removing/Assembling the Removing/Assembling the Freezer Drawer Handle Doors and Drawers Removing the Handles When it is necessary to move the refrigerator through a narrow opening, removing the doors is the recommended procedure. Loosen the set screws located on the lower side of the handle with a in. -
Page 13: Removing The Left Refrigerator Door
INSTALLATION Rotate the hinge lever counterclockwise Removing the Left Refrigerator Door . Lift the top hinge free of the hinge lever latch. The water supply is connected to the upper right part of the rear surface of the refrigerator. Remove the ring in the joint area. -
Page 14: Removing The Right Refrigerator Door
INSTALLATION Removing the Right Refrigerator Rotate the hinge lever clockwise. Door Lift the top hinge free of the hinge lever latch. Remove the top hinge cover screw Lift the hook (not visible), located at the bottom of the front side of the cover with a flat-head screwdriver. -
Page 15: Assembling The Right Refrigerator Door
INSTALLATION Assembling the Right Refrigerator Door Install the right-side door first. Connect the wire harness Make sure that the plastic sleeve is inserted in the bottom of the door. Lower the door onto the middle hinge pin as shown in the figure. Make sure that the door-switch located inside the cover is tightly connected. -
Page 16: Assembling The Left Refrigerator Door
INSTALLATION Push the water supply tube into the hole Assembling the Left Refrigerator on the top case and pull it through the Door backplate. Install the left refrigerator door after the right door is installed. Make sure that the plastic sleeve is inserted in the bottom of the door. -
Page 17: Removing The Freezer Drawers
INSTALLATION Removing the Freezer Drawers NOTE In the following figures, the Pullout Drawers Collet located above the freezer drawer are not shown for clarity. Tube CAUTION Insert Line Use two or more people to remove and Clip install the freezer drawer. Failure to do so can result in back injury or other injury. - Page 18 INSTALLATION Open the freezer drawer. Open the lower Remove the Durabase basket from the rail assembly. Remove the screws from the rails pullout drawer, lift the front of the drawer, at both ends of the freezer drawer. and then pull the drawer out. Grip both sides of the drawer and pull it up to remove it from the rails.
-
Page 19: Assembling The Freezer Drawers
INSTALLATION Assembling the Freezer Drawers Insert the upper pullout drawer into the frame, and push the drawer back into place Pull out both rails simultaneously, until both until you hear a click. rails are fully extended. Grasp the freezer drawer on each side and hook the drawer supports into the rail tabs Place the ice bin back in the upper pullout located on both sides. -
Page 20: Connecting The Water Line
INSTALLATION Connecting the Water Line Before You Begin CAUTION This water line installation is not covered by the Wear eye protection during installation refrigerator warranty. Follow these instructions to prevent injury. carefully to minimize the risk of expensive water damage. If the water pressure from the reverse osmosis system is less than 20 psi or 138 kPa or 1.4 kgf/ Water hammer (water banging in the pipes) in... -
Page 21: Water Line Installation Instructions
INSTALLATION If your existing copper water line has Water Line Installation Instructions a flared fitting at the end, purchase an adapter (available at plumbing supply WARNING stores) to connect the water line to When using any electrical device the refrigerator OR cut off the flared (such as a power drill) during fitting with a tube installation, be sure the device is... - Page 22 INSTALLATION FASTEN THE SHUTOFF VALVE CONNECT THE TUBING TO THE VALVE Fasten the shutoff valve to the cold water Place the compression nut and ferrule (sleeve) pipe with the pipe clamp. for copper tubing onto the end of the tubing and connect it to the shutoff valve.
-
Page 23: Turning On The Power
INSTALLATION Turning On the Power TURN THE WATER ON AT THE SHUTOFF VALVE Tighten any connections that leak. Plug in the refrigerator. CAUTION CAUTION Check to see if leaks occur at the water Connect to a rated power outlet. line connections. Have a certified electrician check the wall outlet and wiring for proper grounding. -
Page 24: Leveling And Door Alignment
INSTALLATION Leveling and Door Alignment Door Alignment Leveling The left refrigerator door has an adjustable nut, After installing, plug the refrigerator’s power located on the bottom hinge, to raise and lower cord into a 3-prong grounded outlet and push the door for proper alignment. the refrigerator into the final position. -
Page 25: Operation
OPERATION OPERATION Before use Clean the refrigerator. Clean your refrigerator thoroughly and wipe off all dust that accumulated during shipping. CAUTION Do not scratch the refrigerator with a sharp object or use a detergent that contains alcohol, a flammable liquid or an abrasive when removing any tape or adhesive from the refrigerator,. -
Page 26: Control Panel
OPERATION Control Panel Depending on the model, some of the following functions may not be available. The actual control panel may differ from model to model. Control Panel Features LED Display Indicator Dispenser Selection Indicator & Button Control Button Displays whether the dispenser is set to dispense water, cubed or crushed ice. - Page 27 OPERATION ( On some Change Filter Door Alarm models) Replace the air filter when the Replace Filter When power is connected to the refrigerator, indicator appears in the display. After replacing the door alarm is initially set to ON. Press the the air filter, press and hold the Fresh Air Filter Door Alarm button to change the display to button for three seconds to turn the indicator light...
- Page 28 OPERATION Control Panel Features (continued) Power Saving Mode Wi-Fi The Wi-Fi button, when used with the Signature When the refrigerator is in the Power Saving Kitchen Suite Smart Refrigerator smart phone Mode, the display will remain off until a door app, allows the refrigerator to connect to your is opened or a button is pressed.
-
Page 29: In-Door Ice Bin
OPERATION In-Door Ice Bin Depending on the model, some of the To remove the in-door ice bin, grip the following functions may not be available. front handle, slightly lift the lower part, and slowly pull out the bin as shown. CAUTION Keep hands and tools out of the ice compartment door and dispenser chute. -
Page 30: Automatic Icemaker
OPERATION Automatic Icemaker WARNING Personal Injury Hazard Depending on the model, some of the DO NOT place fingers or hands on the following functions may not be available. automatic ice making mechanism while the refrigerator is plugged in. Ice is made in the automatic icemaker and sent to the dispenser. -
Page 31: When To Turn The Icemaker Off
OPERATION When to Turn the Icemaker Off CAUTION When the water supply will be shut off The first ice and water dispensed may for several hours. include particles or odor from the water supply line or the water tank. When the ice bin is removed for more than one or two minutes. -
Page 32: Operating The Dispenser
OPERATION Operating the Dispenser Dispensing Crushed Ice Press the dispenser selection button repeatedly until the crushed ice icon illuminates. Press the dispenser switch with a glass or other container to dispense crushed ice. CAUTION Dispensing Cubed Ice Hold the container as close to the ice or Press the dispenser selection button repeatedly water chute as possible to avoid spilling and until the cubed ice icon illuminates. -
Page 33: Ice And Water Dispenser
OPERATION Ice and Water Dispenser Incorrect Way Correct Way Depending on the model, some of the following functions may not be available. Water CAUTION Keep children away from the dispenser. Children may play with or damage the controls. Dispenser CAUTION Throw away the first few batches of ice (about 24 cubes). -
Page 34: Storing Food
OPERATION Storing Food Food Preservation Location Each compartment inside the refrigerator is designed to store different types of food. Store your food in the optimal space to enjoy the freshest taste. Adjustable refrigerator shelf Vegetable storage Adjustable shelves to meet (Crisper) your individual storage needs. -
Page 35: Food Storage Tips
OPERATION Storing Frozen Food Food Storage Tips The following tips may not be applicable NOTE depending on the model. Check a freezer guide or a reliable cookbook for further information about preparing food Wrap or store food in the refrigerator in airtight for freezing or food storage times. -
Page 36: Humidity Controlled Crisper And Glide'n'serve
OPERATION Storing Frozen Food (continued) Humidity Controlled Crisper and Glide’N’Serve Packaging Successful freezing depends on correct Humidity Controlled Crisper packaging. When you close and seal the package, it must not allow air or moisture in or Depending on the model, some of the out. -
Page 37: Detaching And Assembling The Storage Bins
OPERATION Detaching and Assembling the To Remove the Glass (Pantry drawer not shown for clarity) Storage Bins Lift up the glass under the crisper cover, and Glide‘N’Serve and Humidity pull up and out. Controlled Crisper To remove the Humidity Controlled Crisper and the Glide’N’Serve, pull out the Crisper Glide’N’Serve to full extension, lift the front... -
Page 38: Door-In-Door
OPERATION Door-in-Door Door-in-Door Case To open the Door-in-Door case, slightly push The Door-in-Door compartment allows for easy the marked area to pop it open. The Door-in- access to commonly used food items. Door Case is removable for easy cleaning and adjustment. - Page 39 OPERATION Door-in-Door Door Bins Door-in-Door Lower Shelf The Door-in-Door inner and outer door bins are The Door-in-Door lower shelf is removable for removable for easy cleaning. easy cleaning. To remove the door bins, lift up and pull out. To remove the lower shelf, lift the shelf retainer up and out.
-
Page 40: Adjusting The Refrigerator Shelves
OPERATION Adjusting the Refrigerator Using the Folding Shelf Shelves You can store taller items, such as a gallon container or bottles, by simply pushing the The shelves in your refrigerator are adjustable front half of the shelf underneath the back half to meet your individual storage needs. -
Page 41: Smart Funtions
Purchase a Wi-Fi repeater SUITE Application (range extender) to improve the Wi-Fi signal strength. Search for the SIGNATURE KITCHEN SUITE The Wi-Fi connection may not connect or application from the Google Play Store or Apple may be interrupted because of the home App Store on a smart phone. - Page 42 SMART FUNTIONS FCC RF Radiation Exposure Statement FCC Notice This equipment complies with FCC radiation For transmitter module contained in this exposure limits set forth for an uncontrolled product environment. This transmitter must not be co- This equipment has been tested and found to located or operating in conjunction with any other comply with the limits for a Class B digital device, antenna or transmitter.
-
Page 43: Smart Grid Function
Grid LED on the refrigerator Signature Kitchen Suite will also provide open display and control its power consumption source code to you on CD-ROM for a charge according to the signal. - Page 44 SMART FUNTIONS Temporary Appliance Load Reduction (TALR) Signature Kitchen Suite Open API The refrigerator responds to a TALR signal by You can manage Smart Grid features for the aggressively reducing the load for a short time SIGNATURE KITCHEN SUITE. period, typically 10 minutes. This mode reduces...
-
Page 45: Smart Diagnosis™ Function
SIGNATURE KITCHEN SUITE application for help when instructed to do so by the call center. diagnosing issues with the appliance without the assistance of the Signature Kitchen Suite Customer Information Center. Follow the instructions in the SIGNATURE KITCHEN SUITE application to perform a Smart... -
Page 46: Maintenance
MAINTENANCE MAINTENANCE Cleaning Both the refrigerator and freezer sections defrost automatically; however, clean both sections about once a month to prevent odors. Wipe up spills immediately. Always unplug the refrigerator before cleaning. General Cleaning Tips Inside Walls (allow freezer to warm up so the cloth will not stick) Unplug refrigerator or disconnect power. -
Page 47: Replacing The Fresh Air Filter
MAINTENANCE Replacing the Fresh Air Filter Replacing the Water Filter Replace the water filter: Replace the air filter: Approximately every six months. Approximately every six months. When the water filter indicator appears in the display. When the REPLACE FILTER indicator When the water dispenser output appears in the display. - Page 48 MAINTENANCE Remove the old water filter. After the water filter is replaced, dispense 2.5 gallons of water (flush for Lower or remove approximately 5 minutes) to remove the top left shelf to trapped air and contaminants from the allow the water filter system.
- Page 49 MAINTENANCE Performance Data Sheet Model: ADQ36006101-S Use Replacement Cartridge: ADQ36006101 The concentration of the indicated substances in water entering the system was reduced to a concentration less than or equal to the permissible limit for water leaving the system as specified in NSF/ANSI Standard 42 and Standard 53.
- Page 50 Do not use with water that is microbiologically unsafe or of unknown Manufactured for Signature Kitchen Suite by quality without adequate disinfection before CUNO Incorporated 400 Research Parkway or after the system. Systems certified for Meriden, CT 06450 U.S.A Worldwide: 203-237-...
- Page 51 MAINTENANCE...
-
Page 52: Troubleshooting
TROUBLESHOOTING TROUBLESHOOTING Review the Troubleshooting section before calling for service; doing so will save you both time and money. Problem Possible Causes Solutions Refrigerator and The refrigerator control is set to Turn the control ON. Refer to the Control Panel Freezer section OFF (some models). - Page 53 TROUBLESHOOTING Problem Possible Causes Solutions Refrigerator or Refrigerator was recently It may take up to 24 hours for each compartment Freezer section is installed. to reach the desired temperature. too warm. Air vents are blocked. Rearrange items to allow air to flow throughout the compartment.
- Page 54 TROUBLESHOOTING Problem Possible Causes Solutions Interior moisture Doors are opened often or for When the doors are opened often or for long buildup. long periods of time. periods of time, warm, humid air enters the compartment. This raises the temperature and moisture level within the compartment.
- Page 55 TROUBLESHOOTING Problem Possible Causes Solutions Frost or ice Condensation from food with a This is normal for food items with a high water crystals on frozen high water content has frozen content. food (inside of inside of the food package. sealed package).
- Page 56 TROUBLESHOOTING Problem Possible Causes Solutions Icemaker is not Doors are opened often or for If the doors of the unit are opened often, ambient making enough long periods of time. air will warm the refrigerator which will prevent ice (continued). the unit from maintaining the set temperature.
- Page 57 TROUBLESHOOTING Problem Possible Causes Solutions Not dispensing Unable to hear the sound of ice In the control panel, select the modes for cubed ice. coming out? ice and crushed ice alternately to dispense the ice. Doors are not closed Ice will not dispense if any of the refrigerator completely.
- Page 58 TROUBLESHOOTING Problem Possible Causes Solutions Not dispensing New installation or water line Dispense 2.5 gallons of water (flush for water. recently connected. approximately 5 minutes) to remove trapped air and contaminants from the system. Do not dispense the entire 2.5 gallon amount continuously.
- Page 59 TROUBLESHOOTING Problem Possible Causes Solutions Ice has bad taste Water supply contains minerals A water filter may need to be installed to or odor. such as sulfur. eliminate taste and odor problems. NOTE: In some cases, a filter may not help. It may not be possible to remove all minerals / odor / taste in all water supplies.
- Page 60 TROUBLESHOOTING Problem Possible Causes Solutions Icemaker is Icemaker shutoff (feeler arm) Empty the ice bin. If your icemaker is equipped making too much obstructed. with an ice shutoff arm, maker sure that the arm ice. moves freely. Reinstall the ice bin and wait 24 hours to confirm proper operation.
- Page 61 TROUBLESHOOTING Problem Possible Causes Solutions Pulsating or Your refrigerator is designed Normal Operation High-Pitched to run more efficiently to keep Sound your food items at the desired temperature. The high efficiency compressor may cause your new refrigerator to run longer than your old one, but it is still more energy efficient than previous models.
-
Page 62: Limited Warranty
SIGNATURE KITCHEN SUITE will, at its option, repair or replace the Product. This limited warranty is valid only to the original retail purchaser of the Product and applies only when purchased and used within the United States including U.S. - Page 63 Damage or failure to the Product caused by accidents, pests and vermin, lightning, wind, fire, floods, acts of God, or any other causes beyond the control of SIGNATURE KITCHEN SUITE. Damage or failure caused by unauthorized modification or alteration, or if used for other than the intended purpose.
Need help?
Do you have a question about the UPFXC2466 Series and is the answer not in the manual?
Questions and answers